google.com, pub-5059501654592326, DIRECT, f08c47fec0942fa0

Fathers Day Greeting

Written and Created by PaperCraftCentral Susan

If you are looking for a Fathers Day Greeting Card, how about making a little gift card for your Dad?

"A father carries pictures where his money used to be"
~Anonymous


Let's make a Fathers Day Greeting with gifts inside
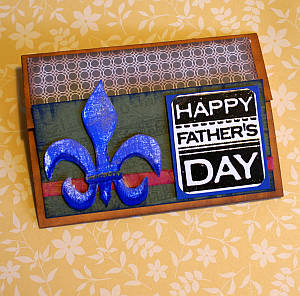
This card has two little envelopes inside for gifts to be inserted

A Father can be a special person in your life, whether he be your biological Dad or someone who is just like a Dad to you. This time of year is a little hard for me sometimes because I lost my own Dad in 1999 and my husband's Dad is also gone now. Losing these special men means I want to encourage you to appreciate your own Daddies as much as I can!

I made the Fathers Day greeting card (it's really a gift wallet) shown above for my husband this year. I decided that he deserves special treatment because he has played a huge roll in the raising of our children, so I am going to show my appreciation to him :)

Here's how to get started:
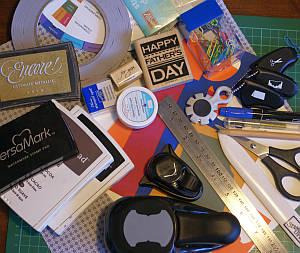
Gather the supplies you will need

Gather together the supplies you will need to make your Fathers Day greeting card. I needed the following:

  • Cardstock in colours of my choice (I used 6 plain colours and some designer paper but you decide how many you want. Pick your Dad's favourite colours!)
  • Stamps, inks, pens
  • Black Embossing Powder and Versamark ink
  • Paper Punches - a corner rounder and tag maker
  • A white envelope (you can choose another colour of course)
  • Other papercraft tools such as scissors, heat tool, pencil and ruler, paper cutter, distressing tool, adhesives and a bone folder.

Here's what to do:

  • First, cut out your cardstock: for the body of the card. Mine measured 12cm x 21cm (4.7" x 8.3") The decorated panel for the lower front of the card measured 5 1/2cm x 11 1/4cm (2.2" x 4.4") The piece of designer paper for the top flap was 11 1/4cm x 3 1/2cm (4.4" x 1.4") Measure out the two inserts as well. Mine were made of Very Vanilla cardstock and measured 6cm x 10cm (2.4" x 3.9")
  • Next stamp or create your images. I had no Fluer-de-lis so I drew my own on cardstock, cut it out with paper snips and inked it up the way I wanted it to be
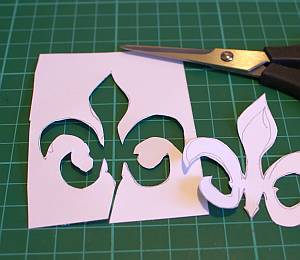
My fleur-de-lis was hand drawn
  • Next I stamped and heat embossed my sentiment, cut it out and layered it onto another piece of cardstock, sponge daubed the lower front piece and ran a (now retired) Stampin' Around roller stamp (Weathered) over it.
  • Next I made some paper ribbon that I distressed and coloured, then adhered the paper ribbon, Fleur-de-lis and the sentiment to the front piece. I used a few Stampin' Dimensionals on the Fleur-de-lis. I then set these aside
  • The main body of the card needs to be scored and folded at 4cm and 12 1/2cm (1.6" and 4.9") Then I used the roller stamp to create a weathered effect on the main body of my Fathers Day greeting card and I also sponge daubed the edges of the piece. I left the other side of the card body clean and plain but you may choose to decorate it as well
  • The decorated body of the card

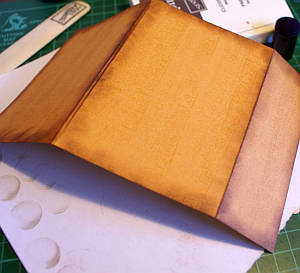
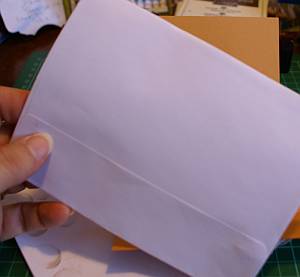
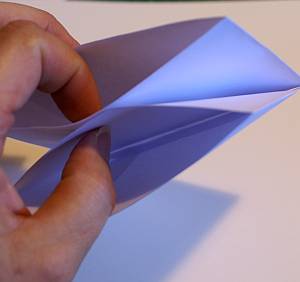
  • The next step was to take the envelope and seal it shut, then cut it in half. Adhere the two smooth side together by placing a strip of double sided tape in the middle of them. The 'good' sides of the envelope need to face each other as these are what your Dad will see the most when he opens up the card wallet:
    Seal the envelope shut
    Adhere the two pockets together in the middle, 'good' sides turned inward

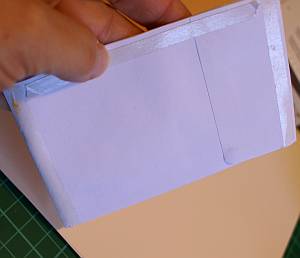
  • Next apply double sided tape to the outside of the pockets, along both sides and across the top (the side with the openings). You will be adhering the envelope pockets inside the card so that they open at the top and do not gape away from the card:
    Adhere along the top and the sides of the envelop pockets

  • Position the pockets inside the card so they are slightly below the fold line of the top flap. You want to give the flap room to fold over them when the card is closed and allow for some tags to poke up above the pockets when you add the card inserts:
    Adhere the envelopes to the inside of the card back
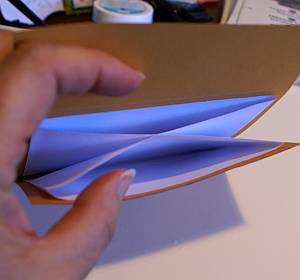
  • Fold the card front up to adhere the pockets to that. You should be able to fold the flap over to the front of the card now

    Take the decorated panel with your sentiment and Fleur-de-lis on it. Apply a couple of strips of double sided tape to the lower half of this embellishment. You will want to firmly attach it but allow room for the top flap to slip in behind it when it is in place
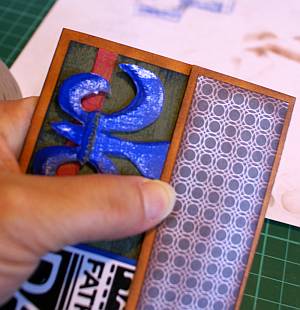
  • Firmly adhering the front panel

    I sponge daubed my designer paper panel before adhering it to the flap of my card:
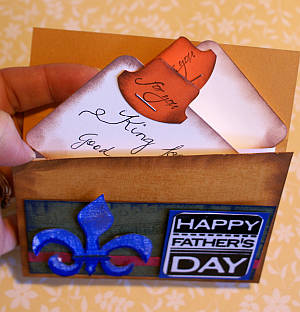
  • Last, I made some card inserts using a tag punch and wrote out a special promise on one of them. I will add a personal greeting to the other one :)
  • The inserts half in place!

    I trust you have enjoyed seeing how I made my greeting card (wallet!) and are now set to make your own Fathers Day greeting. You could add anything else you would like to the pockets - a monetary gift or gift card to his favourite store, or think up some more creative ways to spoil him such as promising to cook his favourite desert, or mow the lawn etc.

    Have a wonderful day and do share what you have made with me - I would love to see how yours turns out! I'd especially like to know what creative things you have thought of to put inside the gift wallet :)

    Do You Have A Favourite Handmade Card to Share?

    Do you make greeting cards? Please do share it with me.

    [ ? ]

    Upload A Picture Of Your Card[ ? ]


    Click here to upload more images (optional)

    Author Information (optional)

    To receive credit as the author, enter your information below.

    (first or full name)

    (e.g., City, State, Country)

    Submit Your Contribution

    •  submission guidelines.


    (You can preview and edit on the next page)

    (By the way, you don't have to use this Fathers Day greeting idea just for Father's Day. You could make a gift wallet for a child's birthday or make one for any other special occasion. Here's one I made for a child's birthday gift as an example:)
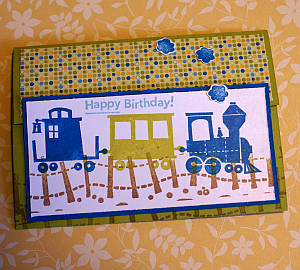
    A Birthday Gift Wallet

  • Home
  • How to make cards for special occasions
  • How to make Fathers Day cards

    New! Comments

    Have your say about what you just read! Leave me a comment in the box below.

    Share this page: What's this?

    Enjoy this page? Please pay it forward. Here's how ...

    Would you prefer to share this page with others by linking to it? Click on the HTML link code below. Copy and paste it, adding a note of your own, into your blog, a Web page, forums, a blog comment, your Facebook account, or anywhere that someone would find this page valuable.

    var l = window.location.href, d = document; document.write('<form action="#"><div style="text-align:center"><textarea cols="50" rows="2" onclick="this.select();"><a href="'+l+'">'+d.title+'</a></textarea></div></form>');