- Home
- Papercraft Adhesives
- Love Greeting Card
Love Greeting Card
Written and Created by PaperCraftCentral Susan
A Love Greeting Card is sometimes just what you need to make someone feel extra special
"Even though we're far apart
I love you with all my heart"
~Anonymous
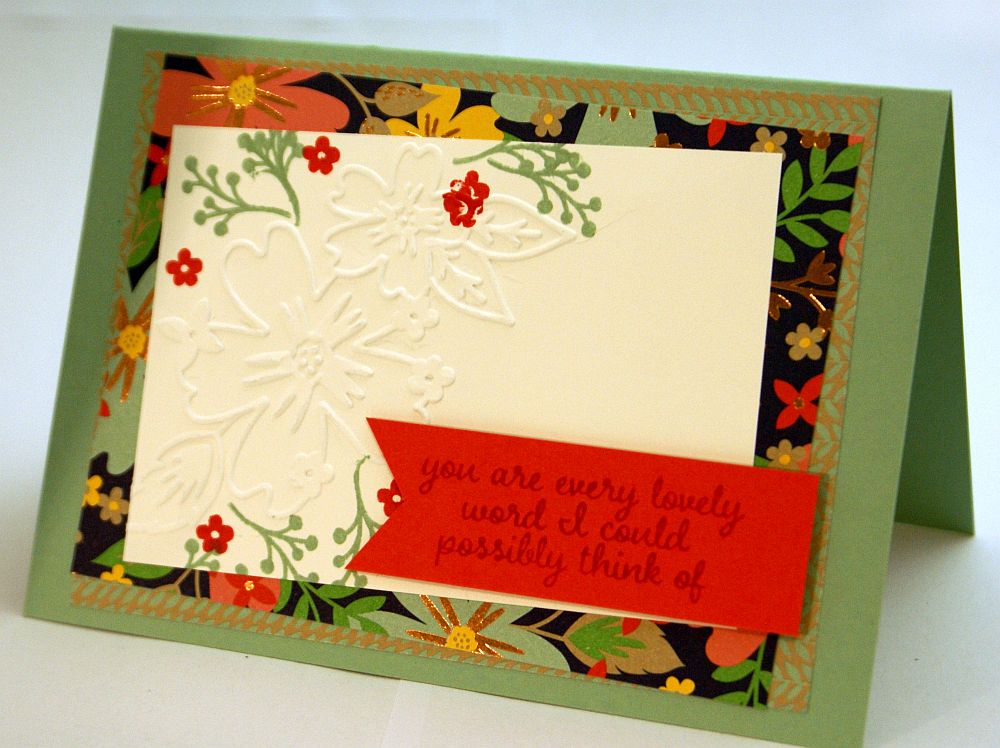
This simple card is perfect when you don't have a lot of time. It is made with the Affectionately Yours stamp set and coordinating embossing folder, and even the matching designer series paper. Even the copper embossing is already done for you on that pretty flowered layer of designer series paper.
❤ Love it! ❤
When you have a bit more time and want to make a batch of love cards, this idea is a good one. The layout is easy to follow.
I needed a love greeting card one week and wound up making fourteen! I suddenly thought how these cards could be just the thing people might need to bring cheer to a special person. Here's how the cards turned out, much more subtle and delicate than the one above:

How I Made my Love Greeting Card in Bulk
Here's What I Used:
- Whisper White cardstock for the base
- A sentiment stamp (I used a retired one from Stampin' Up!)
- A background stamp (I used a retired roller stamp from Stampin' Up!)
- Pink and green ink pads and matching Stampin' Write Markers (from Stampin' Up!)
- Some contrasting or coordinating cardstock to mount the sentiment on and some extra white cardstock for the background
- Double sided tape and some Stampin' Dimensionals
- Rhinestones
- Dazzling Details
- Paper trimmer and scissors, a ruler, and a pencil if needed
Here's How I Made My Greetings:
First I made the background by rolling rows of little flowers on some white cardstock in pink and green ink. I put some Dazzling Details in the centre of each little flower and put this aside to dry completely. You could get a similar effect by using your Two-Way Glue Pen and some Dazzling Diamonds. It would dry faster than Dazzling Details does. (Why didn't I think of that earlier? Lol!) Or you could use a Wink of Stella pen.
Next I coloured the stamp in three different colours with my Stampin' Write markers. I chose a pale blue, a pale purple and a yellow. I huffed on the stamp after I inked it up to hydrate it, then stamped it onto white cardstock. After it was trimmed to the size I wanted and the edges were inked by dragging them across an ink pad, I attached the sentiment to some Apricot Appeal cardstock (retired) and trimmed it to be a mat for my sentiment.
After the background piece with the Dazzling Details on it was dry, I cut it into three even strips, added double sided tape to the back of each, and used my ruler to set them evenly on the card where I wanted them to be.
I added Stampin' Dimensionals to the back of my sentiment topper, then attached it where I liked the look of it.
Finally I added a little crystal pink flower to the 'v' in Love on the sentiment.
Don't forget to sign the back of your cards so people know they are hand made by you. I stamp a Stampin' Up 'handmade' stamp on the back of my cards so people will know where the images come from too.
If you want a bolder look, choose darker and brighter inks and papers.
Now you have a sweet Love Greeting Card and you can add whatever you want to the inside before you give it to your special person.
Go ahead. Do a good deed and brighten someone's day with a handmade card. You could be making a real difference to them.We all need love and encouragement, right?
Return from Love Greeting Card to Special Occasion Cards | Return to PaperCraftCentral Home Page


All brand names and product names used on this website are trade names, service marks, trademarks or registered trademarks of their respective owners. Also mentioned products or brand endorses this website. no mentioned products or brand endorses this website. Go to Privacy Policy to read more
PaperCraftCentral.com is a participant in the Amazon Services LLC Associates Program, and affiliate advertising program designed to provide us with earn fees to link to Amazon.com and affiliate sites.
Powered by Solo Build It!
New! Comments
Have your say about what you just read! Leave me a comment in the box below.