- Home
- Papercraft Adhesives
- Paper Crimper
Paper Crimper Tool
Written and Created by PaperCraftCentral Susan
A Paper Crimper is an easy tool to master and the embellishment effects they can produce are so much fun to use.
"Anything you can do needs to be done,
so pick up the tool of your choice and get started"
~Ben Linder
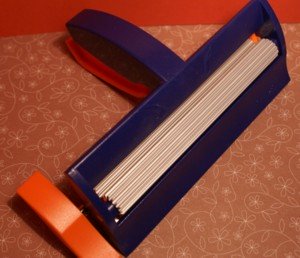
Corrugated handmade paper is a special embellishment you can add to cards, page layouts and off-the-page projects alike.
I like to used crimped paper as a background platform to enhance a central image. A nice sized square (you can custom make the size, within the limits of the size of the tool you use) makes a great mat for a photo or stamped image, adding texture and pop without even using any dimensional adhesives.
Stampin' Up! often has corrugated paper embellishments for sale, but there are ways you can make some of your own.
How to Use a Paper Crimper
You can buy the tool pictured above from various suppliers.Once you have a tool, here is what to do:
- First cut your paper to size. Add from 1/3 to 1/2 extra length to allow for
the shortening effect of crimping. (The width of the paper will not
change but the length will).
- Experiment with your own tool to ensure you wind up with the final size of embellishment you want for your project. Some crimpers have more or deeper ridges than others so you have to become familiar with your own equipment.
- Remember that if you want to wind up with a square, you must first cut a rectangular shape as the paper will get shorter as it gets crimped. Better too long than too short as you can always trim the finished result to size.
- Now position the paper you want to corrugate in the tool, locating the directional arrows on the tool to help guide you as to how to load it.
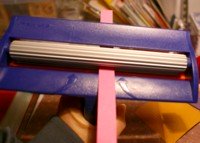
- See how I have used only a strip of paper in the picture? I can use that to make a nice border embellishment instead of a mat, or use it as a mat with ribbon on top
- Once you have positioned your paper in the tool, slowly turn the handle to move the paper through the corrugating drum.
- The paper crimper may have a bias to one side or the other so you may wind up with a curved embellishment if you move the paper through it too quickly. This can give you further embellishing options, of course! Again, experiment with your own tool to find its best pace.
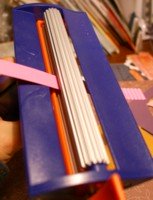
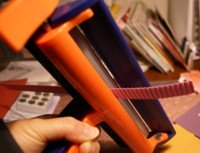
Other things to try:
- Try crimping different weight cardstock. Thinner papers will not hold their creases as well as thicker ones but you may want a softer effect
- Try using foiled paper in the tool
- Customise your own paper design by writing, painting and/or stamping on it before winding it through the tool
- Set your finished paper diagonally on your project instead of straight on to make leaves like the ones with these embossed roses. Just send a folded piece of cardstock diagonally through the tool by positioning your paper to send a corner through first, then cut out leaf shapes so the ribs go the right direction
- Layer several pieces of corrugated paper with other embellishments (such as paper flowers) for a truly spectacular 3D effect
- Make faux suede
- Crimp a strip of cardstock then fasten it into a rosette shape
- Make cupcake paper embellishments with it
- Slide a piece of cardstock into the tool, but don't crimp anything but the middle of your piece
- Crimp die-cut pieces to add texture to your embellishments
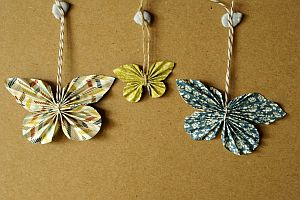
- Use it to make paper butterflies instead of folding them into accordion shapes manually
Now you have some ideas, I hope you find lots of uses for your Paper Crimper.


New! Comments
Have your say about what you just read! Leave me a comment in the box below.