- Home
- Papercraft Adhesives
- Wedding Greeting Card 3
Wedding Greeting Card 3
Written and Created by PaperCraftCentral Susan
These wedding greeting card 3 projects have a touch of vellum and embossing about them. I think using embossing and vellum adds a great deal to handmade projects and makes them very classy. Make someone's special day even more memorable with a touch of vellum and embossing of your own.
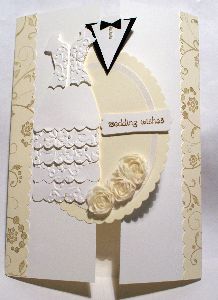
These wedding greeting card 3 projects have embossed elements on them, as you can see. I used the Dress It Up framelets from Stampin' Up! to make the pretty and long dress. The original shape stopped at the first tier of scallops, but I just cut a couple more skirts and lined them up to add length. I cut another top section for the little jacket, split it down the middle and popped it up on the dress top. Then I embossed selected pieces of the dress.
The groom's outfit is really two triangles with a small raise in the middle of the white shirt for the neckline. Fold a small rectangle of black cardstock in the middle and trim out the tie.
Further embossing was done when I cut the oval framelets for the left side of the gate fold card. I added the roses last.
I finished the card decorations off by stamping on a piece of Very Vanilla cardstock and wrapping it around the back of the card. That added strength too. Then I scallop edge trimmed the two sides and adhered them to the card front.
Bet you're wondering where the vellum comes in?
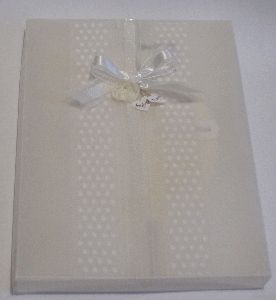
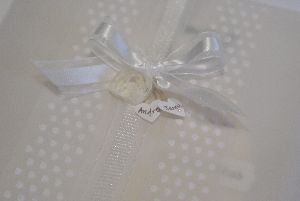
Well, I decided one of the wedding greeting card 3 projects was too 3-d to be placed in an envelope. It needed its own box! So I made one from vellum cardstock and embossed a couple of strips of vellum to add to the box top. I used my favourite white ribbon to tie a bow, then added some more roses and a few punched hearts with the names of the bride and groom tied on. Cutest effect ever! Lol!
More ideas for you for the Wedding Greeting Card 3 page
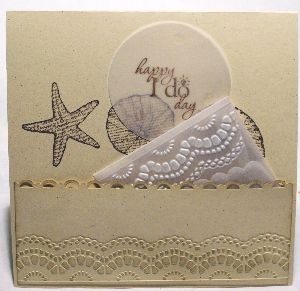
Here's another project I made with ivory and confetti cream cardstock (all supplies are from Stampin' Up!) and the same Dress It Up framelit. Doesn't the dress look different? I made the groom's outfit with the creams too and gave him a soft suede tie. This couple is getting married on a beach so I stuck with the shells, starfish and crab from the By the Seashore stamp set. I used pearls too because pearls come from the sea, right?
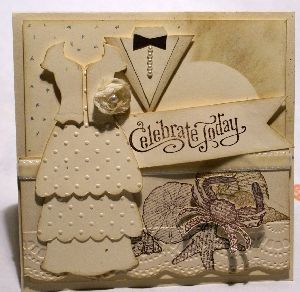
There's some shimmer spray on the card and on the rays of the sun (made by masking off with a circle shape and sponging with Crumb Cake ink) and I sponged all the clothing pieces to make them more 3-d. I used different embossing folders on this card and found some Very Vanilla velvet ribbon that I thought looked beautiful and added even more texture appeal.
I know. You want to know where the vellum is, right?
The wedding was a wishing well wedding so my gift was going to be monetary. This time I made a scallop edged envelope out of vellum cardstock and slipped it into a little pocket of cardstock inside the card, so I could place my gift into it in safety. Then I stamped my Word Play sentiment onto vellum and added it over the shells I stamped directly to paper. I wrote my greeting on the strip of plain cardstock on the pocket later:
Colouring on vellum cardstock is also a lovely way to enhance wedding cards. I like how Frenchiestamps shows you how to do this:
So now you have some ideas for using vellum cardstock and embossing on your wedding greeting cards. I hope you enjoyed my wedding greeting card 3 projects and that you try these ideas out yourself!
How to purchase your supplies
If you live in Australia and would like to purchase any of the current Stampin' Up! items I use in my paper crafting, you can search my online store by clicking on the catalogue link in the right column of this page.
Return from Wedding Greeting Card 3 to Special Occasions | Wedding Greeting Cards2 | Make Wedding Cards | Wedding Greeting Cards | Return to PaperCraftCentral Home Page


All brand names and product names used on this website are trade names, service marks, trademarks or registered trademarks of their respective owners. Also mentioned products or brand endorses this website. no mentioned products or brand endorses this website. Go to Privacy Policy to read more
PaperCraftCentral.com is a participant in the Amazon Services LLC Associates Program, and affiliate advertising program designed to provide us with earn fees to link to Amazon.com and affiliate sites.
Powered by Solo Build It!
New! Comments
Have your say about what you just read! Leave me a comment in the box below.