- Home
- Papercraft Adhesives
- How to Make Paper Flowers
How to Make Paper Flowers 1
Written and Created by PaperCraftCentral Susan
Come on in and find out How to Make Paper Flowers 1 that look three dimensional and therefore more realistic.
"Flowers have spoken to me more than I can tell
in written words.
They are the hieroglyphics of angels,
loved by all men
for the beauty of their character,
though few can decipher even fragments of their meaning".
~Lydia M. Child
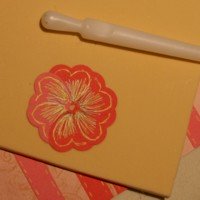
Instructions for How to Make Paper Flowers 1 (3d flowers)
In How to Make Paper Flowers 1 I will show you how to make flowers the flower shapes and also how to make them look 3-d.
To Make 3-d Flowers You Will Need:
- A shaping tool or a round nosed item like the Tombow Multipurpose Glue cap (still attached to the bottle!)
- A soft mat, such as a thick mouse pad turned over so the foam side is up. You can actually buy special little flower shaping mats that have a lot of give and a more durable surface than a foam mouse pad at some craft shops. As I make lots of these types of blossoms, that's what I did
- I also use my Stampin' Up! Silicone Mat especially while gluing parts of my flowers together. There is enough give in this mat to help you create the shapes and dimension you want also
Here’s What to Do:
- First take your flat, heart shaped punched, assembled flower shapes and prepare to use the shaping tool
- Starting with the petal layer, take your shaping tool and place the
petal layer on the shaping mat.
- Use the larger, rounder end of the tool
or glue cap to press the petals, one by one, and carefully rub them into a cupped
shape.
- Experiment until you get the effect you want or create something that pleases you
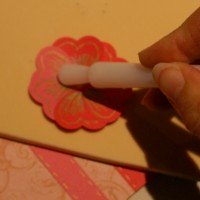
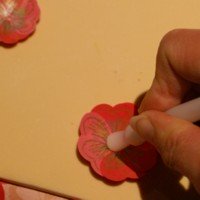
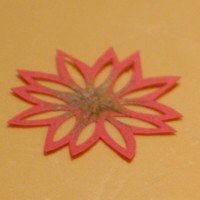
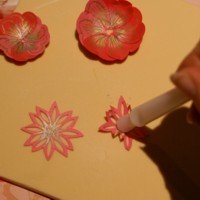
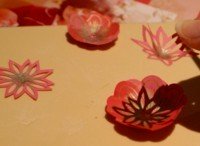
You can add a third layer by making another flat flower and flipping it so that when you press each petal with the shaping tool, you will make petals that curl downward.
This will add even more to the dimension of your flower.
Similarly, make another layer for the back of the flower with petals curling downwards. This will make it stand up from your project even more.
You now know how to make 3-d paper flowers with your heart punches.
How to Make a Vertical Garden
Stampin' Up! made a beautiful set of stamps and framelits called Oh So Succulent (retired now, but check and see if there are any succulent themed stamp sets in my SusanSalutations shop) which makes a wonderful vertical garden.
You could also substitute 3-d paper flowers for the project shown in the following video:
Remember, if you are in Australia, you can order any current Stampin' Up! supplies online at my SusanSalutations shop.
I just loved this set of dies and stamps (they came as a bundle too so you could save some money. Check for other bundle deals in the store) so ordered them at the very first opportunity.
Your paper plants can look so real!
Cotton Paper Flowers
Another way to make 3d blooms is with Cotton Paper from Stampin' Up! I found a little video made by the company that shows you just how to do it.
It's another quick and easy way to get volume into your papercraft projects and add pops of colour and joy. :
Remember, you can search for all the products used on this page in my SusanSalutations Store. Click on the catalogue link in the right hand column to do that.
Congratulations on completing How To Make Paper Flowers 1!
There are step-by-step instructions for making Paper Roses on another page. Why not consider using both on your project? What a lovely bouquet they could make!
You
may want to learn how to get a more 3-d effect with stamping, through
watercolouring your stamped images or using layers of cardstock. If so, find out how to do that with the Bunch of Blossoms stamp set and coordinating punch (now retired, but use what you have).
And please do share your flowers with us all when you make some. I would love to see what you make.
You can show your paper flower creations by adding them below:
Do You Have A Paper Flower Idea To Share?
Do you have a paper flower idea? I'd love to see it!
What Other Visitors Have Said
Click below to see contributions from other visitors to this page...
Paper Flowers Not rated yet
Hi Susan
I used your idea to make some paper flowers for this page from my album. What do you think?
Vanessa
****
Vanessa, …
Return from How To Make Paper Flowers 1 to Paper Flowers Return to PaperCraftCentral Home Page


New! Comments
Have your say about what you just read! Leave me a comment in the box below.