- Home
- Papercraft Adhesives
- Paper Flower Tuturials
How to Make Paper Flowers
Written and Created by PaperCraftCentral Susan
Have you ever wondered how to make paper flowers? There are so many lovely ways to learn how to make paper flowers. It's a great papercraft technique. One way is to use your heart punches. You can make flat flowers or 3-d ones very easily. I show you how to use them on this page but scroll down for many more ideas linked to this page.
"A profusion of pink roses
bending ragged in the rain
speaks to me of all gentleness
and its enduring".
~The Collected Later Poems of William Carlos Williams
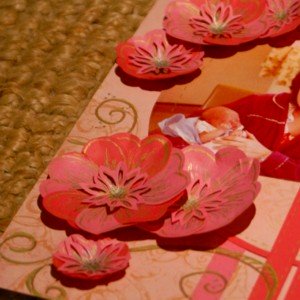
To make flat paper flowers, you will need:
- A heart punch. Use several different sizes of heart punches if you want to make a few different sized flowers
- Some cardstock or designer series paper
- Some adhesive such as a glue pen, flex or other double sided tape runner, or even a hot glue gun
- Perhaps a circle punch for the centre, or you could use a brad, a gem, another shaped punch, or anything else that you think would make the centre of the flowers pretty
- Scissors with a sharp point are often very useful, but
sometimes not really necessary. The punch can do all of the cutting for
you but you may want them to add a finishing touch or two
- Pens, sponge daubers and ink, paints or other markers for adding a little depth to your blossoms with a few lines or accents. I used a lot of metallic pens for this project, like gold, copper or silver or even all three with a little black to add more depth
By the way, do you love making paper flowers, cards, scrapbook pages and other papercraft items? Do you have a papercraft product to sell or special knowledge to share? Provide sought-after guidance and earn income. Click here to learn how I transformed my own passion for paper into a paying part-time hobby.

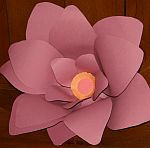
Here's How to Make Paper Flowers like the ones in my illustration above, only flat:
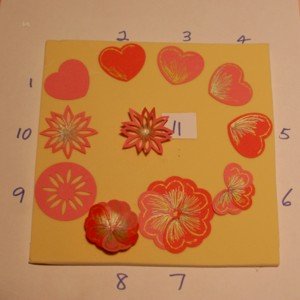
- Step 1 - decide what size heart punch you want to use. It will be forming the petals. Punch out about seven hearts. You may need more or less, depending on the punch size and how much you want to overlap the hearts
- Steps 2 to 5 - Now use your markers or pens to make the centres seem more like blooms. I coloured the point of my hearts as they will form the centres of the blossoms. I also ran a little edge over the outside of the heart as shown in steps two and three
- Step 6 to 7 – Assemble your hearts together as shown, continuing until you have enough to make a flower. Put some adhesive behind each petal so it will stick to the last one. When you reach the last petal, slip it under the first and adhere it down
- Step 8 – Shape your flower with the shaping tool or the back of a spoon. This process is described in more detail below
- Step 9 – punch out the shapes to make the centre of your flower. I used two punches here, a flower punch and a circle punch. If you use a flower punch like this where the petals are a silhouette, punch the flower first then punch out around it with your circle punch. If you try it the other way round, the circle will slip around in the flower punch and it be hard to get an even border
- Step 10 – With this centre decoration, I added
accents with gold, silver and black pens then trimmed around the
image with my sharp little scissors
- Step 11 – The shaped centre (See below)
For one finished effect, you can now use the flat shapes as they are. Just place the centre piece in the middle and glue it down. This is great for scrapbook albums where you don’t want too much bulk for cards you want to mail.
You now know how to make flat paper flowers with your heart punches and are ready to adhere your finished flower to your project!
Now, would you like to know how to make paper flowers with a 3-d effect?
Remember there are also step-by-step instructions for making Paper Roses on another page - why not consider using both on your project? :)
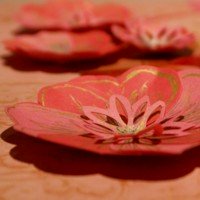
More Ideas for Paper Flower Making:
The flowers look quite different when they are done in different
colours, in contrasting colours, with patterned paper, with stamped
embossed images on them, and when you use different textured papers or
other bits and pieces for the centres. You could also add layers to make
a really full flower or bulk up the petals by embossing them before assembly in your Die Cut and Embossing Machine.
Once you know how to make paper flowers you will probably think of lots of different ways to use the end result, such as placing them
- on altered projects such as boxes or picture frames
- on cards
- on scrapbooking layouts
- on posters or tri-fold displays
- on hats that won’t get wet!
These beautiful paper flowers can do more than embellish your scrapbook pages. You can even use them to create lovely cupcake toppers.
Did you think that learning how to make paper flowers was going to be hard? I hope you found it wasn't! Let your imagination go and enjoy your new found skill!
Want More Paper Craft Ideas? Subscribe to Paper Twists!
Want to know when a new idea becomes available on PaperCraftCentral? How
about being among the first to see a new paper flower idea?
Here's Some More Paper Flower Ideas available on PaperCraftCentral.com:
As I discover new ways to make paper flowers, I will add them here for you to enjoy.
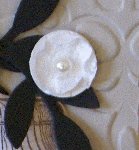
- Here's how to make tiny white flowers or any other coloured tiny ones, actually.
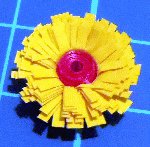
- Do you quill? If you want to see how to make quilled paper daisies, the instructions are right here
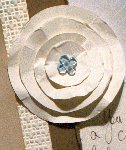
- Here are some simple distressed, crumpled flowers to make from graduated circles
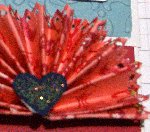
- Make some spectacular Fan Fold Blooms to decorate your next layout or handmade greeting card
- How about making some Faux Suede Flowers to add texture and interest to your pages and cards?
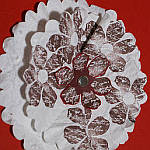
- Ever wanted to know how to make Giant Paper Flowers using your smaller punched or die cut shapes?I can show you how!
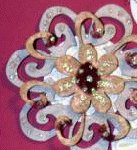
- Here's how to make texturised chipboard blooms with flocking powder and glitter
Hey - How About Sharing Your Own Paper Flower Ideas?
You know one of my favourite things about papercrafters? It's their willingness to share ideas with one another and to learn from one another.
Do you know how to make paper flowers in a different way than I have shown here? How about sharing it with me? You can have your own web page by filling in the form below. You can then show it to your friends and family.
And you'll be sharing your creativity with other papercrafters who will appreciate your work as well.
Thanks in advance for being willing to share how YOU make paper flowers.
And if you want to know more about PaperCraftCentral Susan, I share something about myself on this page.
Do You Have A Paper Flower Idea To Share?
Do you have a paper flower idea? I'd love to see it!
What Other Visitors Have Said
Click below to see contributions from other visitors to this page...
Ribbon Weave Wreath Not rated yet
I saw this ribbon wreath and HAD to learn how to make it.
I watched the video over and over. Then I practiced and practiced.
I made Christmas designs …
Tissue Paper Flowers Centerpieces for weddings Not rated yet
Hi Susan!
Really Cool site!! My husband and I were "re-getting married" (vow renewal) in April 2010 and I made tissue paper flower centerpieces for …
Cherry Blossom Time Not rated yet
Hi Susan
I made a special layout to show off a friend's family photo from Japan. I made the flowers look like cherry blossoms on branches by hand cutting …


New! Comments
Have your say about what you just read! Leave me a comment in the box below.