- Home
- Papercraft Adhesives
- Faux Suede Technique
Faux Suede Technique
Written and Created by PaperCraftCentral Susan
The faux suede technique can add a lot to your handmade greeting cards. I love the soft texture it creates and the added tactile element it allows you to place on your projects. It's perfect for the people in your life who appreciate texture and softness.
Find out how to make some here.
"
Is that paper? It feels so soft and looks like material!"
~PaperCraftCentral Card Class Attendee
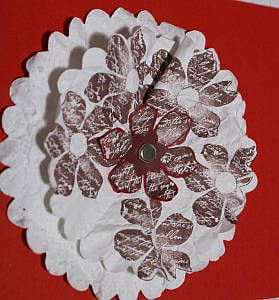
Treating cardstock this way can add texture and visual appeal to your handmade greeting cards or scrapbook pages. You can make some from ordinary cardstock, your paper crimping tool and your bare hands.
If you have used this method before, I hope you will show me your papercraft project. Scroll down the page to add your picture and tell me something about it.
Here's a video showing you how to make little paper flowers with the faux suede technique.
The supplies used in the video are:
- Medium Daisy Punch (retired). Search your punches for a petalled flower shape or choose a Cheerful Daisy Die shape
- Take Your Pick Tool
- Bone Folder
- Multipurpose Liquid Glue
- Water Painter or Blender Pen
- Faceted Gems
Each item that is still available is linked to my online store for your convenience
Using the Faux Suede Technique
Did you know that cardstock is made in layers like tissue often is? You can take advantage of that fact and make yourself some lovely elements with the thinner layers of it.
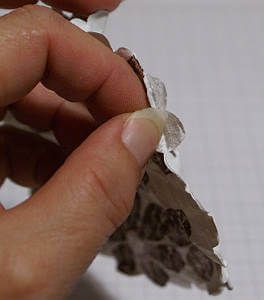
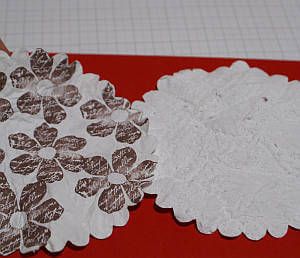
Your aim in this technique is to separate those layers to create the faux suede technique. You will wind up with soft, fluffy layers on one side and the smooth cardstock on the other side.
You will need:
- Cardstock
- A punch or shape of some kind
- a crimping tool, or you can crumple with your hands
- stamps and ink of choice, if desired
Here's what to do:
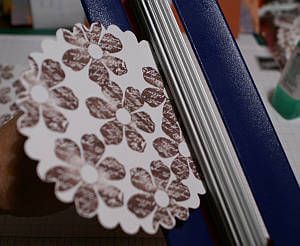
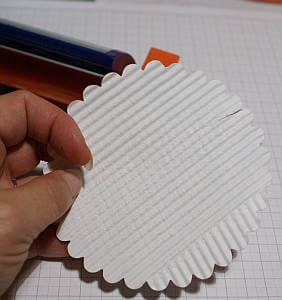
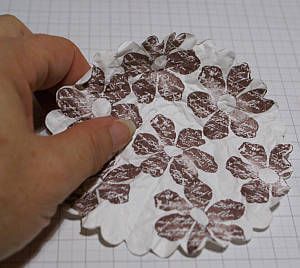
- First punch a shape out of cardstock, stamp it if desired, then run it through the
paper crimper quite a few times. I chose a large scallop circle shape and ran mine through my crimper about 8 - 12
times.
- Be sure to run the paper through in different directions. Your
aim is to break down the fibers in the paper so that it is easy to split
into layers.
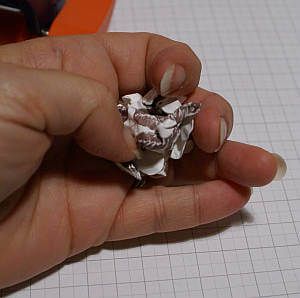
- If you are using your hands instead of the Paper Crimping tool, crumple, flatten and re-crumple the cardstock over and over. Cardstock is strong and needs to be worked over to separate its layers.
How to Use Faux Suede Elements in your Papercrafting Projects:
There are many ways you can use your new embellishments:
- You can stamp on the cardstock before you run it through the crimper, or heat emboss it or distress ink it. Spray it with glitter or shimmer. I think it adds to the interest of the embellishment to have other colours peeking out from underneath.
- I also layer the split papers to add even more dimension and texture to my work especially when building a handmade paper flower.
- Use the faux suede technique to add softness and extra cuddliness to your baby lambs, chicks and monkey shapes, to clothing and hats and shoes to dress your paper dolls, and to landscapes of soft grass or trees.
- Make a faux suede element out of a strip of cardstock or a curved Stampin' Cut and Emboss element and use it to look like ribbon.
NOTE: ALL colours of Stampin' Up! cardstock will split into two if crumpled. You can use other colours than white.
I hope you are inspired to use this method in even more creative ways and that you will share them with me when you do.
Now you have tried this technique, you might like to try making other paper flowers or how to make a customised envelope. You can also make faux silk paper or faux velvet elements.
Do You Have A Favourite Handmade Card to Share?
Do you make greeting cards? Please do share it with me.


New! Comments
Have your say about what you just read! Leave me a comment in the box below.