- Home
- Papercraft Adhesives
- Sketched Layouts
Scrapbooking Sketches
Written and Created by PaperCraftCentral Susan
Have you ever used any scrapbooking sketches to make your album pages? Here's how to do just that.
"My husband says it's him or the scrapbooks. I'm gonna miss that man"
~Author Unknown

I asked this question on my blog, Susan's Saga, to see if people would think about trying this. Many people do hunt for such designs to help them to make a lovely page, but have you ever considered drawing your own?
How to Make Scrapbooking Sketches
I thought it would be hard to do at first, but after going ahead and
trying it, I think designing my own sketches actually helps a lot to
organise my pages. It's a great scrapbooking and cardmaking tip I never would have thought of if some paper crafting friends had not suggested it to me, so now I suggest it to you. Sharing is one of those part of the papercrafting world I love the best.
There are some basic principles of design you might like to consider when making your own sketches.
It might also help you to know what I do when sketching. You will develop your own process but this might be a starting point for you.
Here's how I work:
Step 1: I choose my subject and pick out the photos I want to use, maybe even choose some colours and possible embellishments to inspire me. I usually take some of my colours from those in the photos I wish to scrap but you can use your own preferences here
Step2: I think about my subject and the style that would suit it. For example, if I have a masculine subject, I would not generally use too many flowers, but I would draw in some stars or arrows perhaps, or squares, circles, triangles etc.
If my subject is female, I might tend to choose flowers, lace, and of course, bling.
However if my subject is sporty, I would choose logos, team colours and symbols, perhaps.
I ask myself:
- Does
the person in the photos like more classical styles, or are they more
likely to be enhanced by a modern theme, or country or decorative etc?
- Is the mood fun, congratulatory, celebratory, somber?
- What
colours might I use? Are there any colours in the photo(s) I could base
my page on?
- Do I need more layers of paper because of the colours, to make my subjects 'pop'?
- What neutral colours go best with my theme? (black, white, cream, silver or other metallic colour?)
- What proportions do I need to think about? How big are my photos?
Step 3: Then I take a pencil and paper and start drawing out my sketch. If I use a piece of paper that is the same size as the page I am going to use, I can usually see how things are going to fit better.
The beauty of drawing up your own design is that you can alter it before you commit to cutting up paper or ribbon. You can rub out lines and redraw them, and you can change your mind about whether you will use shapes such as circles or squares. You can see if a layout is going to look balanced before you start adhering things down.
If you would like to have help to design layouts by having a whole lot of ready-made scrapbooking sketches at your fingertips, I found this offer for you. I believe it is priced well as you will receive 500 sketches and another useful resource when you purchase it.
Another advantage to using your own scrapbooking sketches is that you can change your mind about things as you go as well. Your finished product does not have to look exactly like your sketch, but it will have provided a starting point for you.
You are always free to use the sketch as a tool, not as a prescriptive map that absolutely must be followed no matter what.
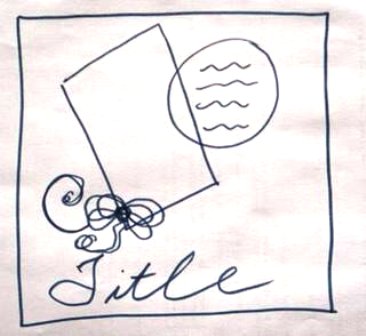
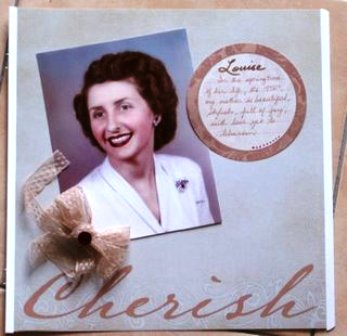
Here's a layout based on the sketch I showed you at the top of this page. My subject is a classical person with style, and I think she would appreciate more unadorned space around her image than I usually leave, so I made the drawing quite simple and I like the end result:

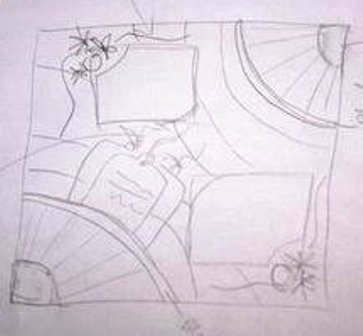
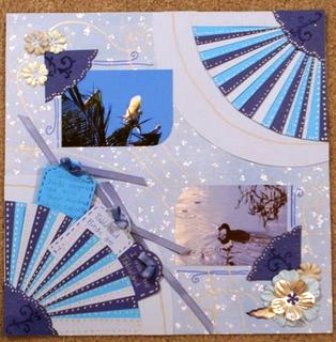
Here's another very rough sketch and the resulting layout, using a monochromatic theme:

Now here is the finished layout using the above plan:

So now you have the idea, why not run with it? Try making your own scrapbooking sketches.
And be sure to have some fun with it all.
Retrun from Scrapbooking Sketches to Scrapbooking Tips | Return to PaperCraftCentral Home Page


New! Comments
Have your say about what you just read! Leave me a comment in the box below.