- Home
- Papercraft Adhesives
- Card Ideas
Card Ideas 2021
Written and Created by PaperCraftCentral Susan
Are you looking for new card ideas? On this page I added all the card projects I had developed for my regular classes being held each month, or just from my own craft desk, in 2021.
Some of the cards featured on this page were made by people who attend my classes, using kits and instructions I provided for them. Some were made by friends who gifted me with them (thank you, my friends!)
You can order products that are still available to make these projects from my online store, SusanSalutations, if you live in Australia.
Card Ideas for November/December
I dropped away from my craft desk during this time period to get over some nasty bugs.
I'm glad to say my mojo definitely came back!
Painted Poppy Dies
In November we acknowledged the fallen on Remembrance Day with poppy pins.
I made this one with the Painted Poppies dies.It has a safety pin held in place with a strip of cardstock on the back.
It's not a card idea as such but you could easily make a card with this poppy creation.

Butterfly Brilliance Stamp Set
The Butterfly Brilliance stamp set was new to me. I wanted a special card with green tones for a friend whose favourite colour is, well, green!

Campology Stamp Set
I decided to make some non traditional birthday cards with Campology,a stamp set I would have thought could only be for making masculine cards (which it does, brilliantly, but many women also love nature and camping).
It was an alternative to always using flower stamps.
I paired the more feminine version with the gorgeous Eden's Garden designer series paper.


Here's the masculine Campology card idea.
This time I chose the In Good Taste designer series paper and I added in a pocket that I could put a gift card in.


Card in a Box
An order for a special birthday card made me think of the Card in a Box idea. I chose some retired stamp sets to make the flowers and attached them to strips of Window Sheet instead of making coloured stems. The flowers and punched shapes floated out of the box!


Eden's Garden Meets Conversation Hearts - Card Ideas
I just love DistINKtive stamps and the Eden's Garden stamp set is just beautiful. With one ink colour you can create a beautiful image with a single stamp.


Frosted Gingerbread Cards
Here are some card ideas using the Frosted Gingerbread stamps and dies. I thought the images I made with Soft Suede cookies and Shimmery White icing looked almost good enough to eat!
I blinged the cards up a little more before giving them to friends.

Perfectly Plaid Card ideas
I couldn't resist making a few different cards with the Perfectly Plaid stamp set and Healing Hugs designer series paper in reds and greens.

What a difference colour makes! Here are some more cards using the same Perfectly Plaid stamp set but with sponged ink backgrounds and a different icy blue dsp to back the main images.
I was glad I had the Pine Tree punch to make these cards as there are five stamped and heat embossed trees on each card!

I hope you enjoyed the card ideas I came up with for November/December. I hope you got all your cards mailed or given out too!
I always feel such a sense of accomplishment when I complete that task each year, and I love being in touch with friends and family via a handmade card.
Merry Christmas and a Happy New Year!
Card Ideas for September/October - I was mostly Caravan Crafting!
I was away in my caravan for about two months during this period, but I was still crafting!
I stopped off to visit my friend and beautiful team member Sharon in the first couple of days of travel. I knew we would craft, so I had brought along a retired Stampin' Up! card kitI had been meaning to assemble. We had quite a few happy hours in Sharon's craft studio. Thank you, Sharon!
I was able to make all 16 cards in the kit in one sitting! The art work and design gave me card ideas to try out when I returned home. And I loved them all.
I used a number of them to thank people and wish them happy birthday while we were traveling.
Talk about handy!

The next time I got to craft was with another crafty friend, Jo, when we got together at her house for a beautiful lunch. I had not brought any craft supplies with me to her house (what was I thinking?) so Jo kindly allowed me to take over her craft room to try card ideas with the Jacob's Coat technique!
Now that's generous, to lend a girl your craft room and everything I needed to make cards. (Thank you Jo!)
I chose a retired stamp set to make this pretty card by inking with blending tools in various colours, stamping in Versamark across the colours, heat embossing in clear embossing powder, then blending a darker ink colour over the top. It's good to buff over your finished project with a tissue to make the embossing pop again.
My granddaughter (age 8) was so taken with this card, she asked if she could have it to give to her best friend.
Of course she could! I sure love that little girl.
Now I need to go try this technique some more. Lol!

Once I got home, it was almost time for World Cardmaking Day and I had joined a great challenge with a group of talented crafters on Facebook. The inspiration was plentiful and I had a great time making my versions of the card ideas everyone provided.
Thank you to Vicky and to all the other beautiful crafters who coordinated and crafted the event!
I used a combination of current and retired products to make this medly of cards.


I hope you still use your retired products from Stampin' Up! to create your card ideas. I have a hard time parting with my older supplies as they still coordinate beautifully with more recent supplies.
Happy October! I hope you have lots of card ideas you are going to try before I post again.
Card Ideas for July/August
With my craftroom in an uproar, hubby in hospital and still unpacking our new home, my craft sessions seemed to be few and far between for a while there! But when I looked back over the last two months, I really did have time to make cards that I want to share with you.
Hubby is doing much better with his new knee, by the way, and we are feeling more settled in our new house. I do love my new craftroom.
Here we go with the first lot of projects.
One Sheet Wonder with Artistically Inked stamps
A One Sheet Wonder project is one where you take a piece of blank cardstock and stamp it all over. You can use a 12" x 12" piece if you want as well. After you have stamped to your heart's content, you cut the page into pieces suitable for making cards.
For this project, I picked out some of my favourite colours and stamps and took an A4 sheet of cardstock to play with.
I stamped my larger images first, leaving white space around them for the most part.
Then I took my medium sized images and more ink colour and added them.
I took my smaller images and stamped them in the remaining white spaces, then took the tiniest images to fill in any leftover white space.

I loved how it turned out and it was relaxing to do. There are no rules with this sort of project. Do what makes you happy!
There are quite a few ways to get different results with this type of stamping, but stamping all over is a wonderful way to start with this technique.
Next I chopped my stamped cardstock into pieces that were good for adding to handmade cards. Here are the measurements:

After that, I started making cards. I chose cardstock colours to match or coordinate with the inks I had used. I also wanted to use different folds for my cards so some open horizontally, some vertically, some or smaller and one in particular is large. The large card is called a Slimline Card. You may remember the donkey card I made in the January card ideas? It was a Slimline Card too.
I made five cards with my one sheet of stamped paper. I thought that was pretty good value for my time and supplies. I could have chosen to make three small cards instead of one large Slimline Card, but I wanted to make a card that a crowd could sign, and this one fits the brief.


Do you think you'll try your own version of these card ideas? I hope you do and have fun with it.
Memory Verse Cards
For August I made some memory verse cards and stamped them with Celebrate Sunflowers plus a sentiment I found in a retired stamp set. They looked so pretty cast all over my desk like that!
I cut my memory card backs at 5cm x 10.5m then round the corners. The verse is printed on Whisper White cardstock and cut down to fit the little cards. That way anyone who keeps them for future reference has them in the same size and they can find a box or create one to collect them in.

These little card ideas have become a bit of a tradition at my church.
Candy Cane Card
There's a new stamp set in the seasonal catalogue with candy canes all over it!
As it was around the 25th of July when I made this card, I counted it as my Christmas in July card and have stored it away for mailing at Christmas.
I used my Stamparatus to stamp all over a piece of Whisper White cardstock in Versamark ink, making sure I had good coverage by stamping and reinking several times.
Then I heat embossed my candy canes in gold embossing powder.
That's new seasonal catalogue ribbon making it look like a present.
My pine tree punch also came in handy and I punched the shape out in red foil paper.
The sentiment is from a retired Christmas stamp set. I keep every single one I buy for use at Christmas!

Here's a close up of my card. I tried to angle it so you could see how shiny it is, but the light wouldn't cooperate too well. I think you can see some glimmer in the top right hand corner?
I used my markers and blends to draw the string for the Christmas bauble.

I hope these card ideas inspire you to make it Christmas craft time every month!
Forever Fern and Peaceful Moments Sympathy Card
Unfortunately I needed to make some sympathy cards since I last wrote. I thought this one turned out beautifully.
Here are the supplies I chose to create my card ideas. Missing are my blending brushes.
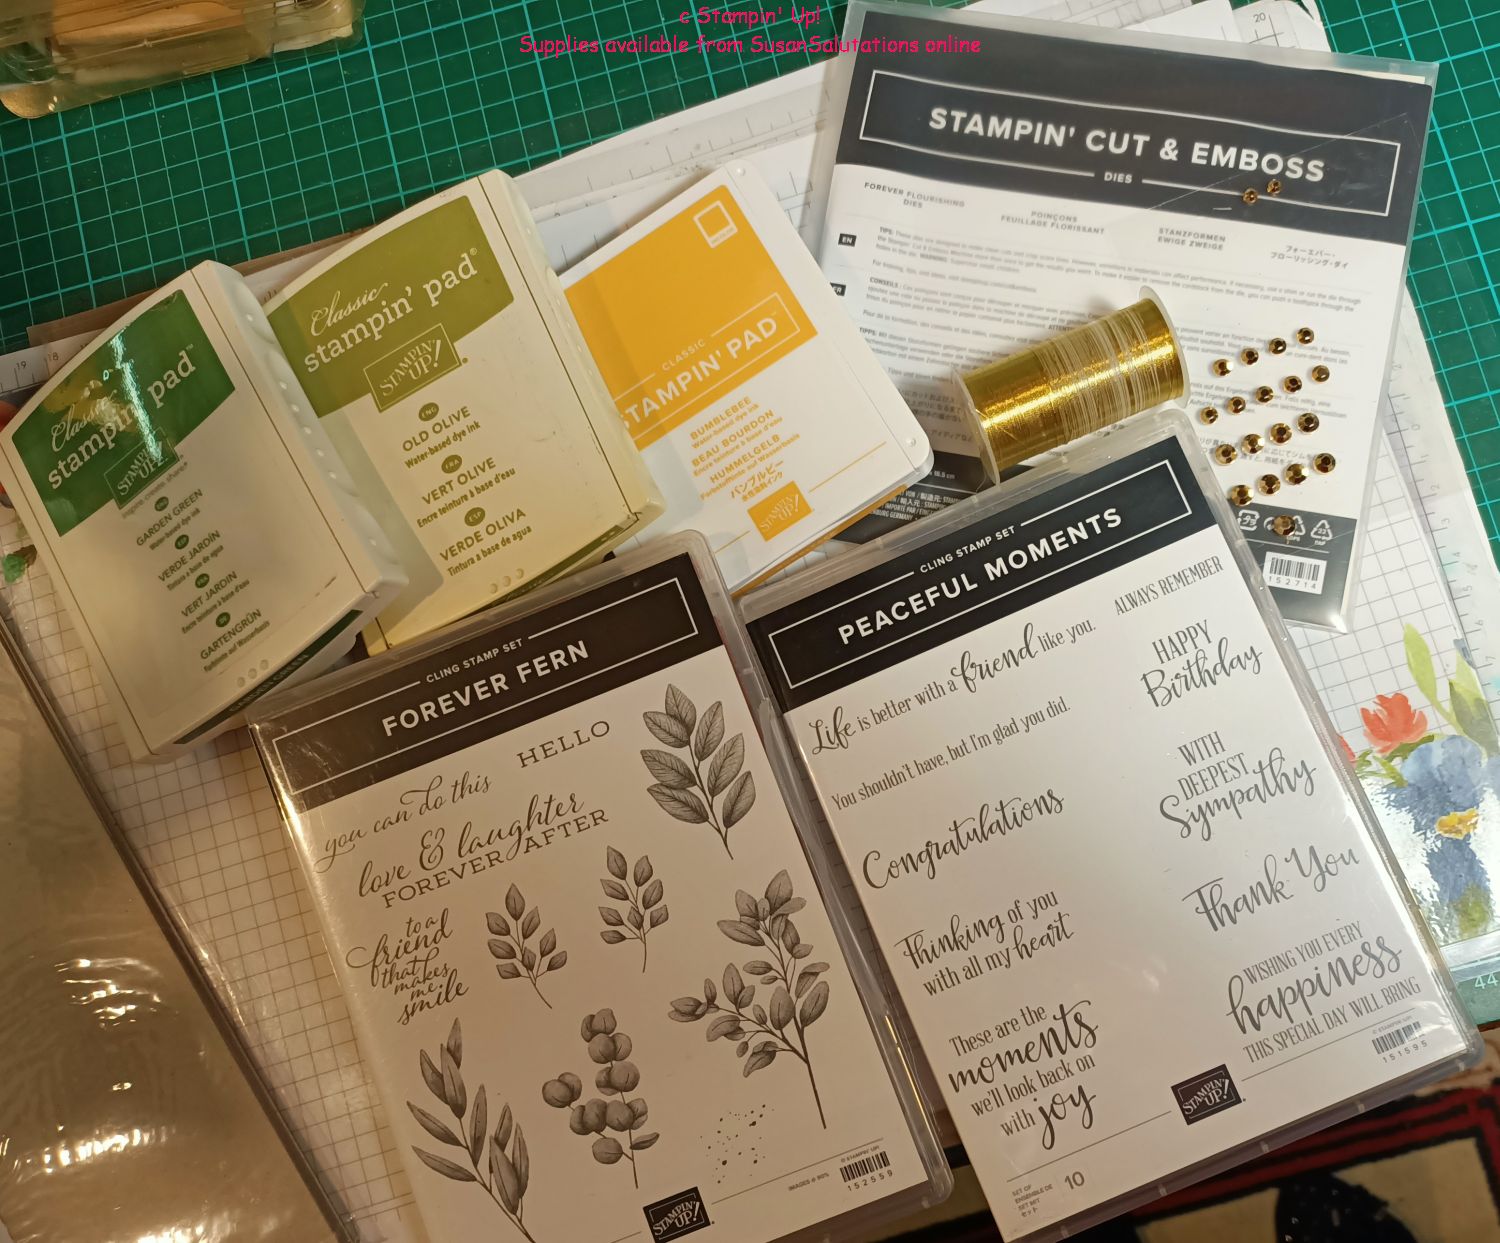
I took my blending brushes and created the background first, then stamped images and the sentiment on top.
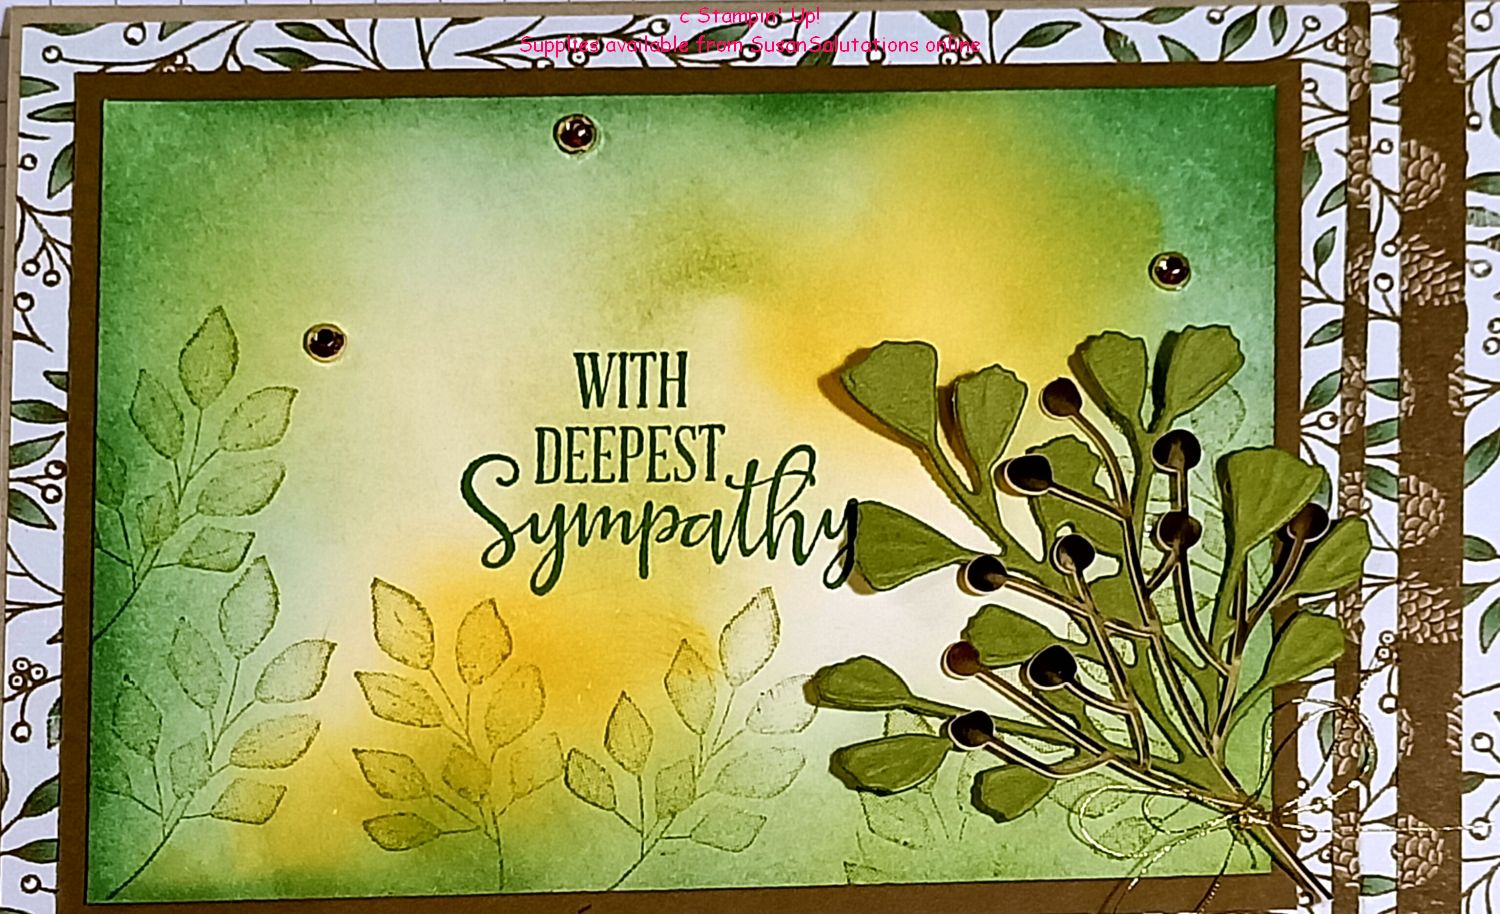
I stamped some pine cones in white ink on a card base made form Sift Suede cardstock, then cut strips and glued the designer series paper layer over the top.
I added some die cut leaves, branches and berries tied up with gold twine (retired now) as a finishing touch before completing the look with some plain rhinestone gems.
I hope you enjoyed these card ideas and do get to try some of these ideas out in your own craft space.
Card Ideas in June 2021
This month it was my birthday and boy, was I blessed with some beautiful hand made birthday cards! It was wonderful to receive them as I am still recreating my craft room after moving to a new home and getting hubby through a total knee replacement.
It was so lovely to be remembered by so many friends. Thank you all for thinking of me this month and for taking the time to send a paper hug to me in the form of a handmade birthday card. I love all of your card ideas so much!
For your viewing pleasure, I am going to post pictures of my cards here.


I received some extra special cards from my darling granddaughters too. I treasure them!
Budding cardmakers, they are. Thank you, my sweeties!
Here they are:


Look out in July when I am pretty sure my new craft room will finally be operational! I have been thinking up new ideas and itching to try them out.
Chat again soon!
Card Ideas - April & May 2021
Whoops! Looks Like I didn't add any new projects in April. That's because I sold my home and am moving out in May! Gradually my craft room has been packed up in boxes, the furniture I had customised for my room has been sold, and I am reduced to one big plastic box of supplies for the time being.
Hubby helped me get it all sorted out. Bless him.
Here he is helping, and the next pic shows my room with empty shelves and plenty of boxes.


The good thing is, there will be NEW furniture and a brand new craftroom at our new house. So I will be showing you another Craftroom Makeover!
I did manage to get some crafty time in before all that happened, amazingly! So now I will share that one project with you.

Why not make yourself something, I asked myself?
I made a sign for the fridge to remind me of why I was opening the door and gazing longingly at the food inside!
Moving is a big emotional stressor for me, so keeping on track with good nutrition can become a challenge as well. Food an be a comfort and distraction. I wanted to remind myself that it does not have to be.
You know what is a good comforter and distraction? Stamping!
So I took the Hydrangea Haven stamp set (there are dies available too) and quickly stamped up a pretty sign for my refrigerator door.
Of course, that sign is now PACKED as I cleared the fridge front of all personal items in order to show our house for sale, but that's beside the point. Lol! I did make the sign and it has stayed in my mind. So it's still working!
Next month I will hopefully have more card ideas to show you from my new home.
Keep on stampin' in the meantime.
Card Ideas - March 2021
Strong and Beautiful Women
This month we celebrated International Women's Day on the 9th. I found some beautiful sentiments in the Strong and Beautiful stamp set and got inspired to make a card and share it with readers on the PaperCraftCentral Facebook page.
Now I am sharing it with you.
Here are the supplies I used to make my card, and I used retired designer series paper and acrylic hearts. I found a black and white designer series paper pack that is still available if you want to re-create this look. It is called True Love designer series paper (item 154281)


Another retired item in my supply picture were the little resin hearts.

I changed the colour of my embellishments to match the Magenta Madness colour of my cardstock and sentiment with a Magenta Madness Stampin' Blend. Only the blends work, mind you. They are filled with alcohol ink which is a permanent ink. The Stampin' Write! Markers are filled with pigment ink, like the ink in your Stampin' Up! ink pads, so they are not permanent inks.
This is the square card I made to show you all and to wish you a Happy International Women's Day. I wanted to acknowledge those who have gone before us to fight for women's rights and freedoms. We still ave a ways to go, but we have come far in many ways.
Celebrate you this week!

Beauty Abounds
This project idea utilises the One sheet Wonder technique. That is where you take a while sheet of designer series paper and stamp all over it, then cut it up for cards, a scrapbook page or in this case, to make little scripture cards for our church.
I took a piece of Seaside Spray cardstock (retired) and the Beauty Abounds stamp set (retired) then ink colours in Seaside Spray (retired), Daffodil Delight (item 147094)and Garden Green (item 147089).
I started stamping all over the blank page, bearing in mind that I would be cutting this while piece into 10.5cm x 5cm pieces.


I needed to use the other side of my sheet to add my scripture verse, so I flipped the stamped A4 cardstock over and stamped with just the spray of dots in all the colours right across this sheet.

Then I chopped my cardstock into little car dsizes (10.5cm x 5cm) and rounded the corners of each little card.
I had already printed out the Bible verse I wanted on an A4 sheet of cardstock and cut it to size. The size of the verse wound up being 9.5cm x 4.5cm .
I stamped a butterfly in Daffodil Delight on each verse piece, then added the verses to the One Sheet Wonder card pieces.
Here they are all stacked up, showing you both the front and back of my project.

Itty Bitty Birthdays Card Ideas

I always need birthday cards. Do you?
That's why I chose out the Itty Bitty Birthdays stamp set (retired) for my next card ideas. You can see Bermuda Bay (retired) and Pool Party (item 147107) ink pads too.
The designer series paper i Used is now retired but you know what? You could use the Fine Art Floral designer series paper (retired) to make really pretty cards.
Those are the Stitched So Sweetly dies (retired) in the picture too. They make wonderful label pieces and mats.
Something that isn't in the picture is Whisper White Baker's Twine. You can get it in the Snail Mail Twine Combo Pack (retired)
And I used Blending Brushes (item 153611) to add some colour the the envelop and inside my card.


Gorgeous Posies Birthday Card

For these next card ideas, I chose out the Gorgeous Posies stamp set (retired), the Word Wishes dies (retired), the Basic Black Combo Pack Blending Pens (item 154843) some Rhinestone Basic Jewels (item 144220), Real Red ink (item 147084) and Granny Apple Green ink (item 147095), Real Red cardstock (item 106578), and Basic Black cardstock (item 121688) and Basic White cardstock (item 159228)
I also used Real Red Stampin' Blends Combo Pack (item 154899) to colour my flowers.
Believe it or not, this birthday card idea has a quick and easy blending pen technique on it. The pens that look bluish in the photo are the Basic Black blending pens.
Here's the card I made:

To make this background, cut a piece of Basic White cardstock in the size you want your mat to be. In this case, mine was 9cm x 13.5cm.
Then take your dark blending pen and swoop lines down from the top, leaving a little space in between each swoop.
After that, take the light Basic Black blending pen and swoop stroked of colour in between the dark coloured strokes, so you fill in the piece. Don't try to make them exactly straight lines or go all the way to the bottom of the white mat, unless that is the effect you are going for.
Then I layered my white cardstock onto a piece of Real Red (9.5cm x 14cm) and added that to a Basic Black card base (15cm x 21cm, scored at 10.5cm).
I stamped and cut out my flower and leaves and also my sentiment. Then I added them to my card front.
The inside wound up looking like this:

Here's a close up of the swiping technique. And it shows how I popped up my flowers too. There are Monster Bash black enamel dots (retired) in the middle of the flowers!

Card Ideas - February 2021
Since I last posted, there have been many sessions of crafting happening in my craft room and beyond. In the last few weeks, we have been allowed to meet in groups at venues again! So I attended a great team meeting with other Stampin' Up! Demonstrators and got lots of inspiration.
There are some great virtual stamping events online too. I went to a virtual Retreat over a whole weekend online. That was a lot of fun too! It's inspiring to use your own supplies to interpret a card idea offered that way.
I'll share quite a bit with you, of course!
Most of the projects posted this month are showing stamp sets and supplies form the new January - June Mini Catalogue and also some Sale-A-Bration products I earned by placing a $90 order. Or two.
Let's start with Sweet Ice Cream, because I like to have desert first.
Happy Valentine's Day!
I just make one Valentine these days, for my husband. He liked this one. I used the same stamp set as I used for the Galentine's Day cards below but changed up the ink colours a little and added Poppy Parade cardstock. I thought card ideas like this are simple and easy to recreate, and I only used my Big Shot to cut out the nested squares on the front.


")
However you spent Valentine's Day,, I hope you enjoyed it with friends or family you love the best.
Sweet Ice Cream Card Ideas
This stamp set comes with its own Ice Cream Builder punch, designer series paper , sprinkles and ribbon, if you buy it as a suite.
The punch sure makes it easy to make this particular card.
All you do is stamp and punch a cone, then punch many scoops of icecream to go on top!

I added stamped sprinkles to some of the scoops and stamped over the top of many in Versamark ink to add a subtle shading.
It's quite a cute card when you open it up!

Well Suited Suite
This suite of stamp set, dies, twine and designer series paper is perfect for masculine cards. The dies allow you to make suits for your card fronts and there are many such card ideas around, but on this occasion I just used the tie dies and some of the designer series paper.
And I used the stitched label dies to create the sentiment with a stamp from the Handsomely Suited stamp set.

Of course, you have to finish the inside of your card and the envelope too. Why not stamp and colour a tie with blends to make it look as though it is popping off the page?
I really popped up the sentiment with some Stampin' Dimensionals though.

Snailed It Galentine
Did you know February 13th is Galentine's Day? It's the day before Valentine's Day of course. It's a day to celebrate friendships with all your gal friends!
I decided the Snailed It stamp set coupled with some of the images form Hearts and Kisses went together really well and, with Sharon Dalton's inspiration beside me, I made this card.

The Snailed It stamp set has coordinating designer series paper too. Isn't it cute with the paper planes and presents and envelopes? I love the little hearts.
Imagine stamping the hearts in chocolate colours to make an almost edible card!
Sweet Strawberry card ideas
Now we get a little more healthy, after having ice cream and chocolate hearts!
The Sweet Strawberry stamp set really is very sweet.
I used cardstock and coloured strawberries coupled with black and white images to make these cards.
I think colouring one element and stamping in black and white elsewhere can really make a card design pop!


Hey Chick is back!
A few years ago, Stampin' Up! brought out the Hey Chick stamp set. I loved it then. This year, Stampin' Up! has it for sale again!
I love playing with these cute chickens.
I decided to make my own little, shallow boxes for some girlfriends to make them feel special at the in person stamping even I attended.
You basically make a little square matchbox.
Cover it in designer series paper, stamp your images and sentiments and cut them out, then pop them up on the box front.

When you open the box, another chicken and message appears inside.
I popped the chicken inside the box up and popped up the sentiment too.


There's also a Hey Birthday Chick stamp set with more fun images to play with.
Available while stocks last!

Card Ideas - January 2021
Happy New Year!
I must admit, my thoughts were kind of still on Christmas Cards but I had some ideas for this month's New Year's celebrations.
I just received the Darling Donkey stamp set in my January to June seasonal catalogue pre-order and had seen some really great New Year card ideas using that stamp set.
Here's one I made today. I enjoyed those donkey images so much! They are quite cheeky.
I made the numbers and words from a couple of other new stamp sets - Make a Difference and Snailed It.

I wanted to add some designer series paper to my project once I had made the card base out of Whisper White (soon to be Basic White).
I simply cut two pieces of In Good Taste designer series paper to fit my card front and my card back and glued them on with Tombow Multi Purpose liquid glue.

To finish the inside of my card, I chose a sentiment from the Ride the Range stamp set (from the current Annual Catalogue) and the flowers from the Make a Difference stamp set (also from the current Annual Catalogue) to embellish the inside of my card and the envelope.
Prized Peony stamp and the Whisper White Pigment Ink Technique

I was reminded of a technique while browsing around the Internet and decided to do a few experiments with the Prized Peony stamp set.
I took Whisper White pigment ink, some black cardstock and my Stamparatus. I stamped out my large peony images, making sure I stamped over the same image several times till I was happy with the density of the white. Then I used my heat tool to make sure the ink was dry.
Next I took Granny Apple Green, Flirty Flamingo and Pumpkin Pie Stampin' Write markers, coloured my stamp several times and stamped over the white flower and leaves. The coloured inks left a subtle almost chalk like impression behind, with just a hint of colour.
I wanted to ramp up the stamped images a bit so die cut a peony and used the negative shape to mask off the background. Then I spritzed my flower with shimmer paint mixed with rubbing alcohol. It gave the image a subtle shimmer.
Then I finished my cards with dsp, ribbon and bling. I made my own envelopes out of Whisper White cardstock as these cards wound up being a bit smaller than the average card.


Split Negative Card Ideas with Rooted in Nature stamps

This was a fun technique. It's called a split negative technique, but I may have tweaked it a bit.
Instead of stamping in different coloured inks, I chose to heat emboss two tree images with silver embossing powder.
I stamped two large trees, one on Whisper White cardstock and one of Granny Apple Green cardstock, in Versamark ink. My Granny Apple Green cardstock was longer than my Whisper White, for wiggle room.
Then I emboseed them with silver embossing powder and my heat tool.
Next I cut the trees more or less in half down the middle, and mounted each half on a single piece of cardstock. I matched up the tree images so they looked like they could have been stamped and embossed over two sheets of cardstock. Then I trimmed down my images to a neat rectangle/square.
After that I finished my card with sentiments, a few little die cuts from the Many Messages stamp set and die cuts, and Rooted in Nature. I did use one die cut from my Stitched Rectangles dies too.

And of course, I did some embellishing on the inside of my cards and to the envelopes.
I think these make nice masculine birthday cards.
Previous Card Ideas
I like to keep track of card ideas by calendar year.
If you are looking for my card ideas from 2020, this is where you can find them.
If you are looking for my card ideas for 2019, this is where you can find them.
I hope this makes it easy for you to keep track!


All brand names and product names used on this website are trade names, service marks, trademarks or registered trademarks of their respective owners. Also mentioned products or brand endorses this website. no mentioned products or brand endorses this website. Go to Privacy Policy to read more
PaperCraftCentral.com is a participant in the Amazon Services LLC Associates Program, and affiliate advertising program designed to provide us with earn fees to link to Amazon.com and affiliate sites.
Powered by Solo Build It!
New! Comments
Have your say about what you just read! Leave me a comment in the box below.