- Home
- Papercraft Adhesives
- Card Ideas in 2020
Card Ideas in 2020
Written and Created by PaperCraftCentral Susan
Here is my card ideas in 2020 page all together in one place for you.
Are you looking for card ideas? On this page I added all the card projects I had developed for my regular classes being held each month in 2020, or just from my own craft desk.
Card Ideas in 2020 - December
It was almost the end of the year! This month I was focusing on making Christmas cards as I had been so late in getting mine in the mail.
I did however make a special order of cards for a good friend. The Poinsettia Petals bundle came to the rescue here.
Quick Christmas Card Ideas in 2020
To make some simple yet effective Christmas cards, all you need is some designer series paper, coordinating cardstock card bases and some Whisper White cardstock.
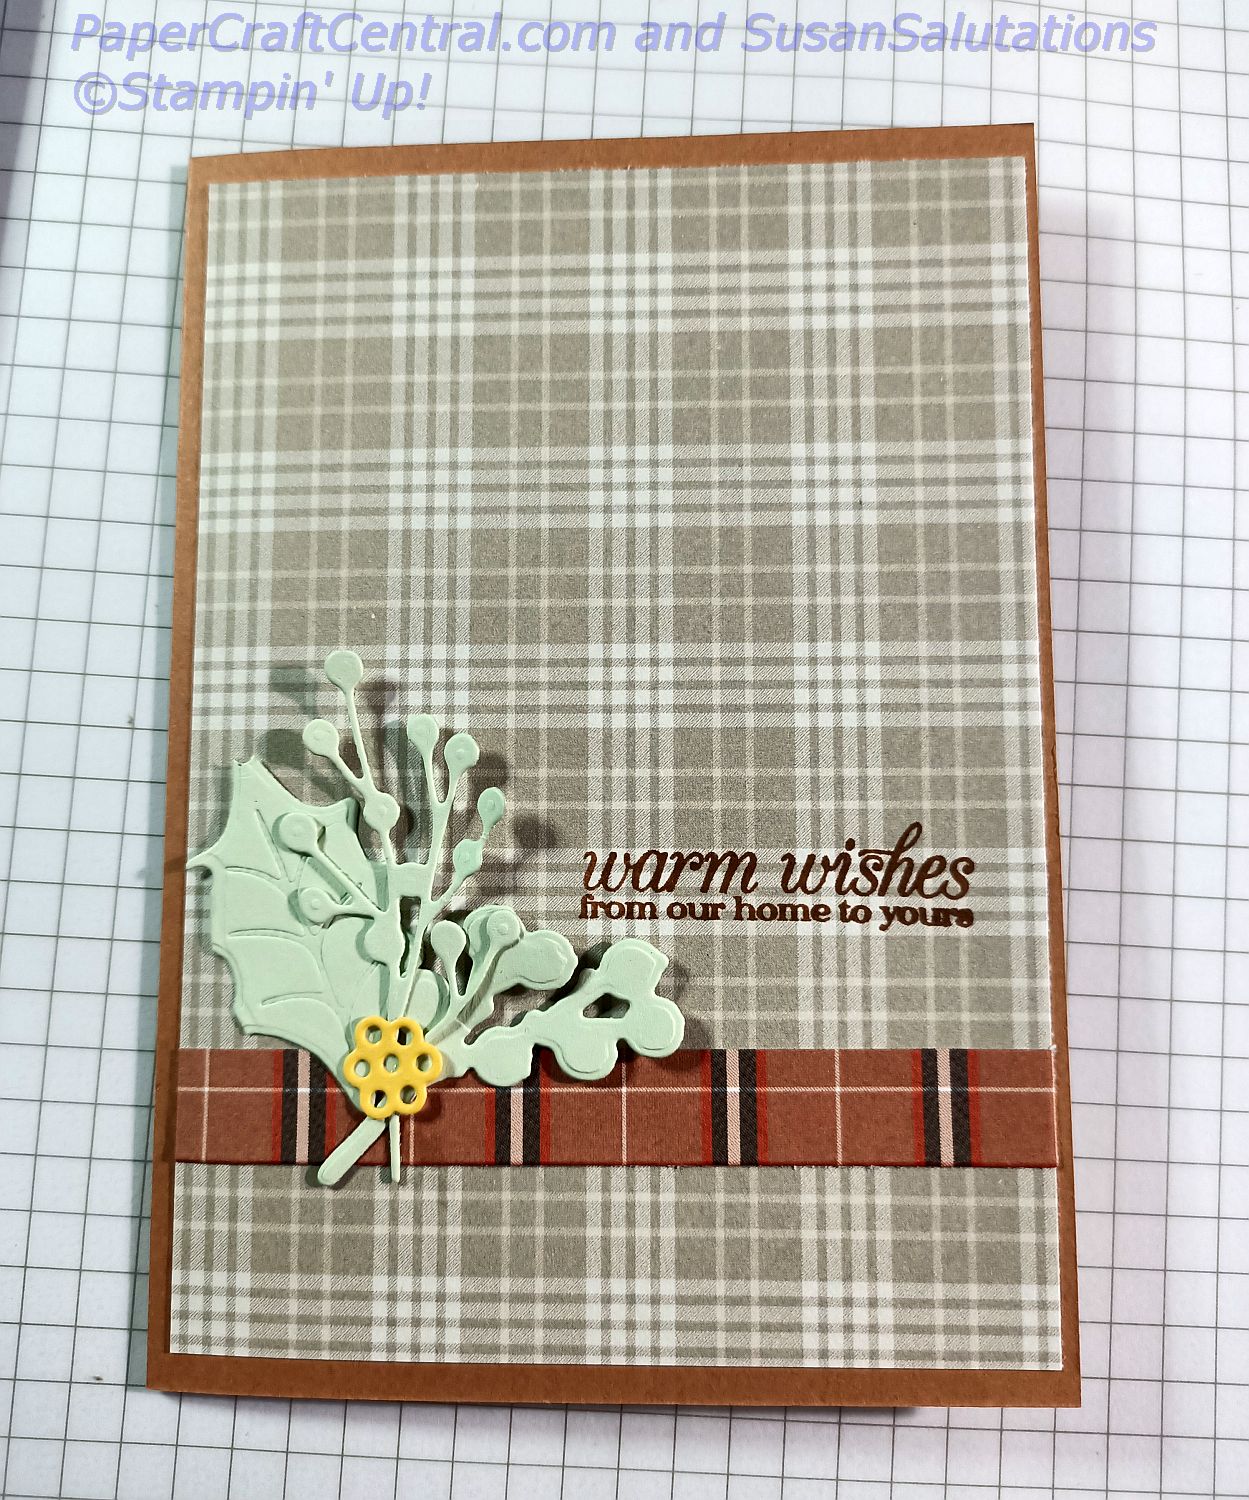
I simply gathered all my stamp sets and the inks that were used in the designer series paper (I chose Plaid Tidings dsp but noticed it is now sold out), and I played with the colours and stamps on my desk. You can do the same!
Choose any dsp, choose the colours that coordinate with it and choose some favourite stamp sets to play with. You can follow these card layout ideas with other dsps, colours and stamps.
Here are a couple of the cards I made. They are deliberately simple, one or two layered cards.
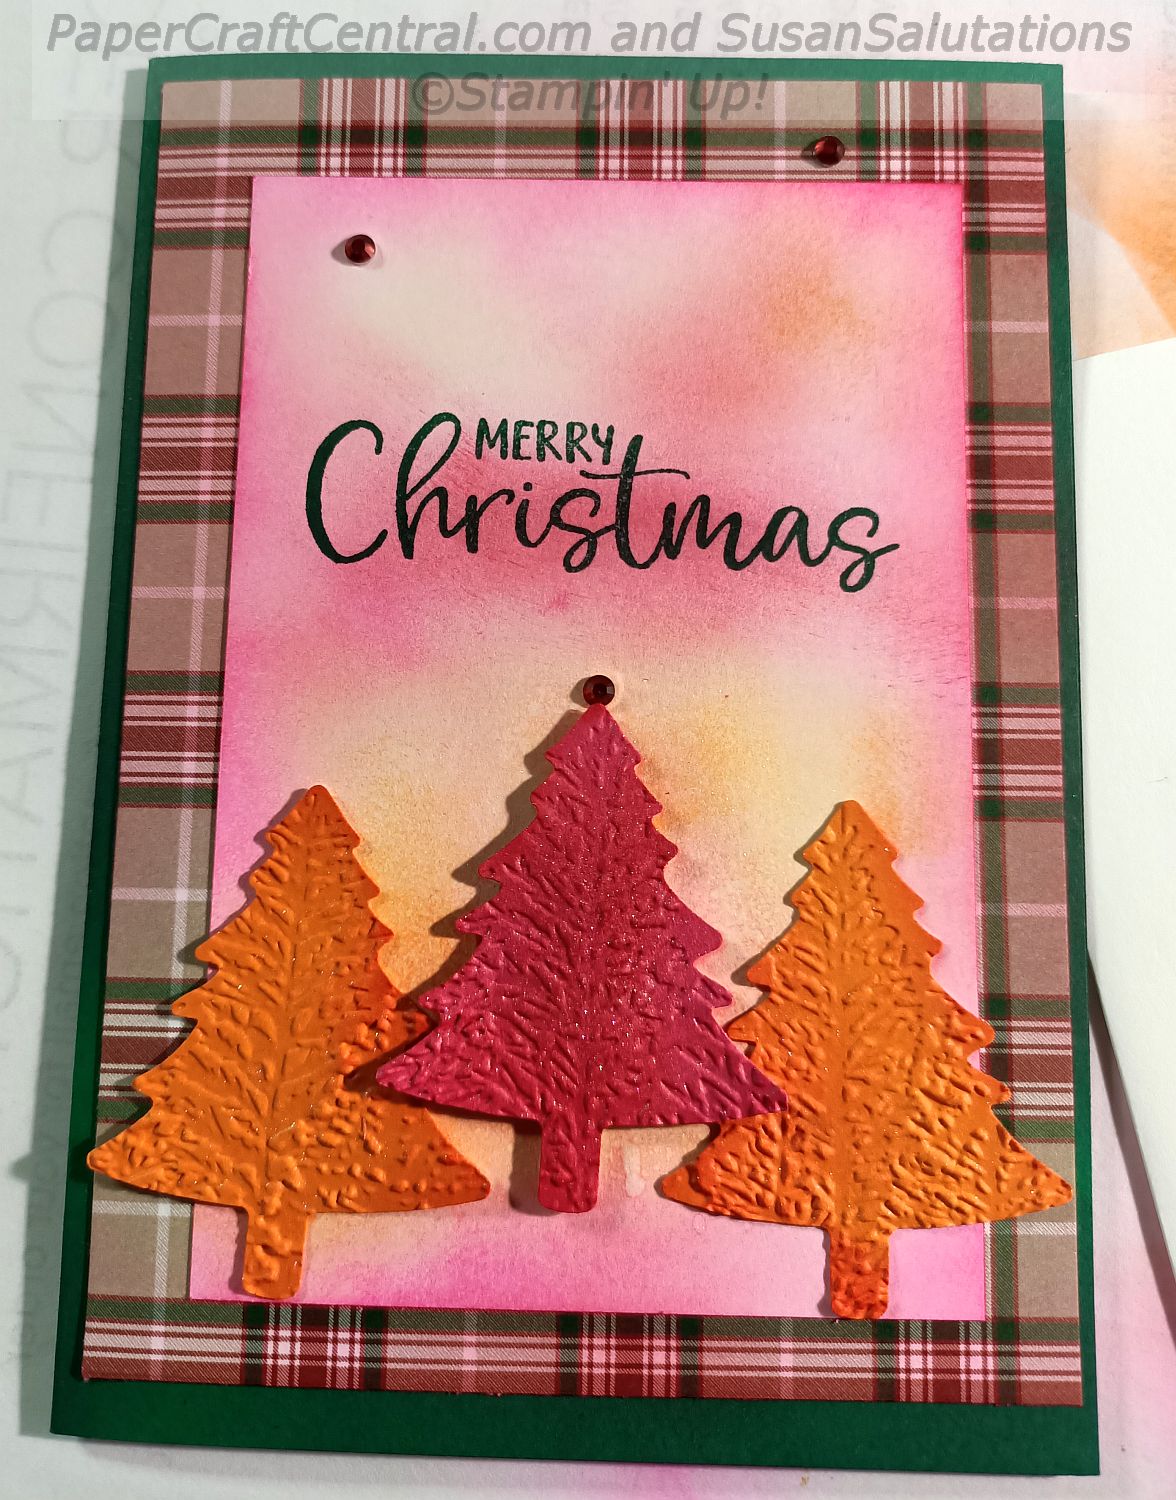
I punched some trees with the Pine Tree punch and embossed them with the Evergreen Forest 3D Embossing Folder. I did spritz them with shimmer paint mixed with Isocol alcohol for some glimmer.
The background is created with Blending Brushes and Melon Mambo, Pumpkin Pie and Real Red inks. Merry Christmas sentiment is from the Joy to the World Kit.
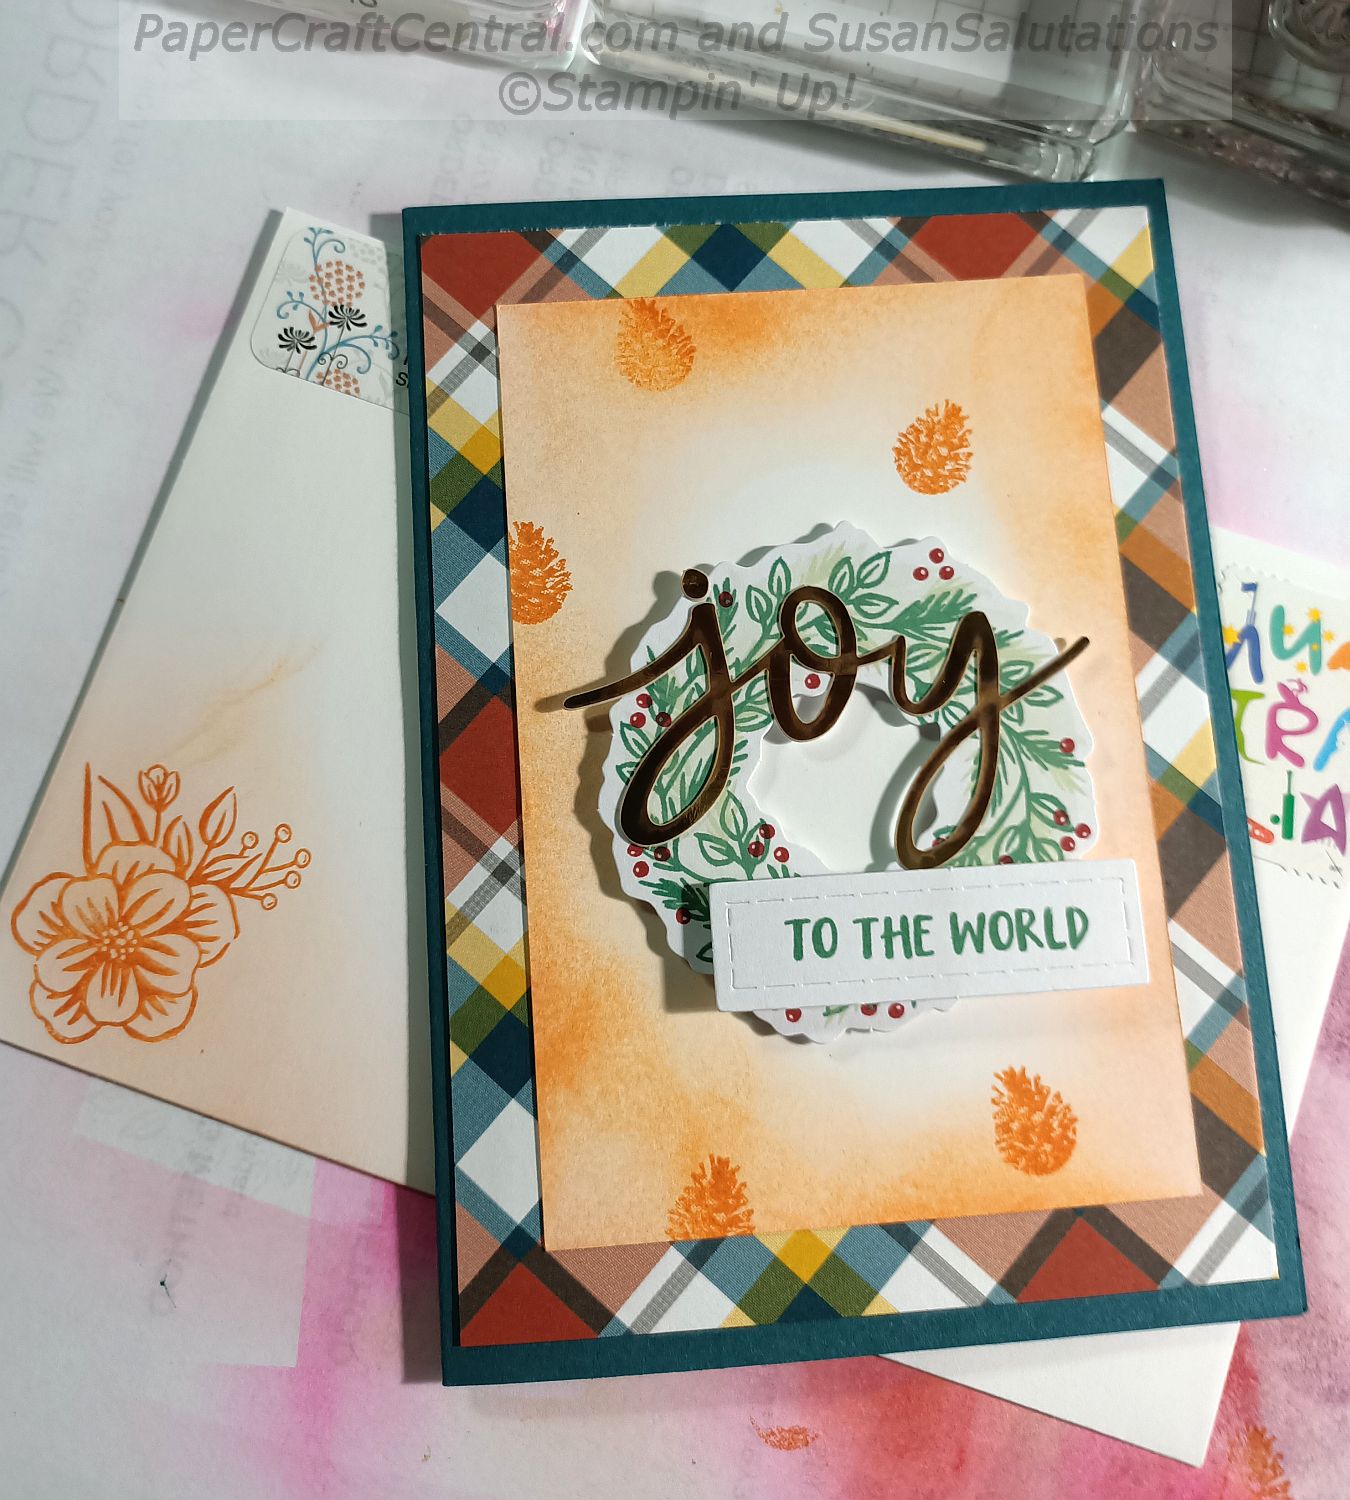
I had a spare wreath element from my Joy to the World Kit so guess where it wound up? The flower stamp on the envelope came from the same Kit.
The pine cones were from the Perfectly Plaid stamp set. I just used Pumpkin Pie ink on this one to blend colour around the edges of my Whisper White cardstock (Did you know Whisper White is being retired? We will have Basic White cardstock in its place).
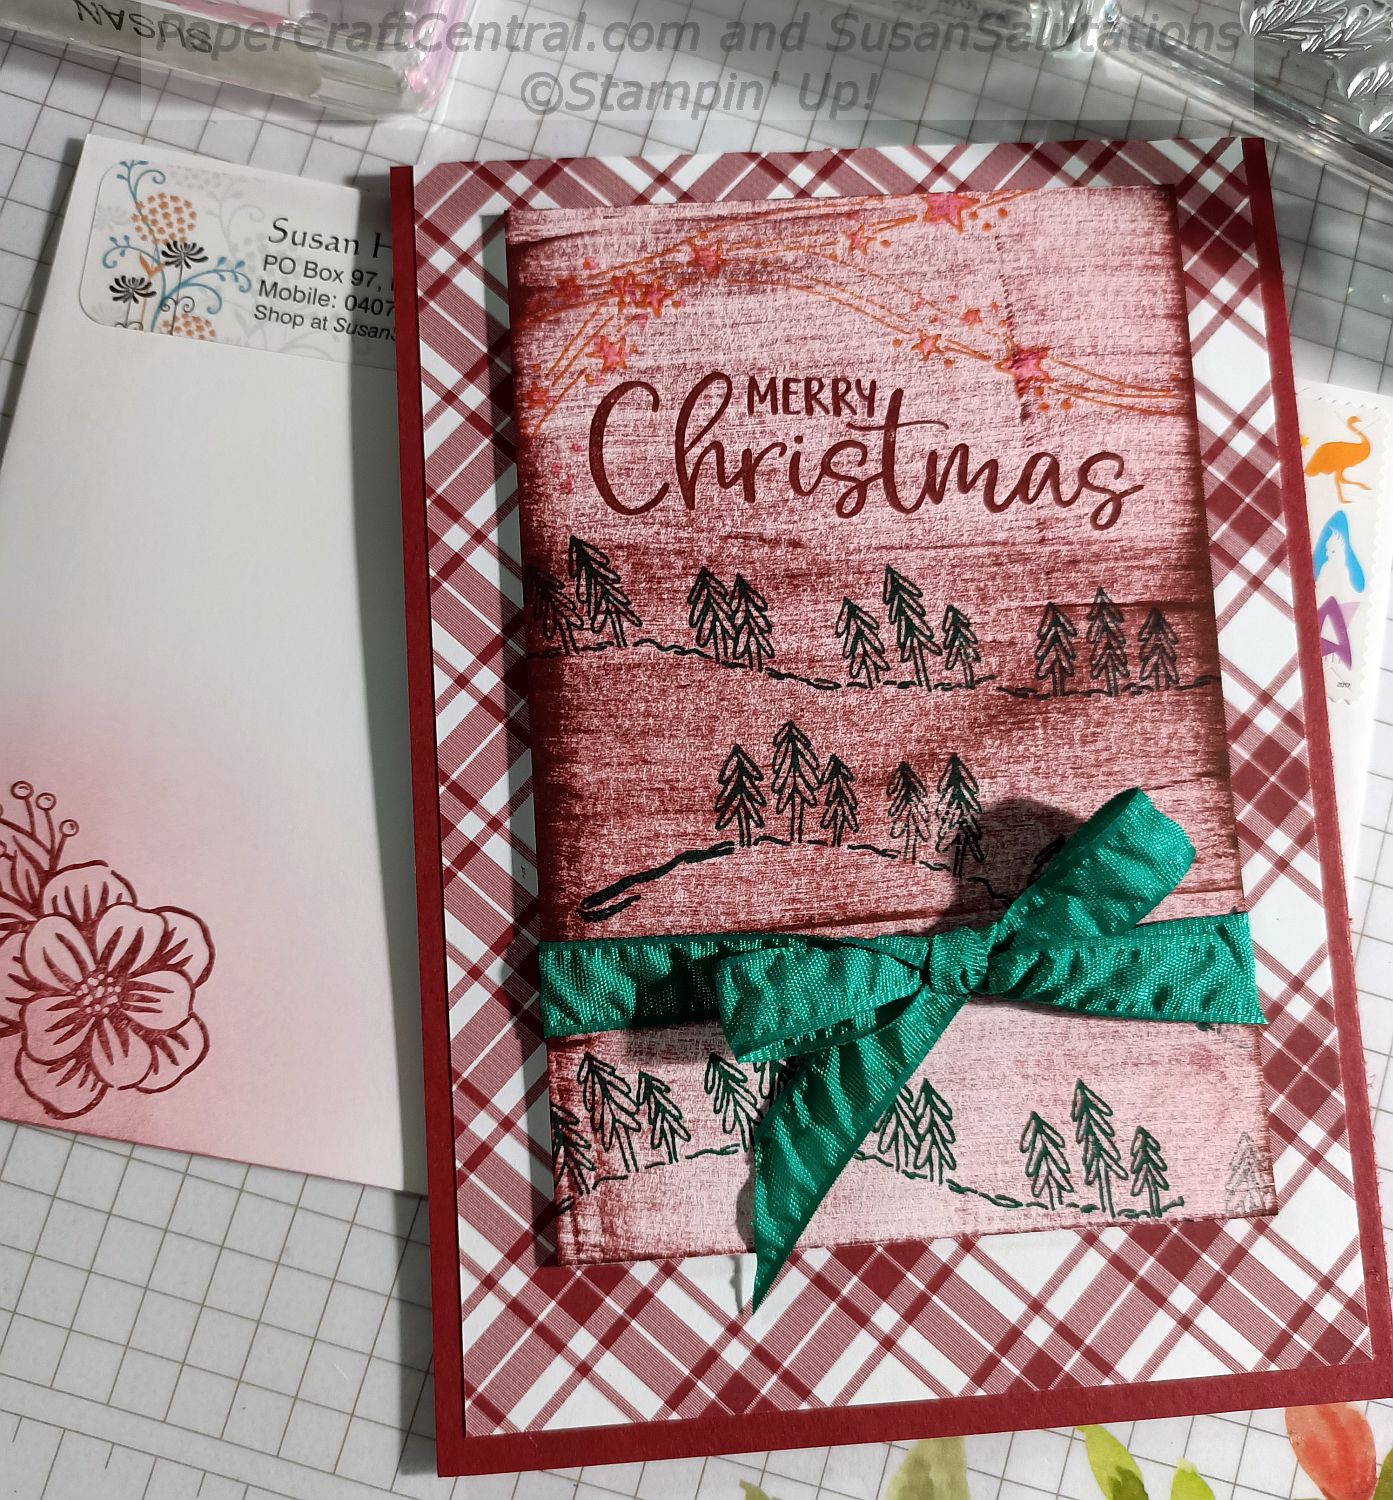
I used a Cherry Cobbler ink pad to add ink directly to my Whisper White paper for this card. Once I had my swiped background, I used the Curvy Christmas stamp set to add some trees in Shaded Spruce ink and some stars in Pumpkin Pie ink. The stars have been glimmered with Wink of Stella. The sentiment from Joy to the World Kit is stamped in Cherry Cobbler.
The ribbon is retired Emerald Envy.
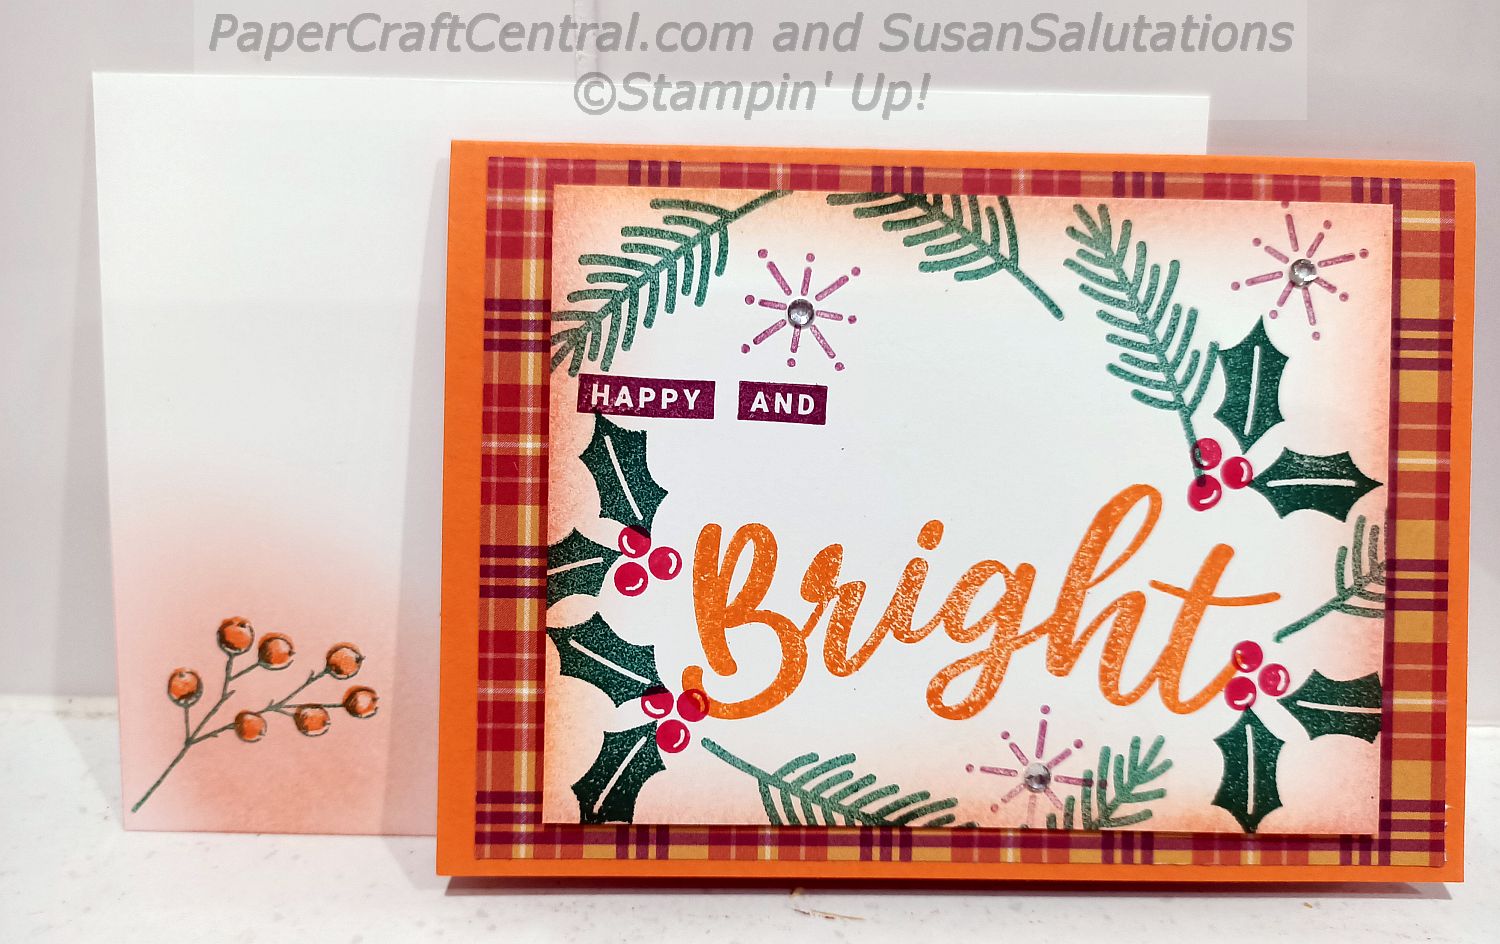
The Peace and Joy stamp set inspired card ideas in 2020 for this one. Since the dsp was Pumpkin Pie and Rick Razzleberry, I chose inks called Shaded Spruce and Real Red. I stamped off for some of the images. The sparkles have been embellished with plain Rhinestones too.
I love how cheery this stamp set is!
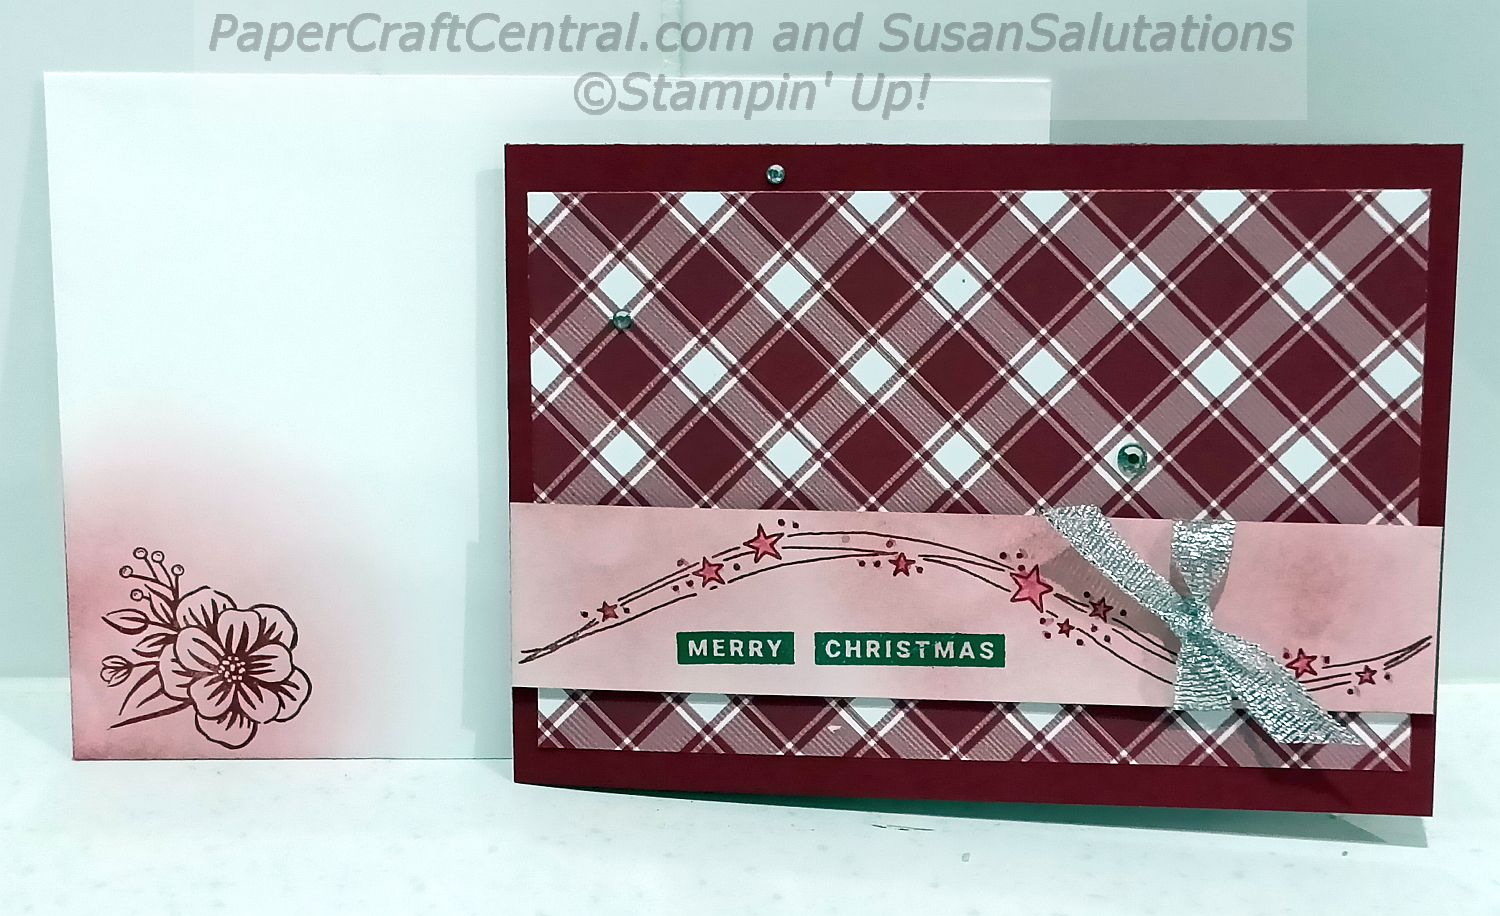
Here I blended Rich Razzleberry ink onto a piece of Whisper White before stamping the stars from Curvy Christmas on it in full strength Rich Razzleberry. I stamped the words from the Peace and Joy stamp set in Shaded Spruce. The stars have been glimmered with Wink of Stella.
The silver glitter ribbon is non-SU.
There are three clear rhinestones added to the dsp.
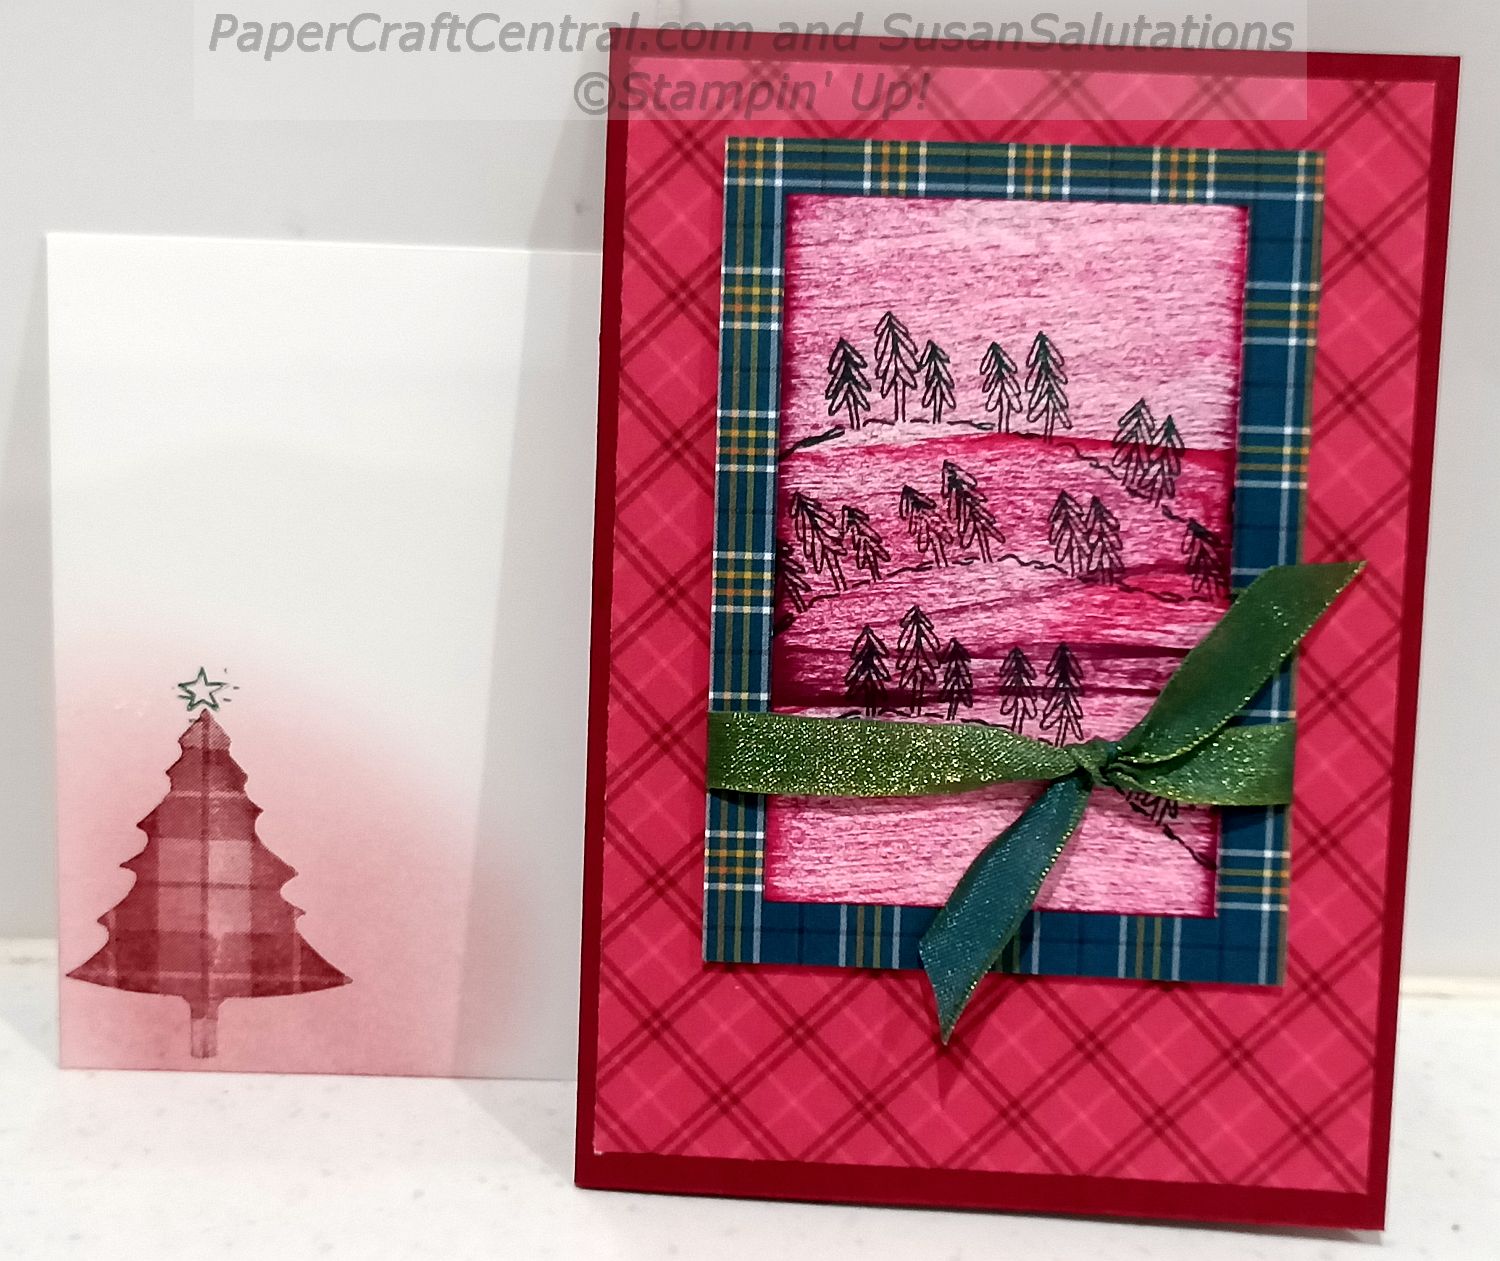
You can see I repeated the ink directly to paper for this card and I even used the same tree stamps as I did in the above card. This time I used the same dsp flipped over to mount my Whisper White element and pop it up with Stampin' Dimensionals on front of my card.
The ribbon is twp toned with Old Olive and Pretty Peacock. It adds a shimmer to the card. I added some stars to the sky with Wink of Stella.
I hope you have all your cards done for Christmas and New Year, but if not, these card ideas from 2020 will help you create a few cute cards quickly!
Poinsettia Petals meets Peace and Joy
The designer series paper I used is retired, but why not use any of the gorgeous current dsps from the Stampin' Up! catalogue to recreate these card ideas?
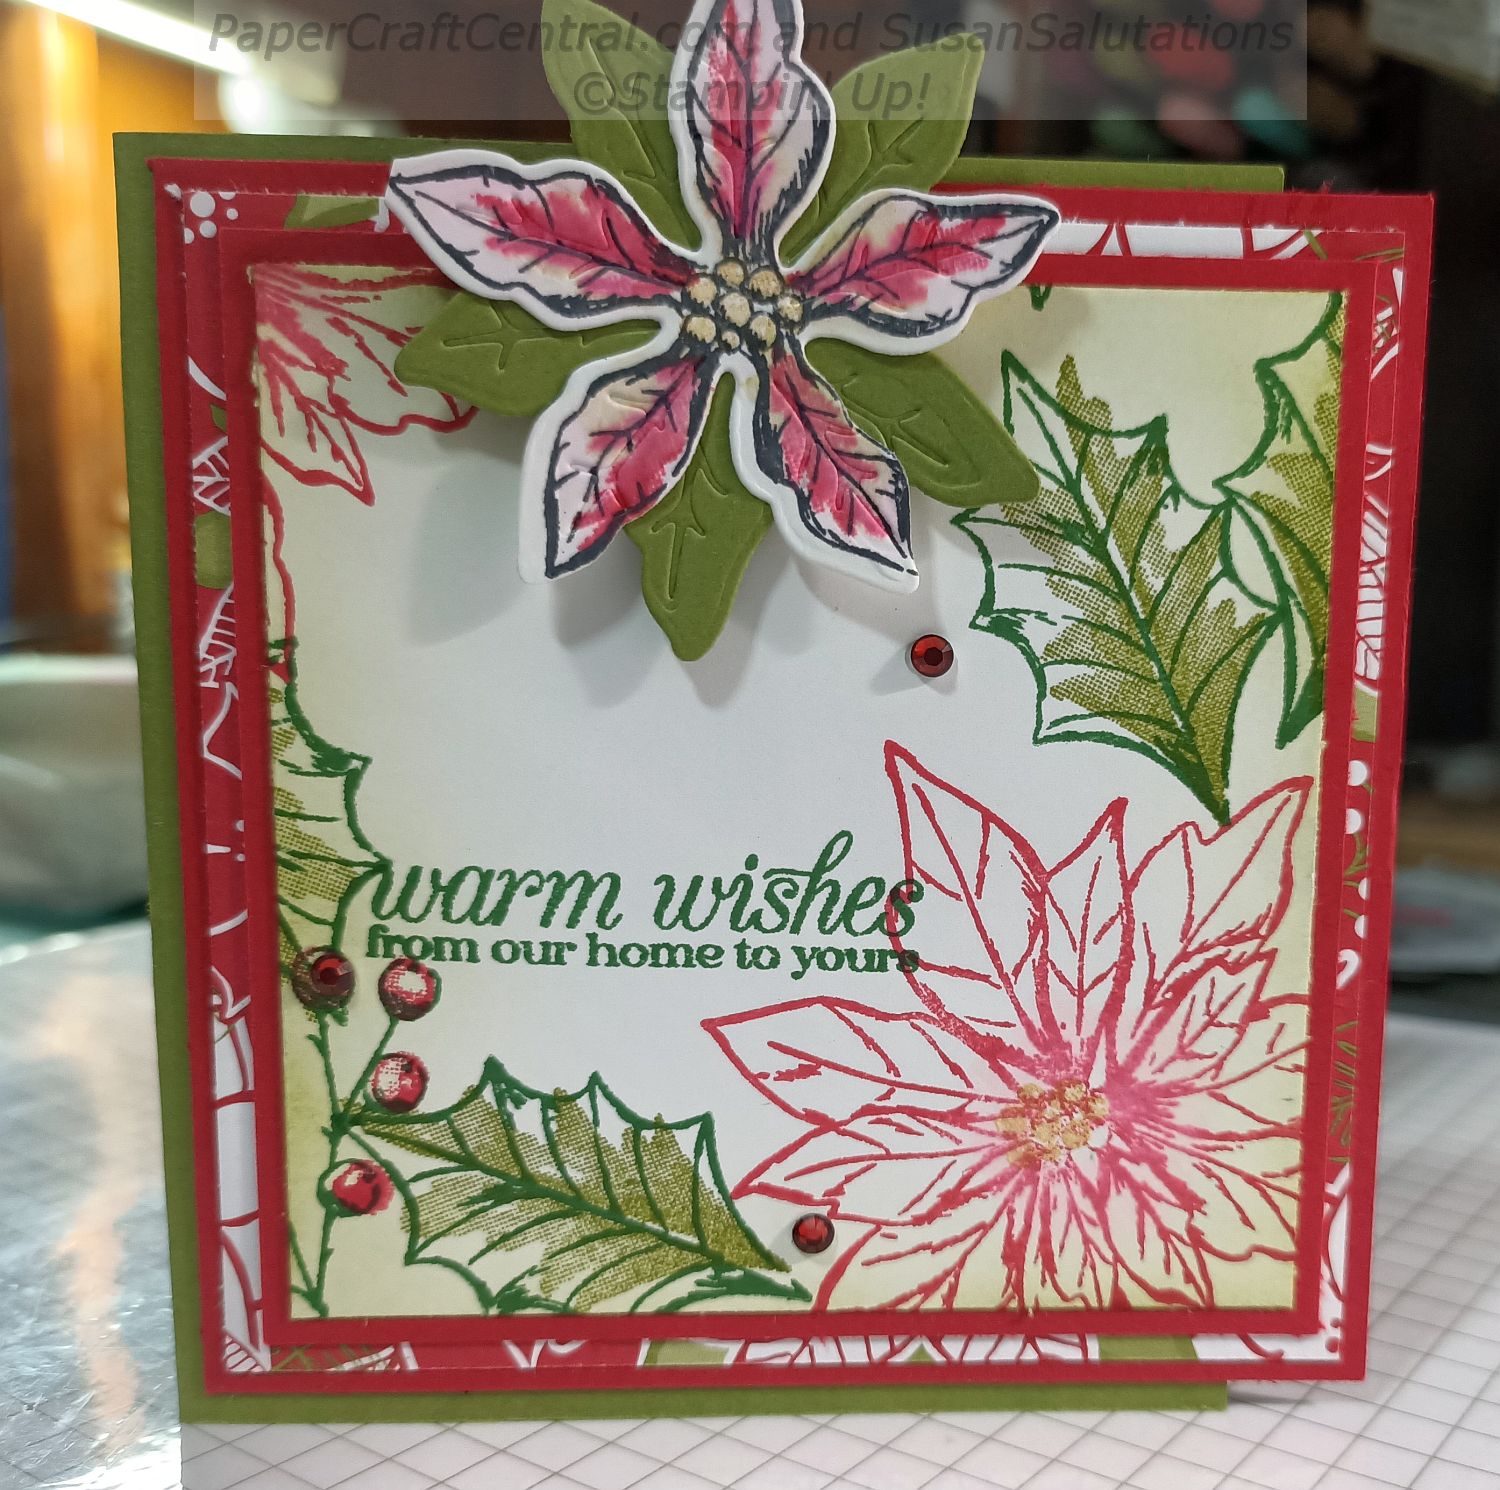
This card is actually a fancy fold card. I loved stamping the large Joy (from the Peace and Joy Bundle) image on the middle sections.
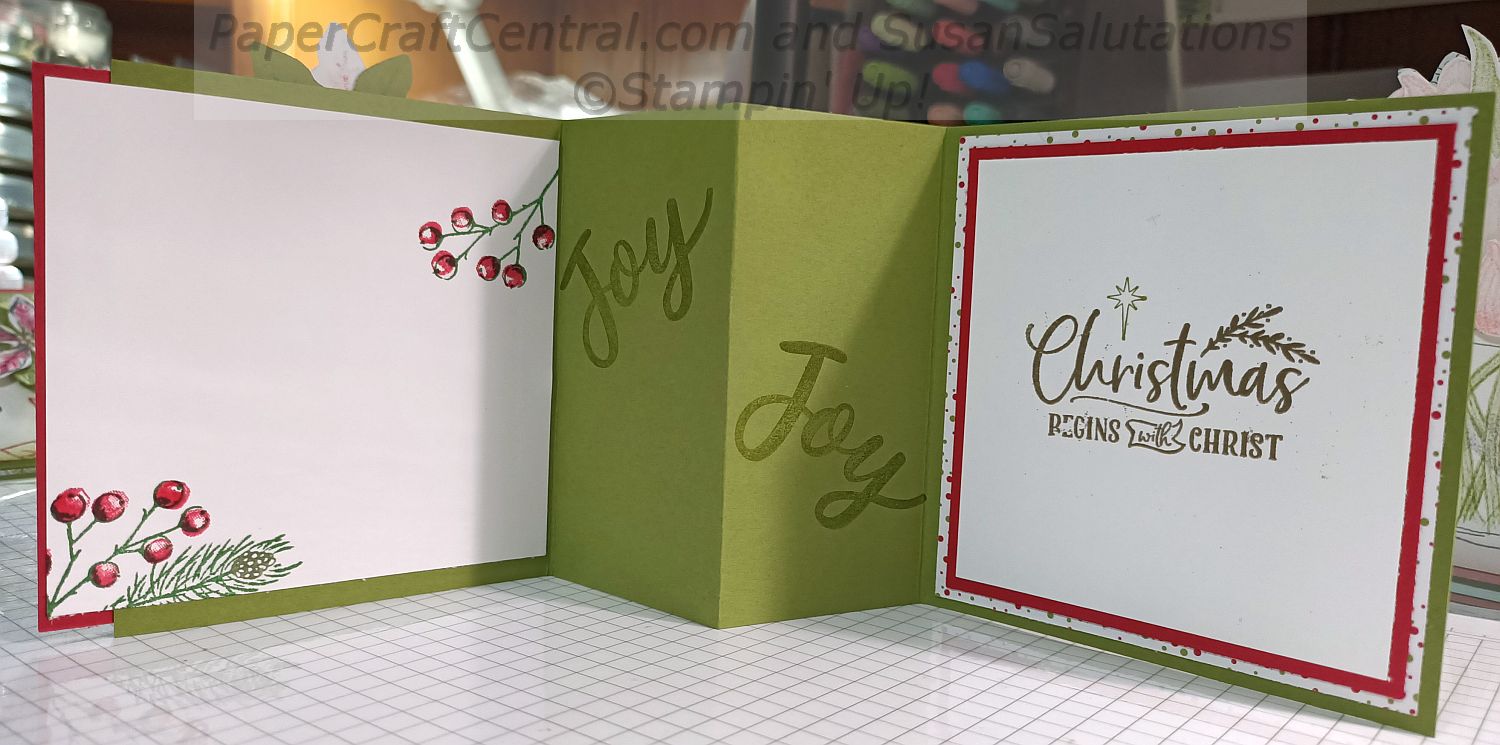
I cut my card base from an A4 piece of cardstock by dividing it in half longways.
Then I scored the card in the middle at 15cm, and added two more score lines equal distances from the middle score line.
Accordion fold along the score lines, in a valley fold, mountain fold and another valley fold. Then decorate as desired.
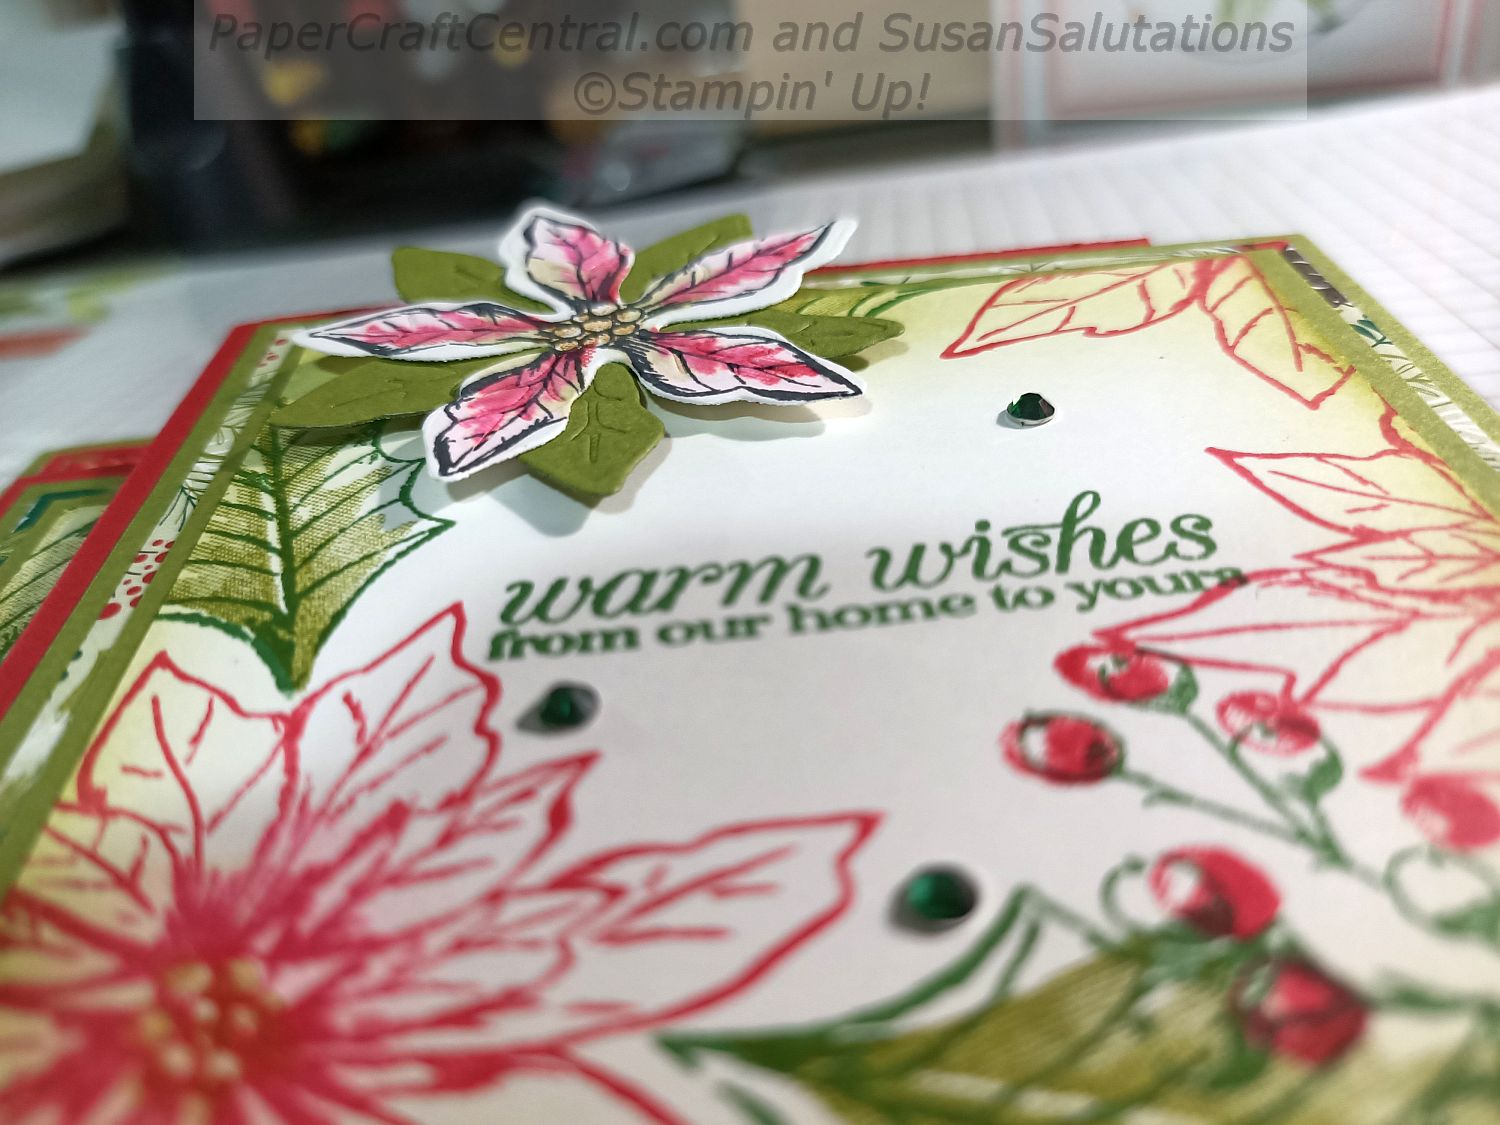
The card winds up being a bit shorter so you can afford to add paper flowers that go outside the top border. Make sure you position them in a way that you can still place your finished card into an envelope.
Sneak Peek at Dandy Garden
Did you know we have a new seasonal catalogue coming out in January 2021? We do! As a Demonstrator. I get to order some of the brand new products before everyone else can. I was able to order the Dandy Garden bundle and play with it to create a range of projects.
Wait till you see the designer series paper!
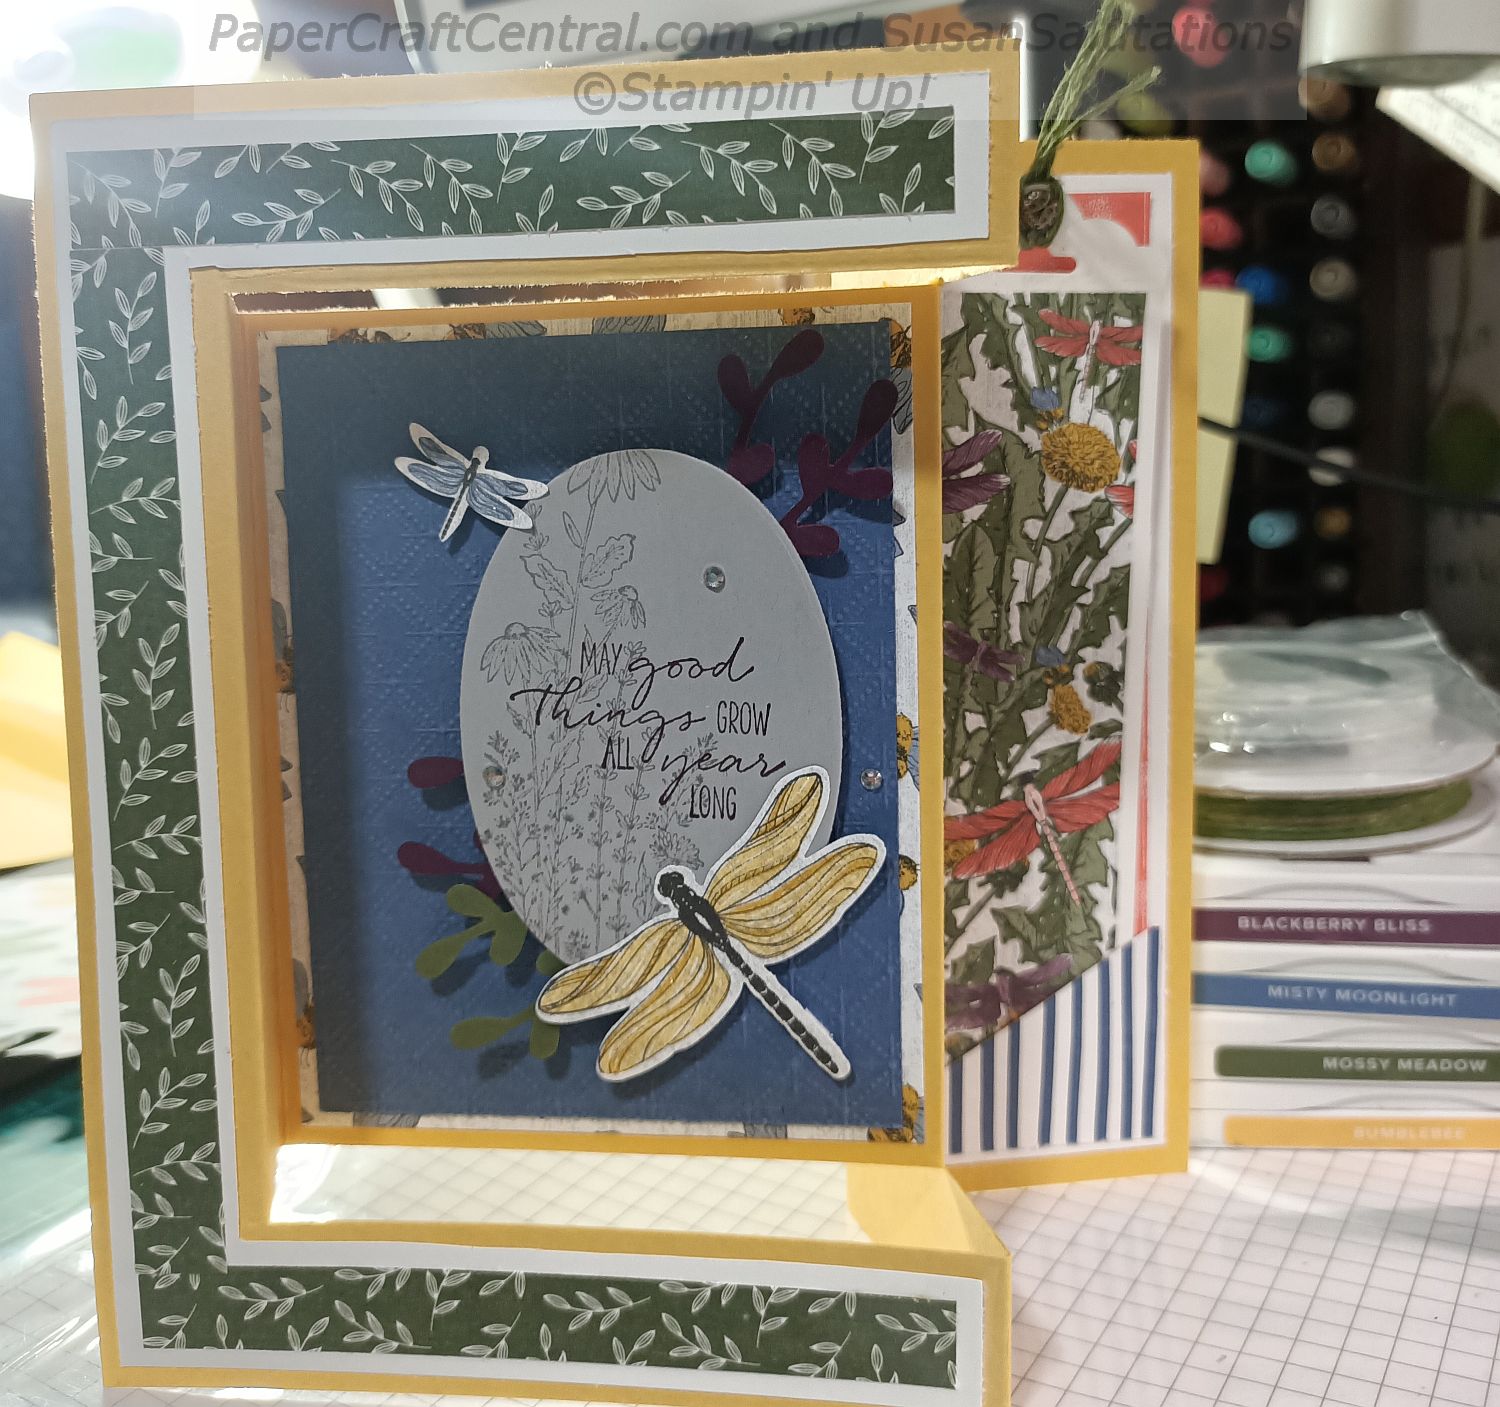
This first card is a fancy fold card. I love the dragonflies and dandelions in this bundle.
I found the video for making this card base on Youtube. It's called a side panel fold card if you want to look for directions.
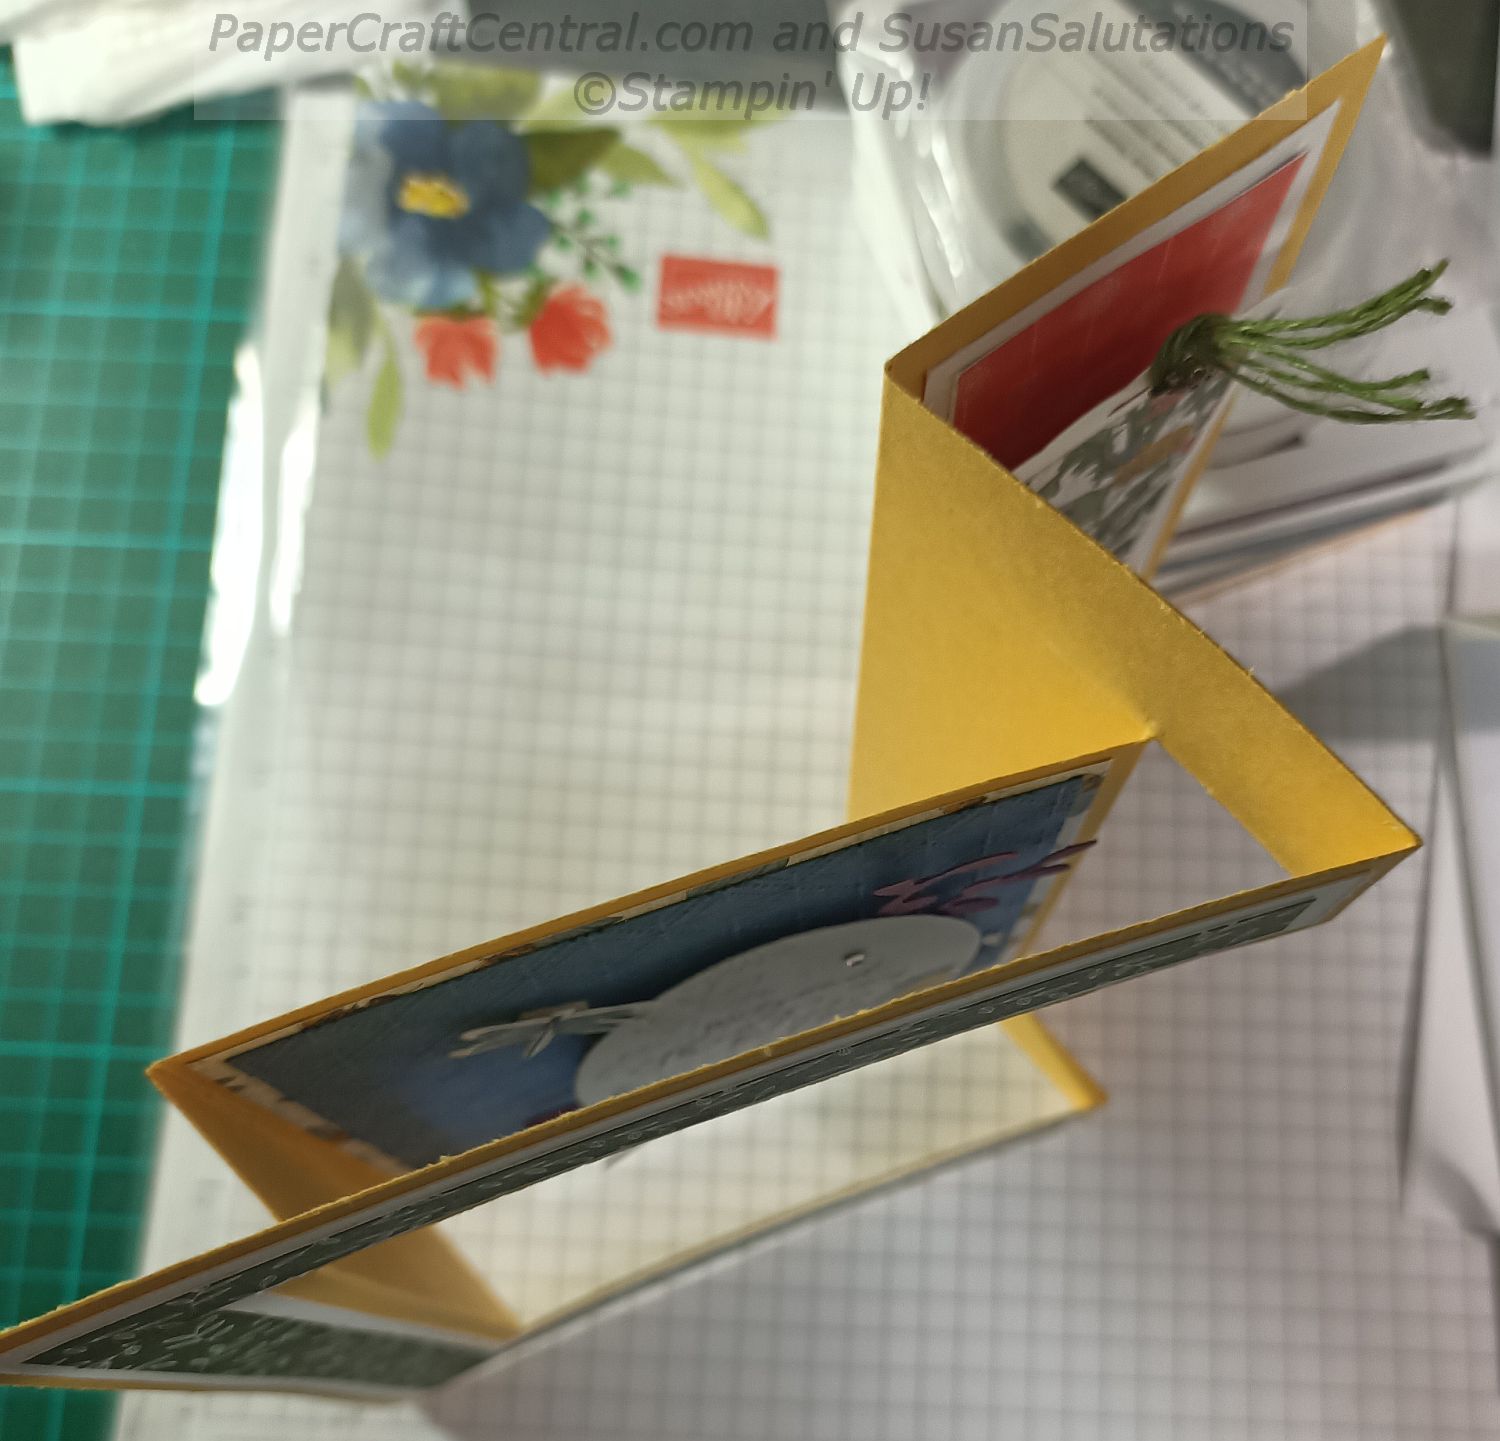
This is how the folds look from above
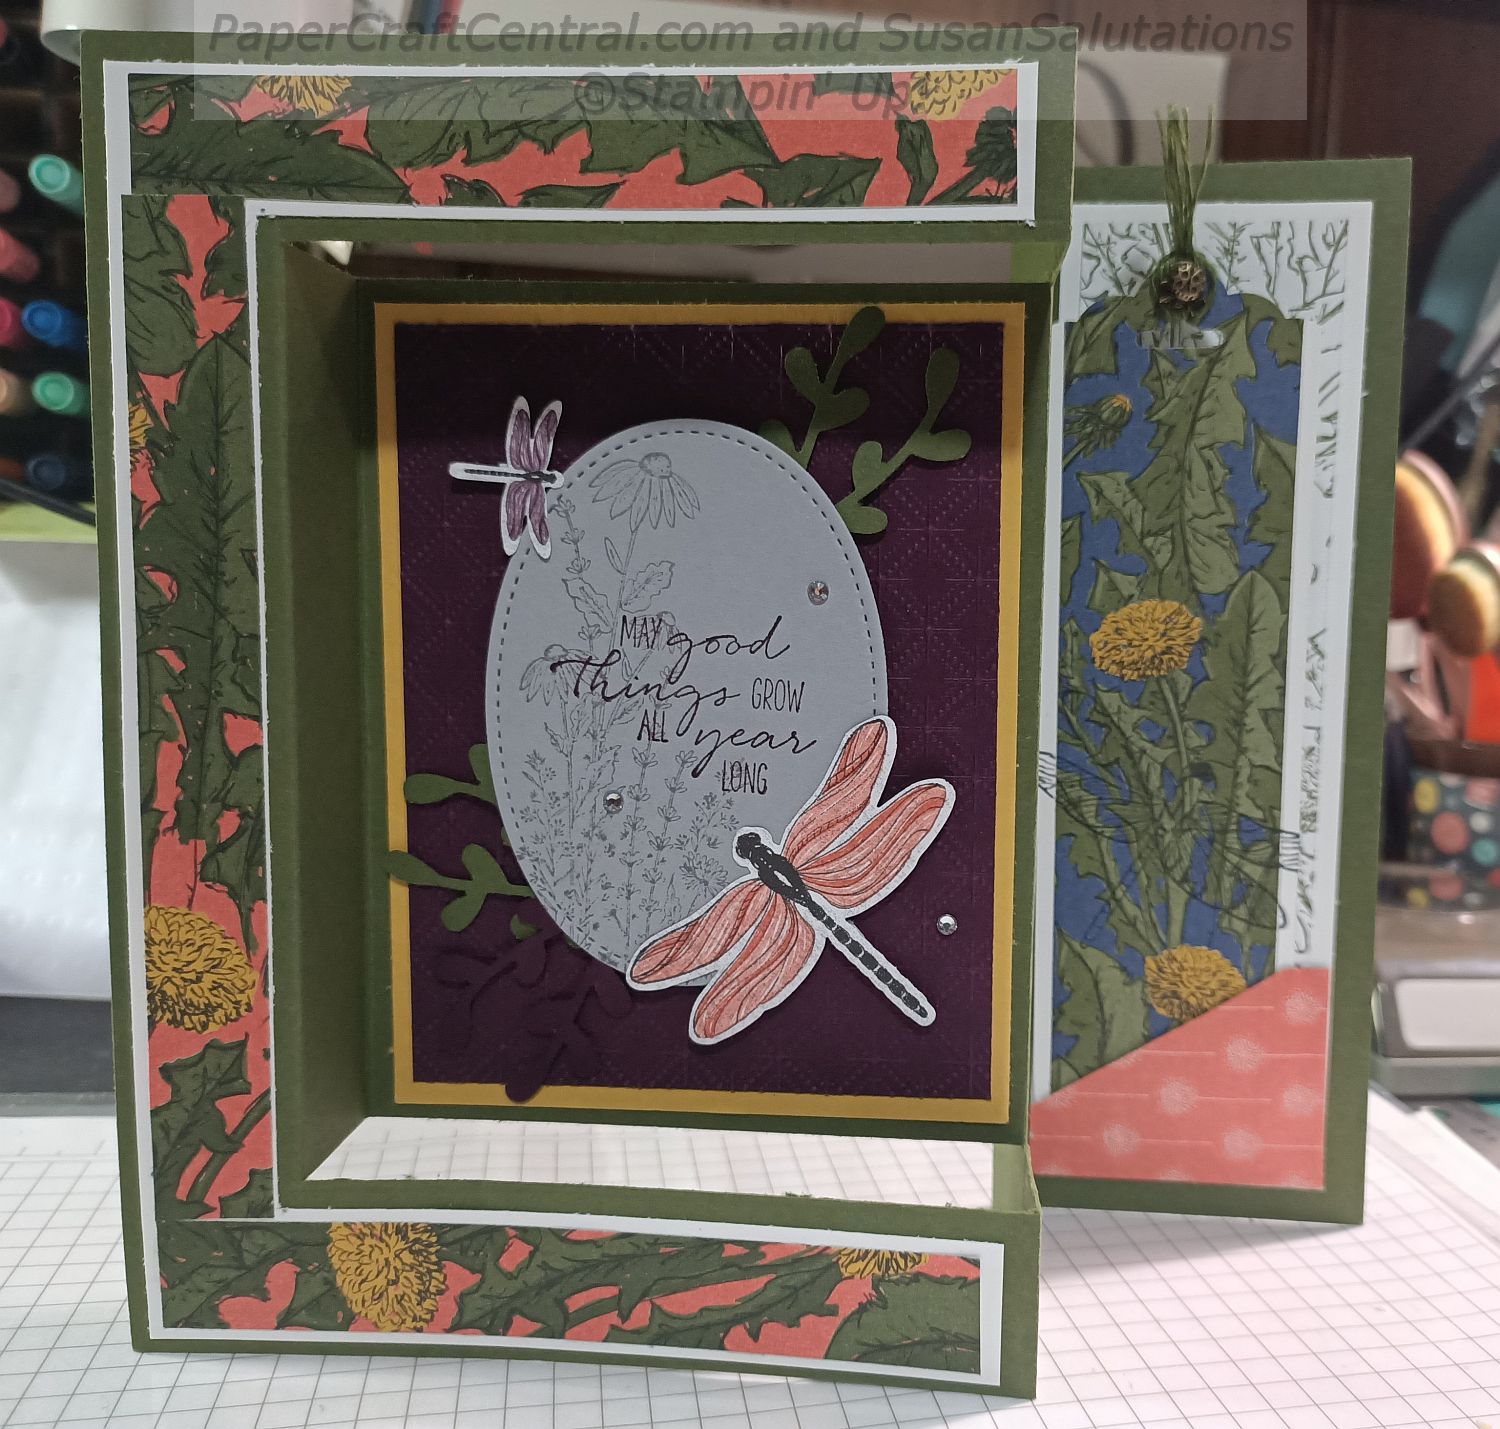
I love how you can make a bookmark to go with this card and can write your special message on the back of it. By using dsp to decorate, taking the book mark out of the card does not ruin the card!
The next project was a black and white #simplestamping card.
You can see that I just stamped my images in Memento Black and added a strip of coloured dsp and ribbon to add some impact.
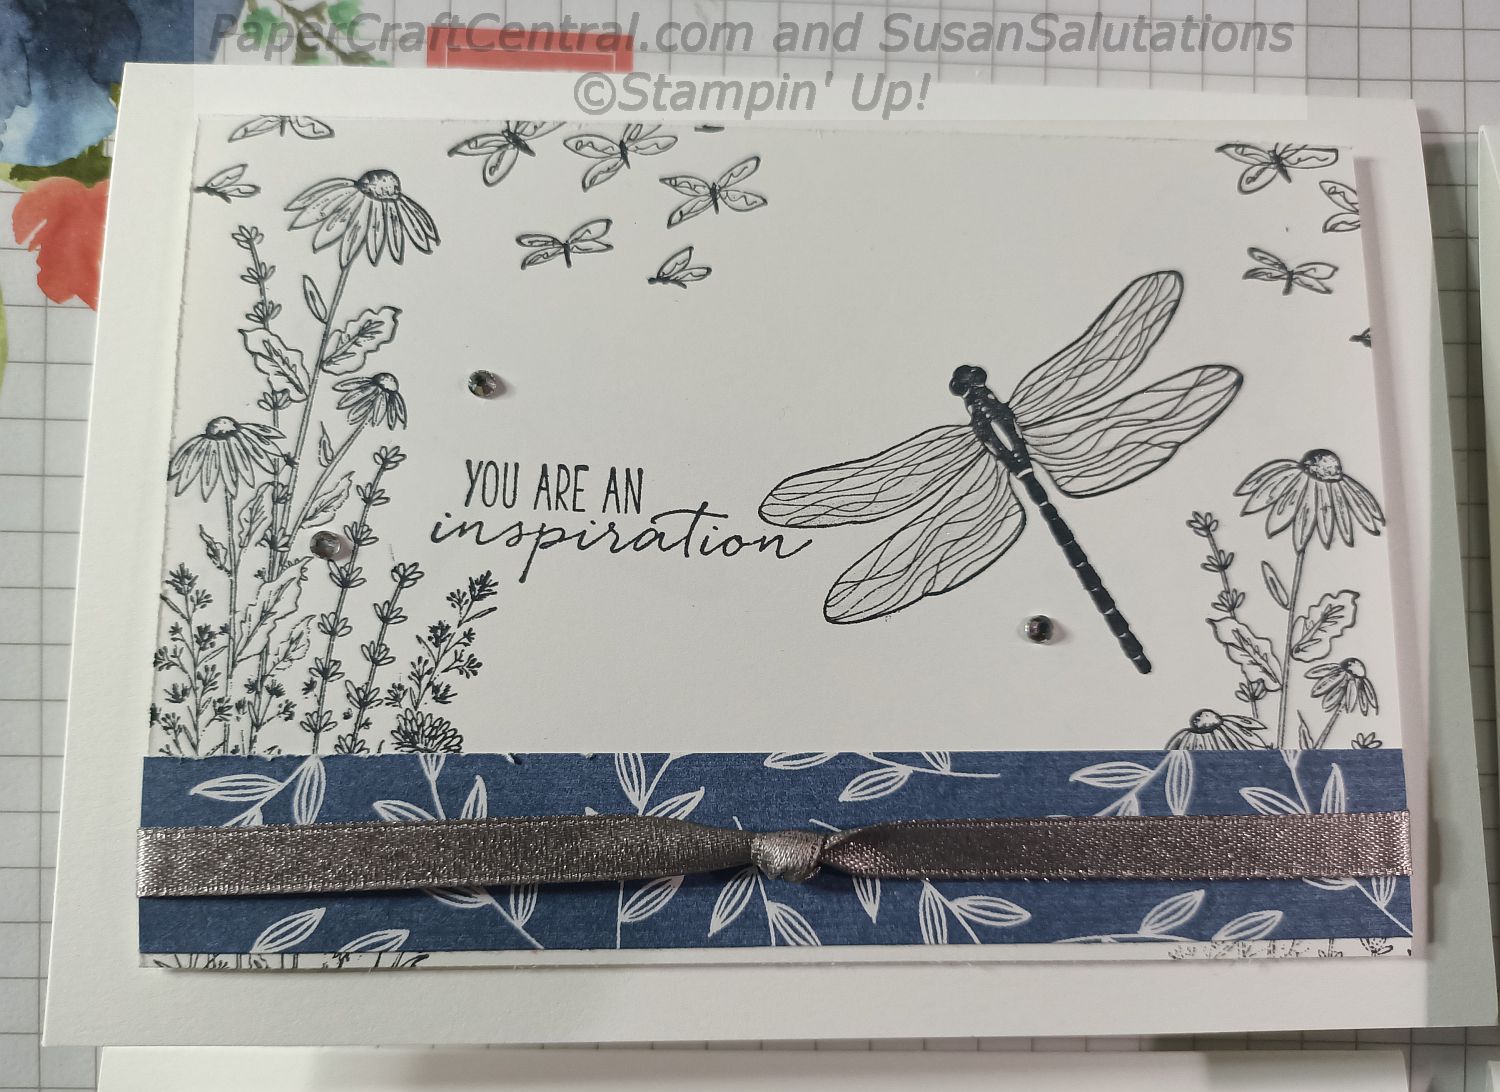
Such a simple card yet how beautiful are those stamps? You could make lots of these in a short time if you wanted to. I think they would be great invitations or thank you cards. Just swap out the sentiment to suit your occasion.
The next couple of card ideas from 2020 used both stamping and dsp strips to make a statement.
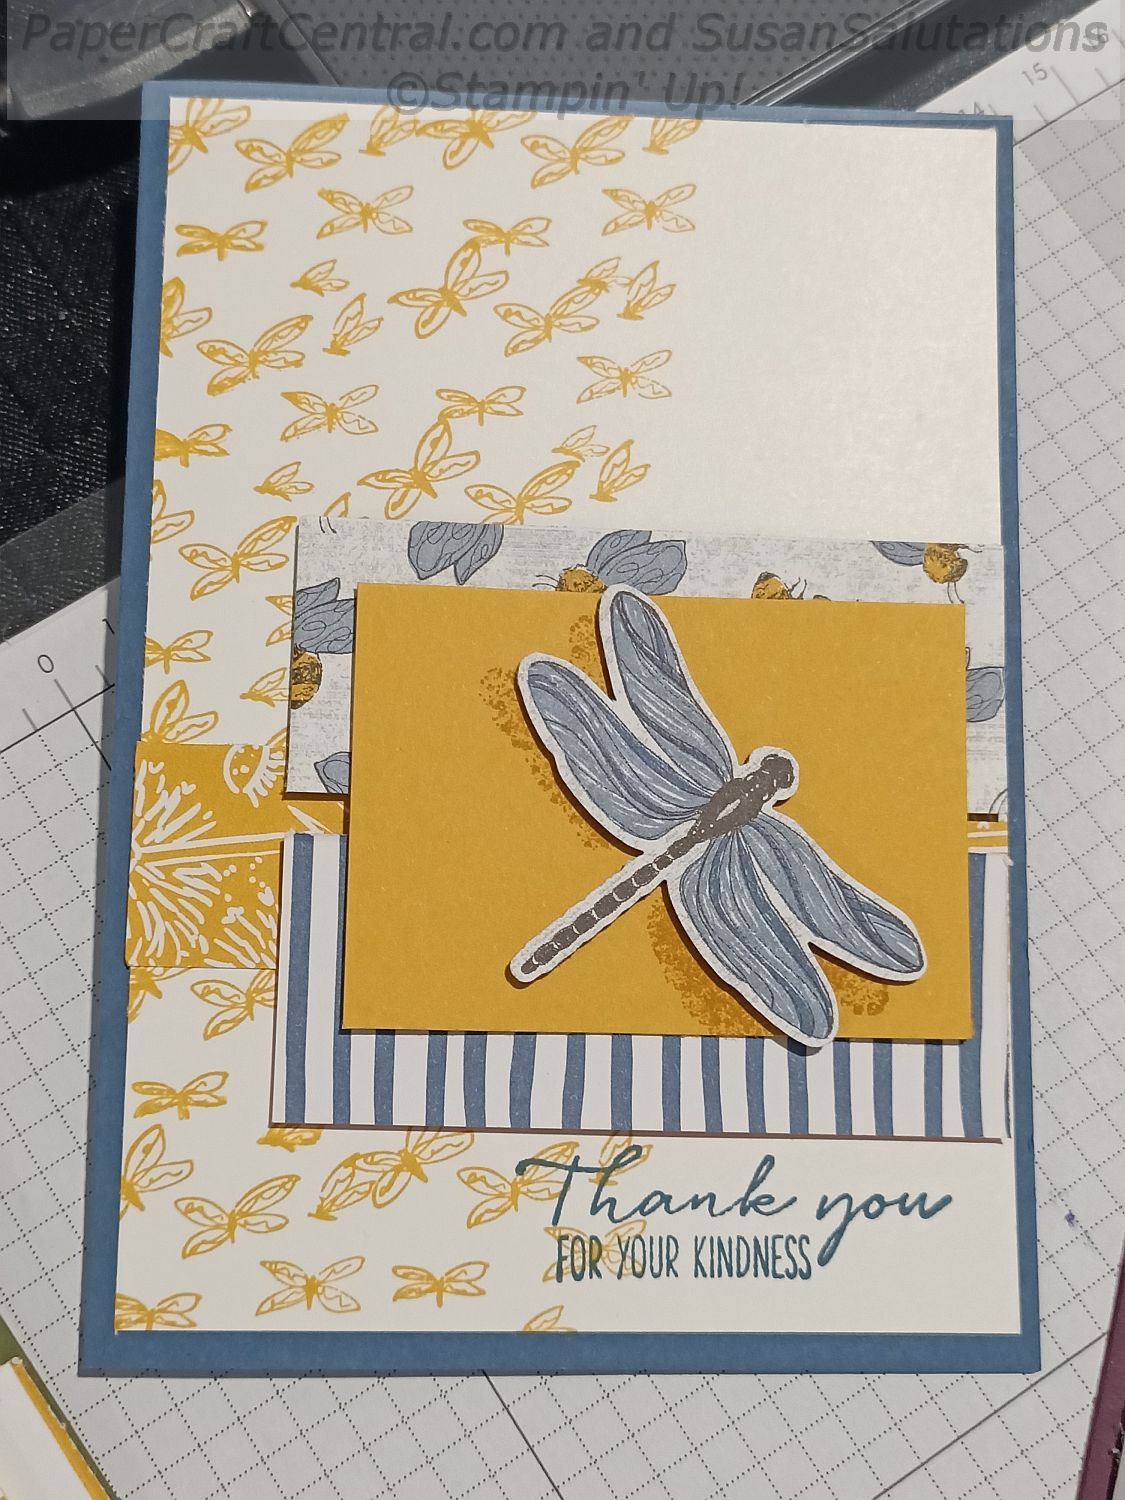
See how I created a border strip with the little butterfly stamps? That's Bumblebee ink I stamped them in.
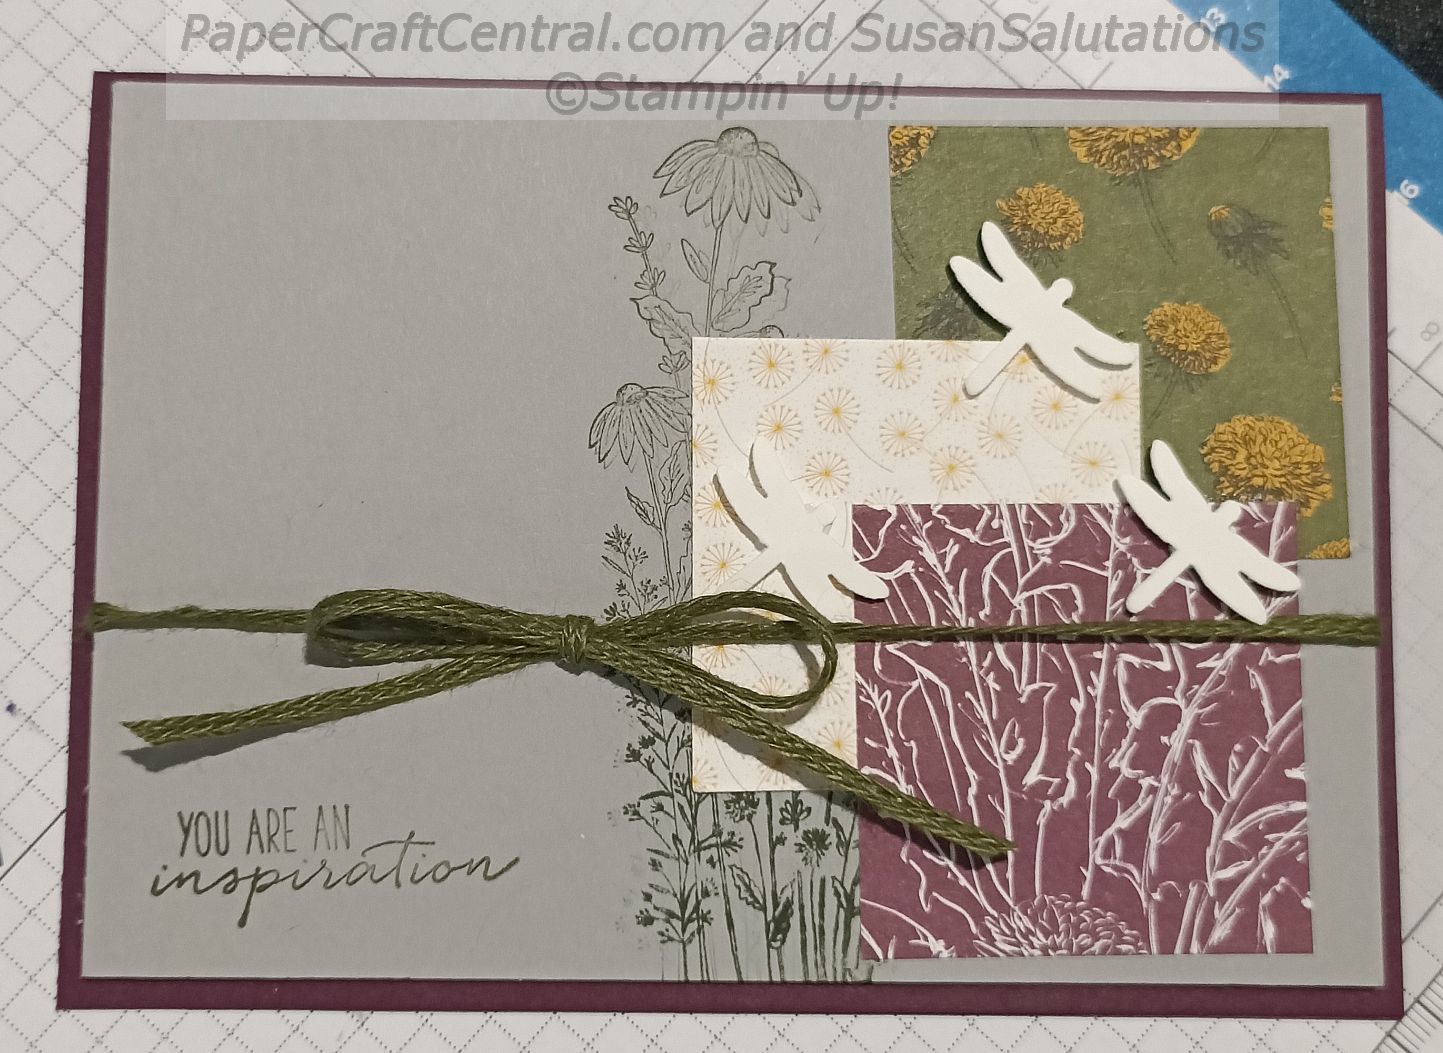
DSP can really say a lot! Here I used overlapping squares of it to layer onto my card. I stamped the background first.
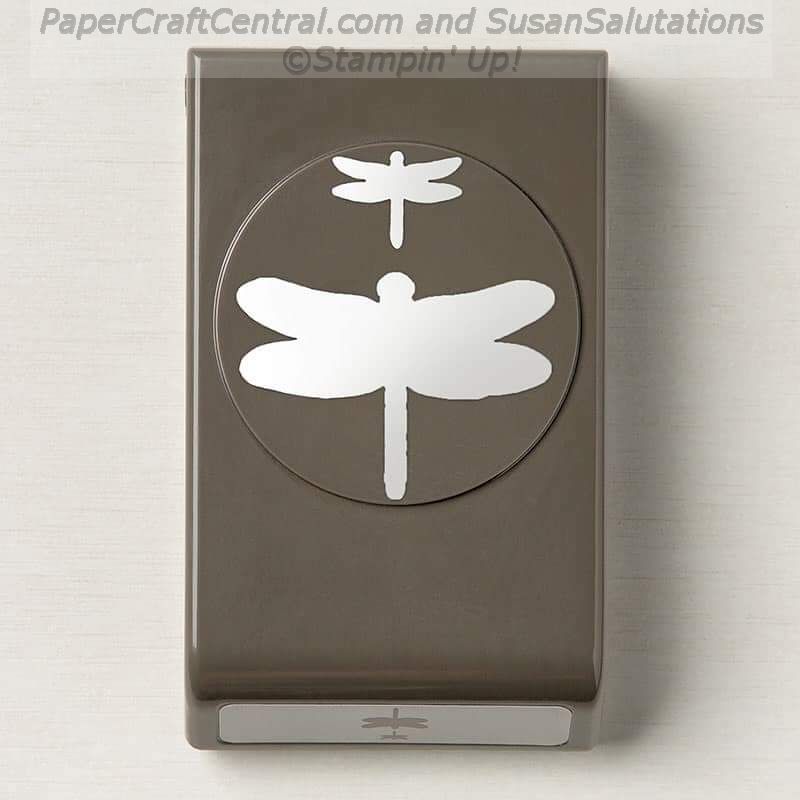
The little dragonflies are punched shapes. Yes! There's a double dragonfly punch coming! There is a large punched dragonfly and a small one.
You'll be able to order the Dandy Garden suite in January 2021, unless you are a Stampin' Up! Demonstrator. If you are already a demonstrator, you could order it earlier!
(As always, you can join my team to get discounts, pre releases and connection with a fabulous group of crafters who also love Stampin' Up! and heaps more!)
Card Ideas in 2020 - November
Forever Fern Mystery Card
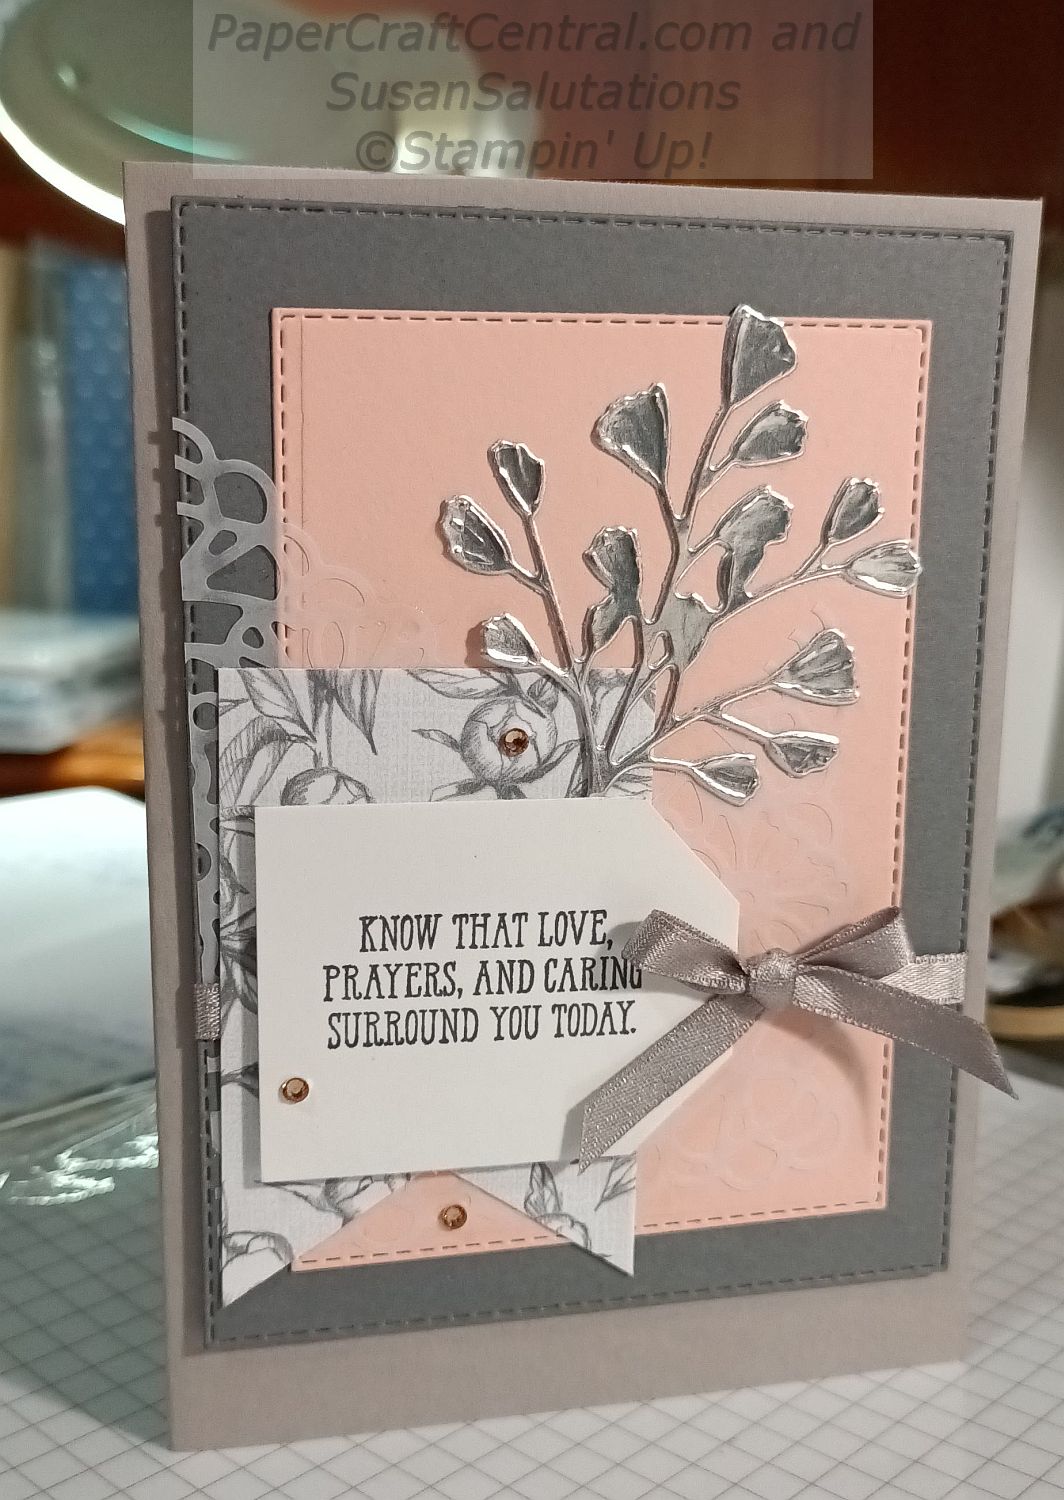
I had a bit of fun for World Cardmaking Day by giving my customers and demonstrators a lost of supplies to gather together. Then we all got together on a Live session to make the card!
I think they turned out just lovely, don't you?
Card ideas from 2020 like this are fun to make with friends.
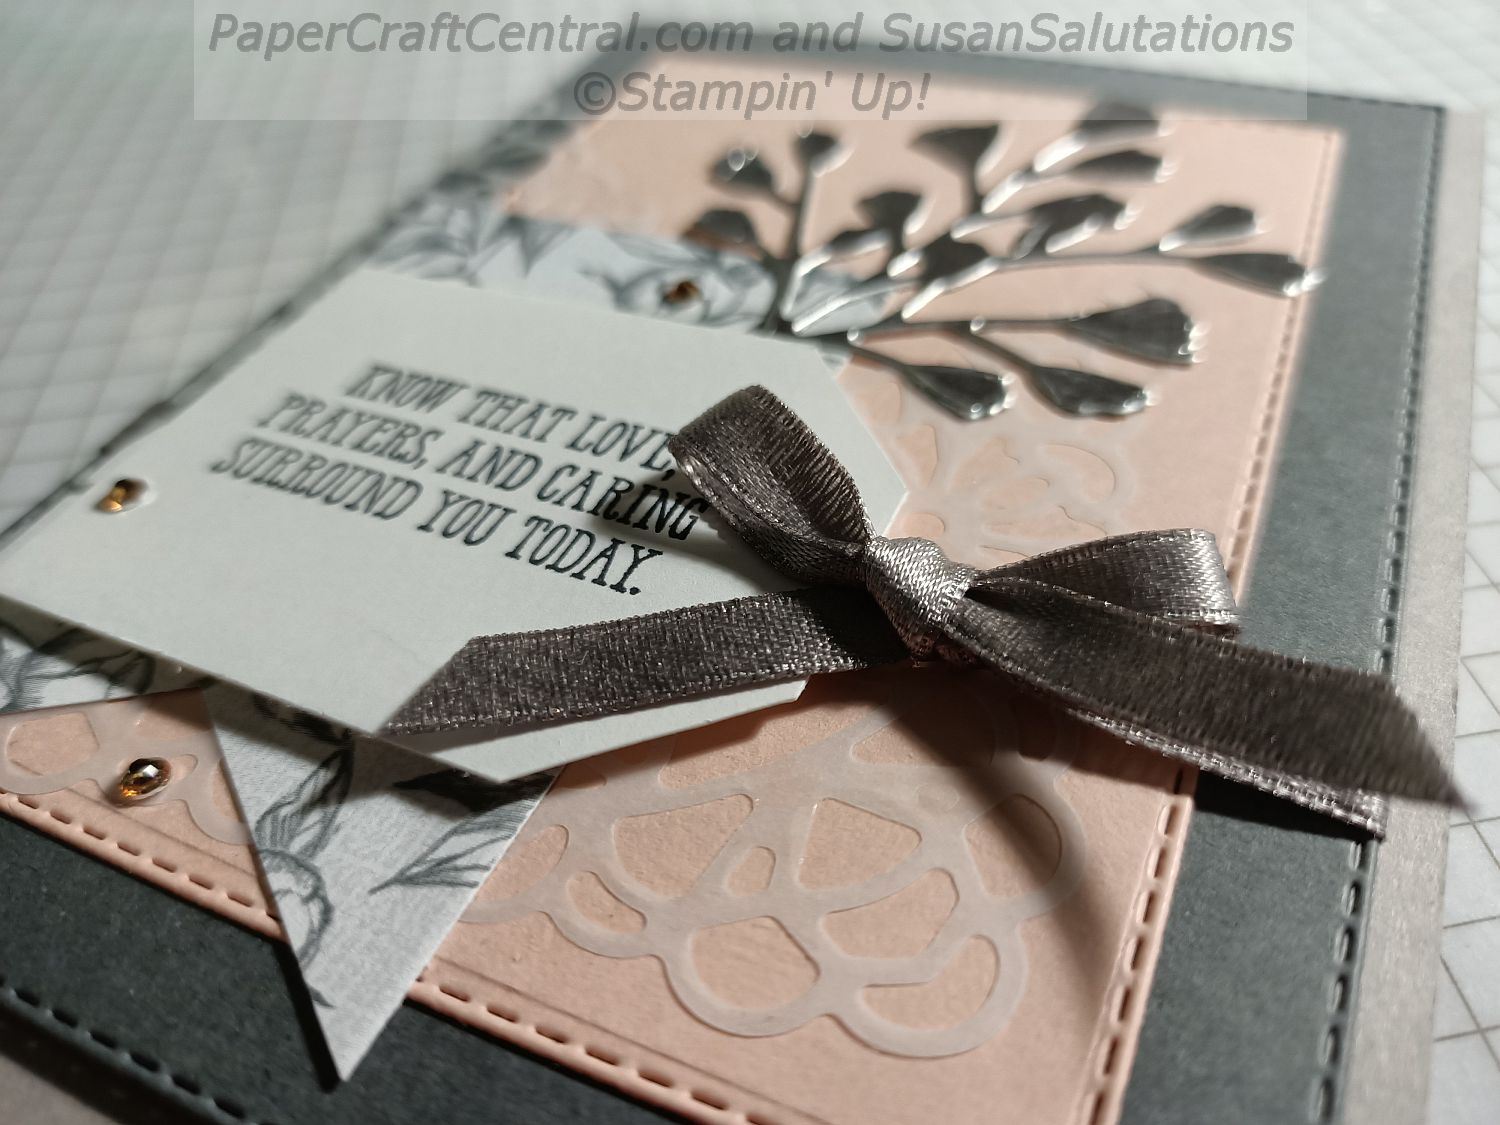
Slim Line Wedding Card
Some friends were married since i last wrote and as one of them was from Papua New Guinea, I wanted to have a Bird of Paradise on the front. The image is not a Stampin' Up! stamp as it came from a free colouring page. The vellum was also not a Stampin' Up! paper
All other supplies used were from Stampin' Up! however.
I decided to make a slim line card with a pocket inside for a cash gift, as this wedding was a Wishing Well wedding.
I love that the designer series paper I used was on special last month, so I had happily stocked up!
I sponged the background before colouring the image with my Stampin' Blends.
I fussy cut some borders from designer series paper, following the pattern that was already on the paper.
I thought the gold foil paper really highlighted my birds and it went with the gold faceted gems I added at the end.
I found the little blossom from Good Morning Magnolia stamp set suited my card and envelope, as did a sentiment form the same stamp set.
I flipped a diagonally cut piece of the dsp over to make the pocket for our gift.
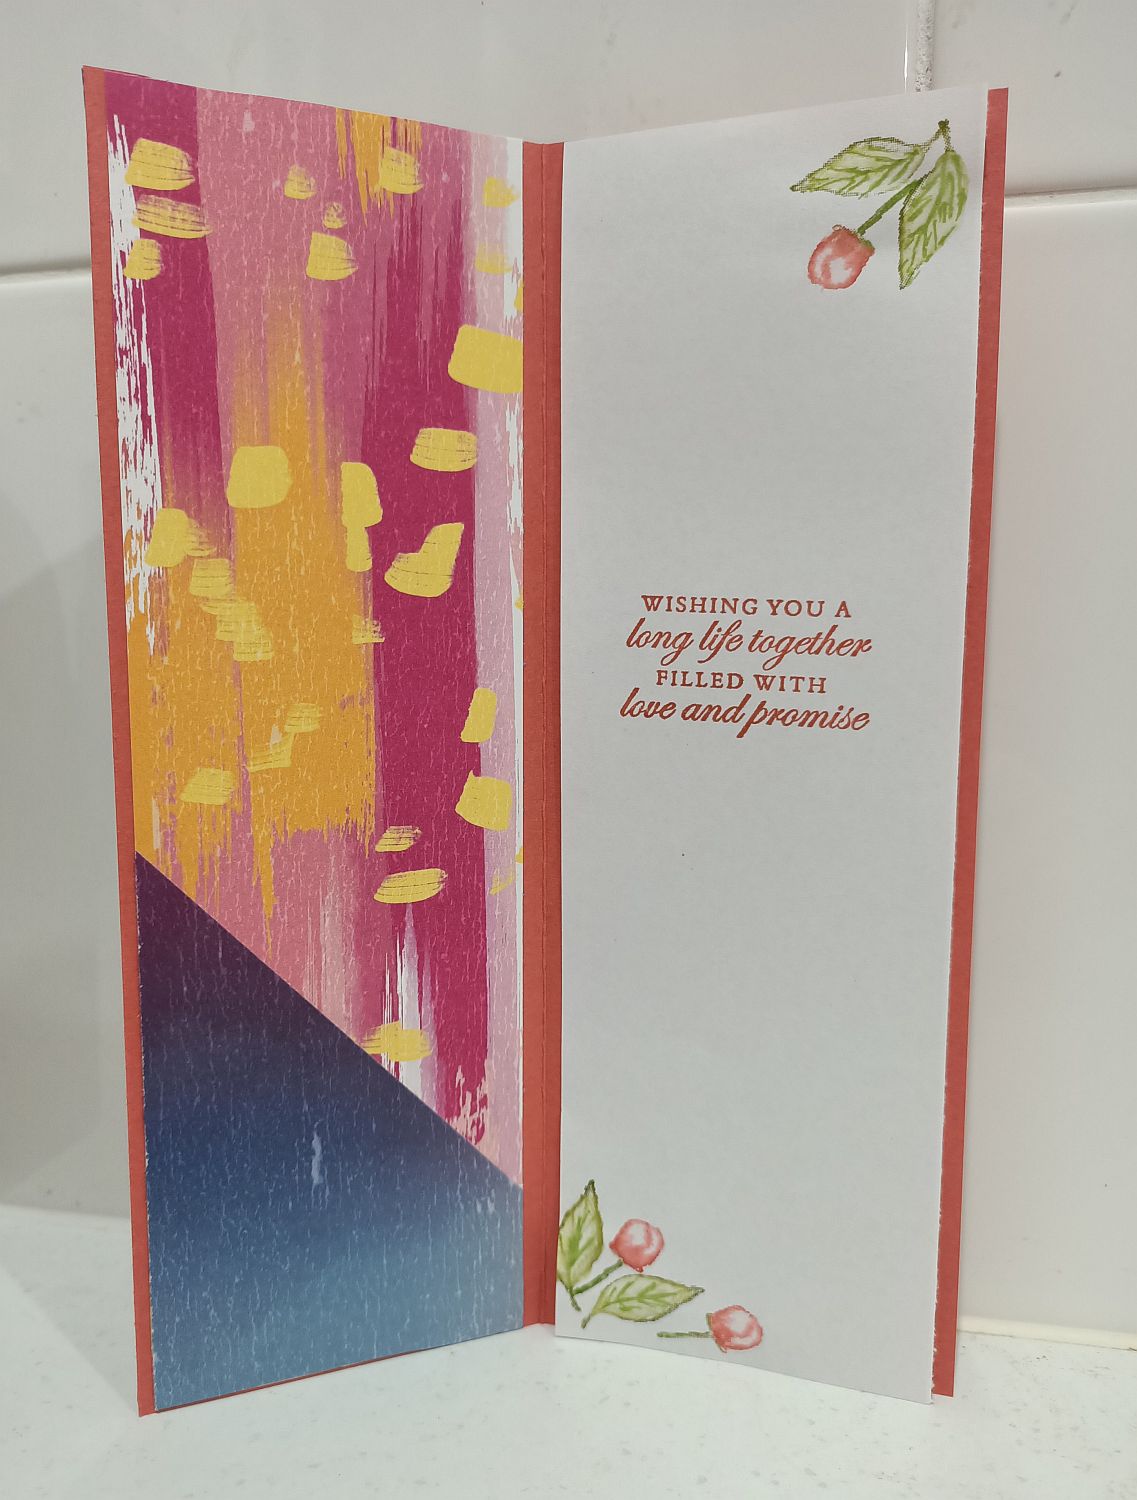
Slim line format gave me so many card ideas in 2020 . I love that there is room to make a scene, either in landscape or portrait mode.
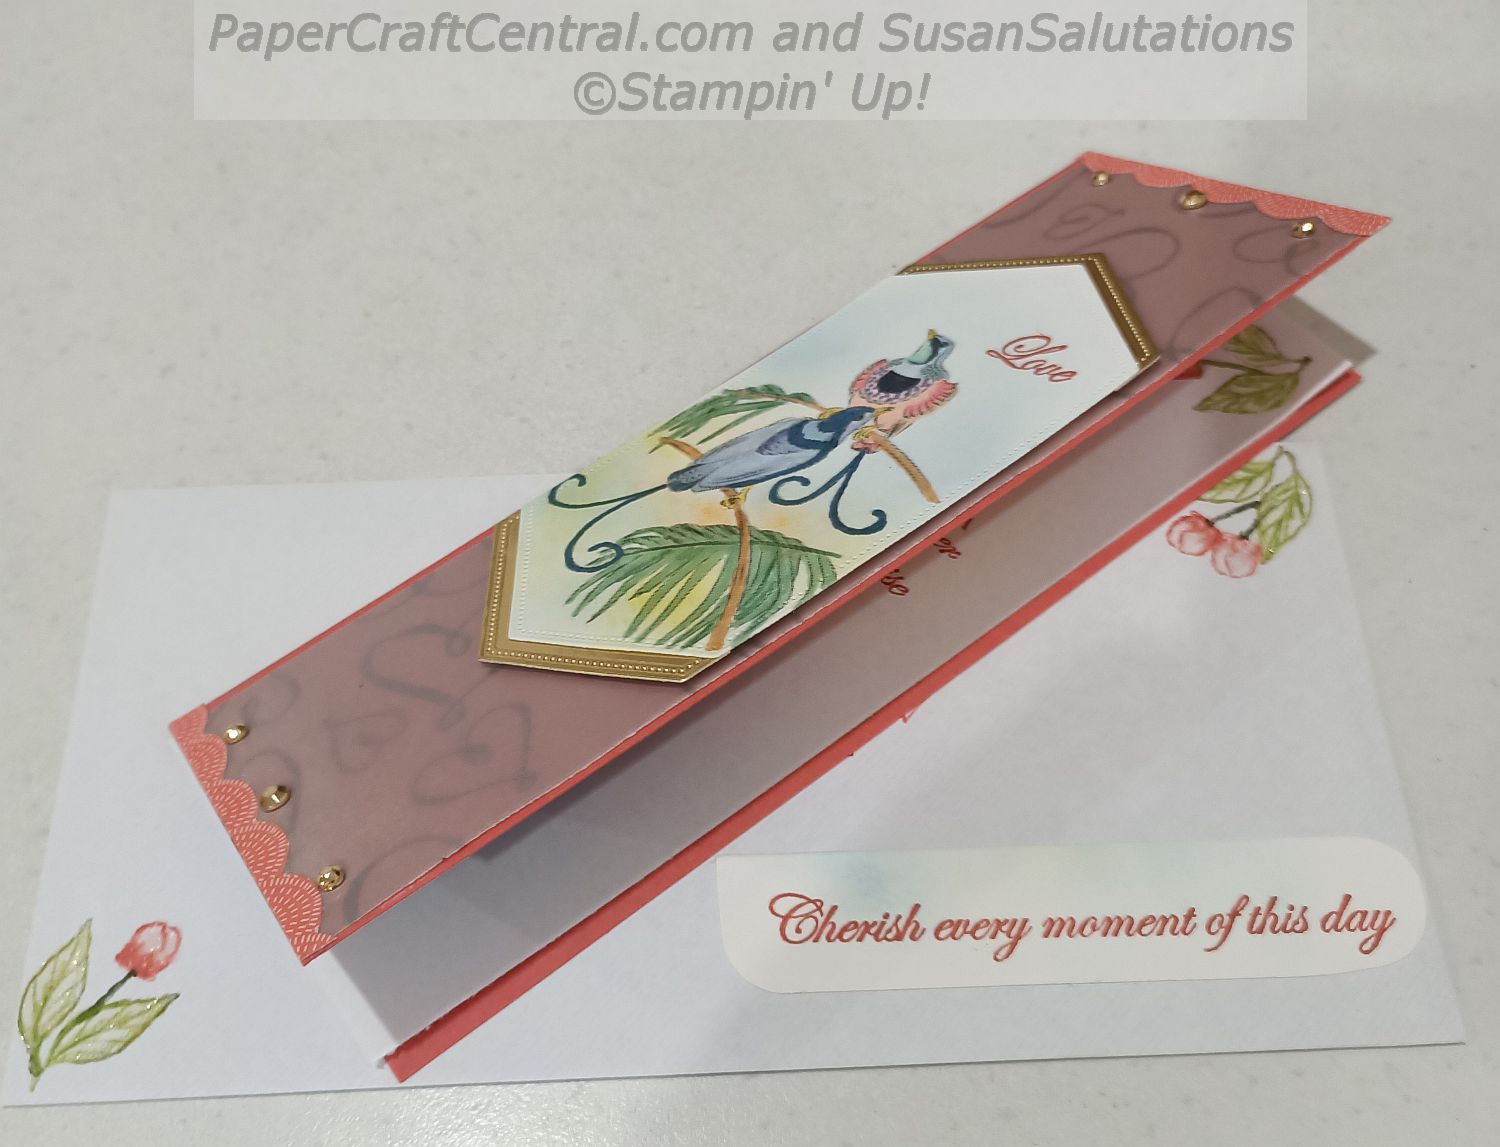
Sail Away Anniversary Card
A friend asked me to make a card for a special anniversary coming up. I chose the Sail Away stamp set and retired designer series paper with retired embellishments to make this card.
The flap to the right opens upward and the bottom flap opens downward.
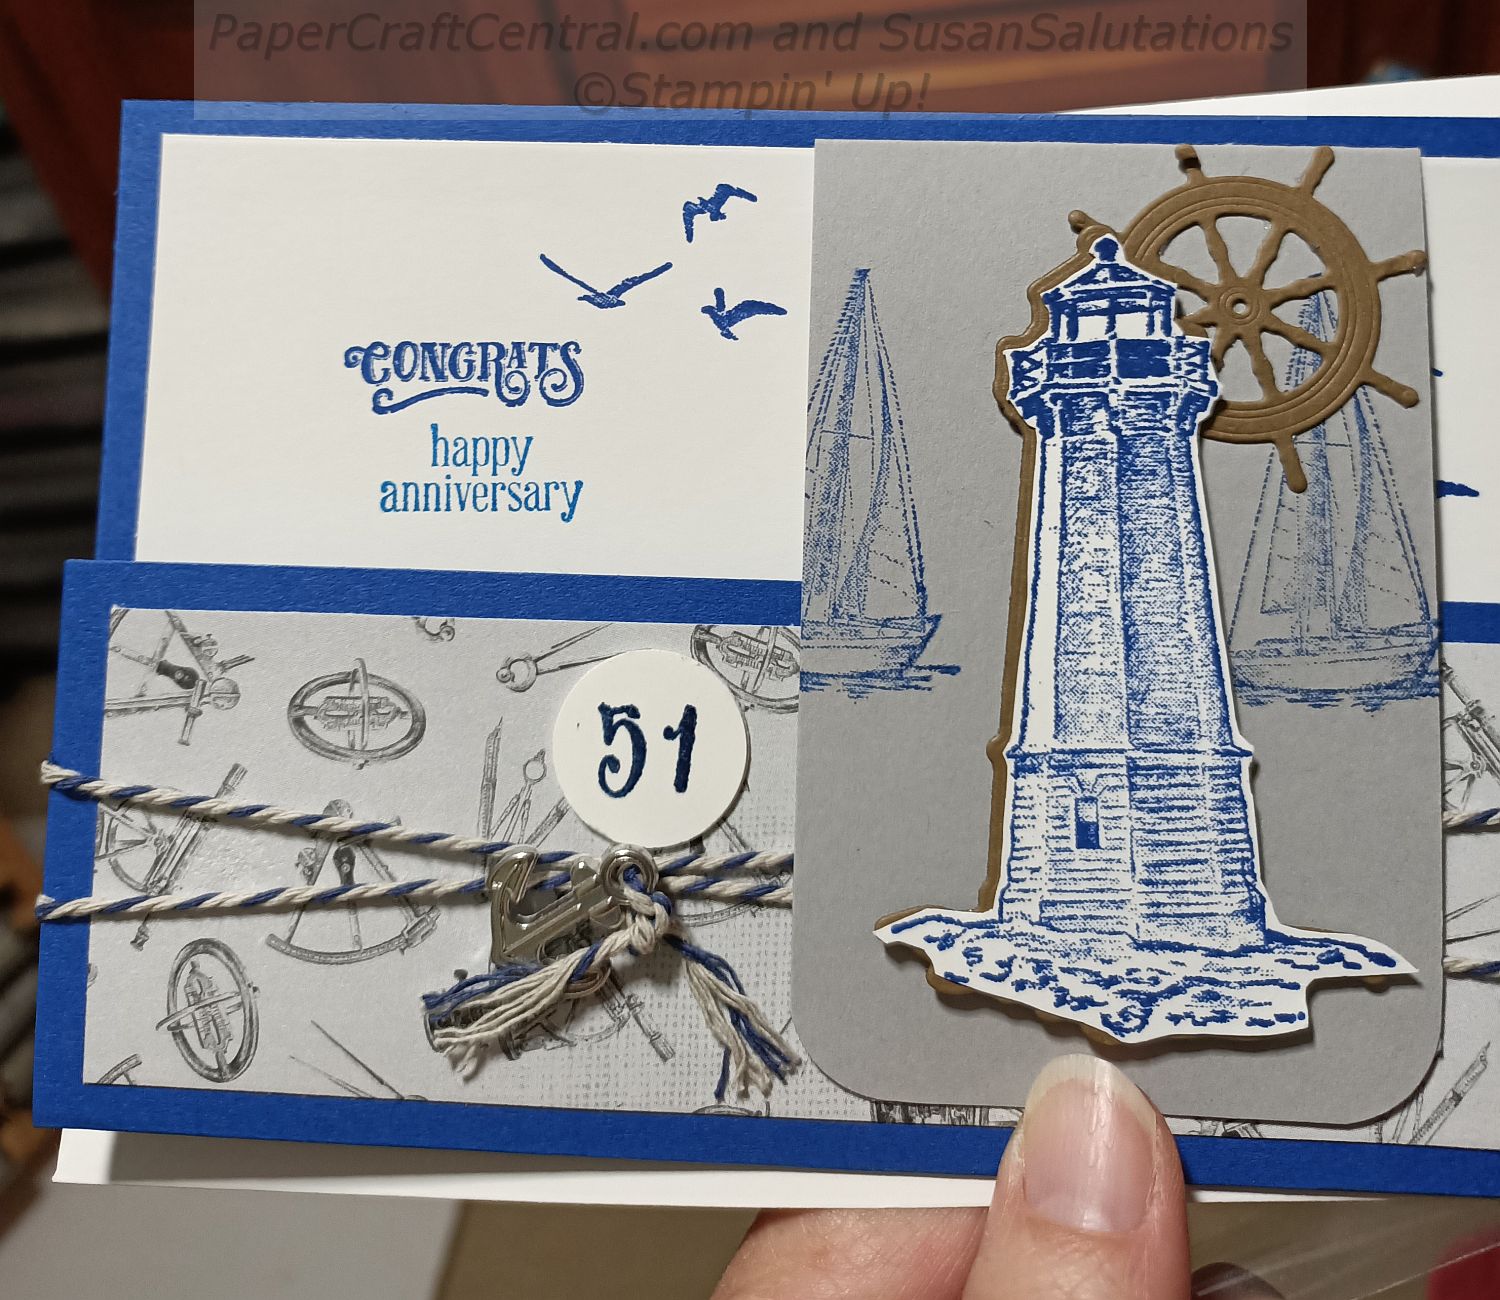
You can just see the back of the flap at the top of this picture. The bottom flap looks as long as the body of the card in this photo, but it isn't!
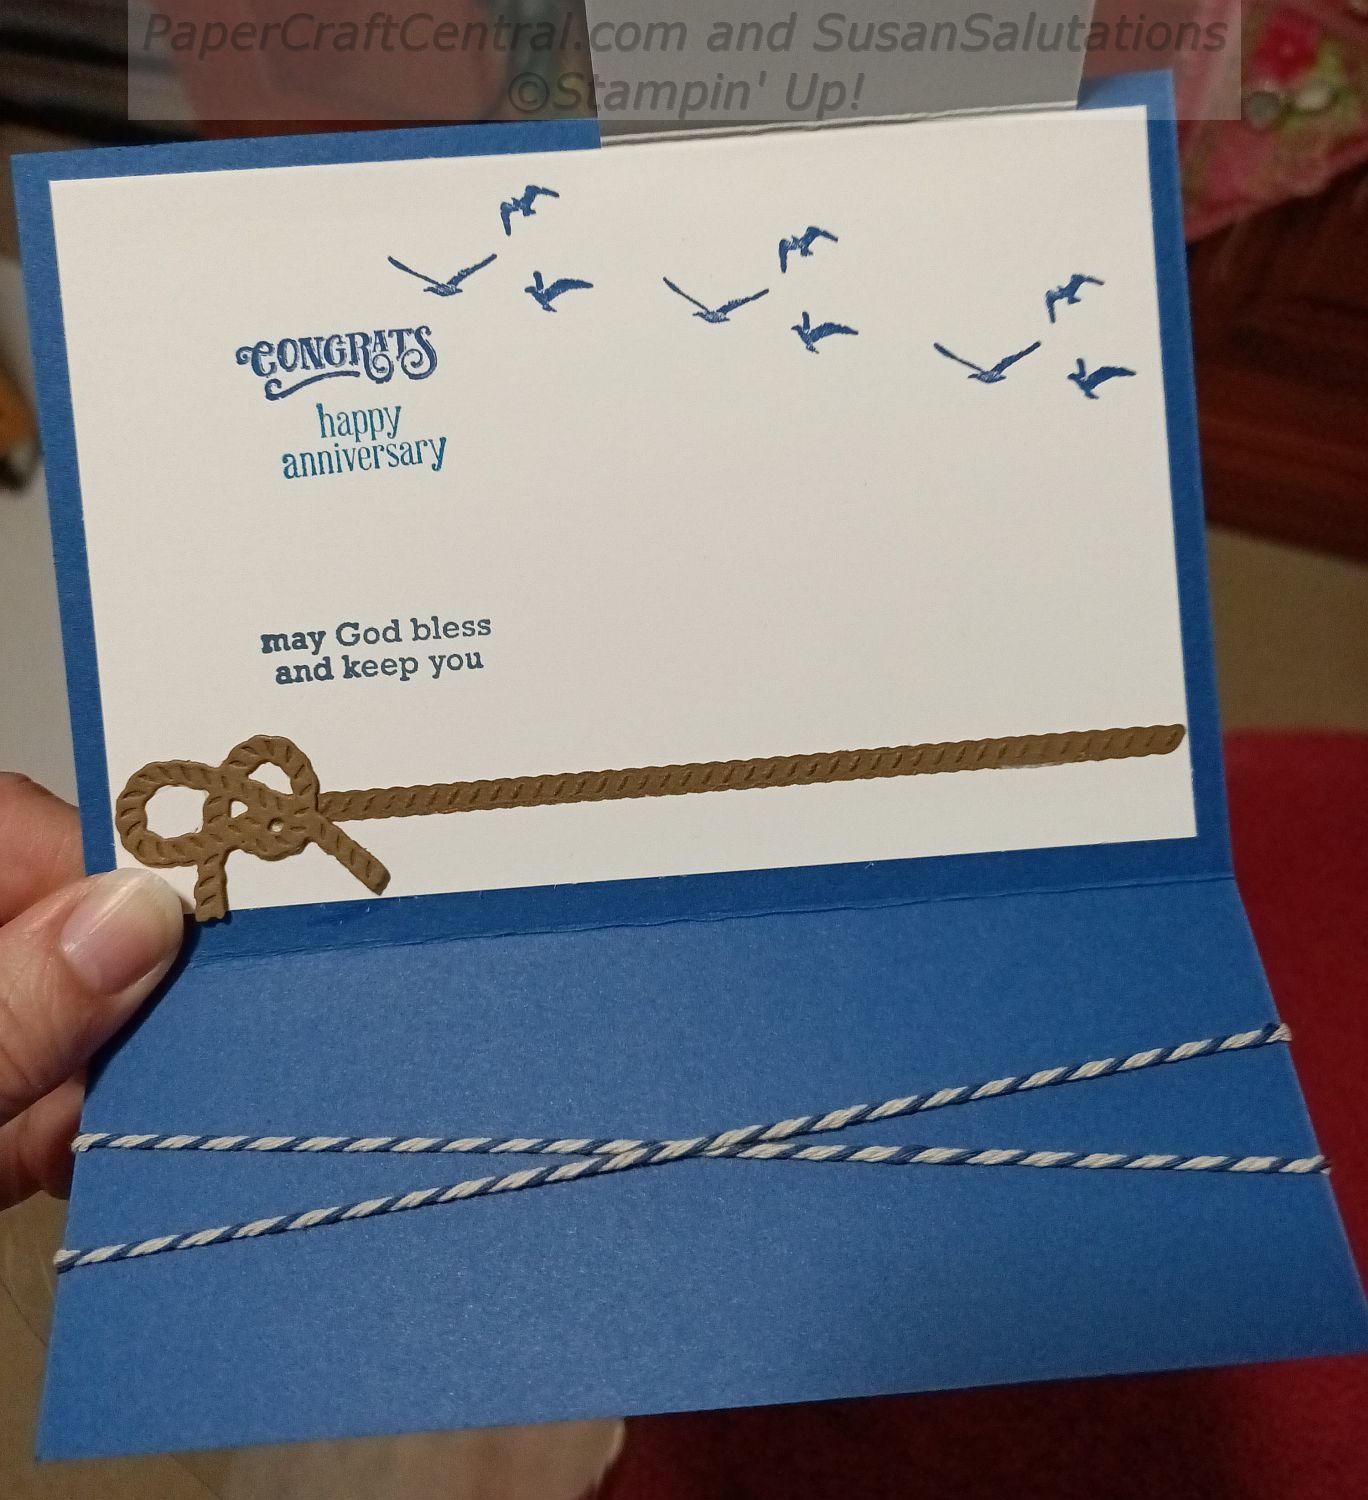
Card ideas from 2020 like these mean you can grab a sentiment from any stamp set you think suits. I found some in my Itty Bitty Greetings stamp set.
Simple Card Ideas in 2020
Sometimes you need to make a lot of cards and need some simple card ideas to help you make them.
This idea is one that certainly fits the bill!
All you need to start with is a background piece of Whisper White/Basic White cardstock and three pieces of Designer Series Paper to go on top.
Once you glue the DSP to the Whisper White, you can add the element to a card base.
I tied ribbon around my element and put Stampin' Dimensionals on the back to pop the element up.
Then I taught a while group of ladies how to do the same, and we sure got some lovely cards made that morning!
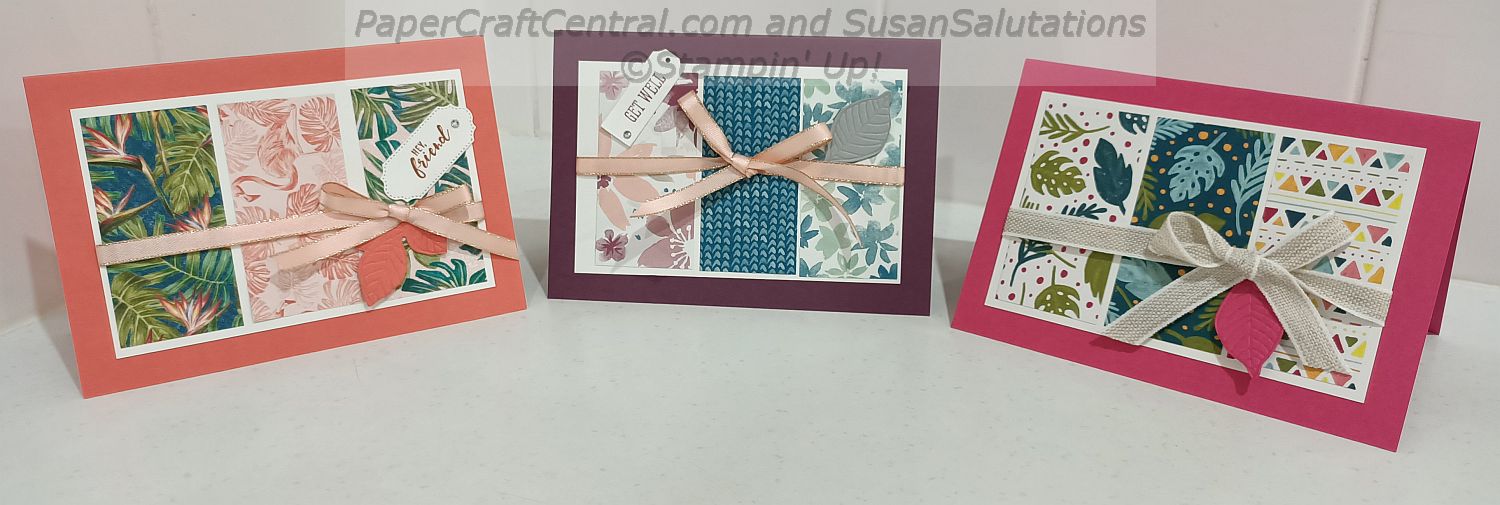
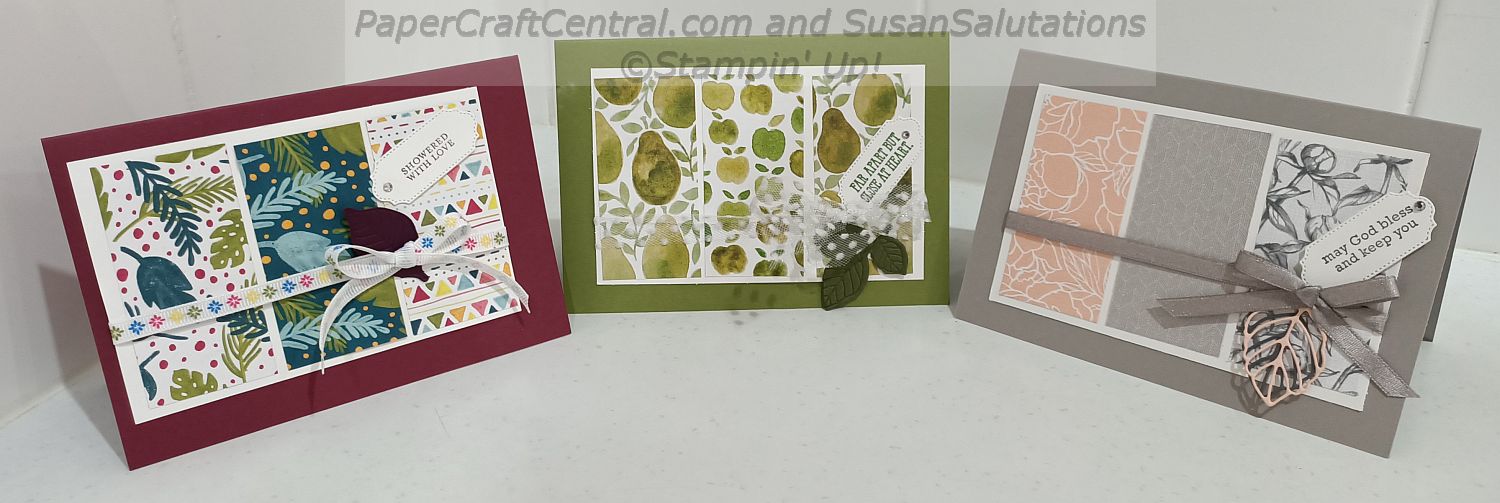
Each card is a different colour and I found lots of different Designer Series Papers to make the strips. I consulted the back of the Designer Series Paper pack to choose my card base colours. I love how Stampin' Up! tells you what colors they use in their DSP.
I hope you enjoyed the Card Ideas from 2020 for November and they maybe even inspire you to make some of your own.
Card Ideas in 2020 - October
This month I' had been accumulating rather than making as much. Accumulating stamp sets and supplies, but also knowledge and information. The good thing is, I had lots more new stamp sets to share card ideas with you in the lead up to Christmas!
Another Waterfront Idea
For the first card idea, I had not been able to forget how beautiful the Waterfront stamp set is. This time I made a scene for a normal sized card front (half an A4 page, scored in half portrait wise).
I took a photo of the inks and pens I used to make this scene. It really is quite easy to create a lovely scene with this stamp set.
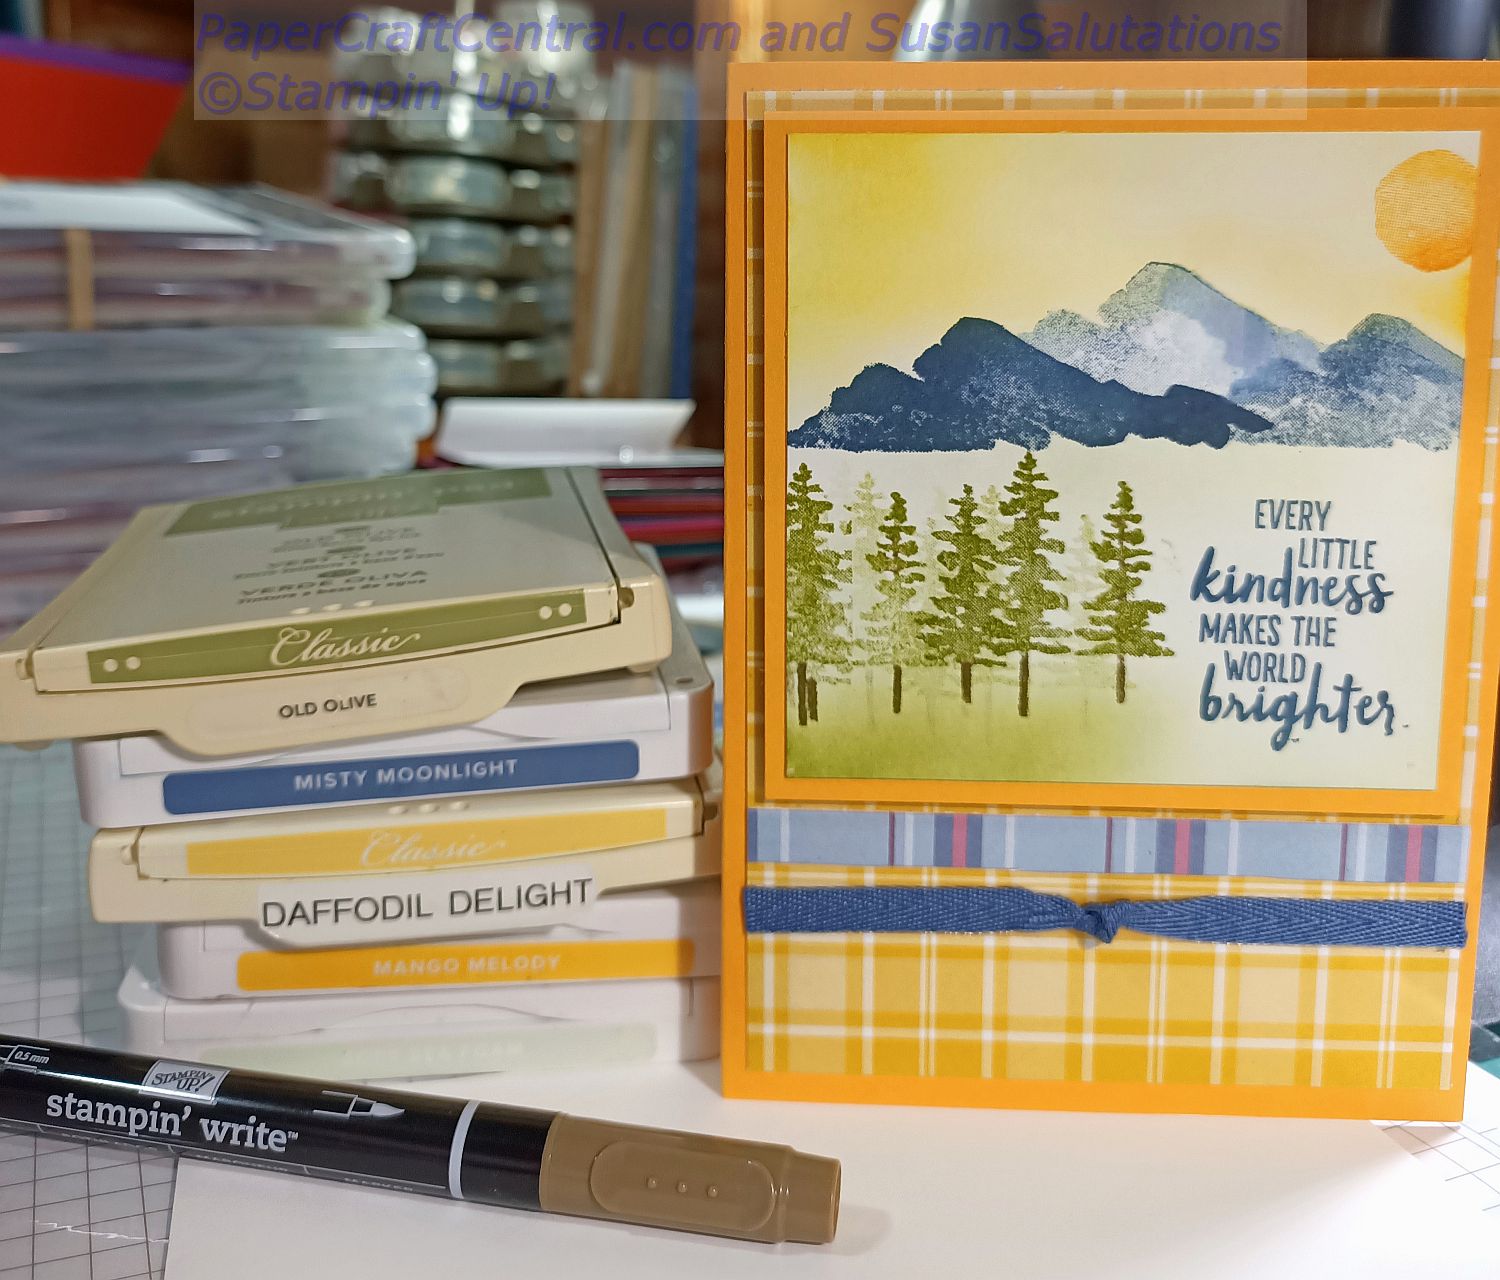
This shows what the inside of the card looked like. I added a cluster of trees to the envelope as well. I try to never send an un-embellished envelope out into the world!

Poinsettia Petals Bundle
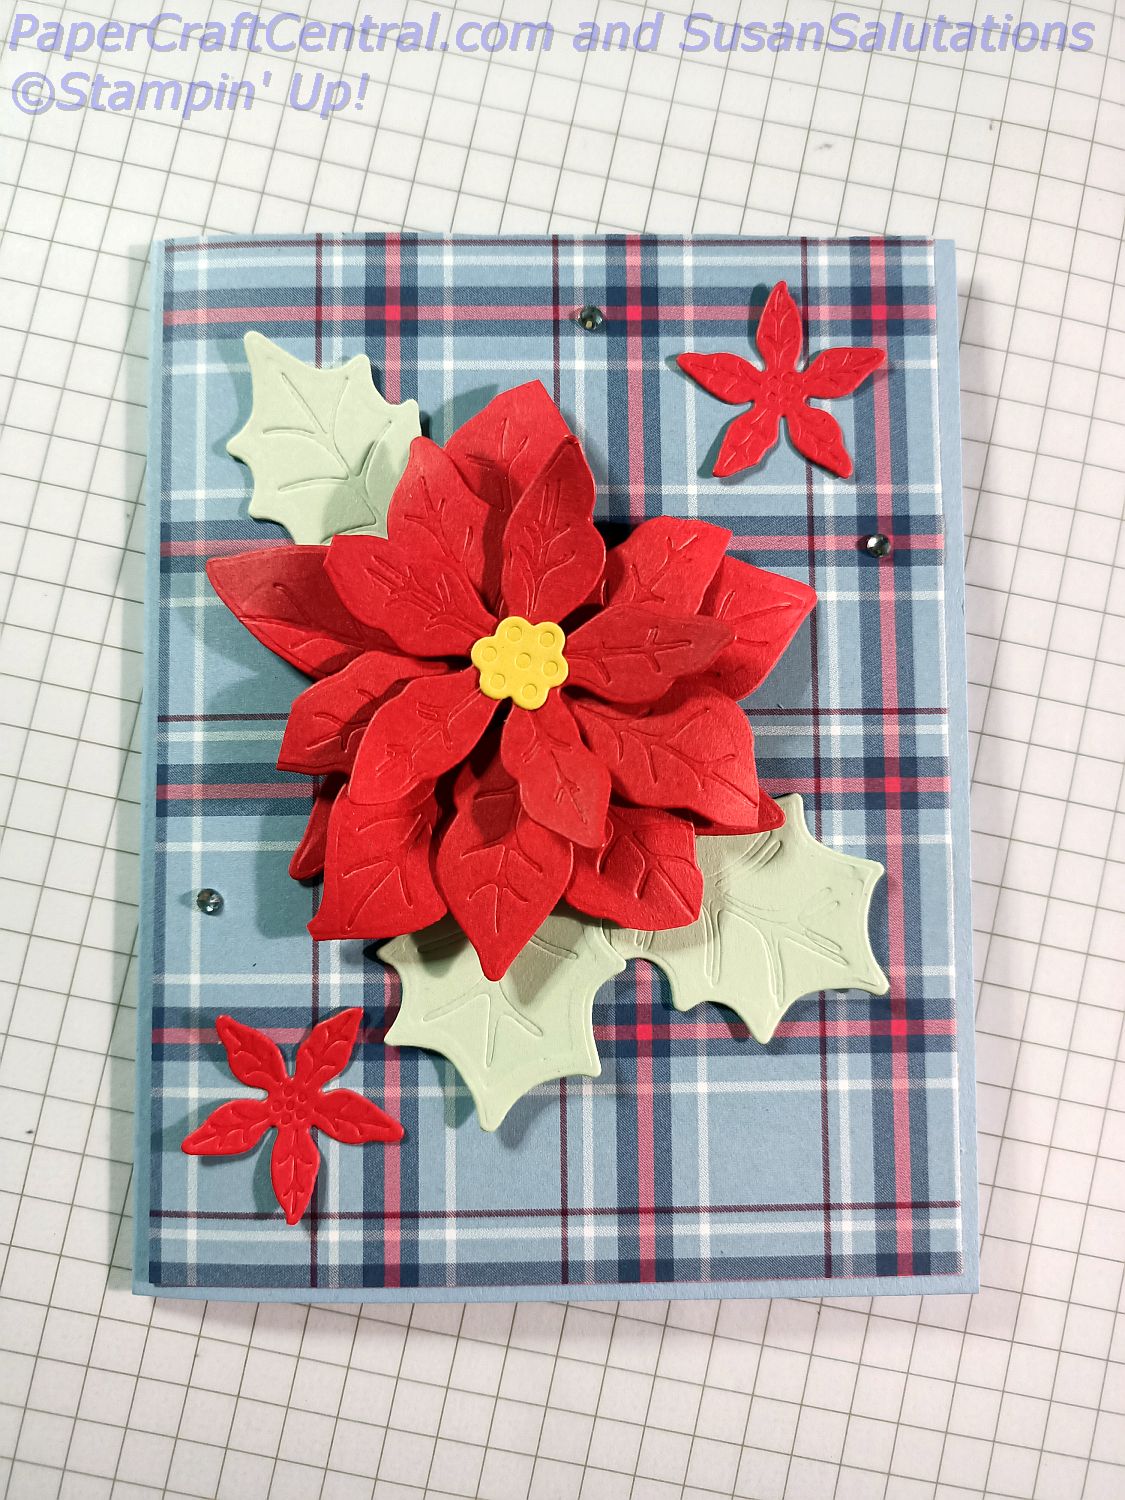
It was lovely to have the Plaid Tidings Designer Series Paper on hand to play with some more. I received my Poinsettia Petals Bundle and thought I needed to make a Poinsettia right away out of Poppy Parade cardstock. It was set off so well against the designer series paper.
I discovered that I could cut shapes and emboss them with this set. It was very easy to line the embossing plates up with the die cut shapes. I found I had to separate the two dies, not run them through my Big Shot together.
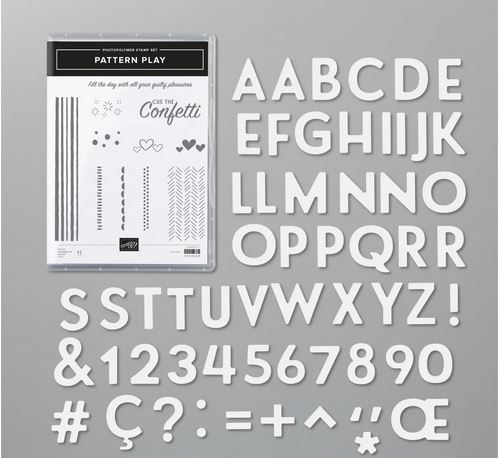
There are several different sized leaves and petals in the die set that comes with this bundle. I figured out right away that I could cut and stack several layers to make my flower. I love how there are embossing dies in the set too. You can choose to have smooth petals or veined ones.
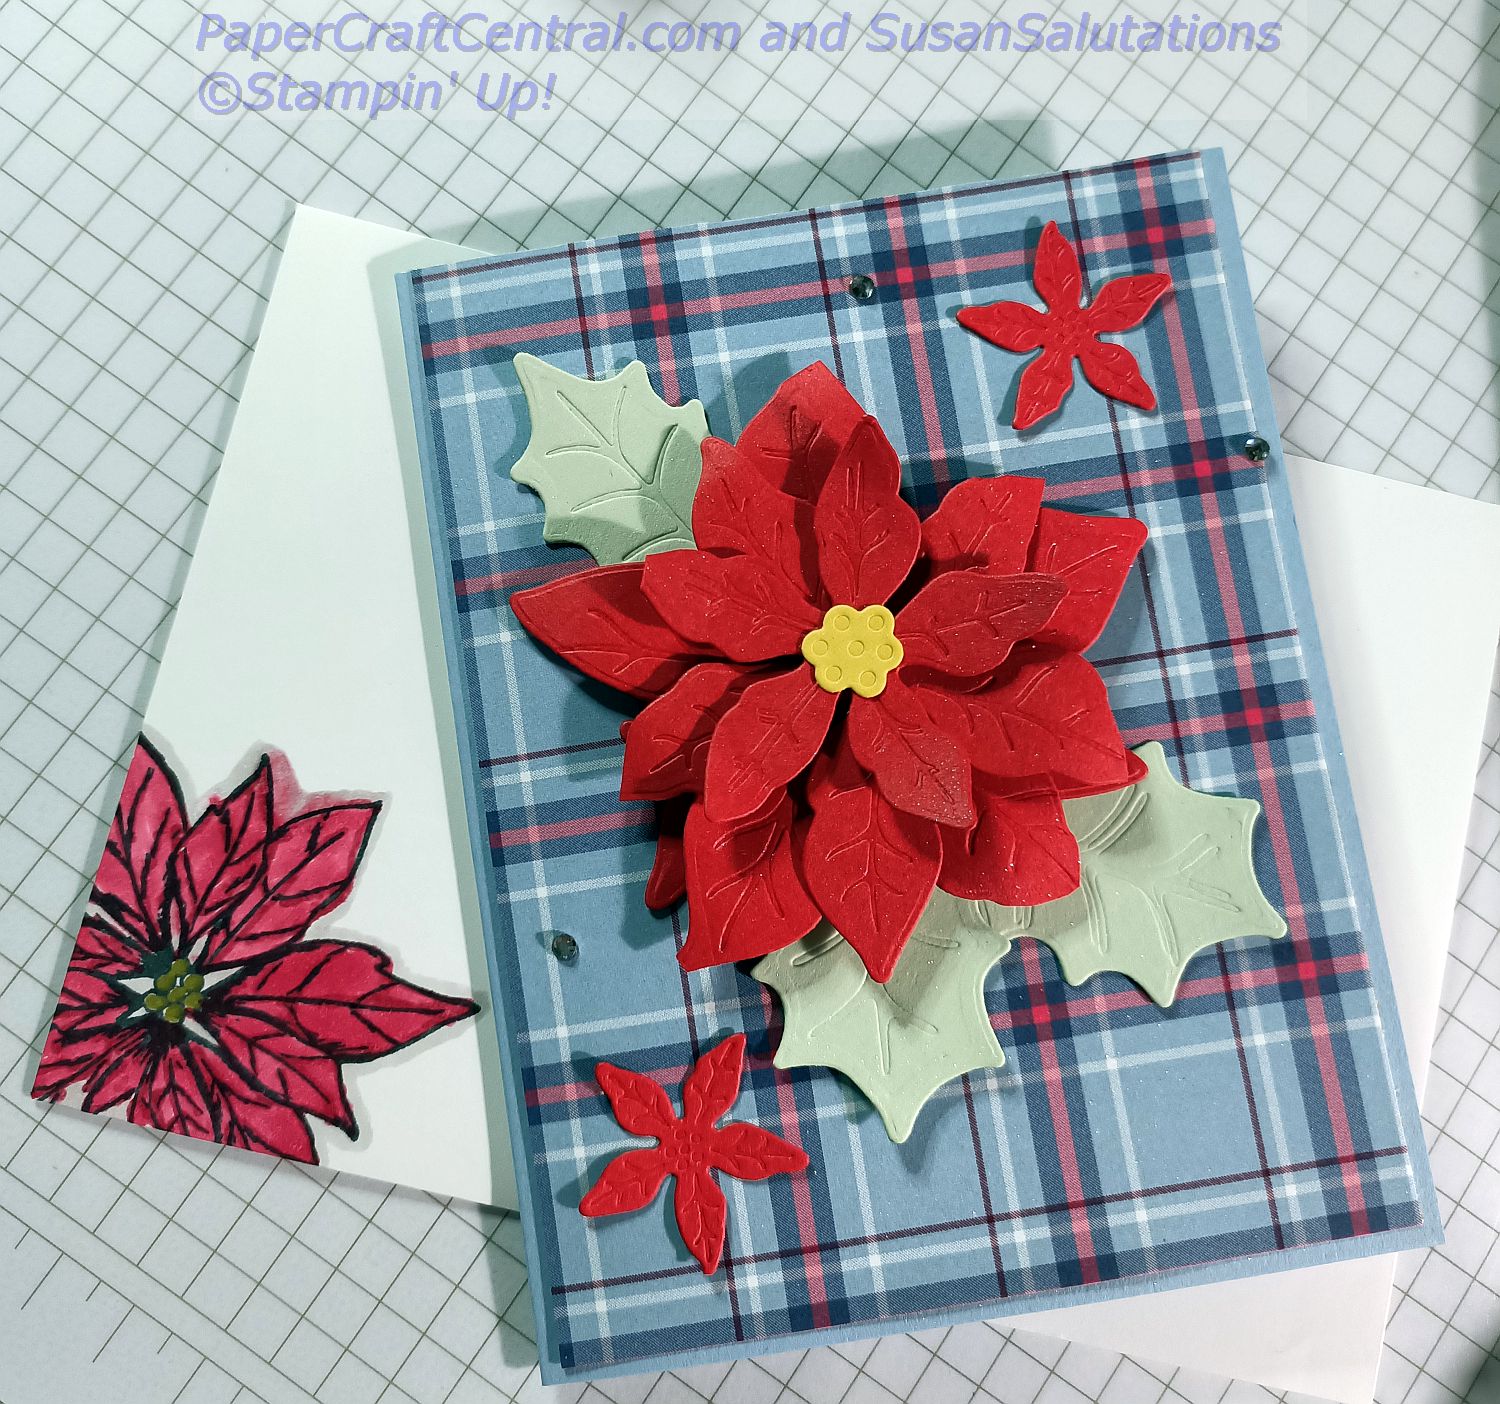
For the envelope this time, I slipped some scrap cardstock down inside the bottom left corner of the envelope while I stamped and coloured the image with various Blends. That way, when you saturate the paper (as you should with blends) the colour won't bleed through to the other side of the envelope.
I had some dsp strips left over as well as some leaf die cuts so this little card came together very quickly with what I already had on my desk. That's Cinnamon Cider ink that I used for the sentiment. The dsp helped me line it up beautifully.
Card Ideas in 2020 - September
I was able to create quite a few card ideas in 2020 this month. I'd been blessed with having a number of new stamp sets and dies, and it was hard to choose which to play with. Isn't that a lovely problem to have?
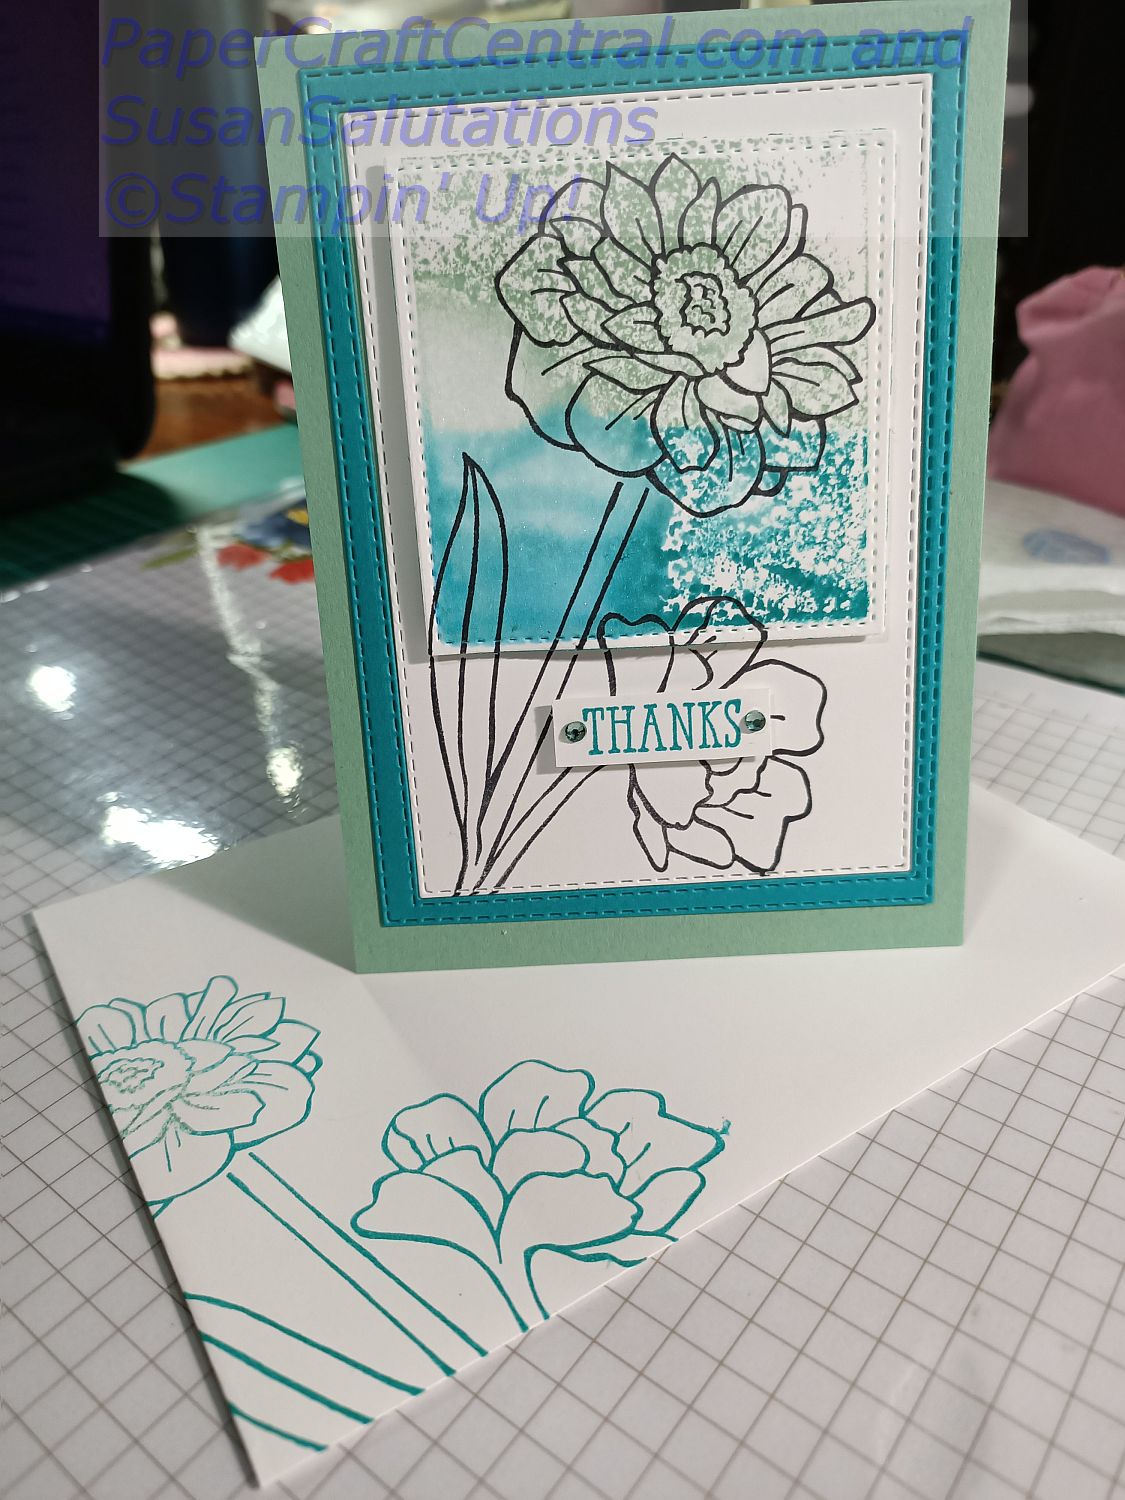
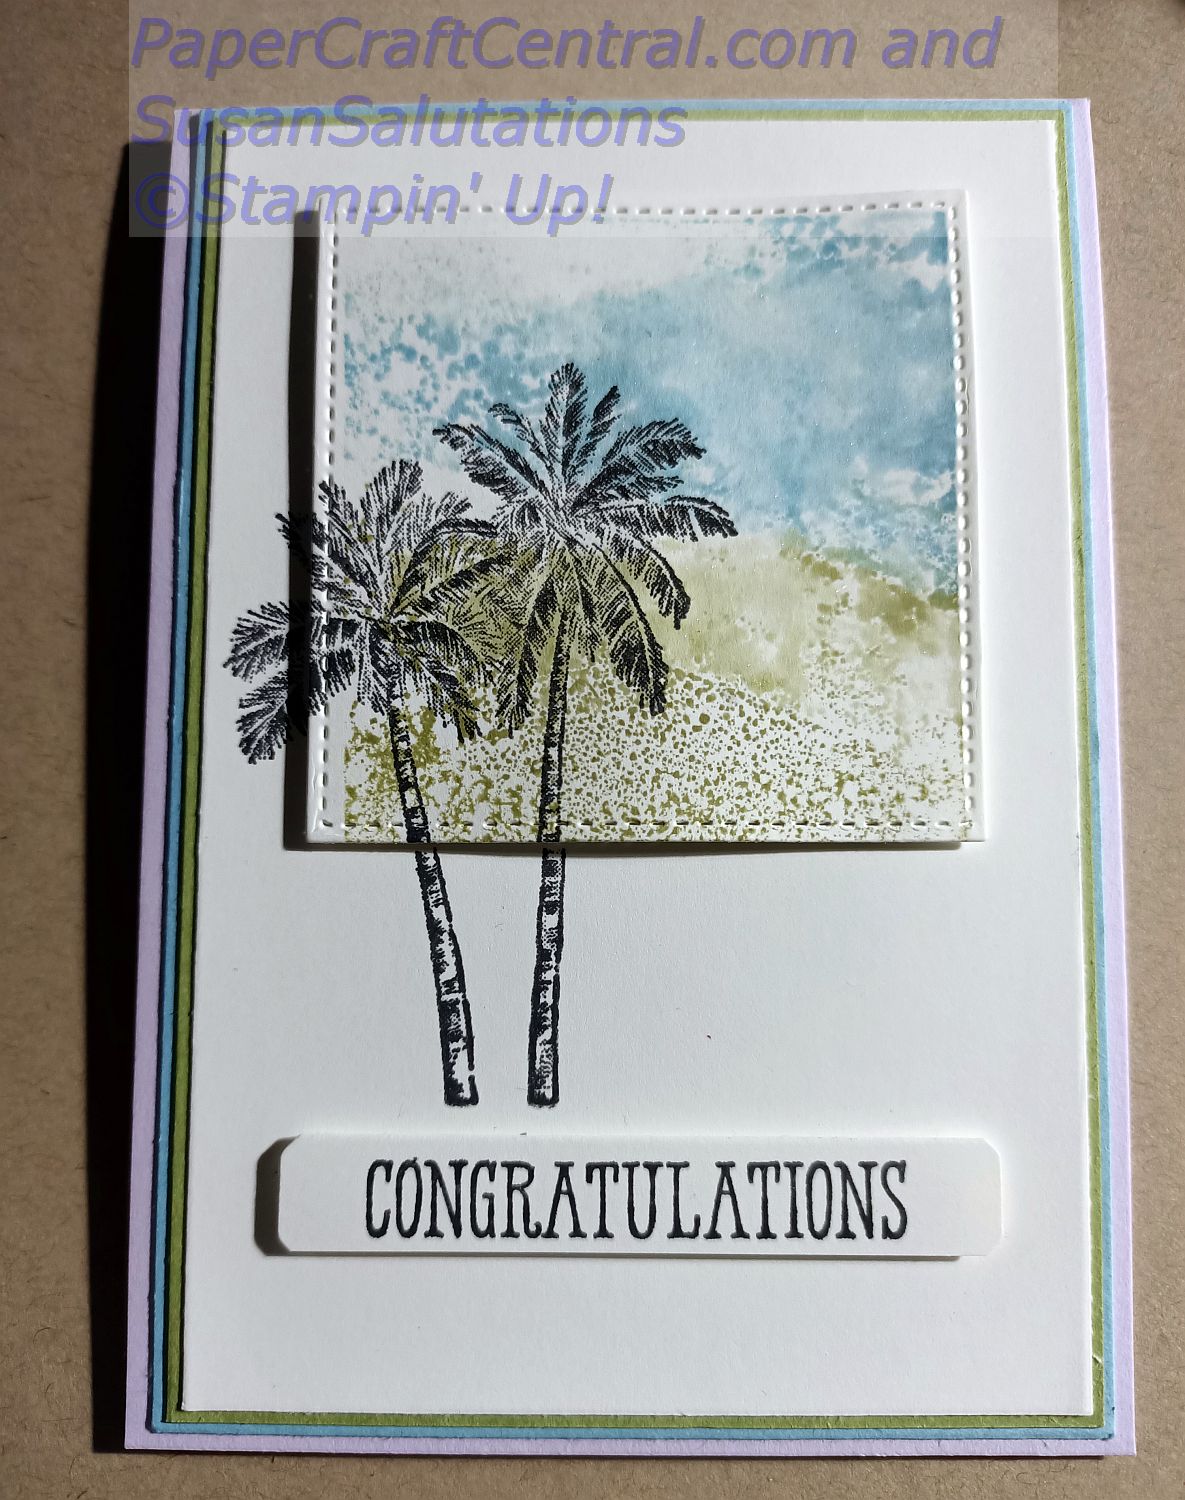
I decided to showcase a couple of techniques this month. First, I played with inking an acrylic block, spritzing it with water or alcohol and shimmer paint, then stamping with it.
Here I used the Band Together stamp set to create a thank you card:
I needed a congratulations card for a Craft Sisters team member who achieved much in her business this month, so used the same technique and the Timeless Tropical stamp set to create her congratulations card:
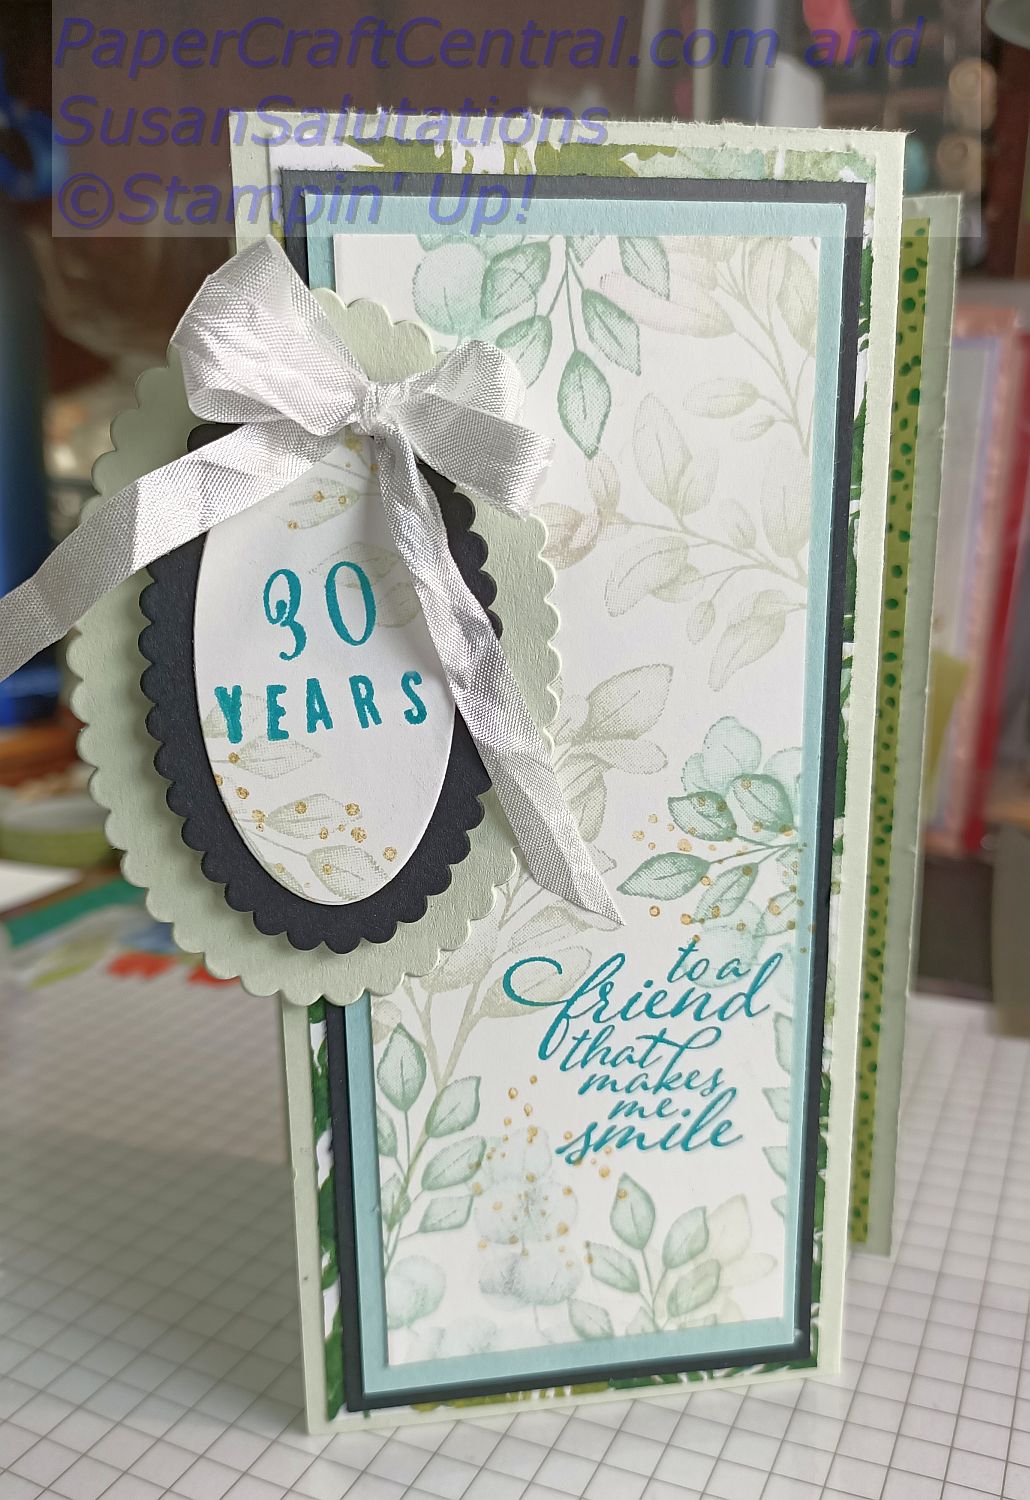
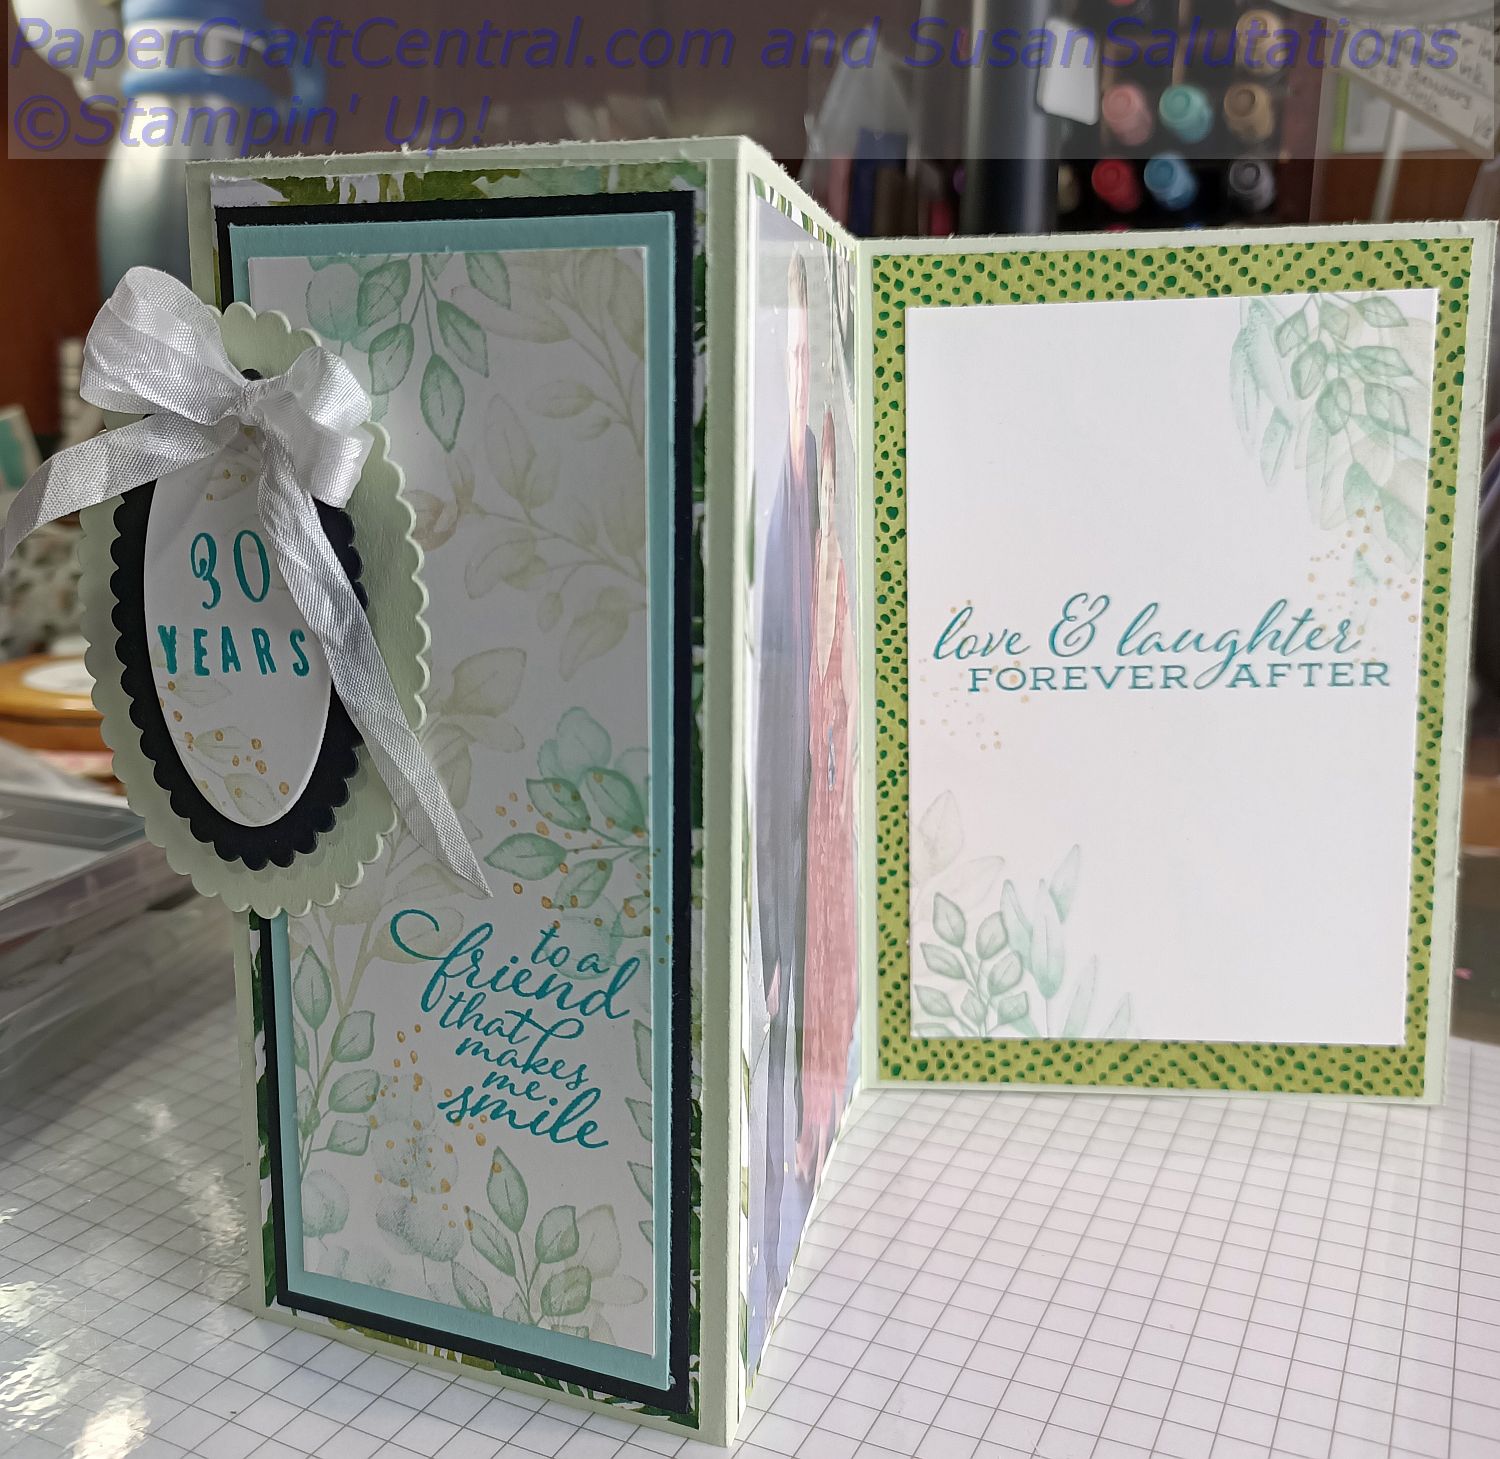
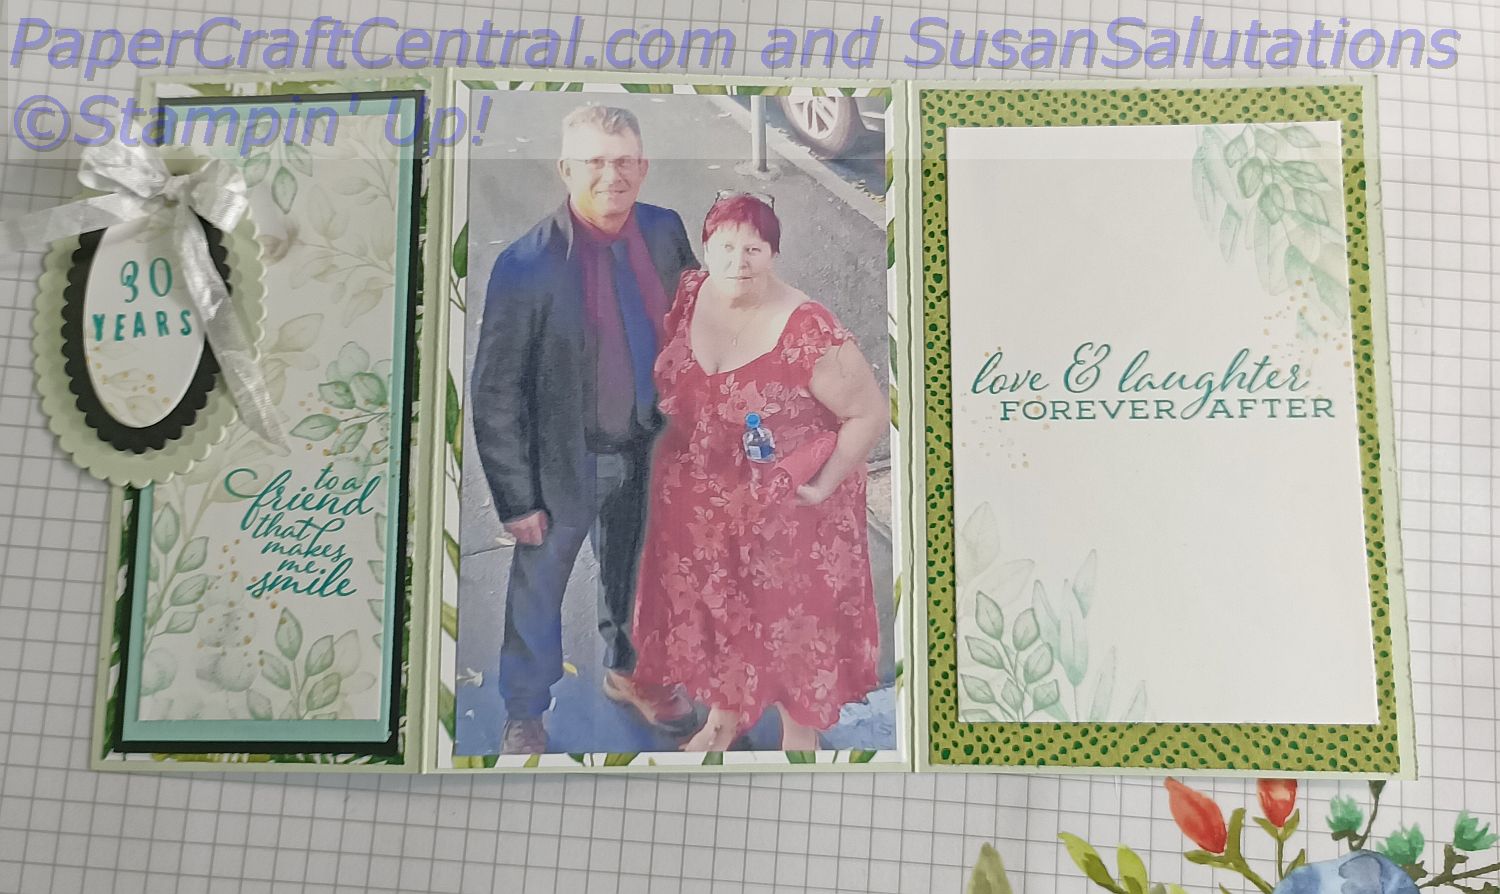
I played some more with photo card ideas in 2020 and wound up making an anniversary card for a 30th wedding anniversary. I chose Forever Fern stamp set and some oval scalloped shapes to make this card.
To cut the card base, use a lengthwise piece of A4 cardstock cut at 10cm wide. Then score it at 10cm and 10cm and you will have a half flap to fold back for the front of the card. I decorated with designer series paper.
Sentiment stamp sets were the Make a Difference stamps and Forever Fern.
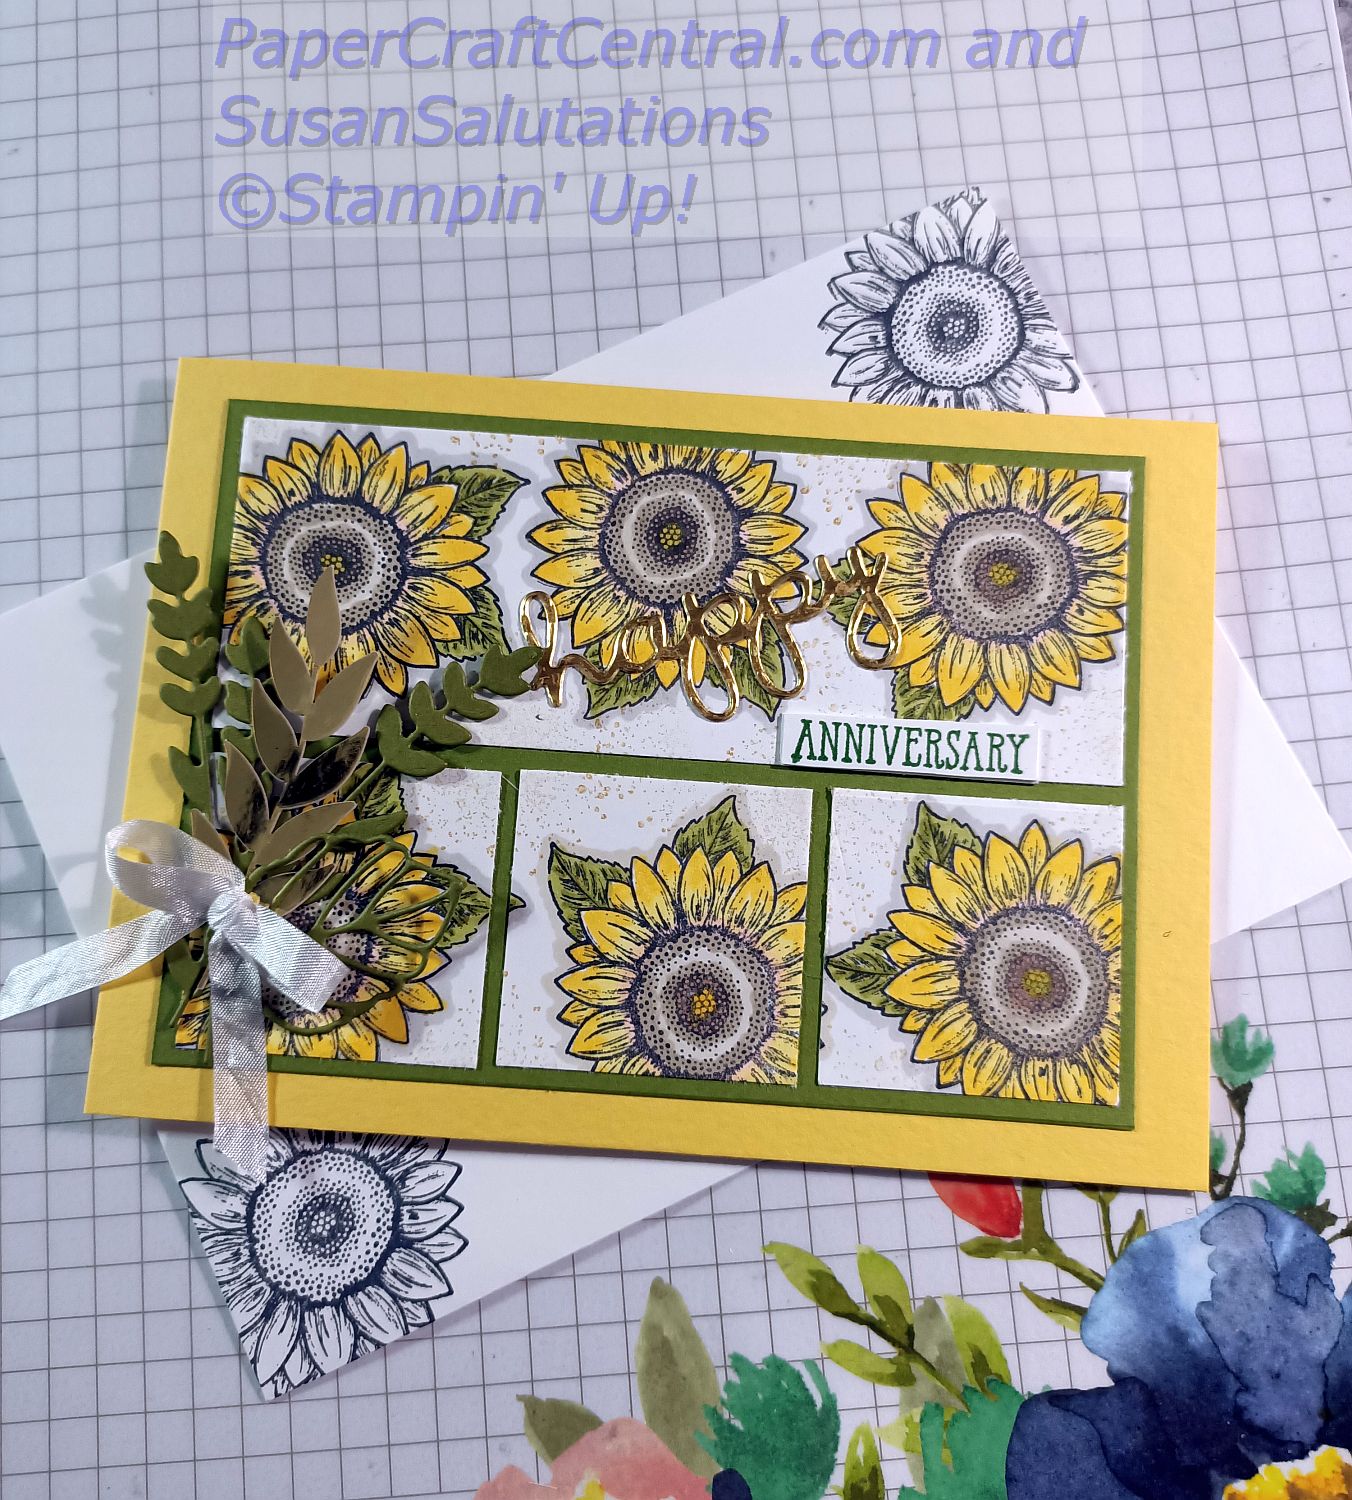
Then I needed a special anniversary card for some beautiful friends who had been married 61 years this year. She loves sunflowers, so what better than the Celebrate Sunflowers bundle?
I created this card idea by stamping out six flowers then cutting them into four pieces and mounting them on a background piece of cardstock. I added sentiments from Well Written and Well Said.
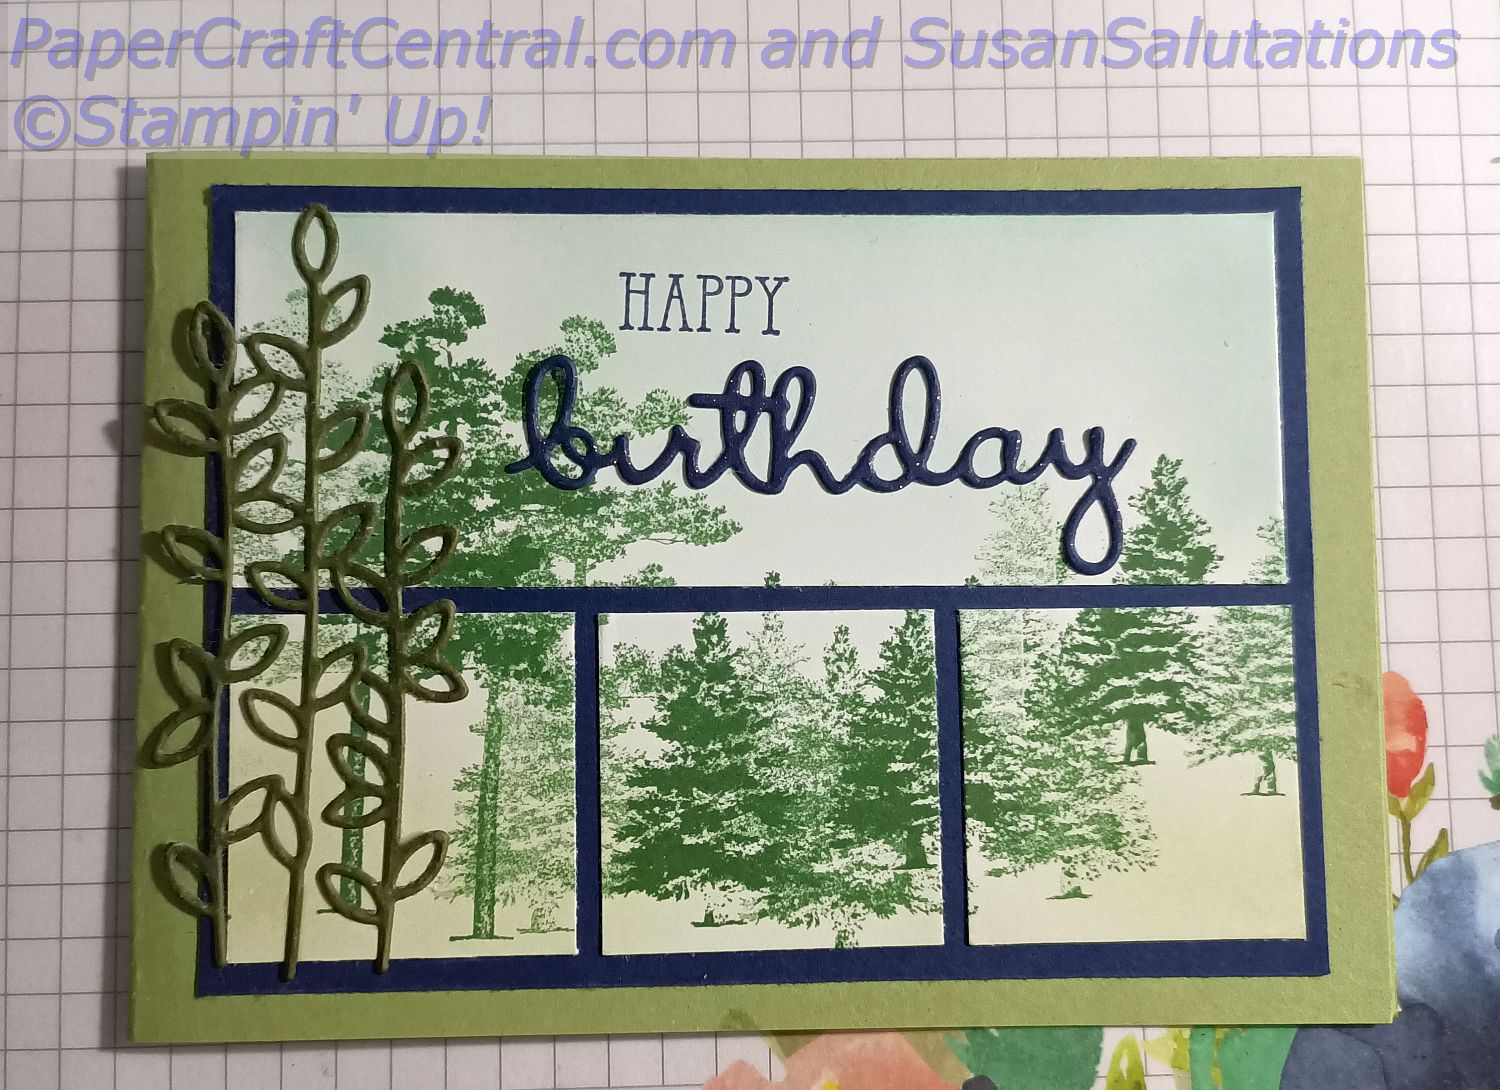
It was hubby's birthday since I had last posted and I used the same layout as above with the Waterfront images and the Forever Flourishing dies to help him celebrate.
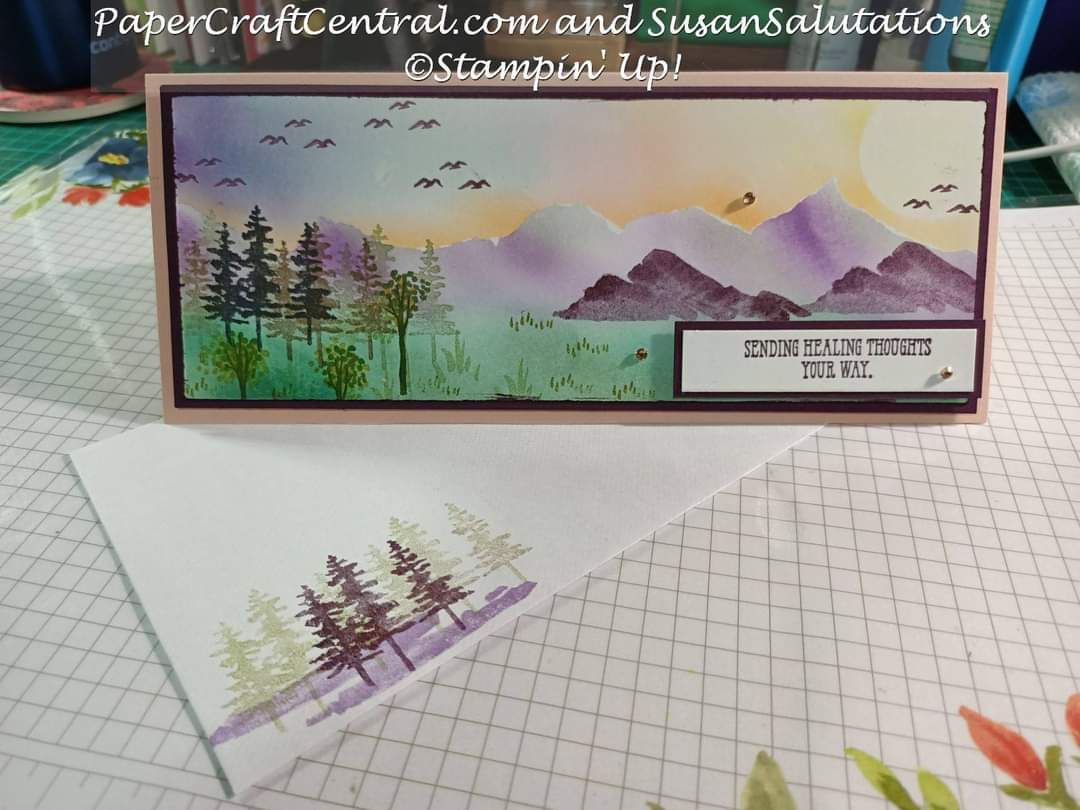
I really loved playing with Waterfront and I wanted to try out a slim line card, so this is the scene I was able to create with those ideas. I tore a piece of copy paper in half and used it as a mask for the sky and mountains before adding in stamps to compliment my scene. I just used makeup brushes to add the ink colours, but of course Stampin' Up! brought out their own brushes in the January to June 2021 seasonal catalogue which were much nicer to use.
All it took to complete it was a sentiment and some champagne rhinestones. It fitted inside a business style envelope.
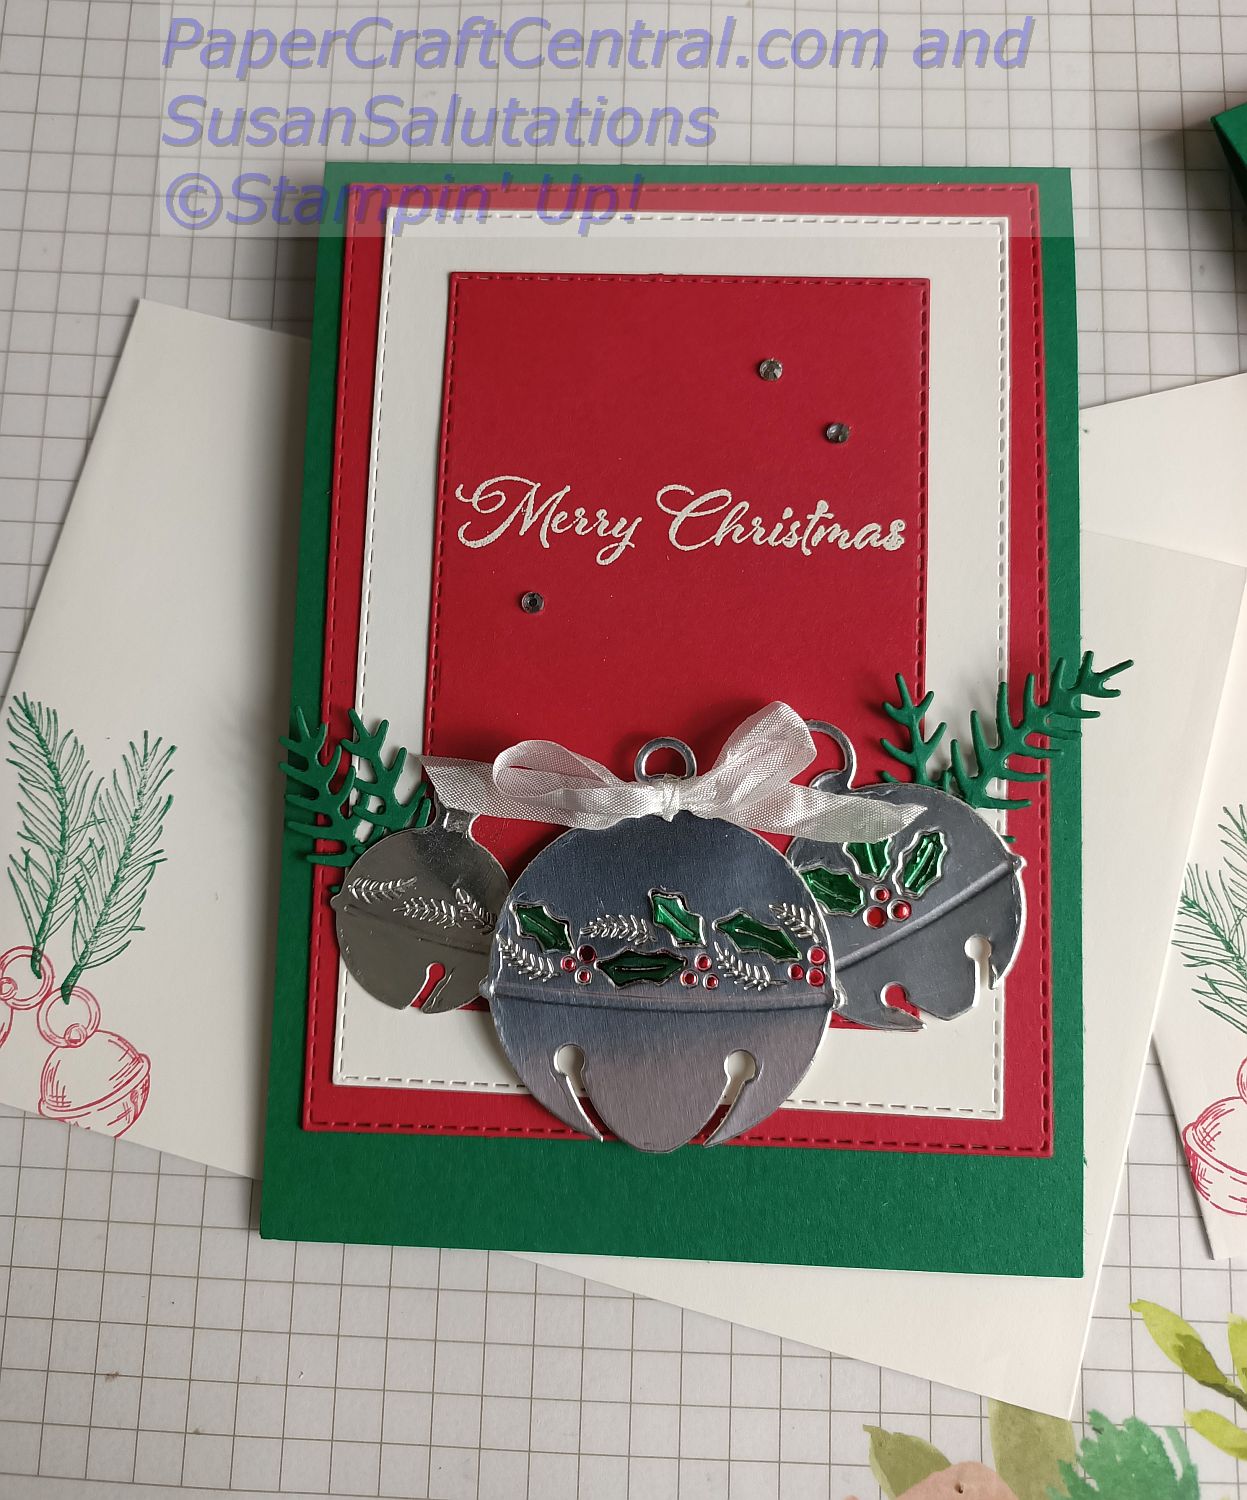
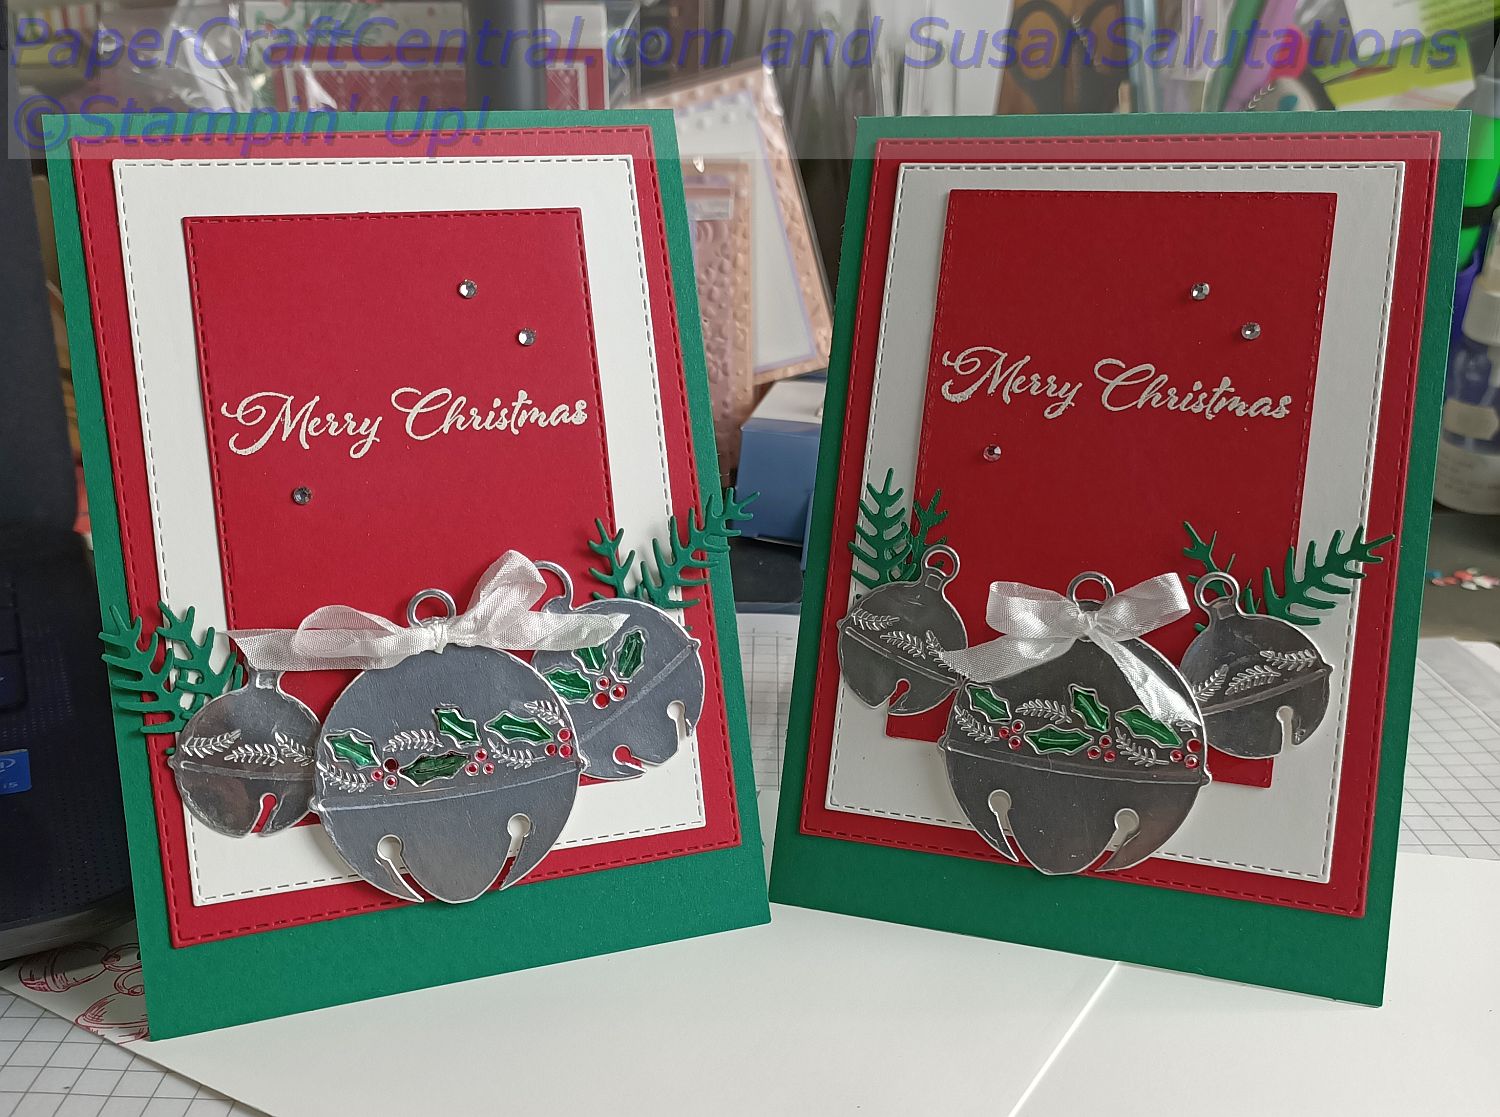
I felt Christmassy when I got my order with Cherish the Season stamps in it and could not resist trying out card ideas in 2020 with these beautiful jingle bells.
I cut out the embossed bells and used my Stampin' Blends to colour the little leaves and holly berries.
Here's a tip: place sticky tape along the back of your foil BEFORE cutting out the shape so the little leaves and holly berries do not fall out. Then you can colour them easily without chasing them around your desk and the floor (guess how I know!!)
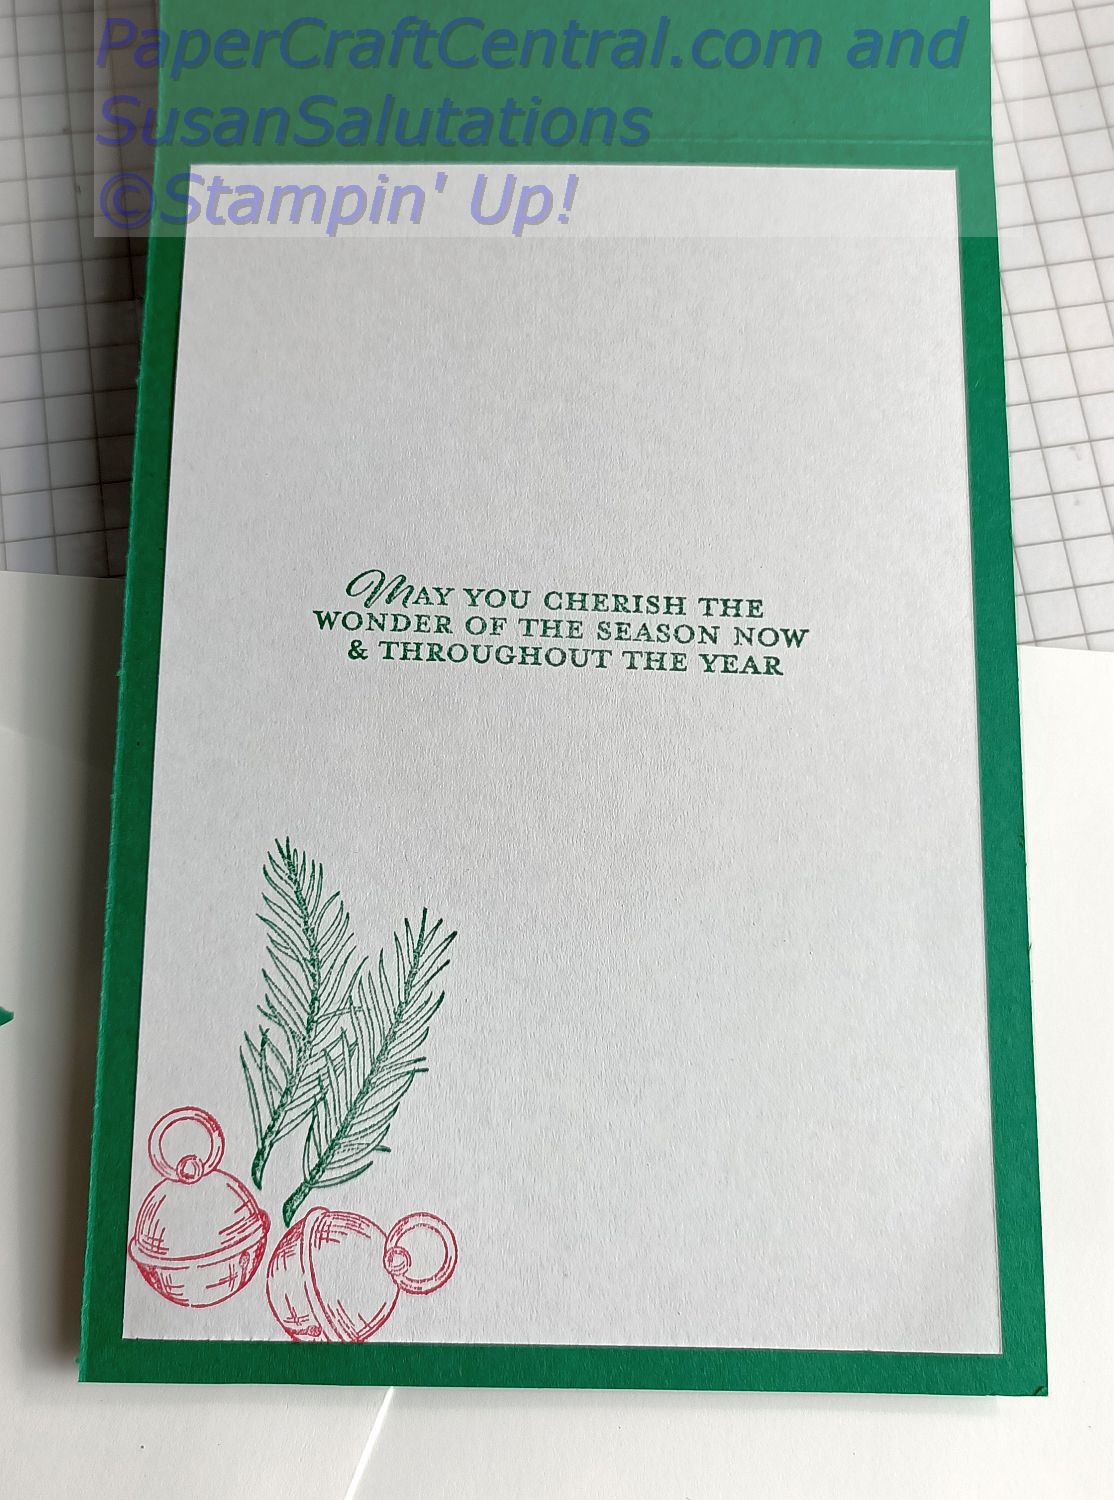
I added a sentiment from Cherish the Season to the inside of my card as well.
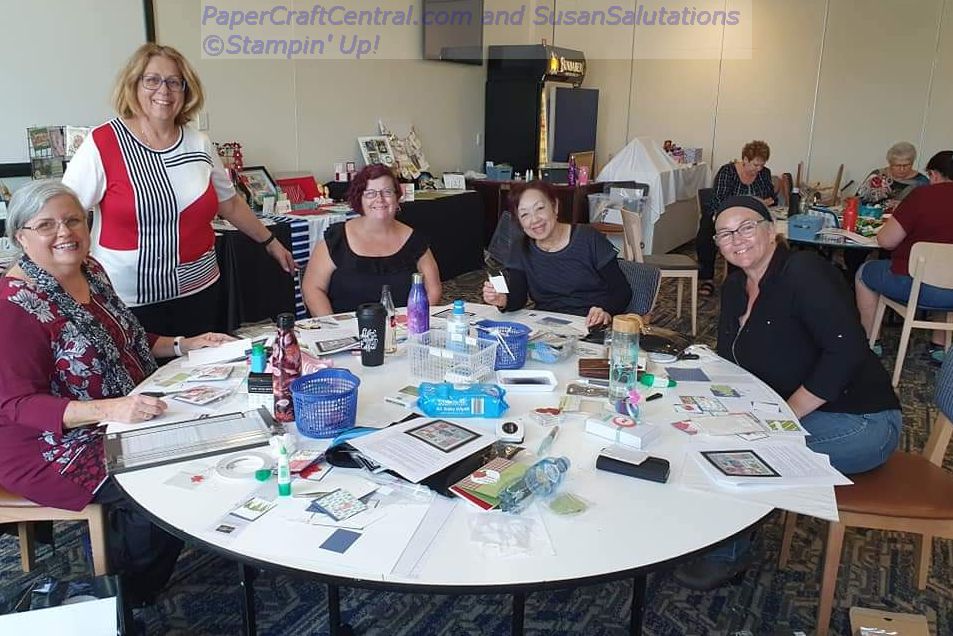
Thankfully, some of our team were able to get together and craft for a day so we held a swap.
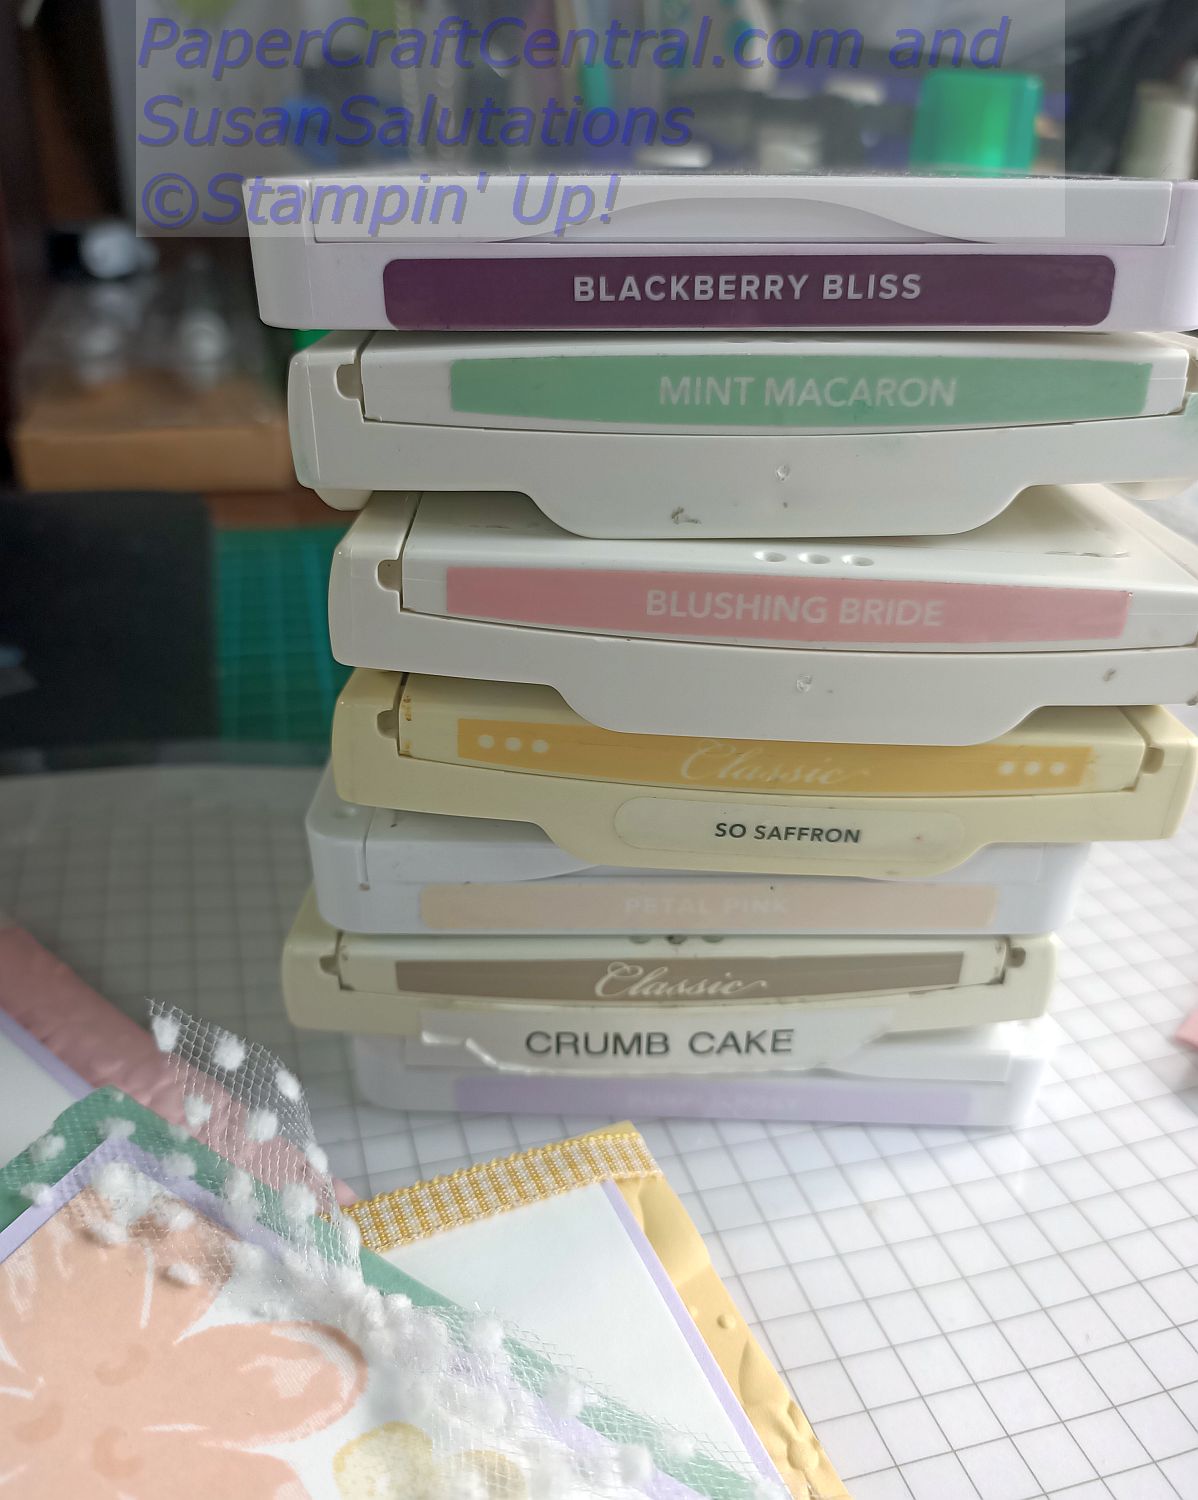
These are the swap cards I stamped for that day, using Gorgeous Posies stamps.
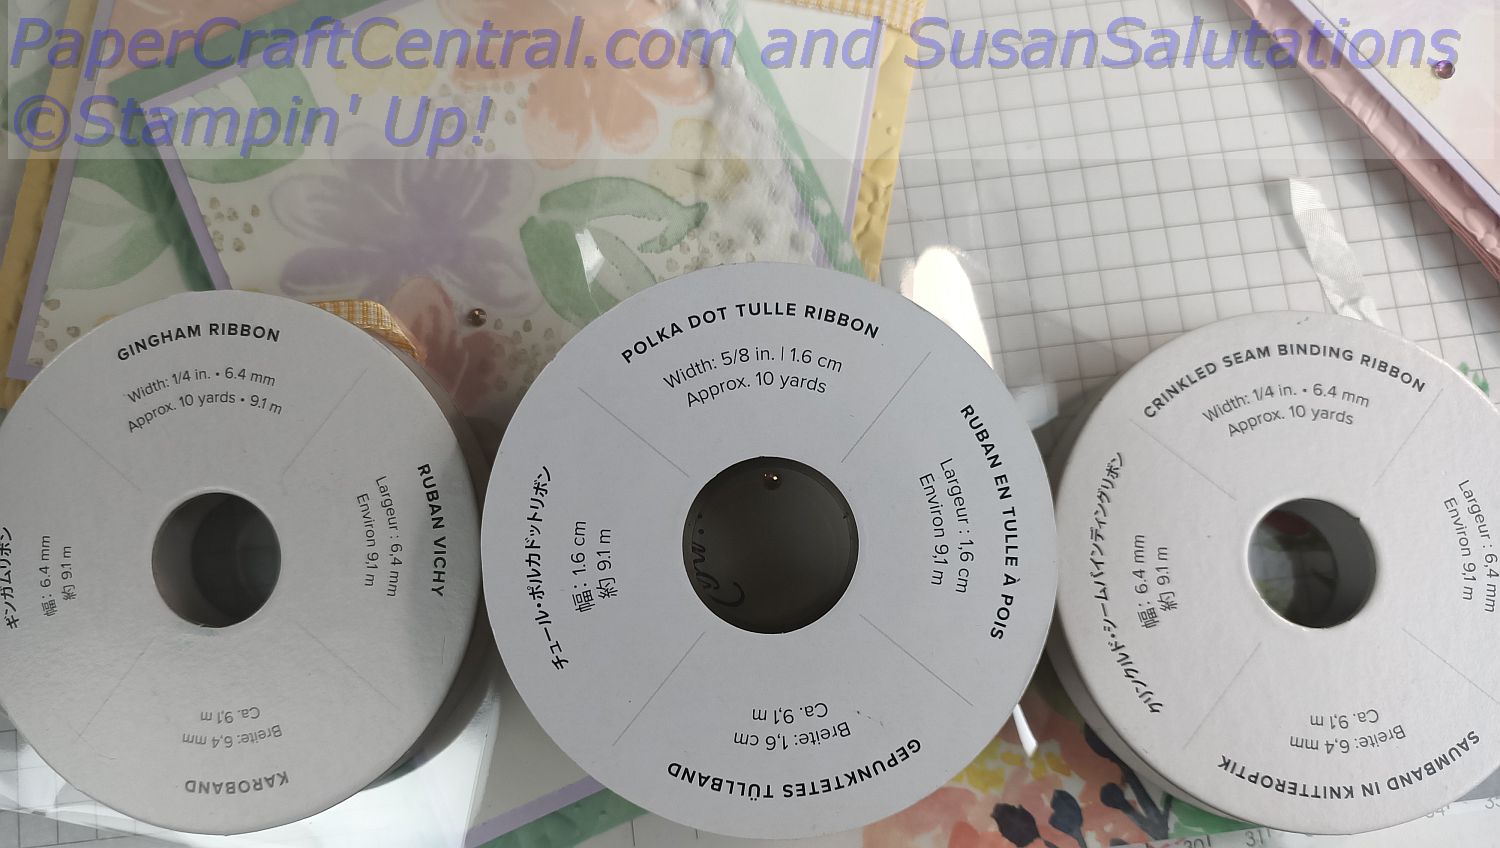
I matched in the ink colours and ribbons I added as embellishments too.
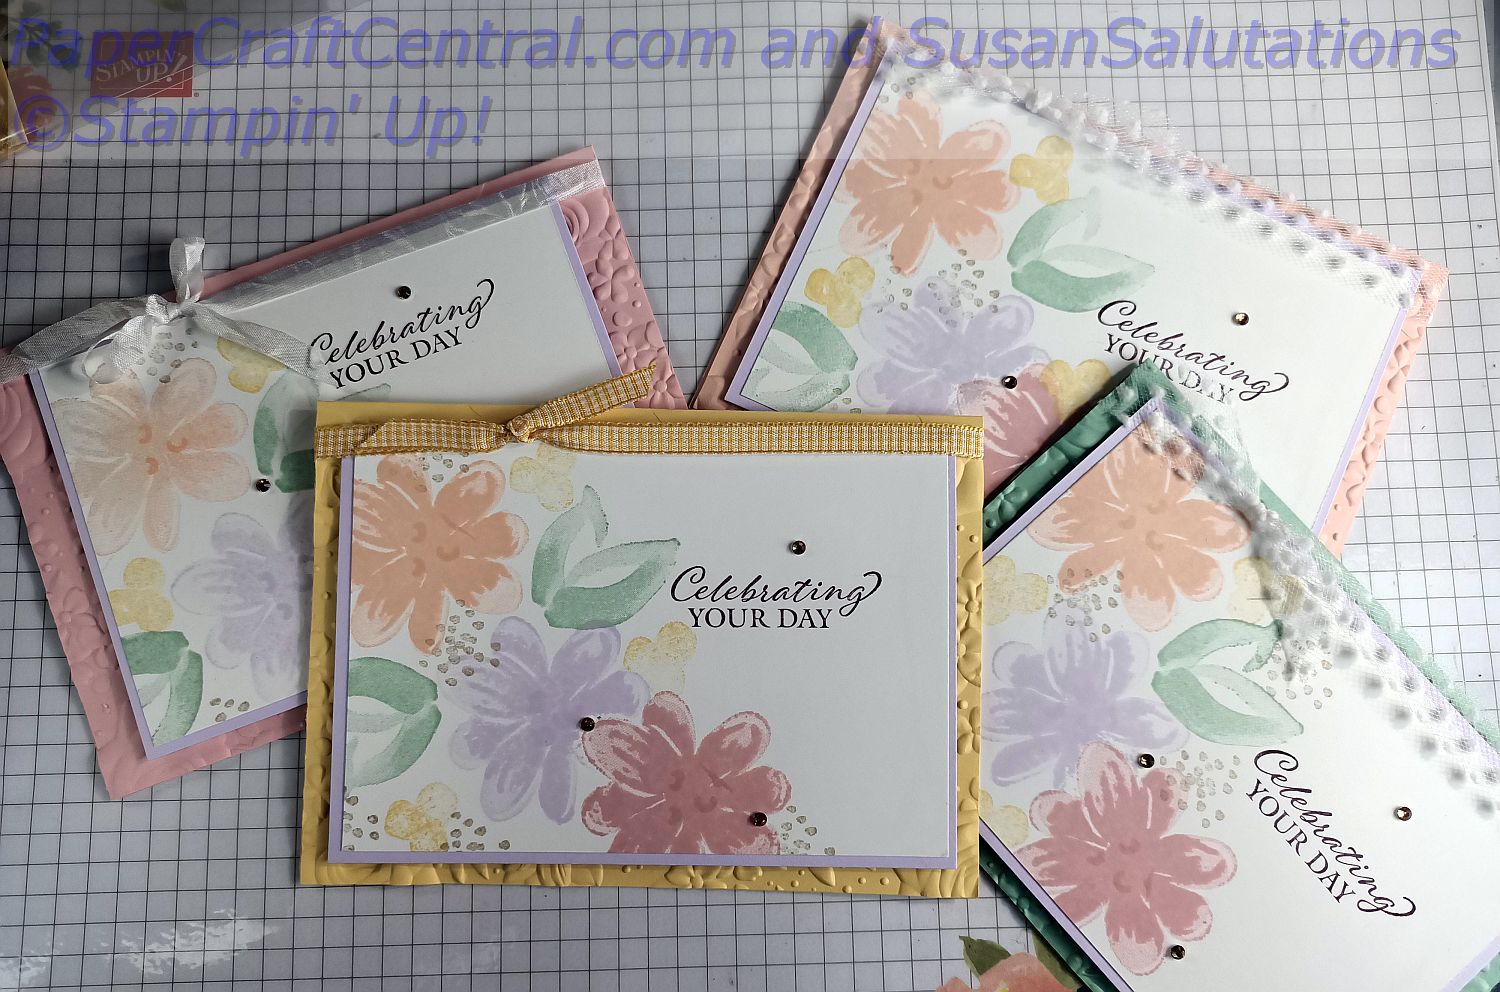
That was a fun day, much needed as a social time as well as a stamping time!
Remember, you can Join My Team (The Craft Sisters) anytime and join in the fun of days like this too.
If you see any supplies you would like to add to your own stash, remember to order from SusanSalutations (Susan Hurley-Luke).
Project Ideas, August 2020
This month, a couple of new card ideas projects were ready for you, including a video showing you how to use Washi Tape to make pretty card backgrounds.
That's what I posted up for you first, in fact.
This technique only required you to use ink, cardstock and Washi Tape to make the background. Then you needed to chose a nice, open style stamp to create the foreground image.
Try using what you have in your stash to make a few of these cards. That's what I did!
I wound up making at least four different Washi Tape cards using this technique. Here are some close ups of what I stamped:
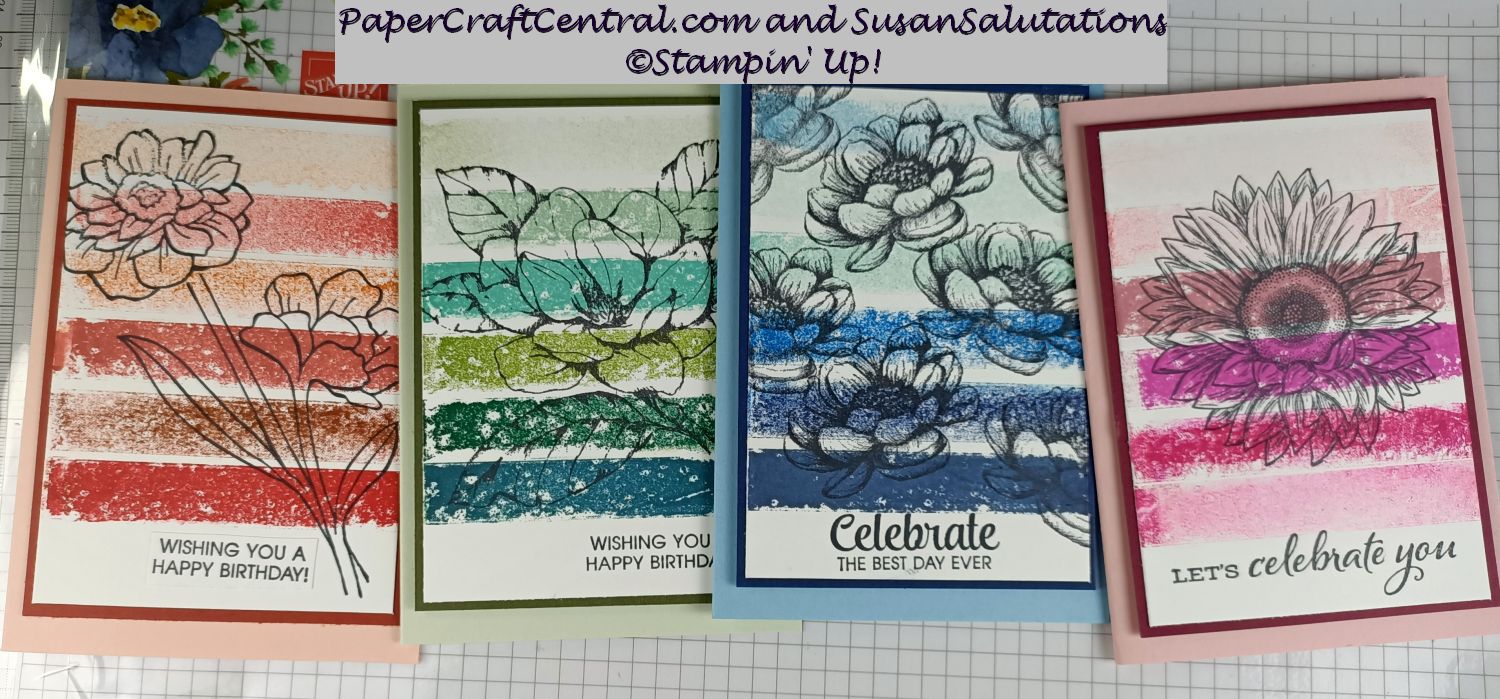
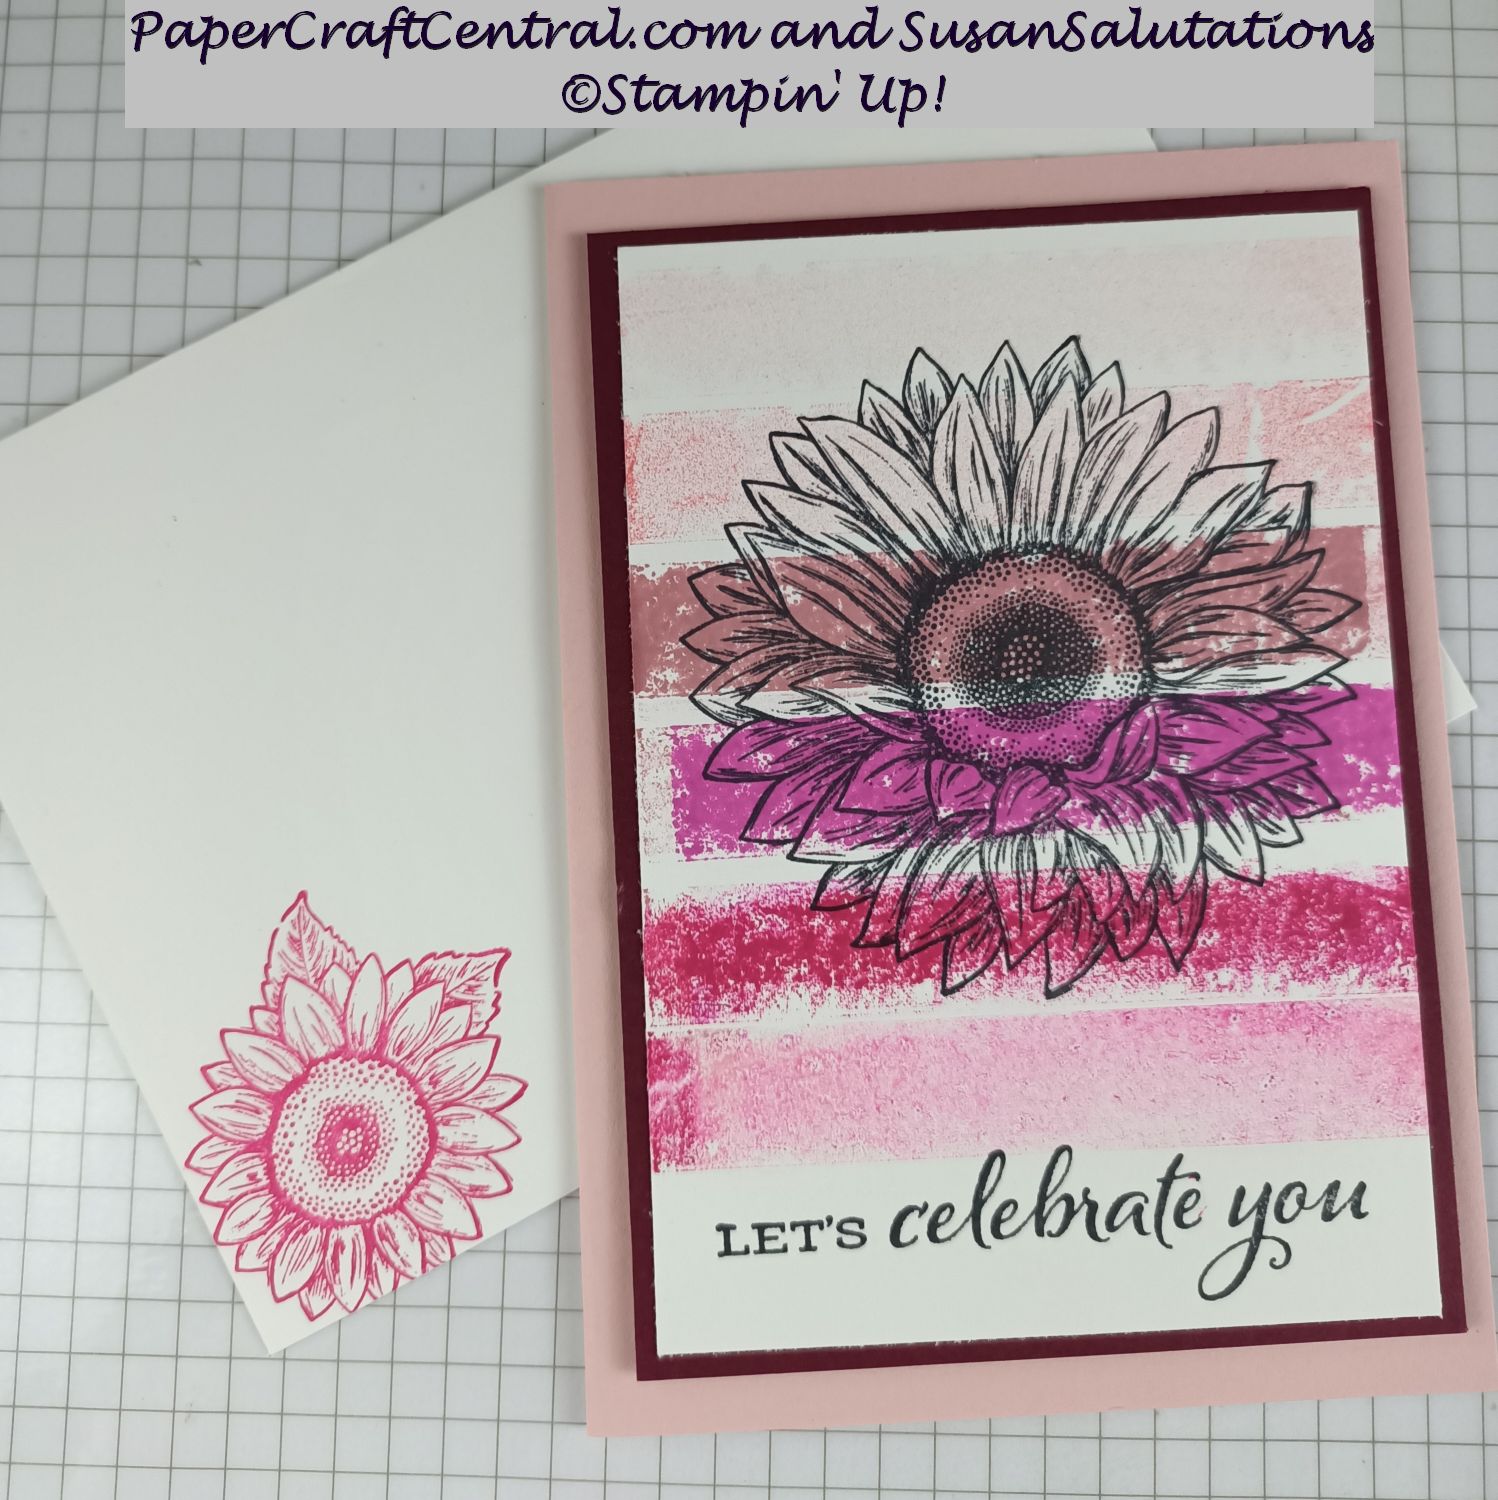
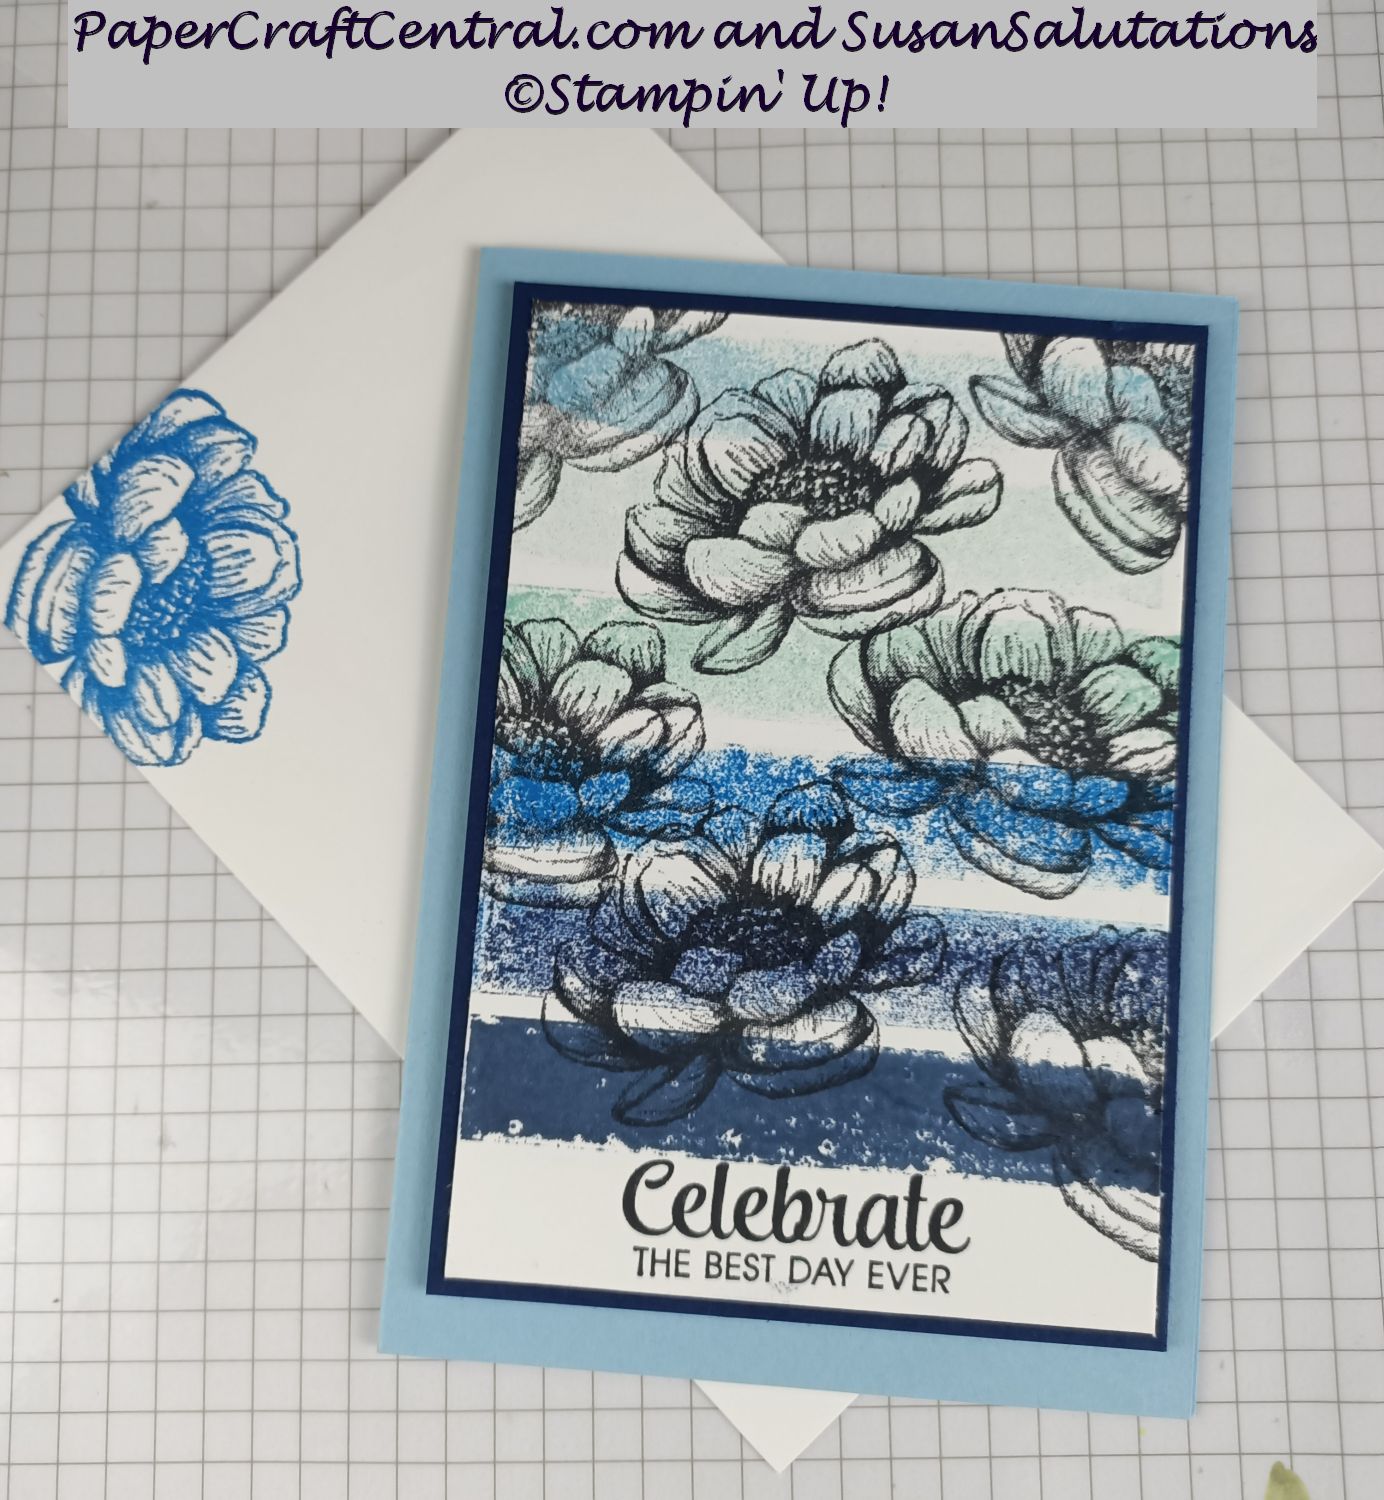
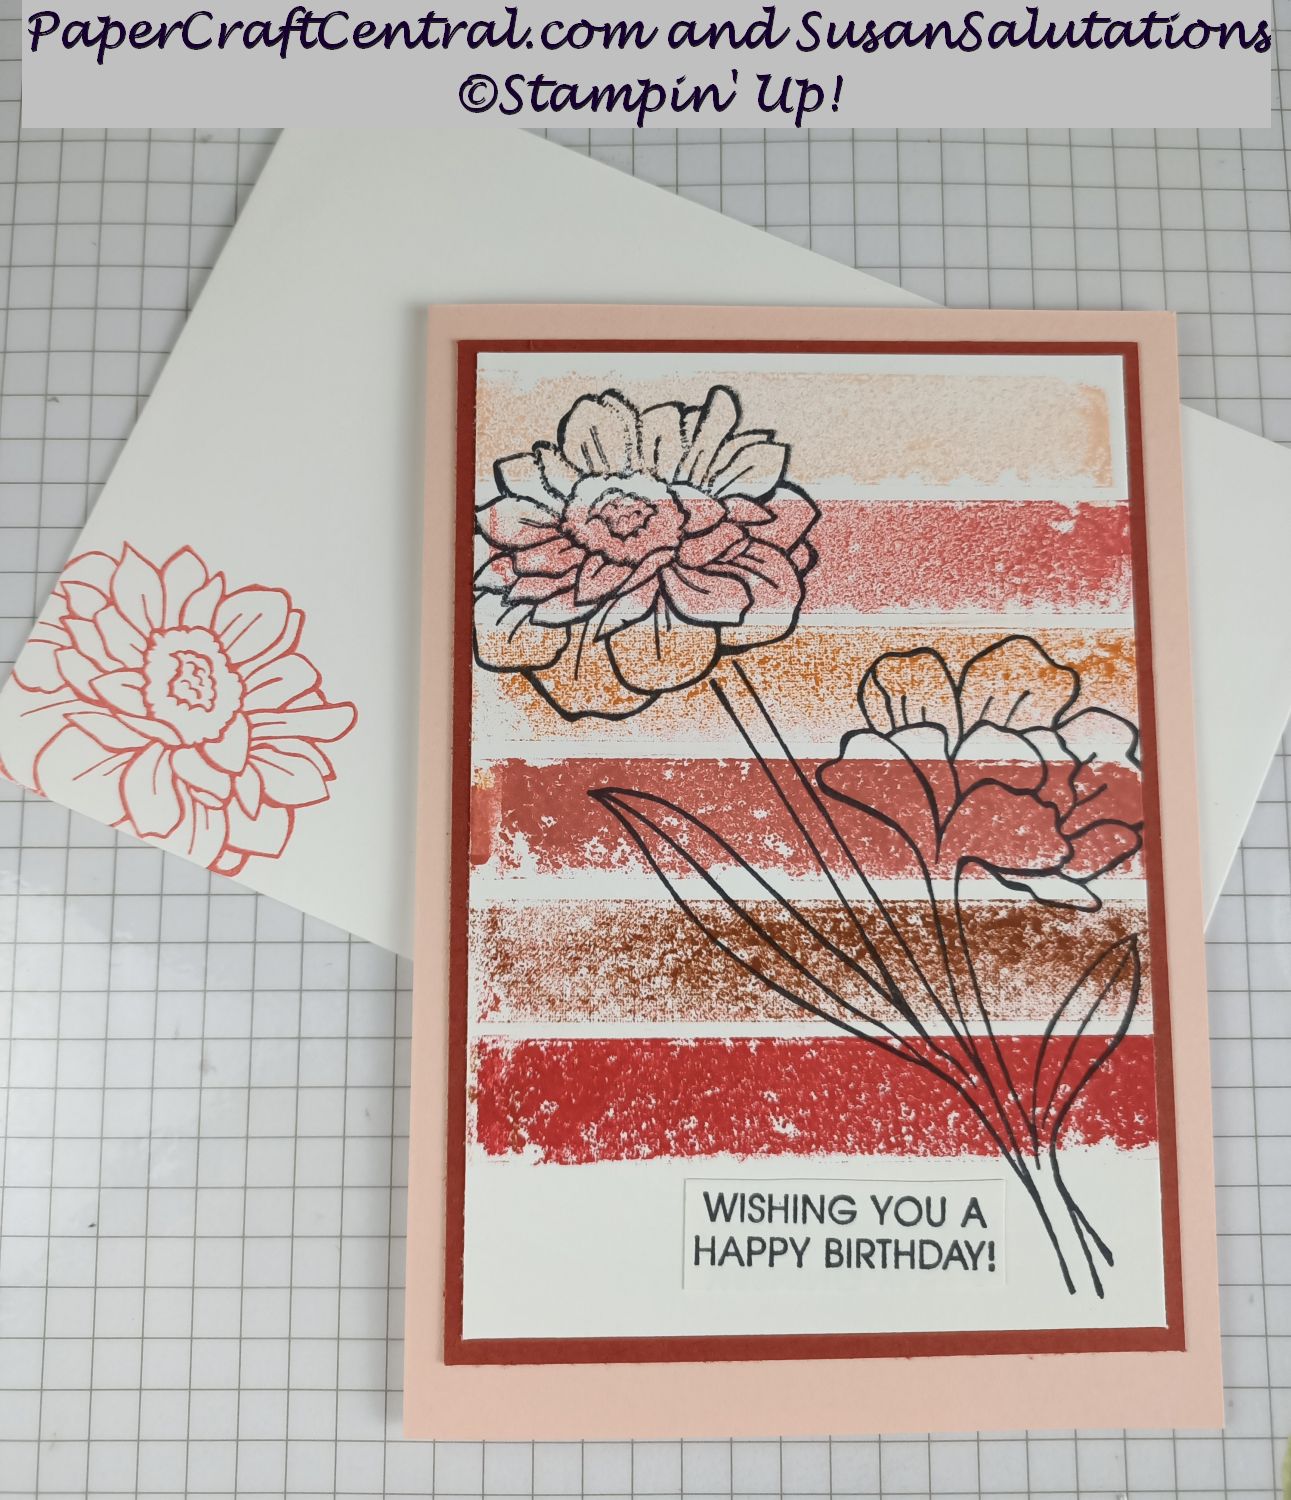
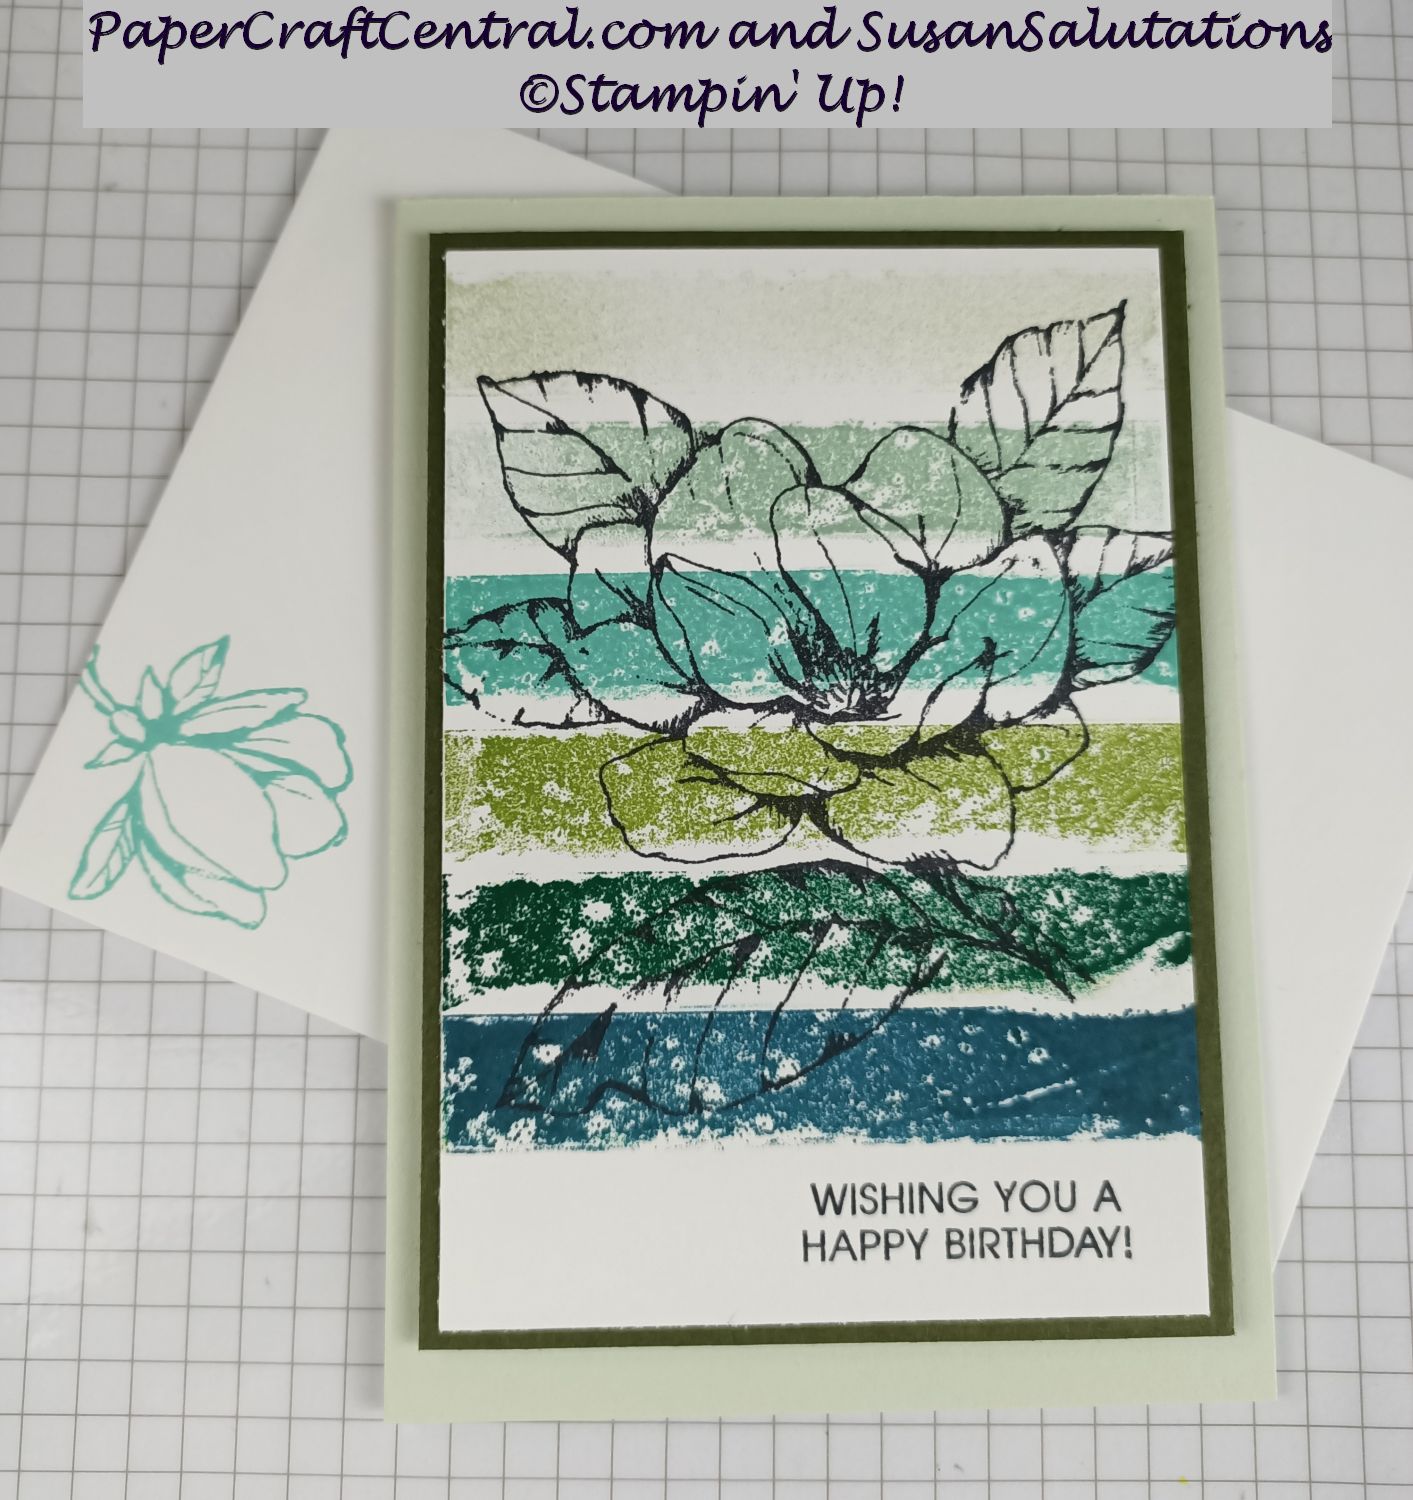
I hope you try these card ideas out and have fun making your own versions of the Washi Tape stamping cards!
Using a Card Sketch
Where do you get your inspiration? One way to be inspired is to try looking at card sketch ideas like this one from Page Maps:
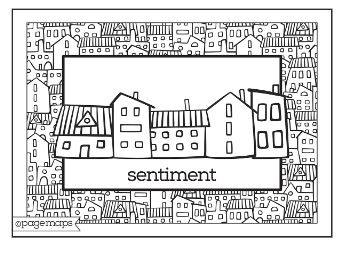
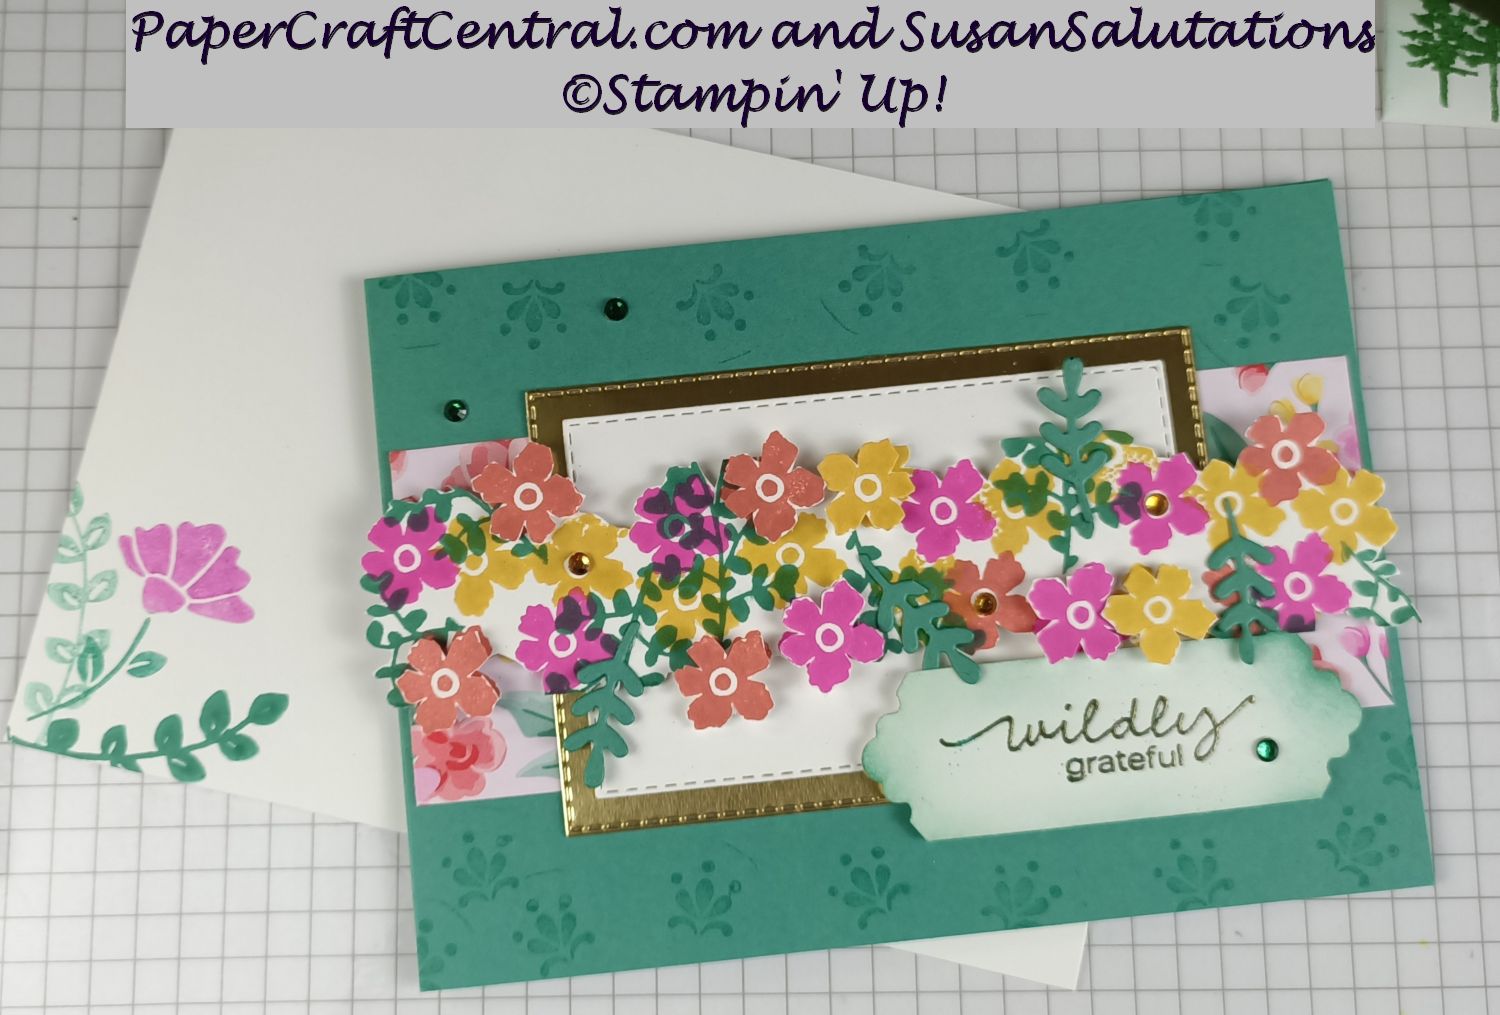
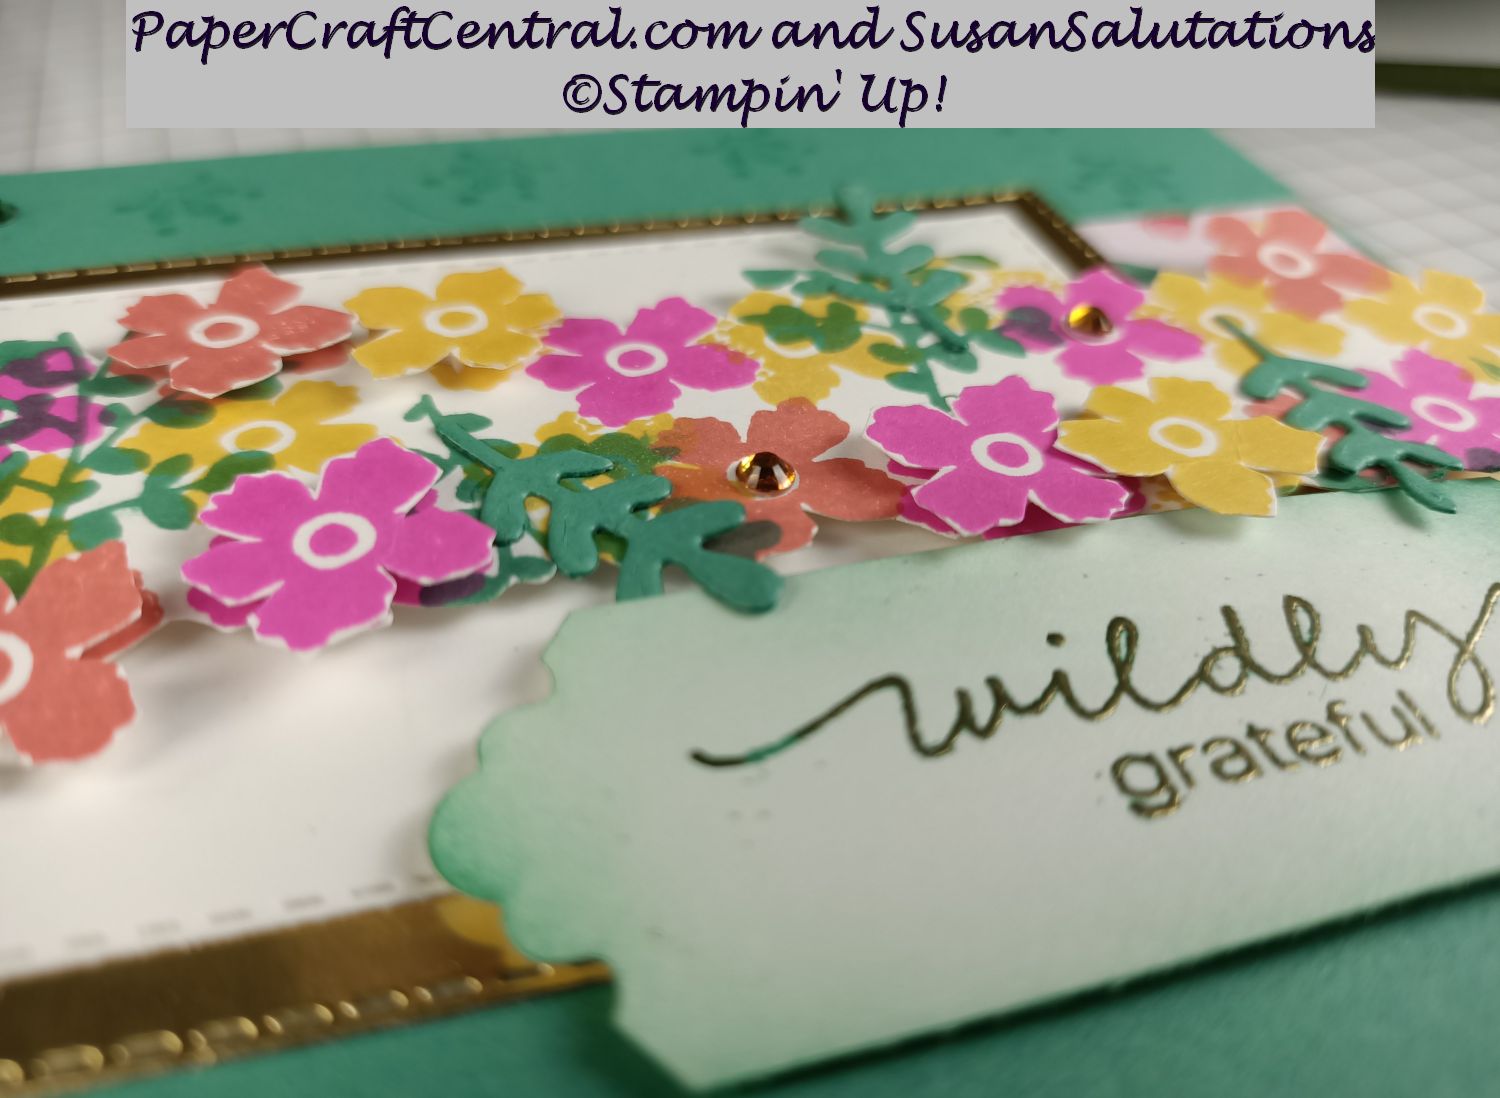
Now to me, a sketch is just an idea to help you create! So I took the basic layout of this sketch and picked a flower image from the Lovely You stamp set to create a strip of stamped flowers. Then I stamped some more of them on a separate piece of Whisper White cardstock and fussy cut them out to pop up on top of the strip of flowers.
I also cut some leaves out with the Forever Flourishing dies to make the centre piece three dimensional.
Then I cut out a Whisper White rectangle and a gold foil one slightly bigger using the Stitched Rectangle dies.
I layered a strip of Flowers for Every Season designer series paper on my Just Jade card base, then added the nested rectangles, then popped up the flower layer with Stampin' Dimensionals.
I stamped and cut out the Lovely You sentiment with the Lovely Labels Pick a Punch.
I stamped the flowers in Bumblebee, Magenta Madness and Terracotta Tile. The leaves were stamped and cut from Just Jade.
I also Versamarked an image on the card base.
But I didn't stop there!
I opened the card up and continued decorating the inside with more designer series paper and cardstock and of course, stamped images and a sentiment.
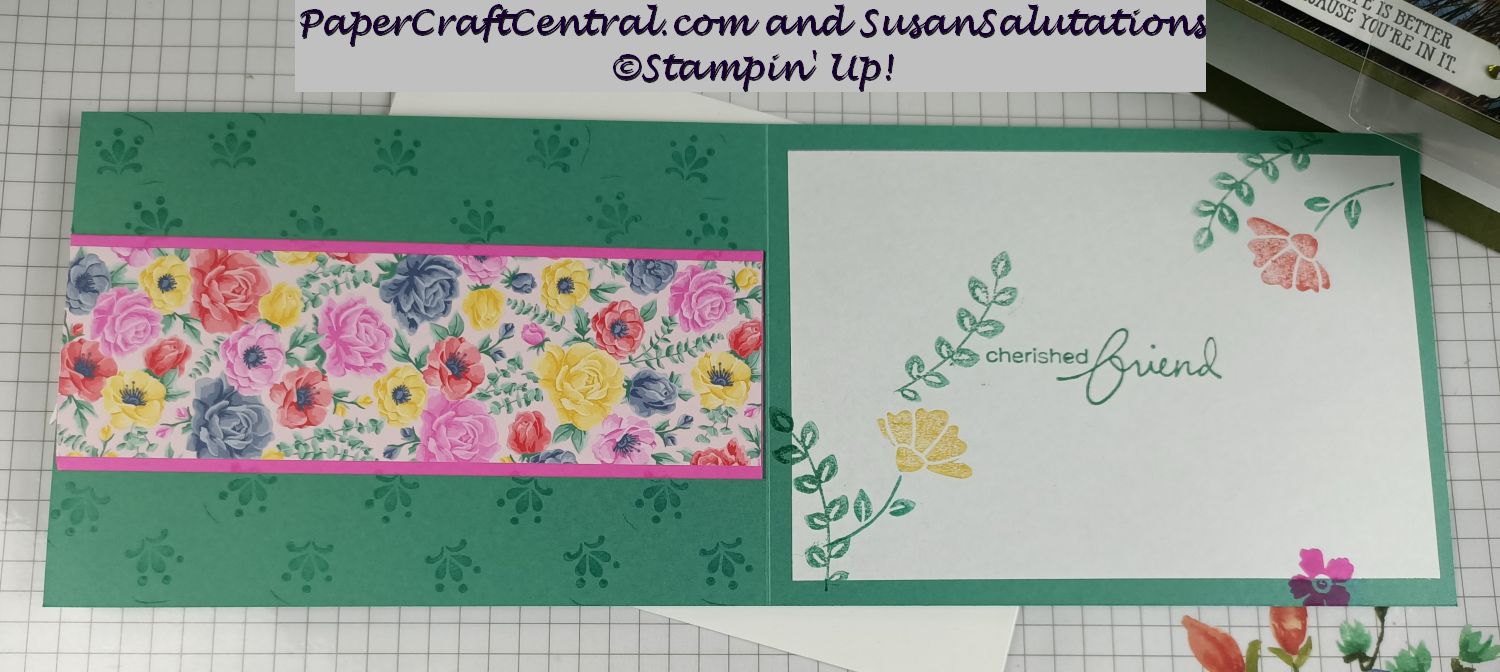
The extra dsp and cardstock inside did a lot to strengthen my card and give it a pleasing weight.
I love playing with sketch card ideas.
Card Ideas in 2020 Using Favourite Photos
Sometimes you have a photo that you just love, year after year.
Have you ever thought of sharing one on a greeting card?
I saw someone use this idea so beautifully, using the High Tide stamp set to embellish. I decided to use one of my photos from our trip around Australia to make a card along those lines, only I chose the Rooted in Nature and the Well Said stamp sets to personalise it.
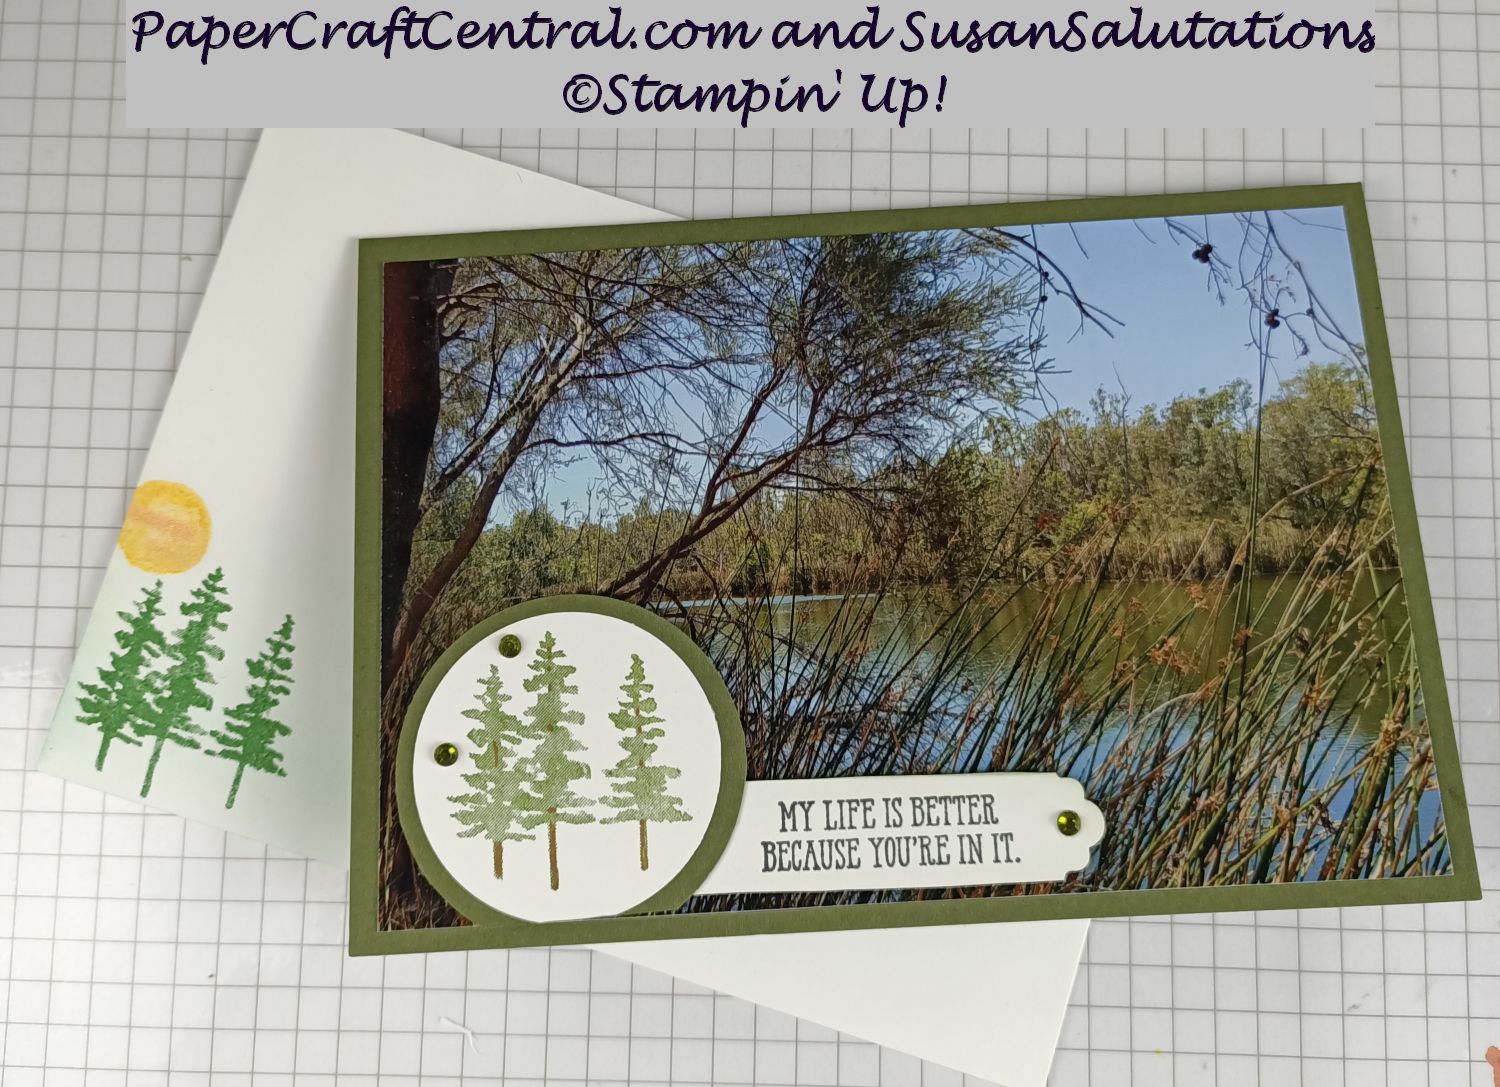
We stayed in a free camp where I took this photo near Karratha, Western Australia.
I just loved that the pine tree by the stream blended in with the Rooted in Nature images of little pine trees.
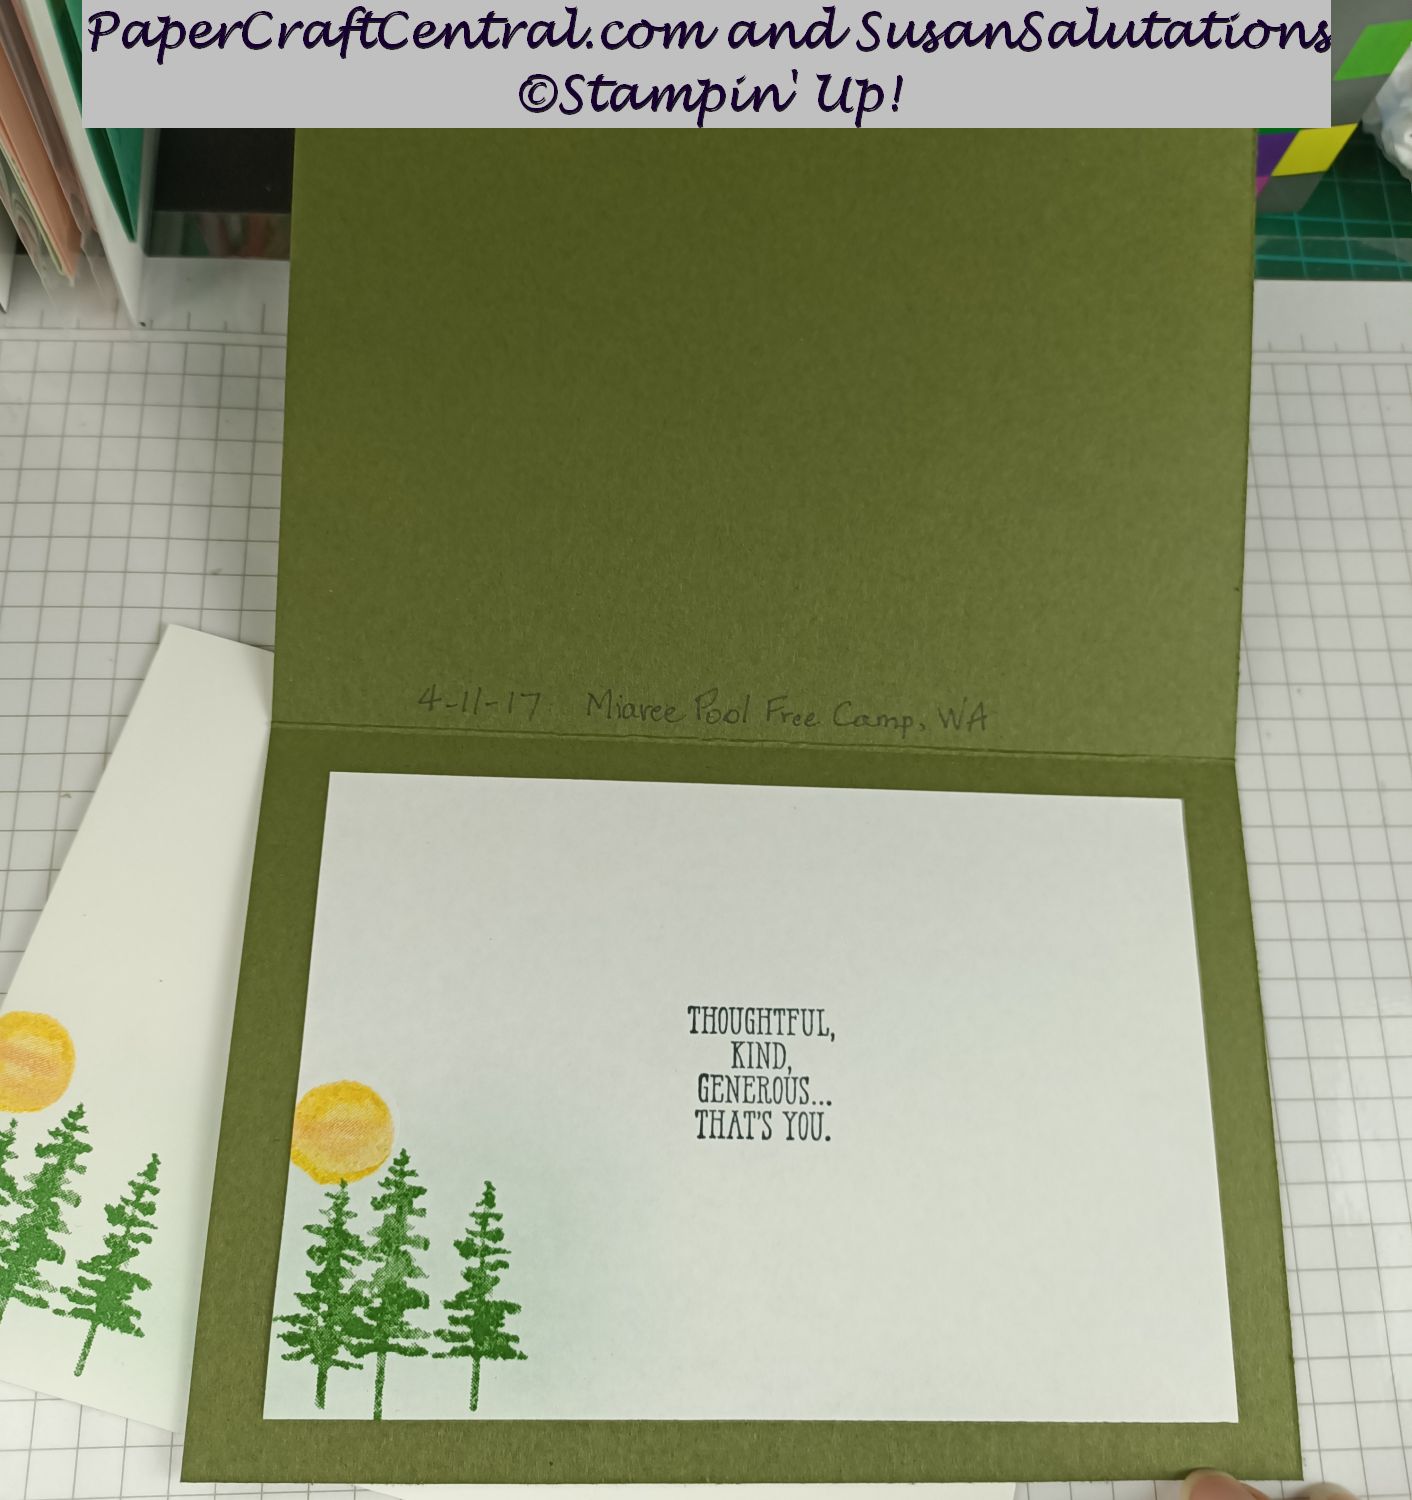
I wonder, are you thinking of some favourite photos of your own to blend with your stamp sets?
What about a playground picture and some of the See a Silhouette images?
Sports stamps for sports photos?
There's a house stamp set in the newest seasonal catalogue for those favourite house photos too.
And we have so many flower and leaf stamps for your favourite garden photos.
You can even stamp directly onto your photos with Memento ink! Just be sure to let it dry for awhile before touching it. A glossy surface does not absorb ink well.
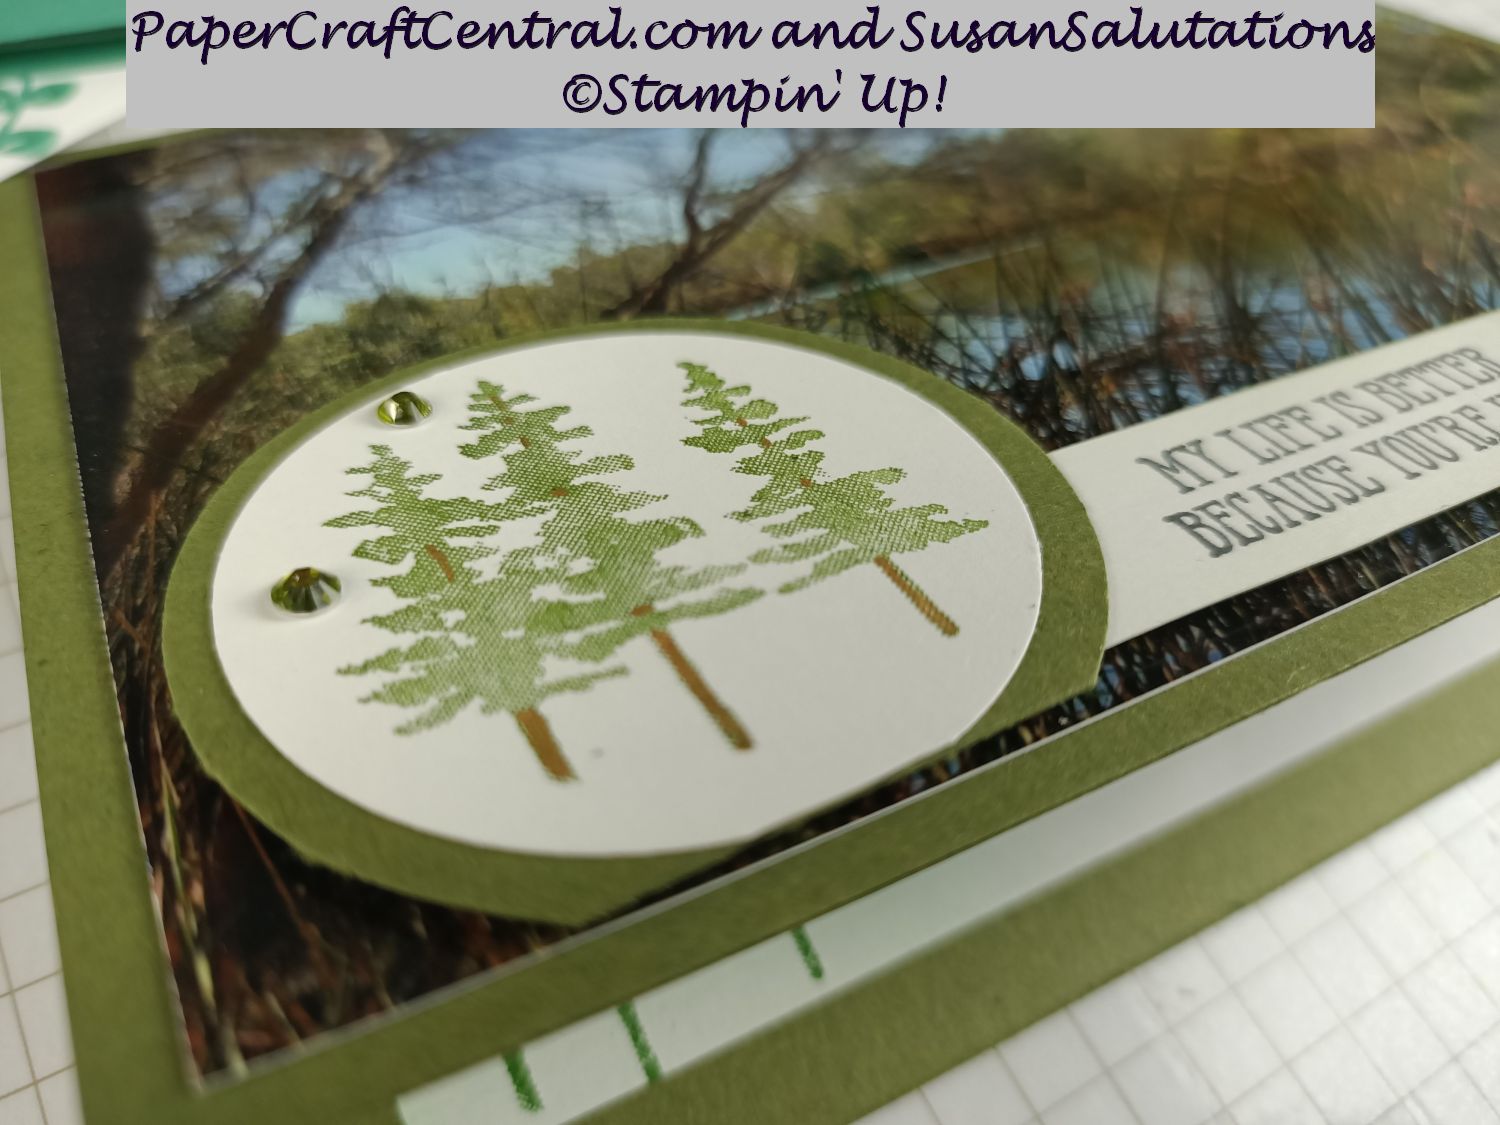
You can see I cut the bottom off my two punched circles to make them sit nicely on the bottom of my photo, and make the feature small enough not to obscure important parts of my photo.
I hope you use some of these card ideas at your own craft table.
Project Ideas, July 2020
So this month, there was cautious optimism in Queensland, Australia as COVID-19 restrictions were eased. Sadly, there had been a resurgence in the state of Victoria, Australia and crafters in my circle were still meeting online to create. And we had been creating heaps of card ideas!
Blossoms in Bloom and Many Layered Blossoms dies
This pretty bundle allows you to use just the dies, just the stamps or both to create your card ideas.
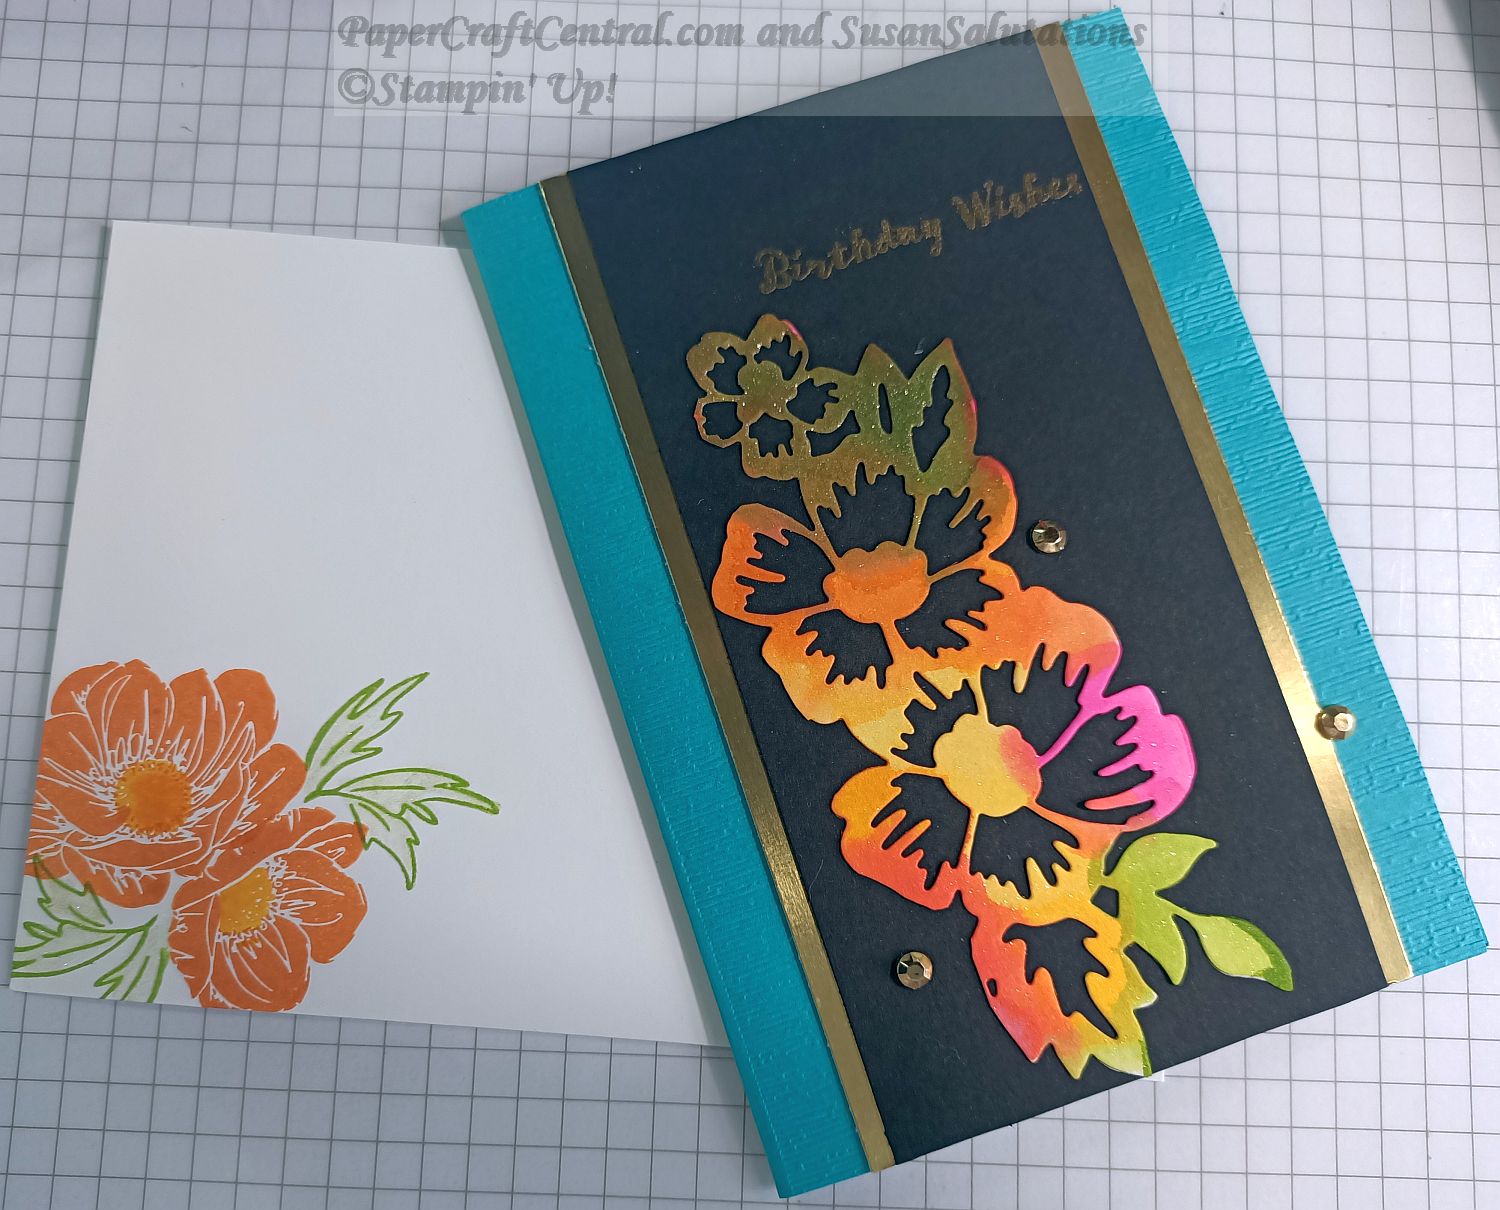
For this card, I die cut the flowers from Shimmery White A4 Cardstock. (Sadly, this pretty cardstock is no longer available). Then I water coloured them with my Blender Pen in various ink colours.
They made a huge impact when mounted on Basic Black cardstock with some Gold Foil Sheet underneath.
Add a couple of Gilded Gems and you have a simple easy card with pop!
This is half a die cut shape, by the way. The whole die cut is big enough to fill your card front.
Naturally I wondered what the other half of my die cut would look on a Whisper White background. Here is the result:
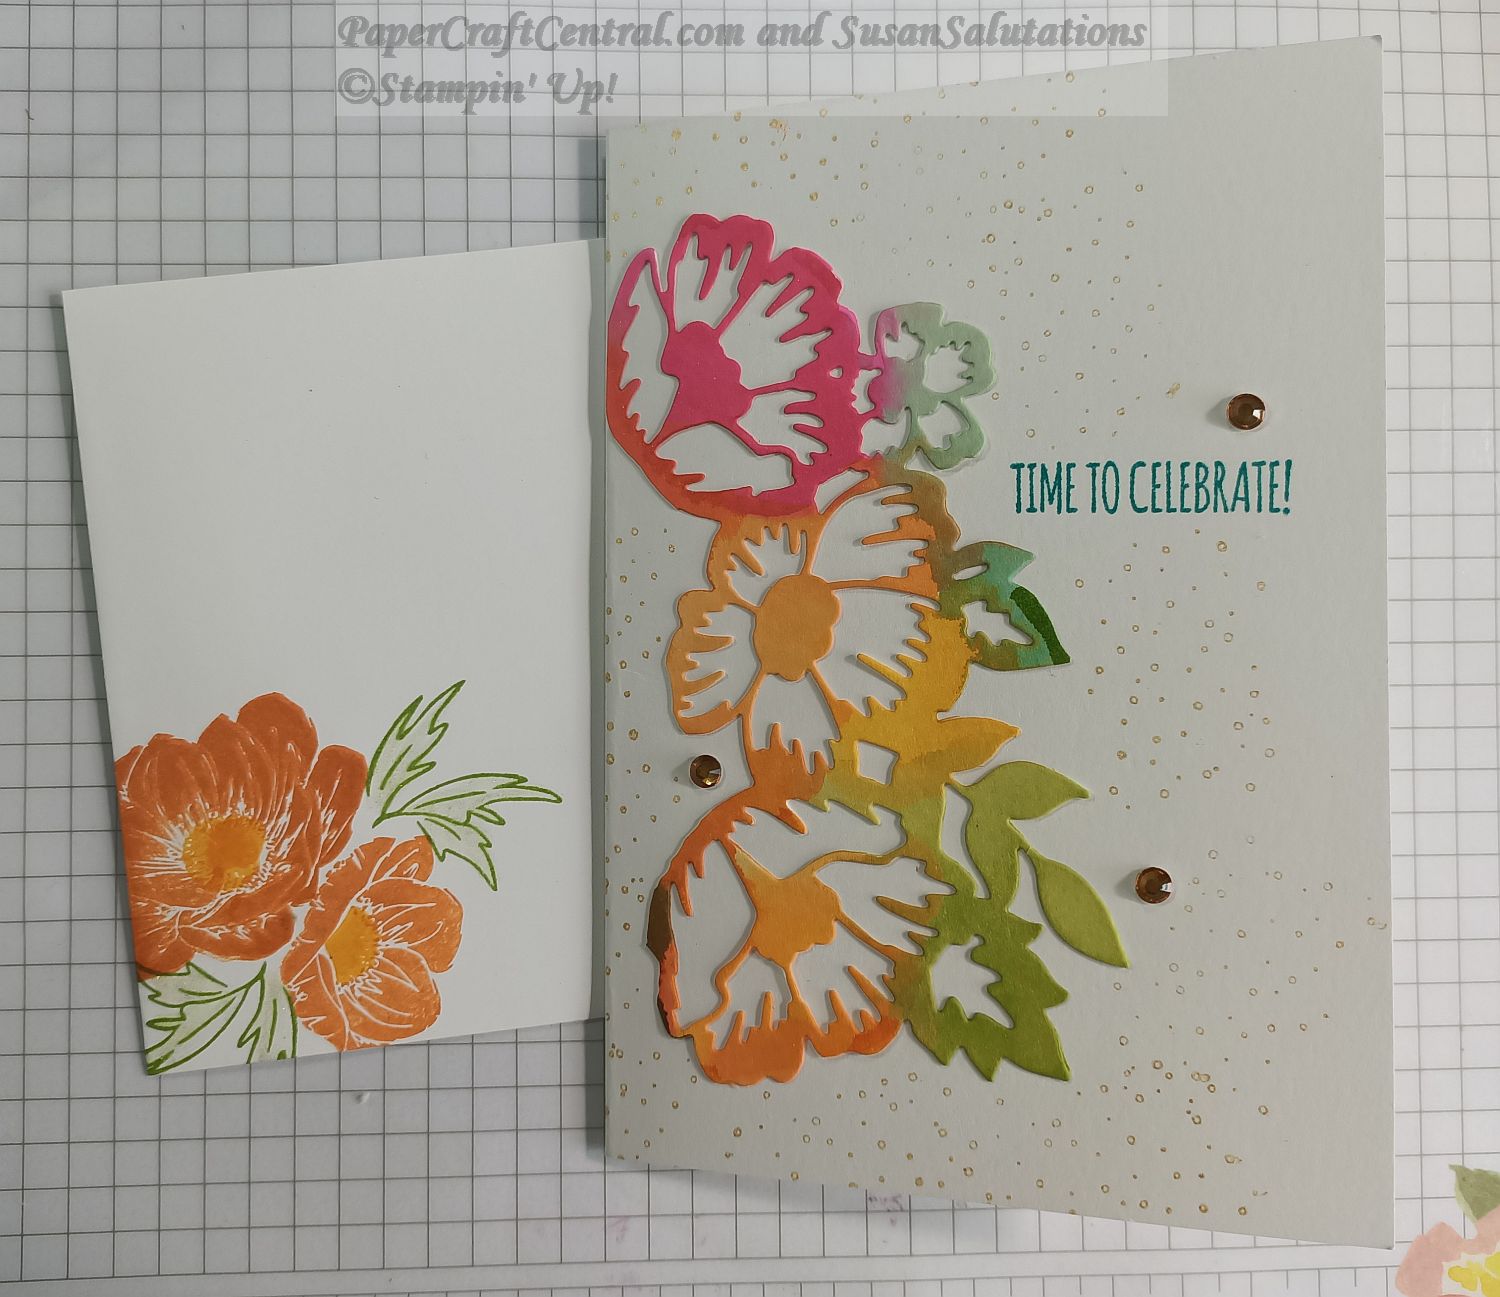
Don't the colours pop?
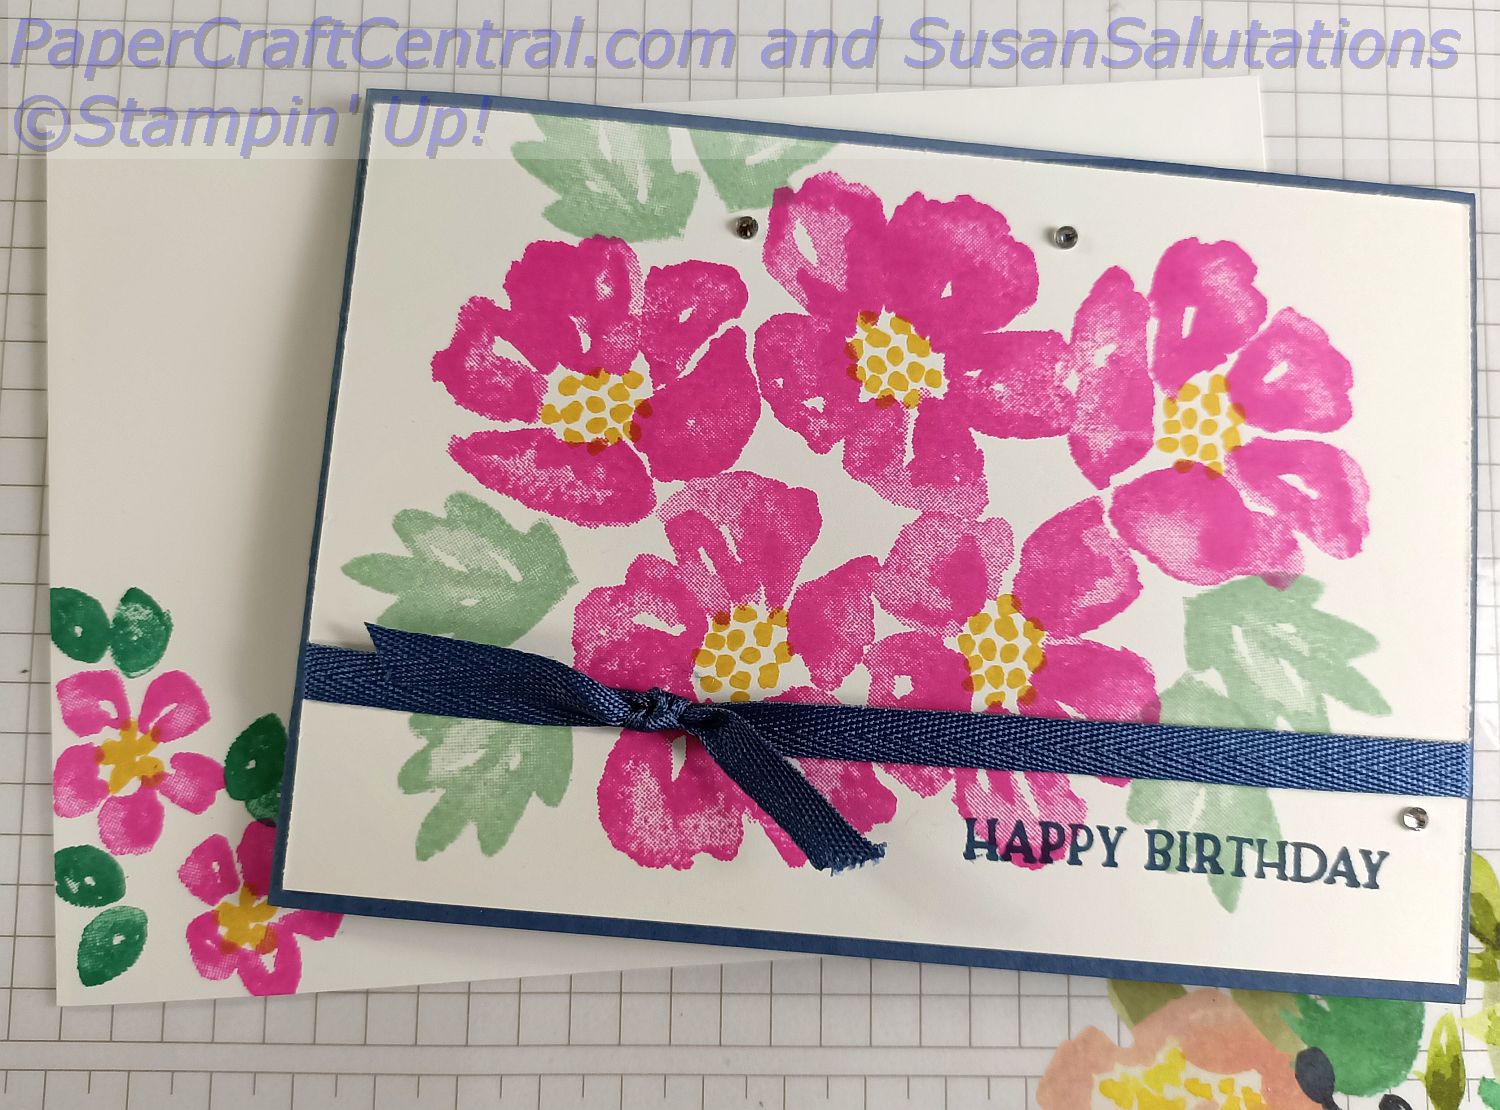
Then I decided to play with the stamps. I made two cards using the whole stamped image quite quickly. I think they look great. Who needs to be artistic with such great stamps to do the hard work for you, I say!
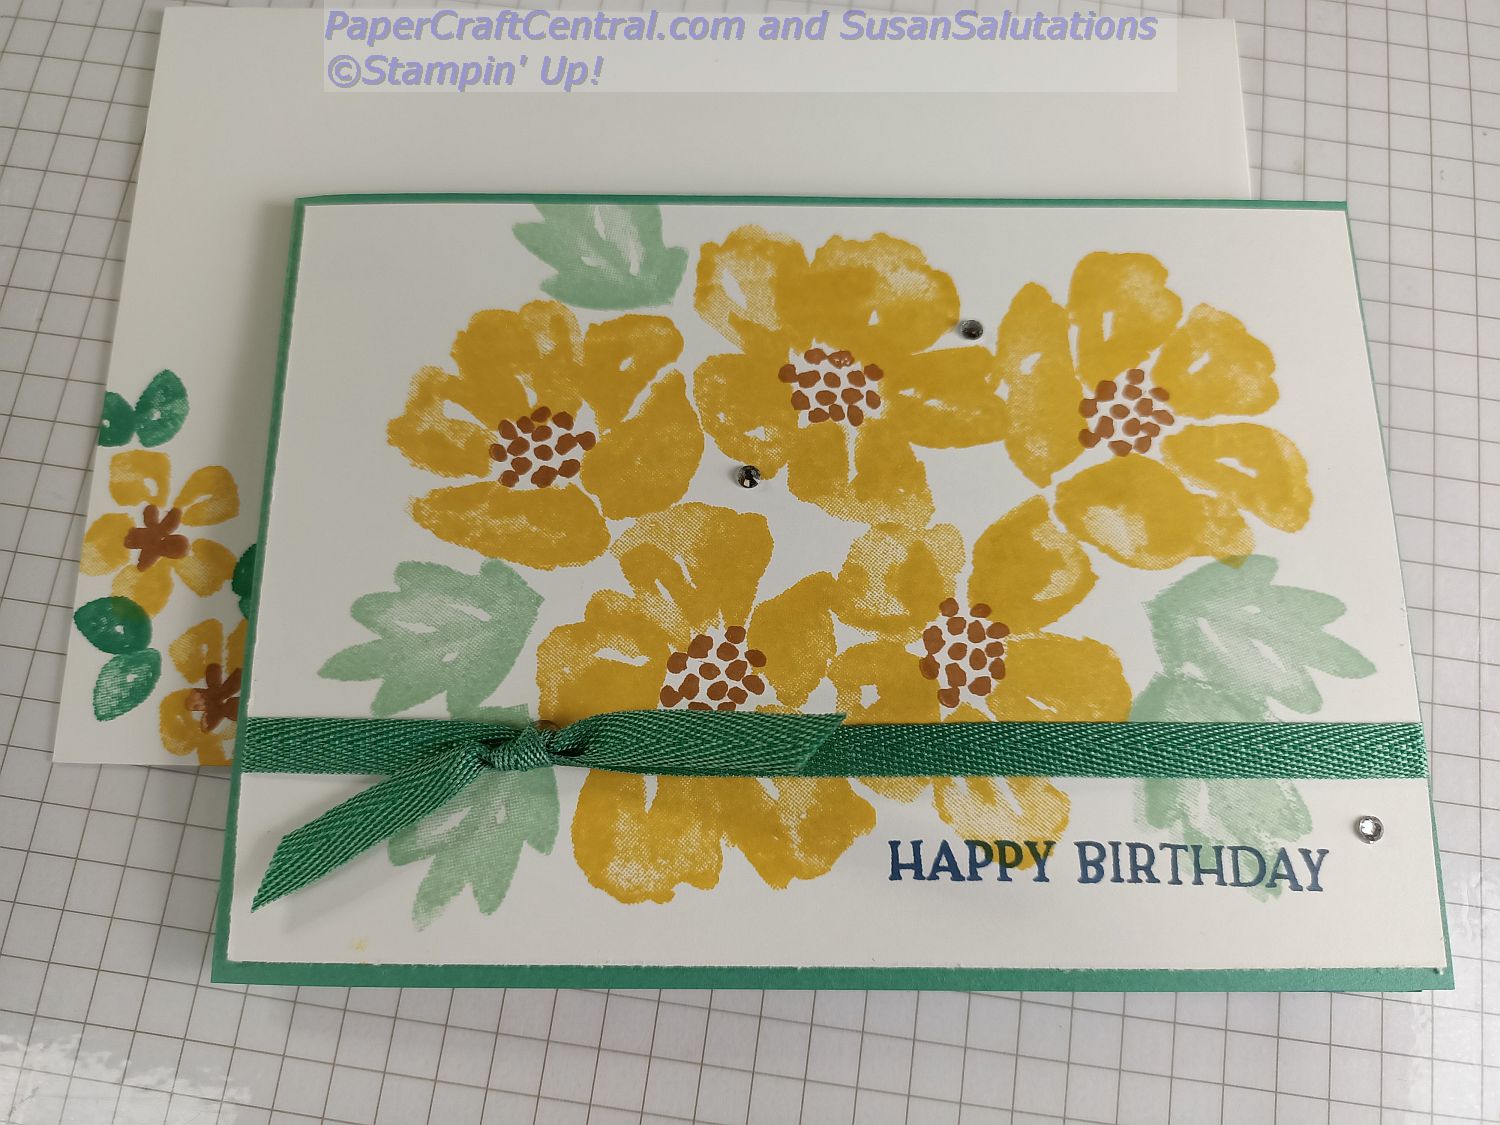
Don't you love the little flowers and leaves on the envelopes, too?
More Celebrate Sunflowers Card Ideas
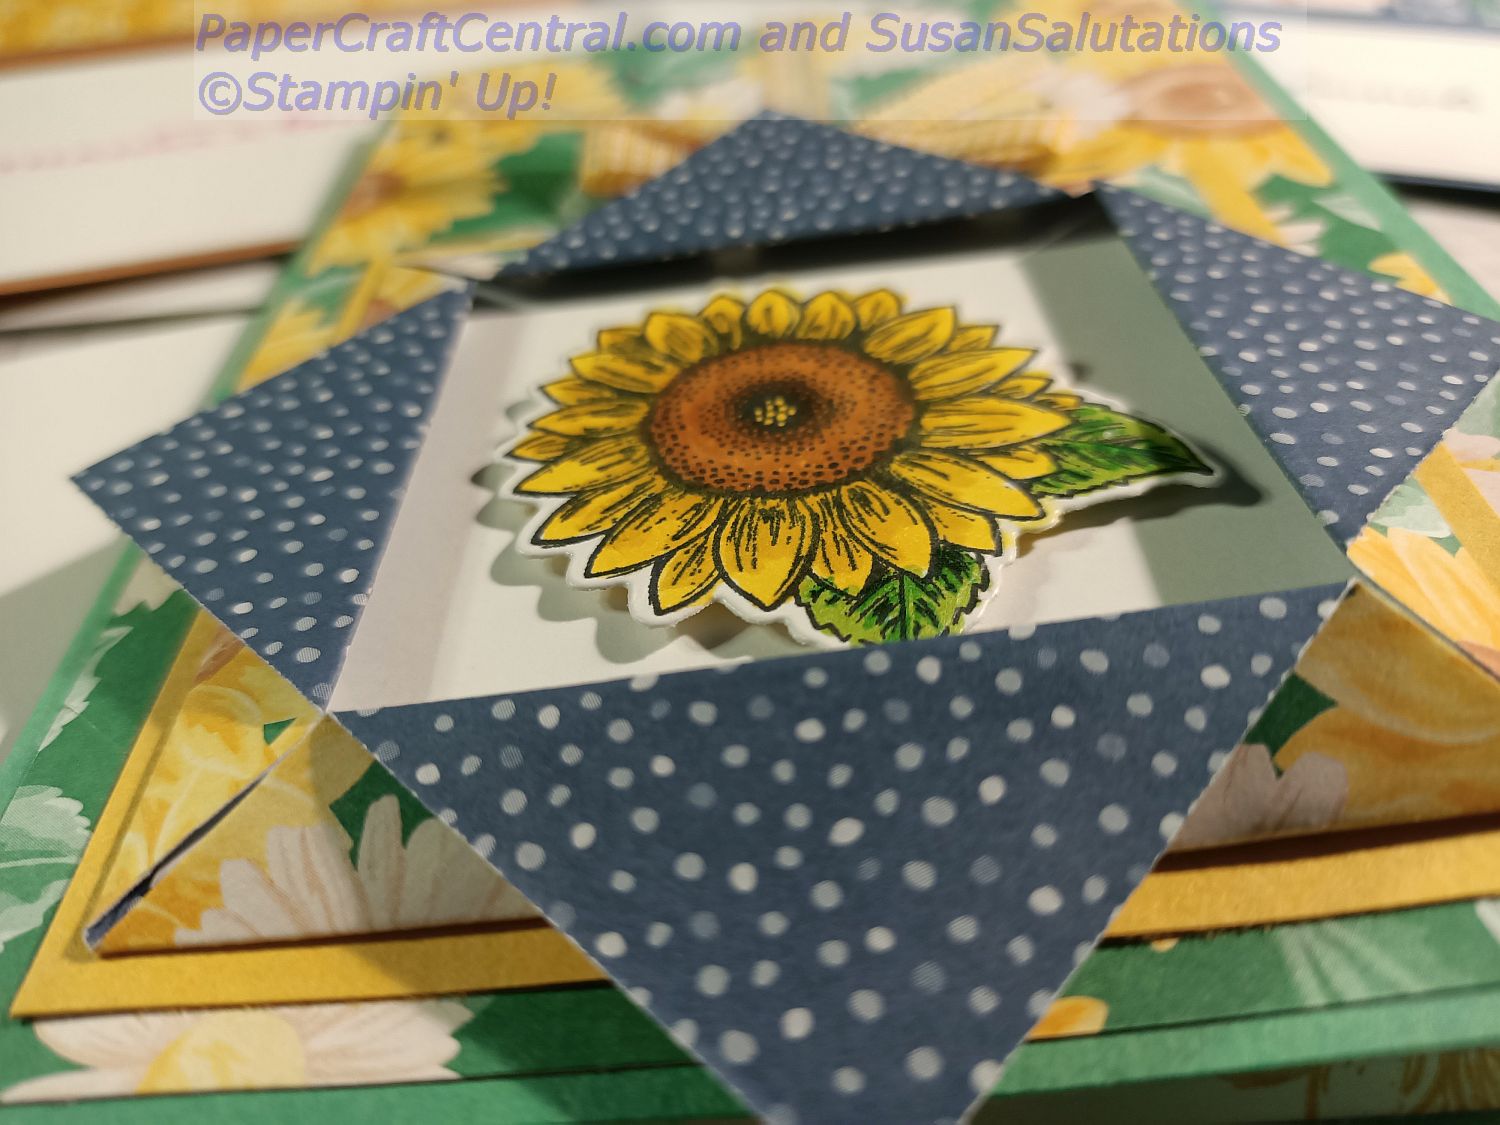
I found out how to make a folded frame fun fold via Lisa Curcio this month so decided to teach it to my team and to make a few cards myself. They are easier than they look to make!
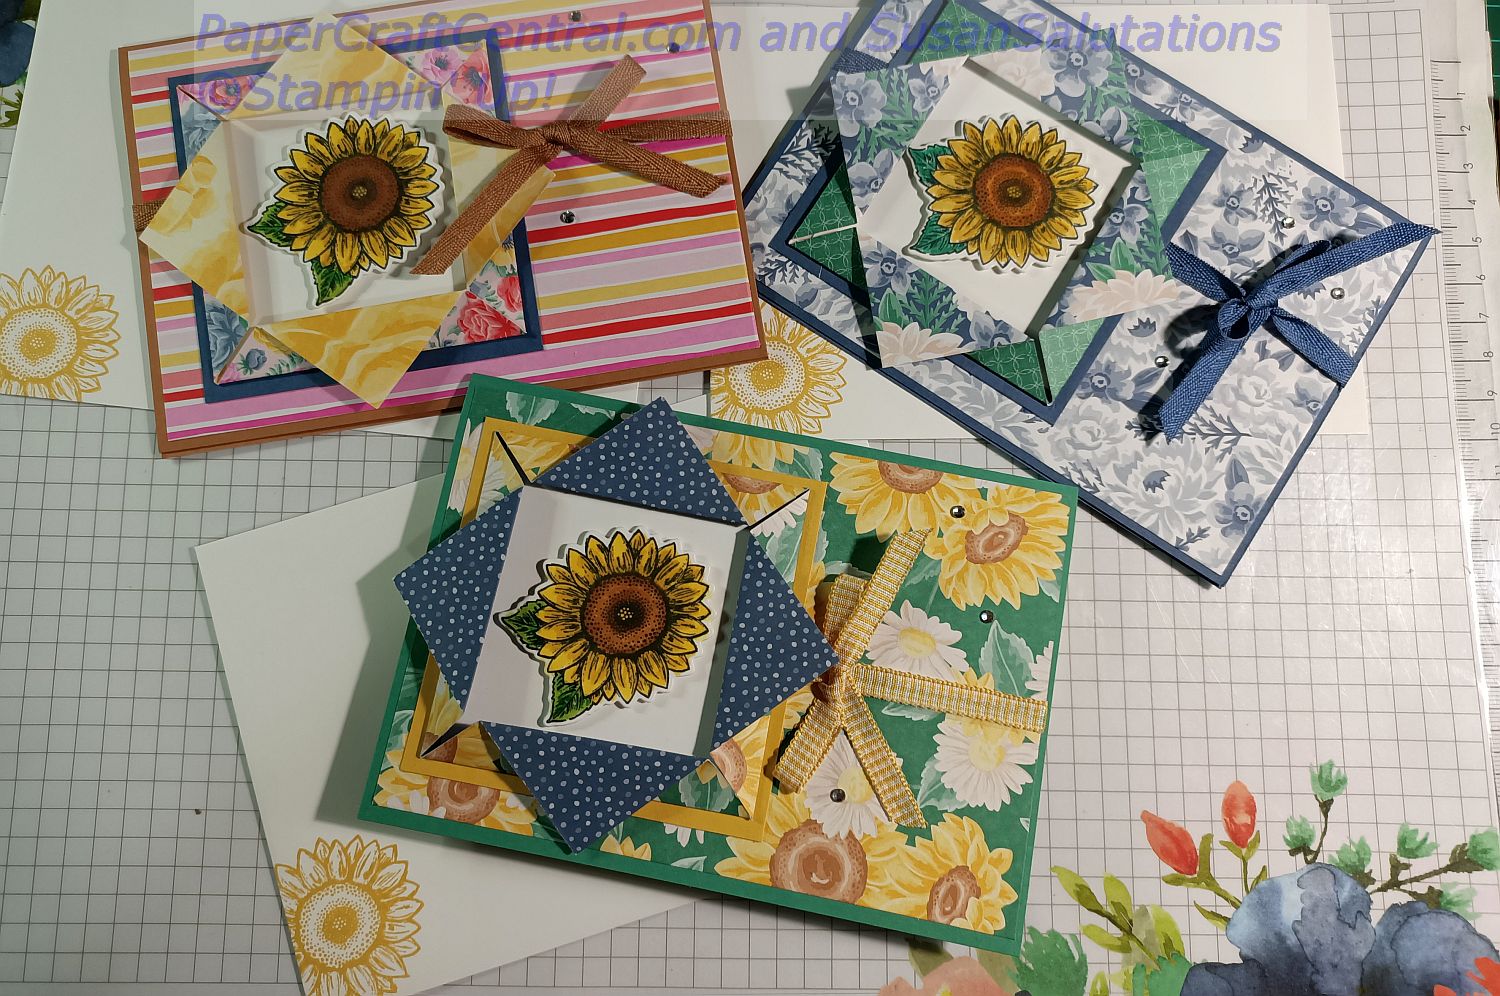
I love how the technique creates a little 3-d frame for your popped up image inside.
Geared Up Garage
I thought of some card ideas in 2020 using the Geared Up Garage stamp set and dies this month too.
A friend's son was turning 21, so I dug out my retired designer series paper as I knew there were keys in there.
I was right!
I managed to fussy cut some keys and a key fob and put them together on my card front. I stamped a background first though.
I love to cut out the gears in gold foil paper. They serve as bling on this masculine card.
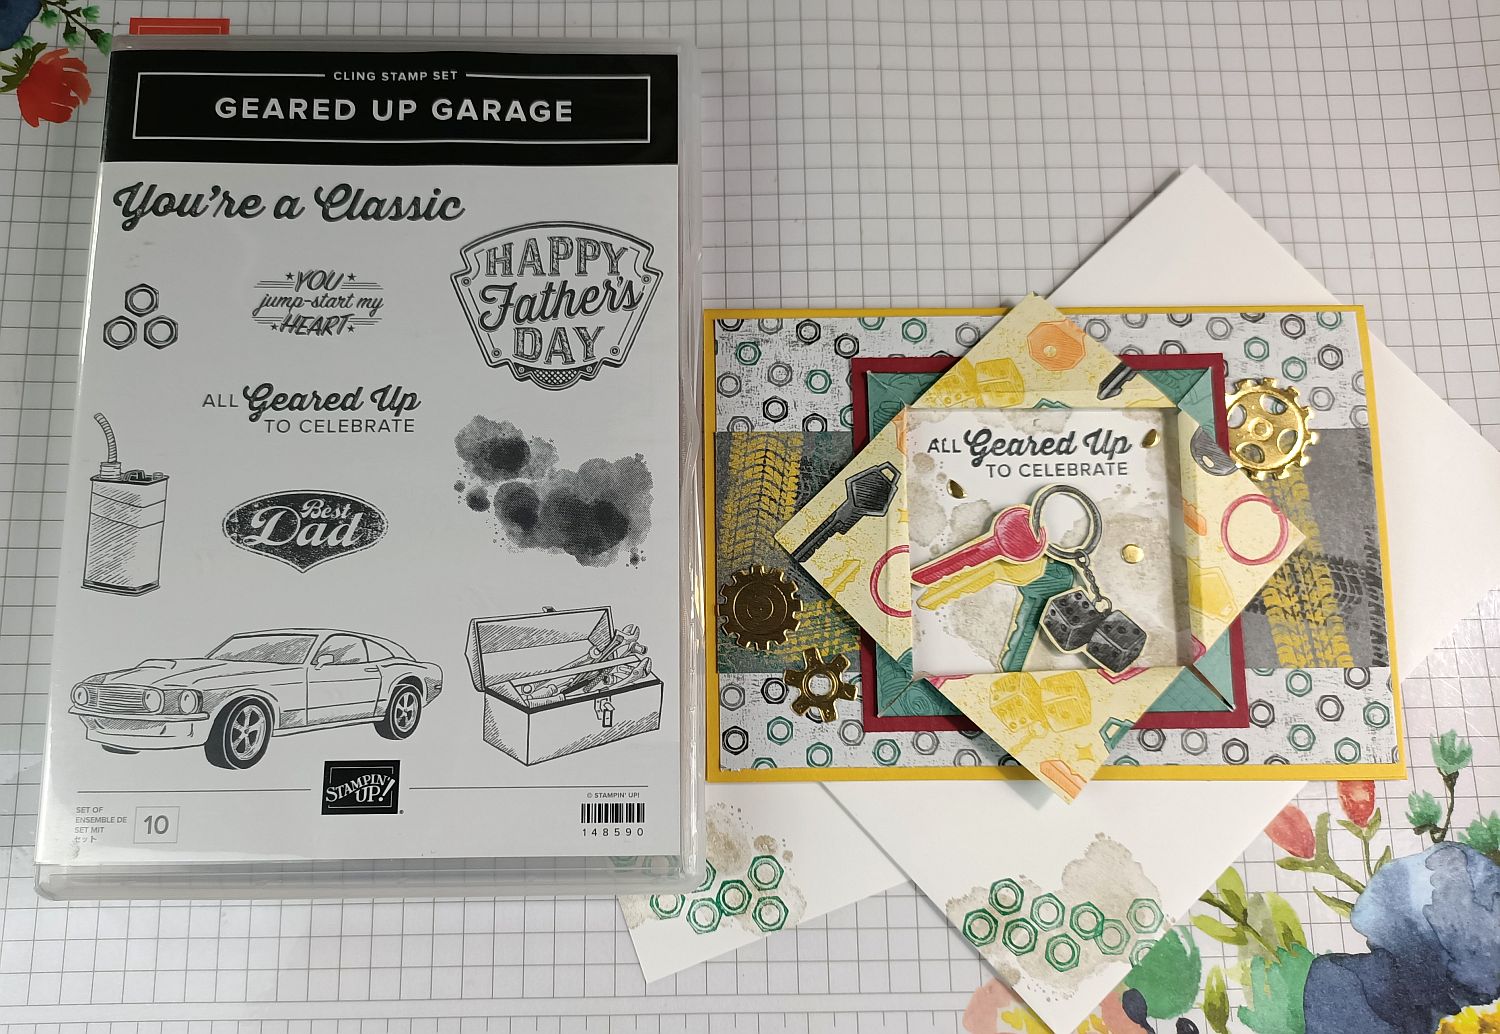
You'll see that I made a folded fun fold frame for this card, too. I folded the flaps a bit further back so I could accommodate the keys in the frame.
Gift Packaging Idea
Do you have a heart punch and a young granddaughter? I do!
It was her birthday soon and I could not visit in person due to geographical distance and COVID, so I wrapped her gift then thought of adding a rainbow of coloured hearts to the package.
I put a note in her card saying if Mum would let her, to create a paper heart rainbow in a window or on a wall or even in a sketch book! I hope she did.
I sent six of each colour and scattered them through the cardboard box packaging.
You could send a rainbow of stars for a boy's gift.
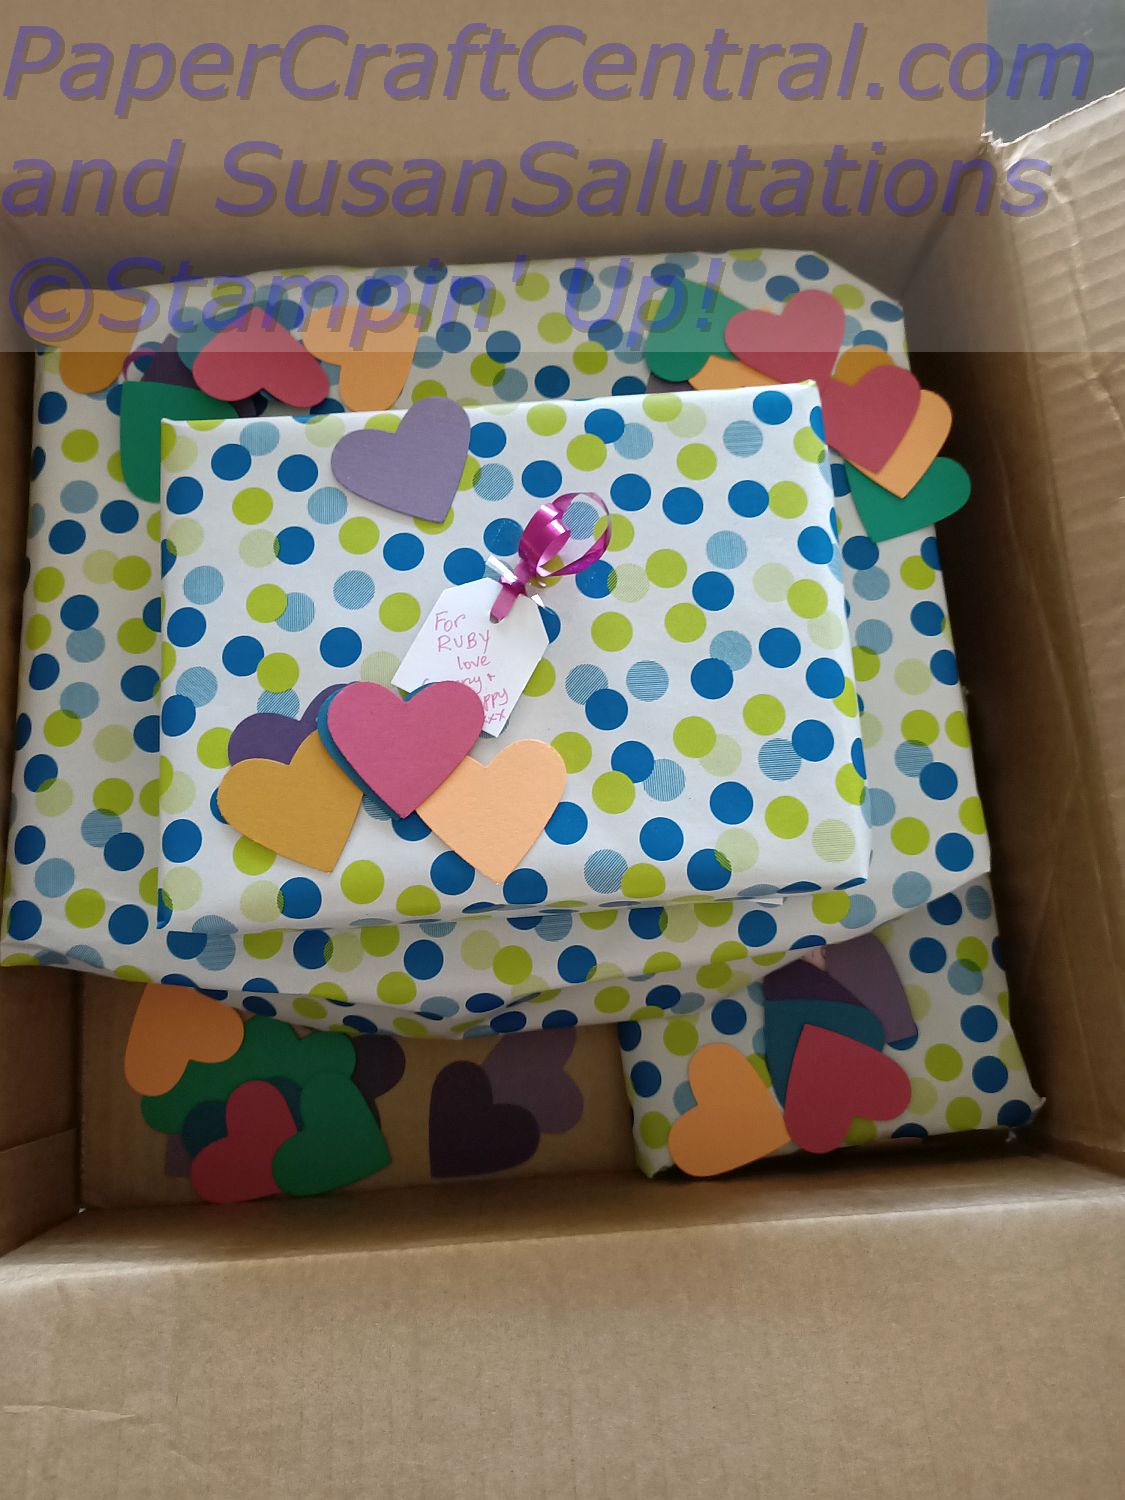
Now I these were not card ideas but this idea did go with the birthday card I included.
It comes up next.
Touched My Heart Birthday Card
This Hostess stamp set is great for sympathy cards, but I just loved the heart image and wanted to feature it on my granddaughter's birthday card.
There are no dies for this image so I stamped and coloured it before fussy cutting it out, then popped it upon the background I created after CASEing it from page 15 of the Australian annual Stampin' Up! catalogue.
I chose a flower centre stamp from To a Wild Rose to make my background. I just stamped full strength at the bottom of my Whisper White cardstock in Magenta Madness ink,, then continued stamping vertically up the card without reinking. The stamp image faded gradually as I kept stamping. Then I reinked the stamp and started again a bit further along the bottom of the cardstock piece.
I added some retired Silver Metallic images over the top.
Then I cut out a stamped, coloured butterfly, also from the Touched my Heart set, and added it and the heart shape to my card with Stampin' Dimensionals.
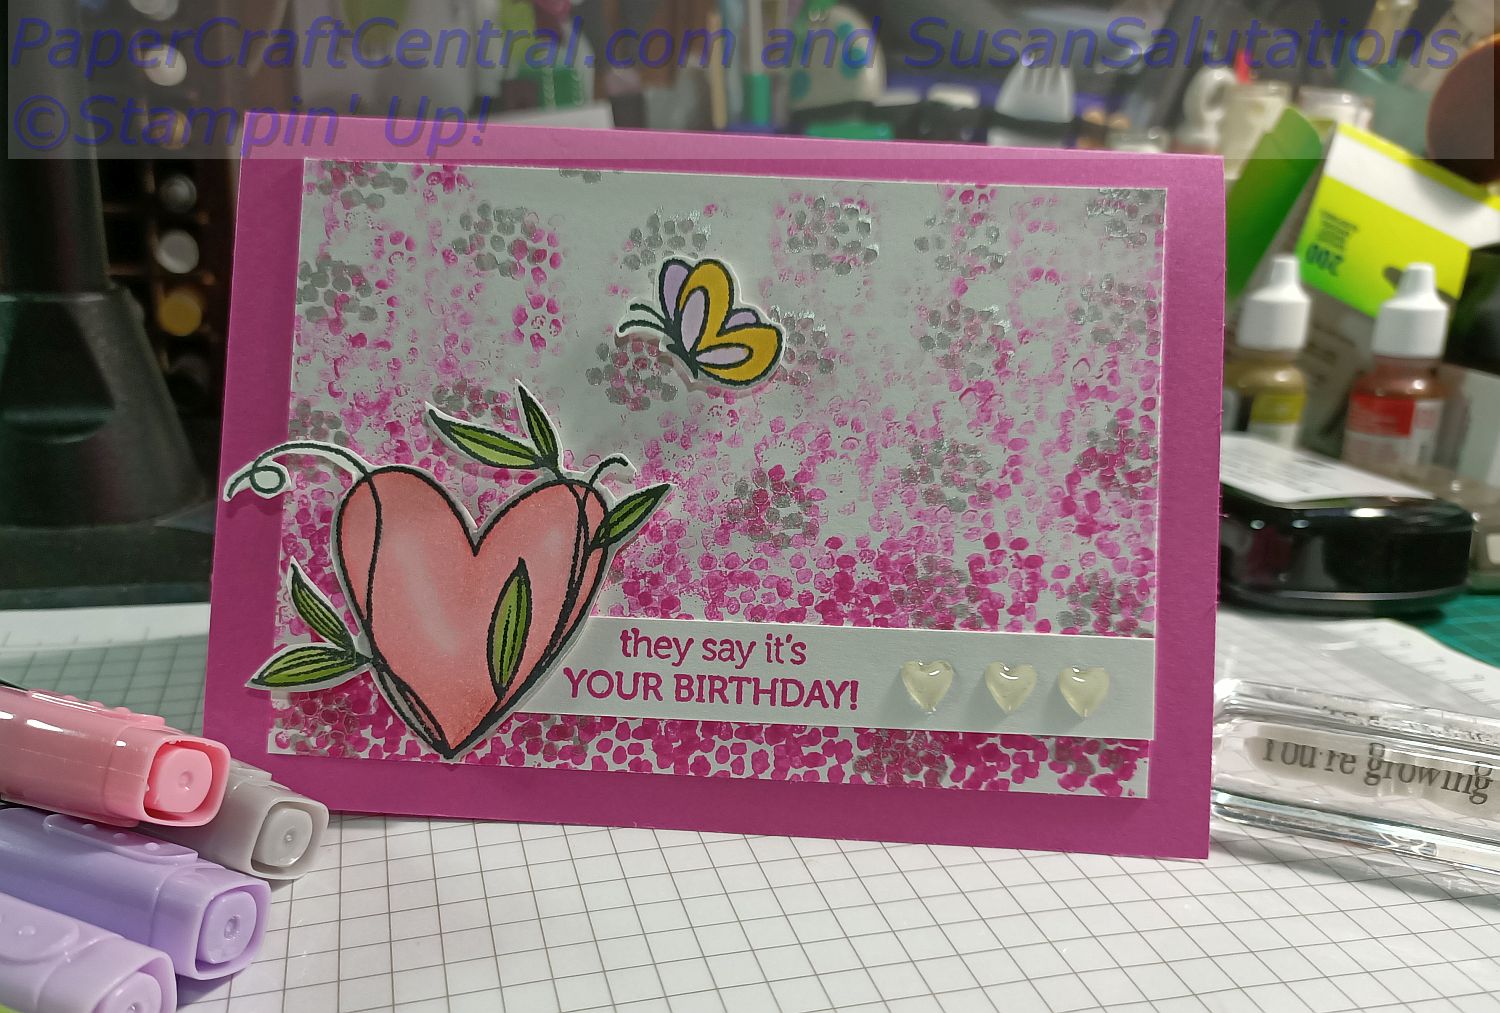
I finished off with a strip of cardstock stamped with a sentiment from the Teeny Tiny Birthdays stamp set embellished with retired clear heart stickers from last year's Heartfelt bundle.
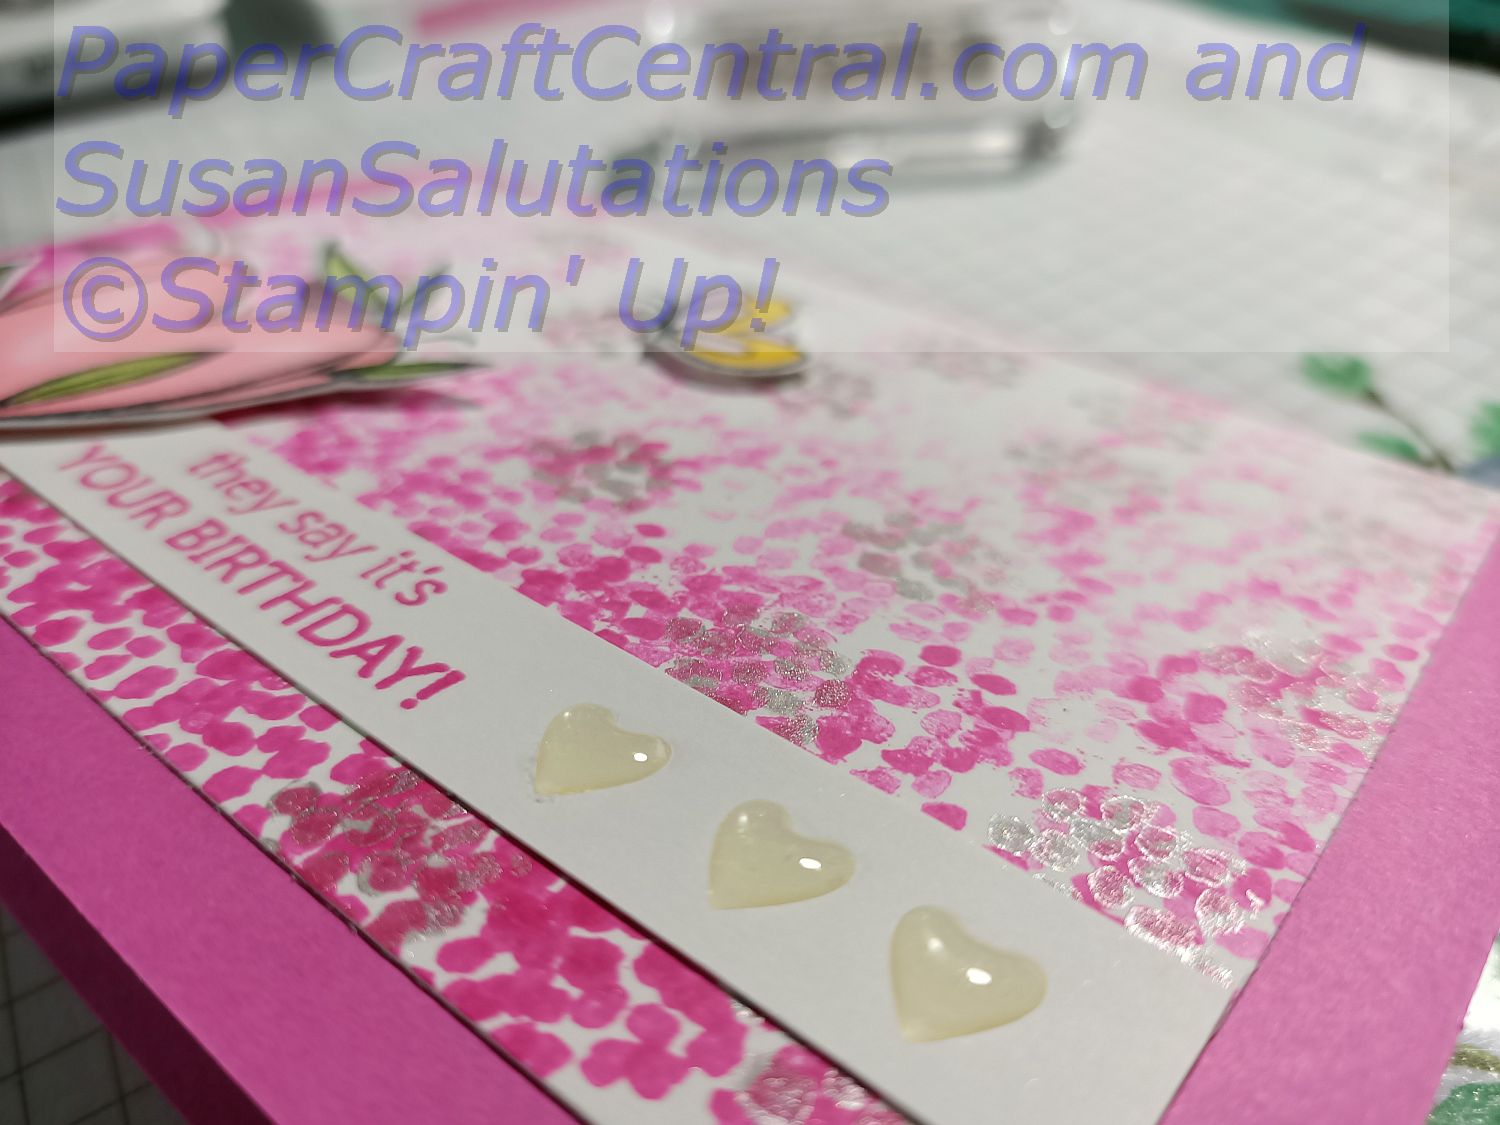
By the way, the Touched My Heart stamp set was only available if you placed a $250 order with me. You could get the stamp set at a discounted price. See page 187 of the Australian annual Stampin' Up! catalogue (2019-2020) for details about this stamp set and one other Hostess stamp set.
You would of course get other Stampin' Rewards to spend on supplies of your choice too!
I hope you enjoyed this month's card ideas!
Project Ideas, June 2020
This month I had continued to hold Zoom craft meetings. I was getting used to them! It's a great way to connect with crafting friends and for us all to play with our papercraft supplies at the same time.
Here's some highlights since I last posted some card ideas in 2020 for you.
Celebrate Sunflowers
The Flowers for Every Season Suite of products is absolutely beautiful and so much fun to play with! It has been hard for me to stop making projects with the stamps, paper and embellishments ❤
The Celebrate Sunflowers stamp set first caught my eye. Then I learned about the Bargello technique and heat embossing with white embossing powder. A card was born!
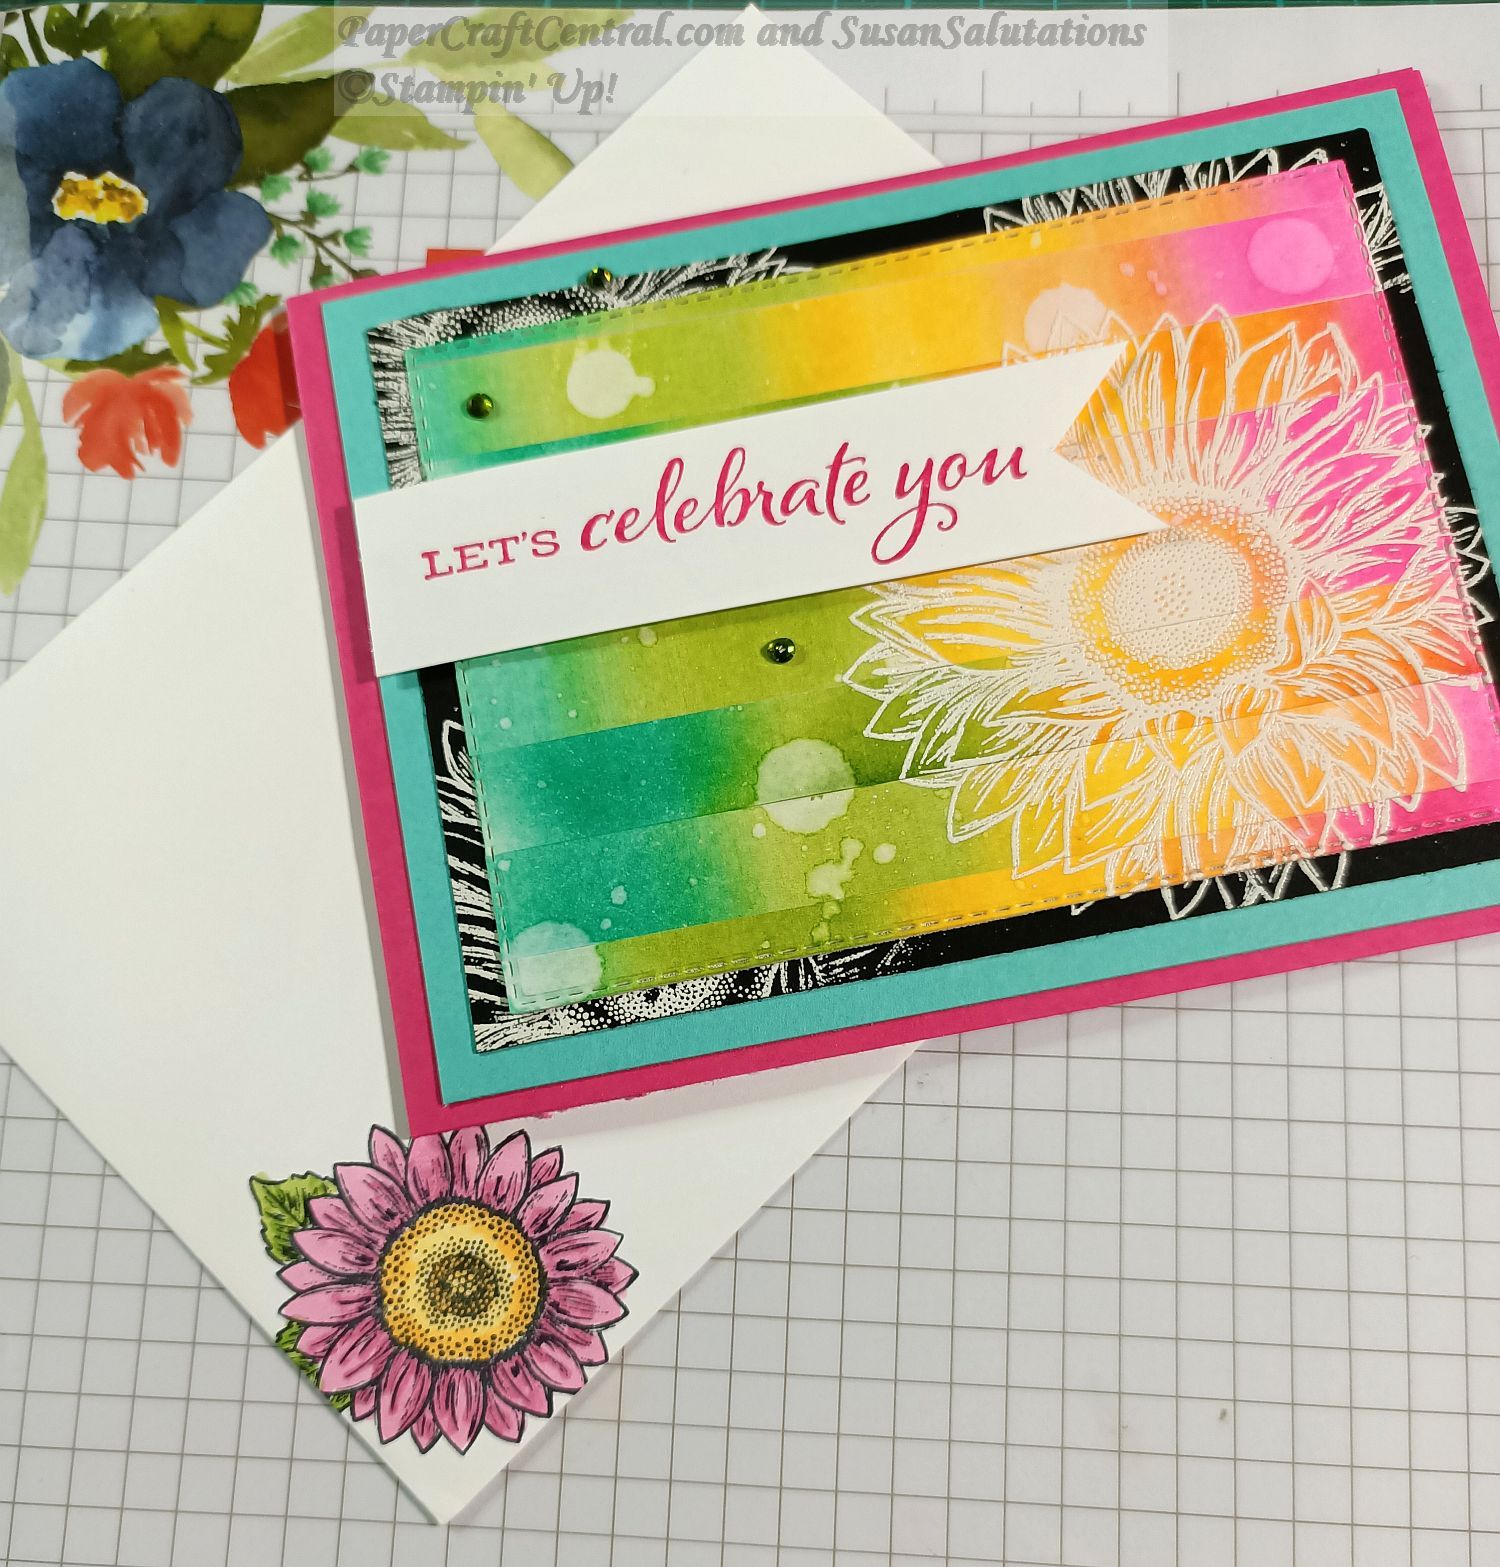
To make this card, start with a plain piece of Whisper White/Basic White cardstock cut into a landscape shape that is longer than your intended card. Then swipe ink colours in broad strokes up and down across the Whisper White till the whole piece is filled with a rainbow of colours.
I chose Melon Mambo, Bermuda Bay, Granny Apple Green and Mango Melody.
Once that is done, cut your inked cardstock into 1cm (1/2") strips, length ways.
Once you have the strips, lay them across another piece of Whisper White cut to the size you want to put on your card front, only shift them left and right a bit each time to stagger the pattern and make a bit of a zigzag.
Glue them down when you like the design you make. You will wind up with lots of bits hanging over the edge of your cardstock.
You can use the Stitched Rectangle dies to cut your piece into shape for your card.
Then heat emboss a sunflower in white over the top of your colours, and heat emboss a sunflower or two or three on the black cardstock layered underneath. I made sure I could match up my coloured sunflower with one on the black cardstock layer.
Finally, flick the colours with water. Blot off the excess. You get those nice lighter circles on the coloured piece, like a bokeh effect.
Finish off with a nice sentiment and add some more layers of cardstock to attach you your card base. I chose Bermuda Bay and Melon Mambo.
These card ideas in 2020 were inspired by The Pampered Stamper.
Then I decided to use the Flowers for Every Season designer series paper to make the next set of cards.
Flowers For Every Season
This fancy fold card idea is actually not hard to recreate!
I made these cards quickly using the Flowers for Many Seasons Memories and More card pack (NLA) made these cards even quicker and easier to finish.
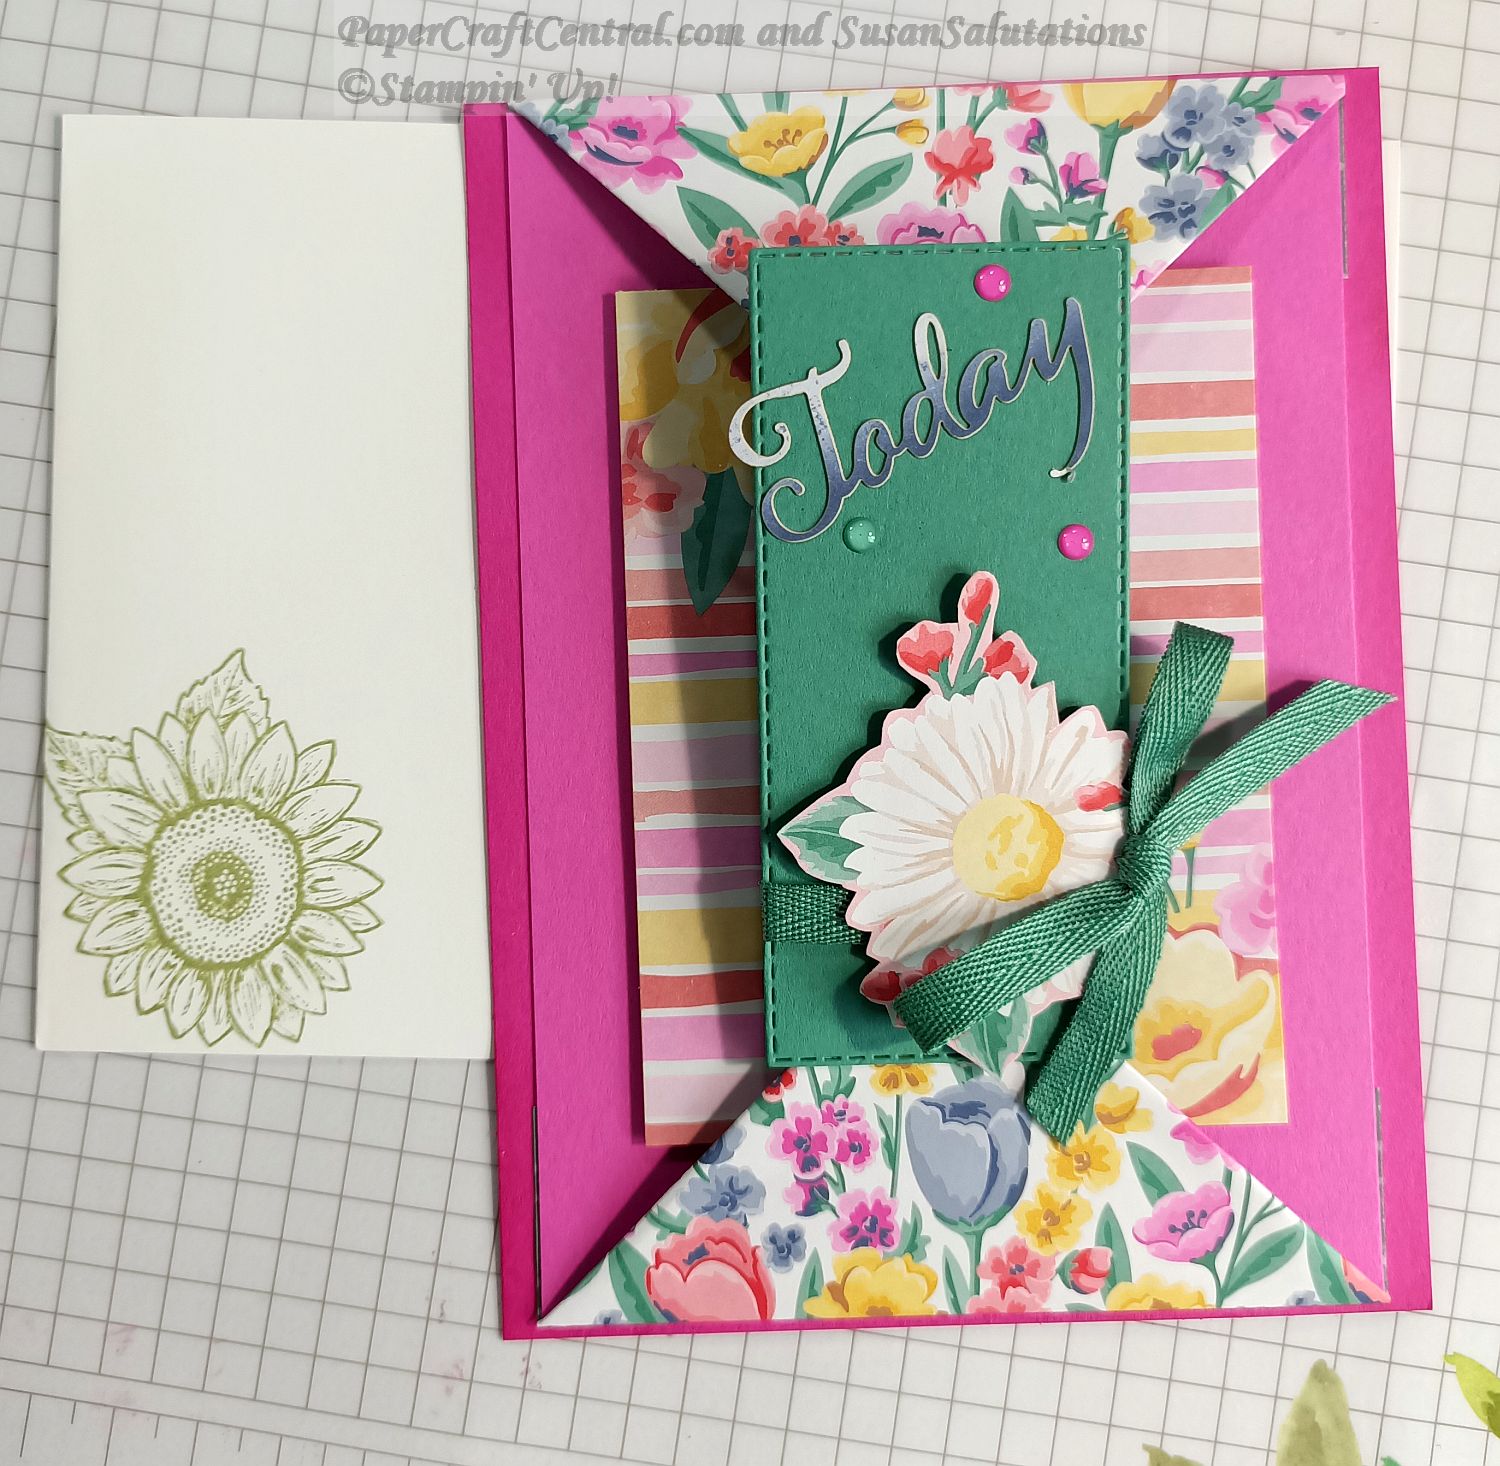
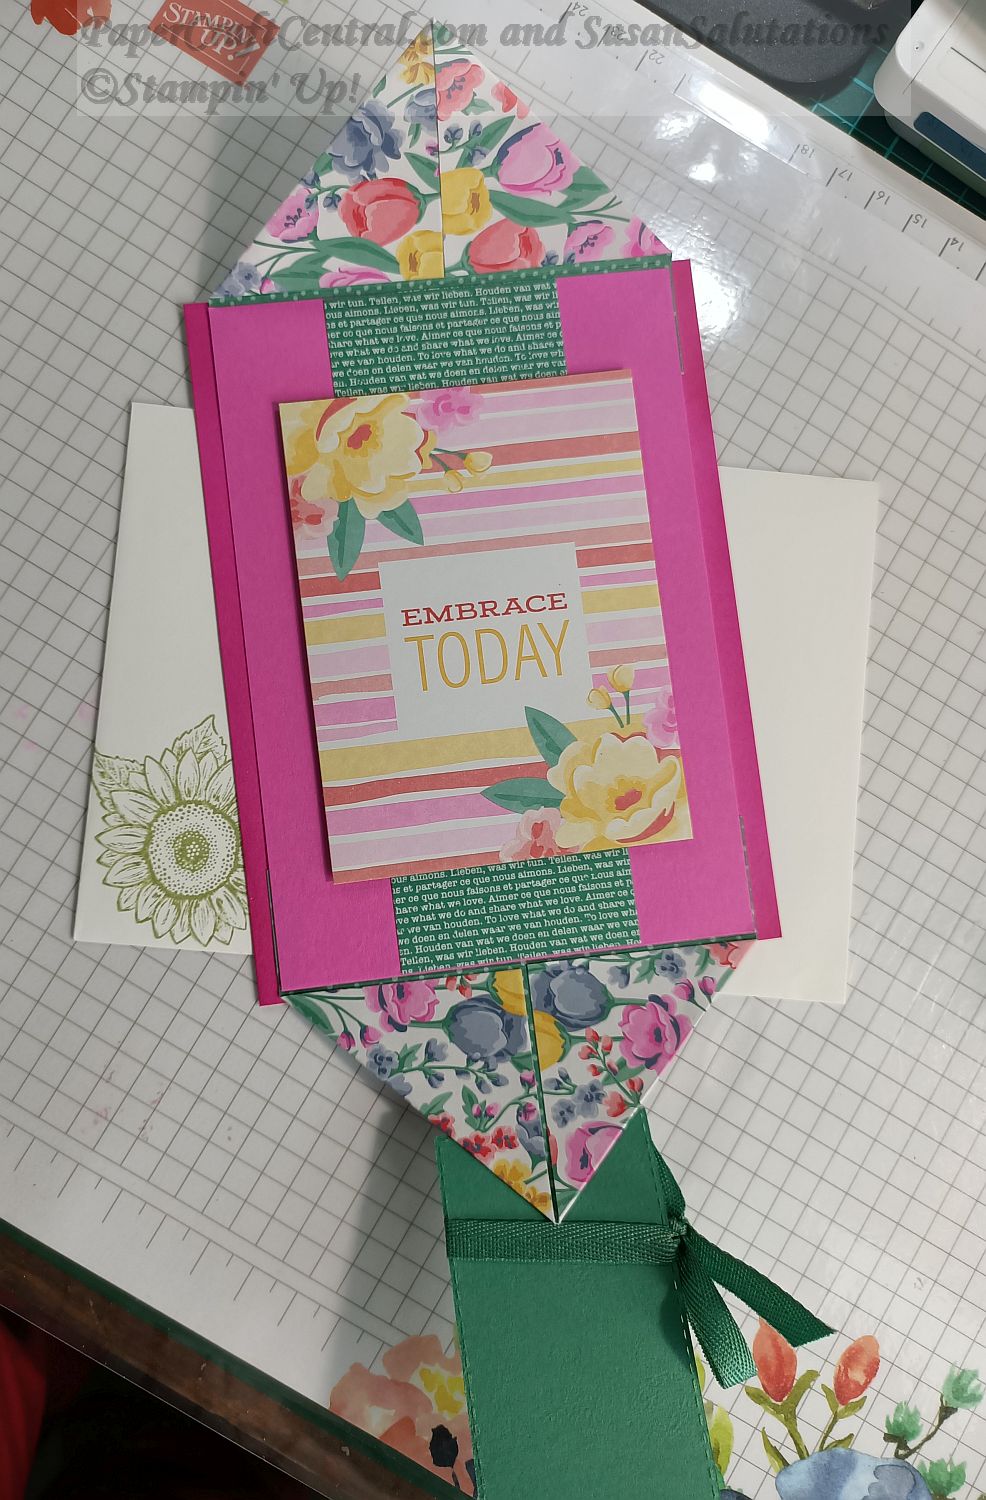
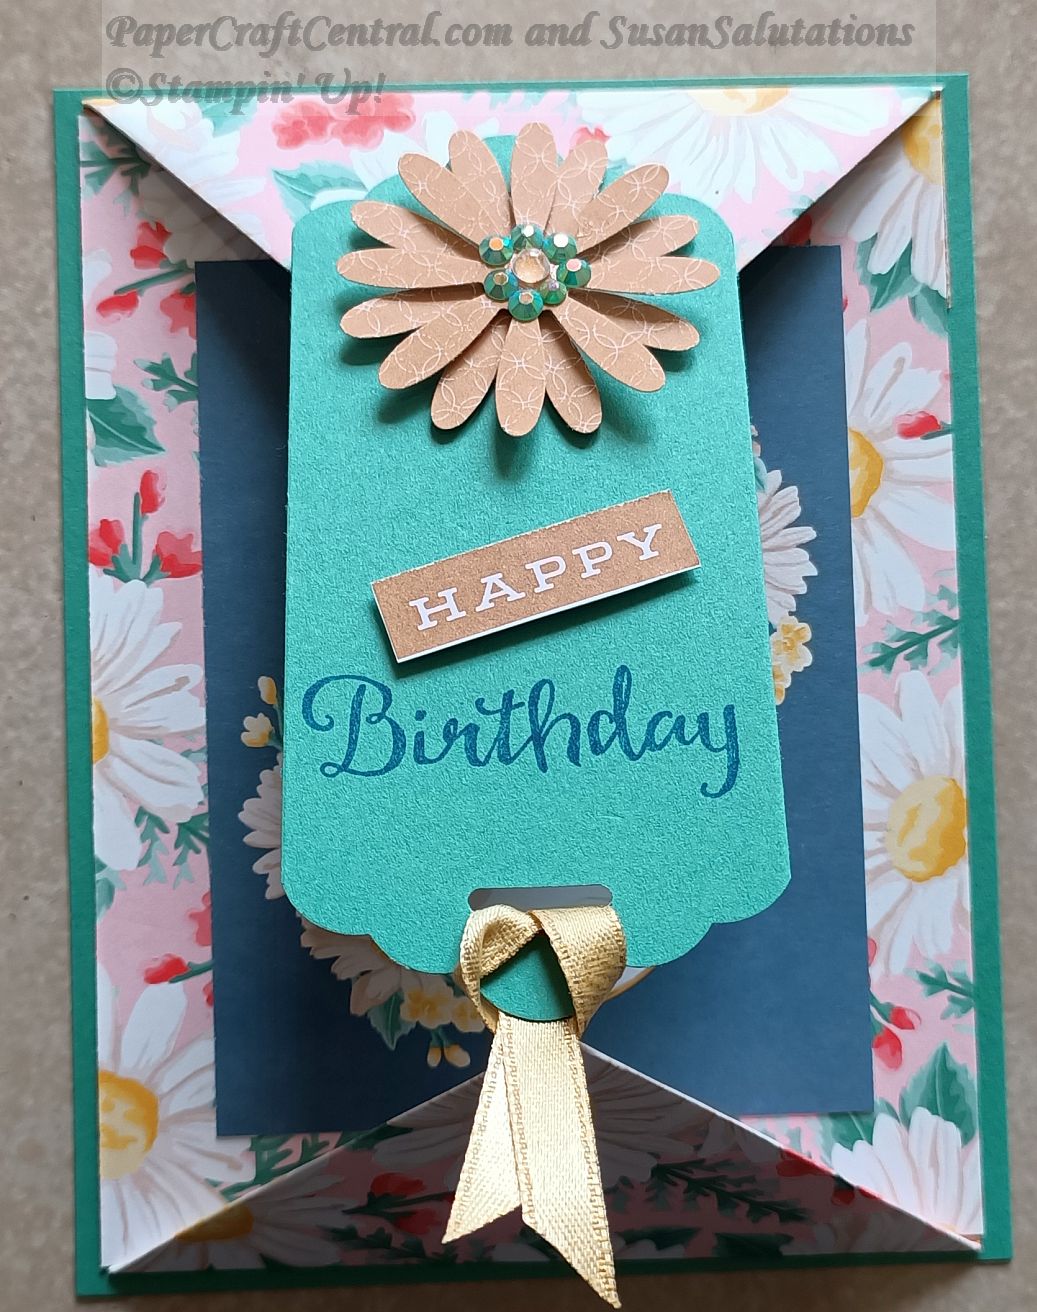
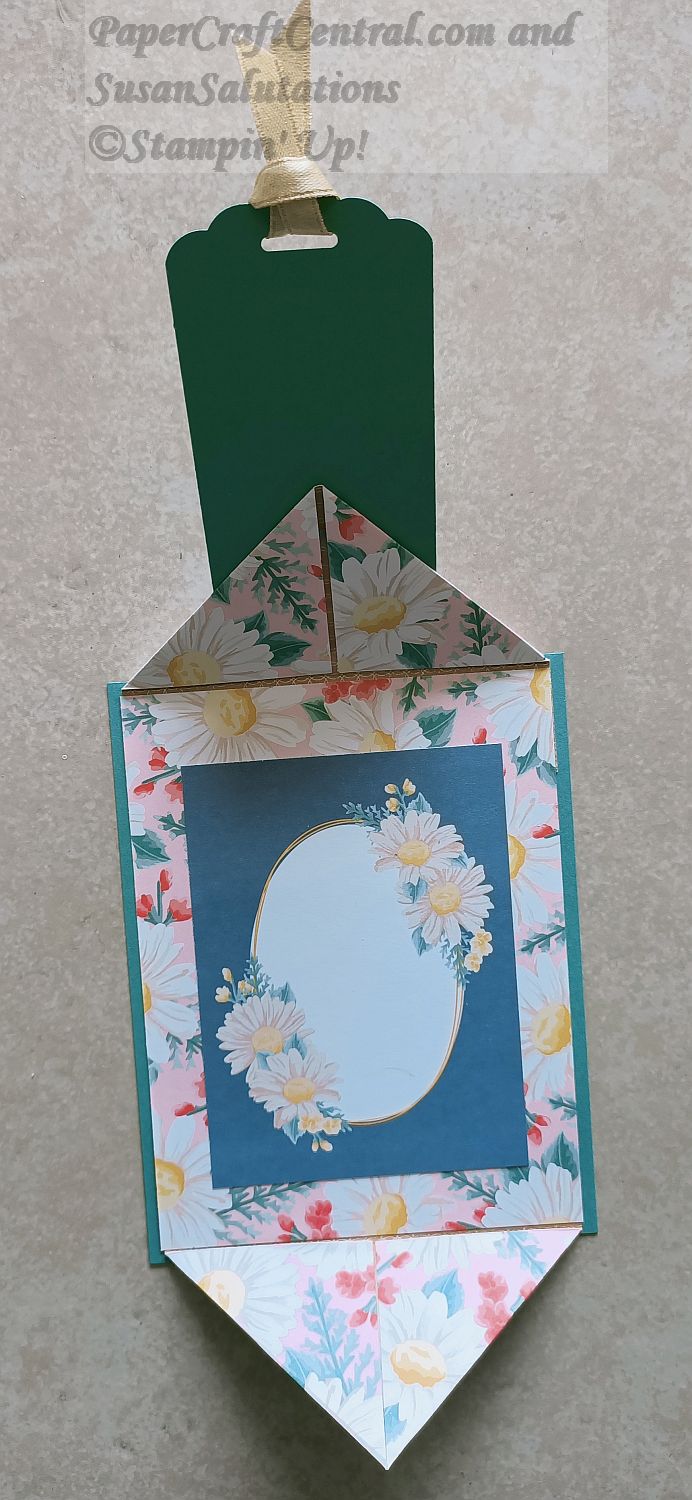
Here are some step-by-step instructions for making the cards I made above:
- Start with a card base that measures 5 1/2" X 4 1/4"
- Take a piece of Designer Paper (DSP) that measures 5 1/4" X 4 1/4"
- The two folded DSP points are 3" X 4", scored at 1" on the long side, with the tips folded to the score line. Fold the score line under and attach the tips to the back both ends of the first piece of DSP
- Then attach the DSP piece to your card base and decorate as desired
- I added the Memories and More cards to the inside of my cards and a piece of Whisper White to the back of the whole thing to write my messages on
These card ideas in 2020 were inspired by Flowerbug Inkspot designs.
Jar of Flowers
Another set of card ideas in 2020 were known as Split Cards. Here I used the Jar of Flowers stamp set and punch (part of the Flowers for Every Season Suite). I made the jar look like glass by coating it with Fine tipped Glue Pen glue.
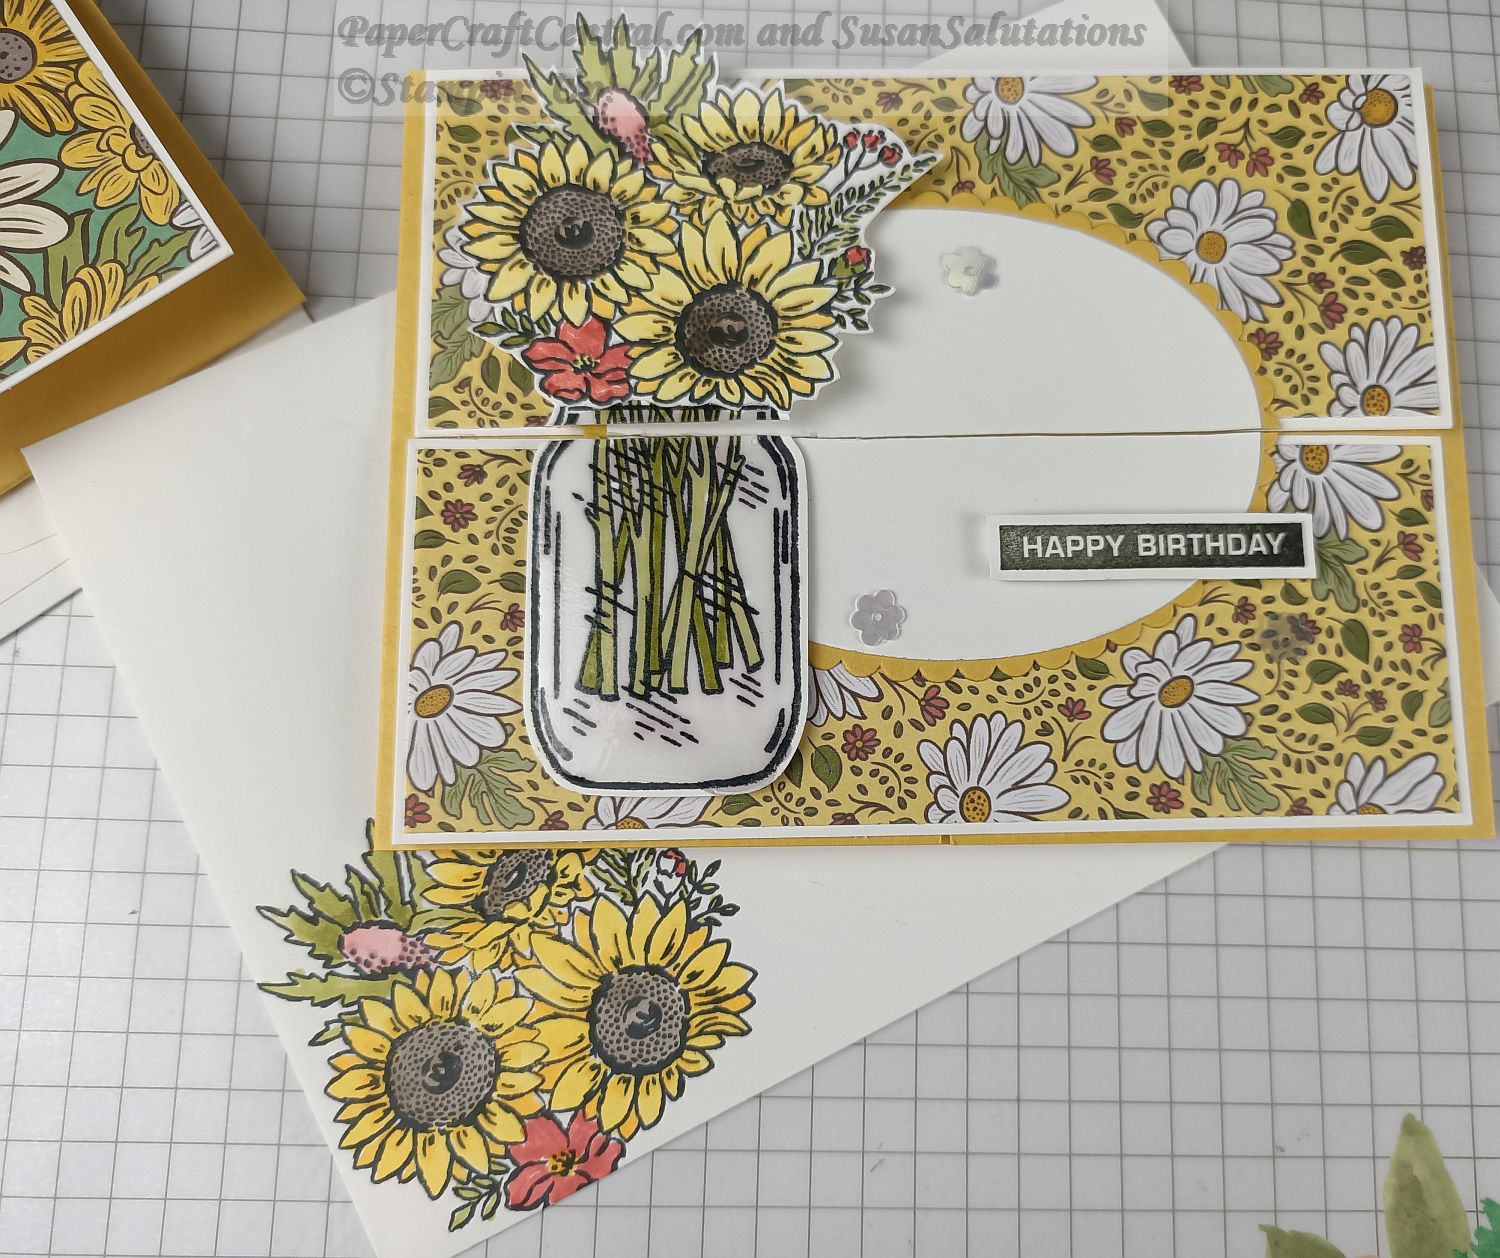
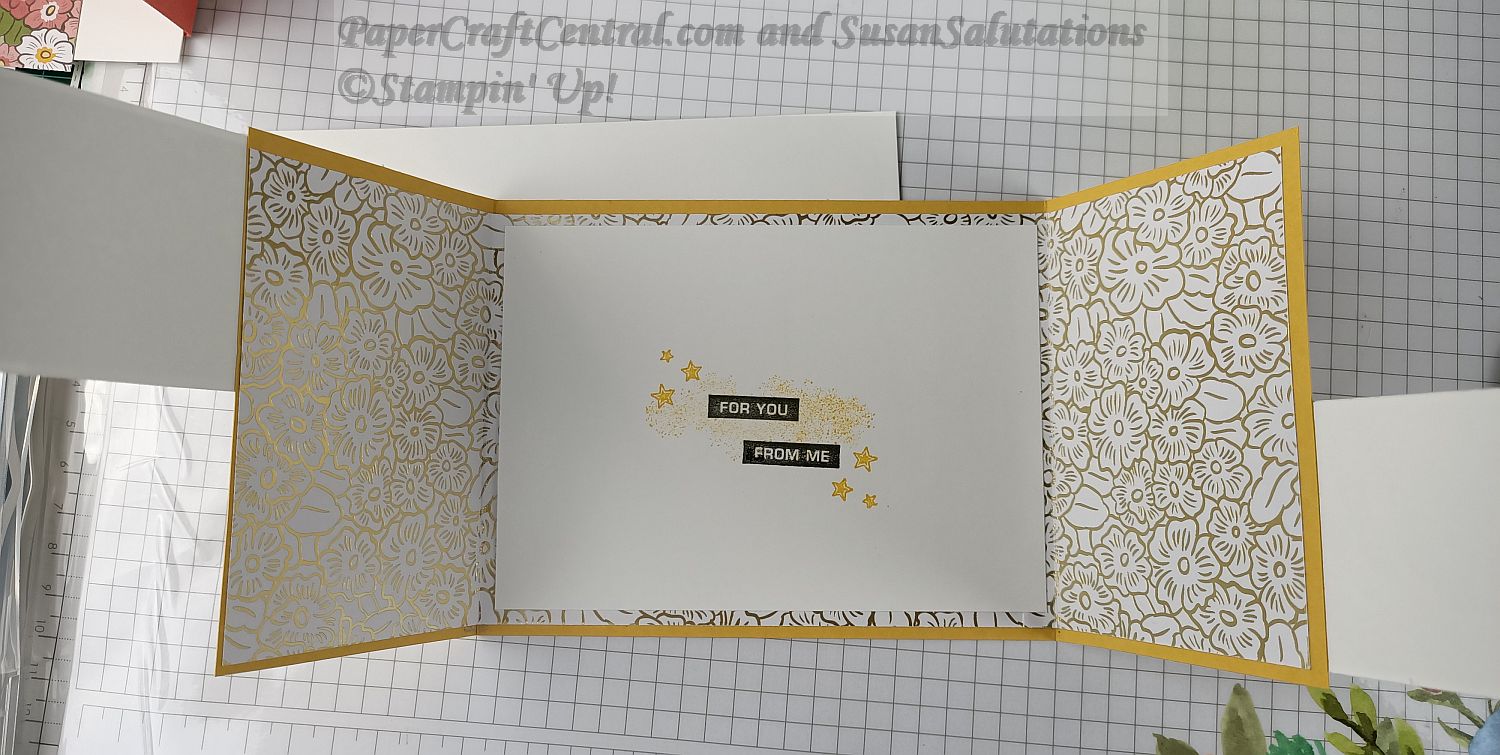
You make a gate fold card first.
Then you make the panels to go on the gate folds. They need to meet in the middle. I decorated mine with DSP.
Then you make the piece you are going to split in half. I started with an oval shape, then stamped and punched/cut out my Jar of Flowers. I cut the assembled focal image in half before gluing it all to the card panels.
Just take care to line up the split image so it meets perfectly when the card is closed.
These cards were also inspired from a crafter who posted on Flowerbug Inkspot.
Here's another Split Card using the Under My Umbrella stamp set and punch.
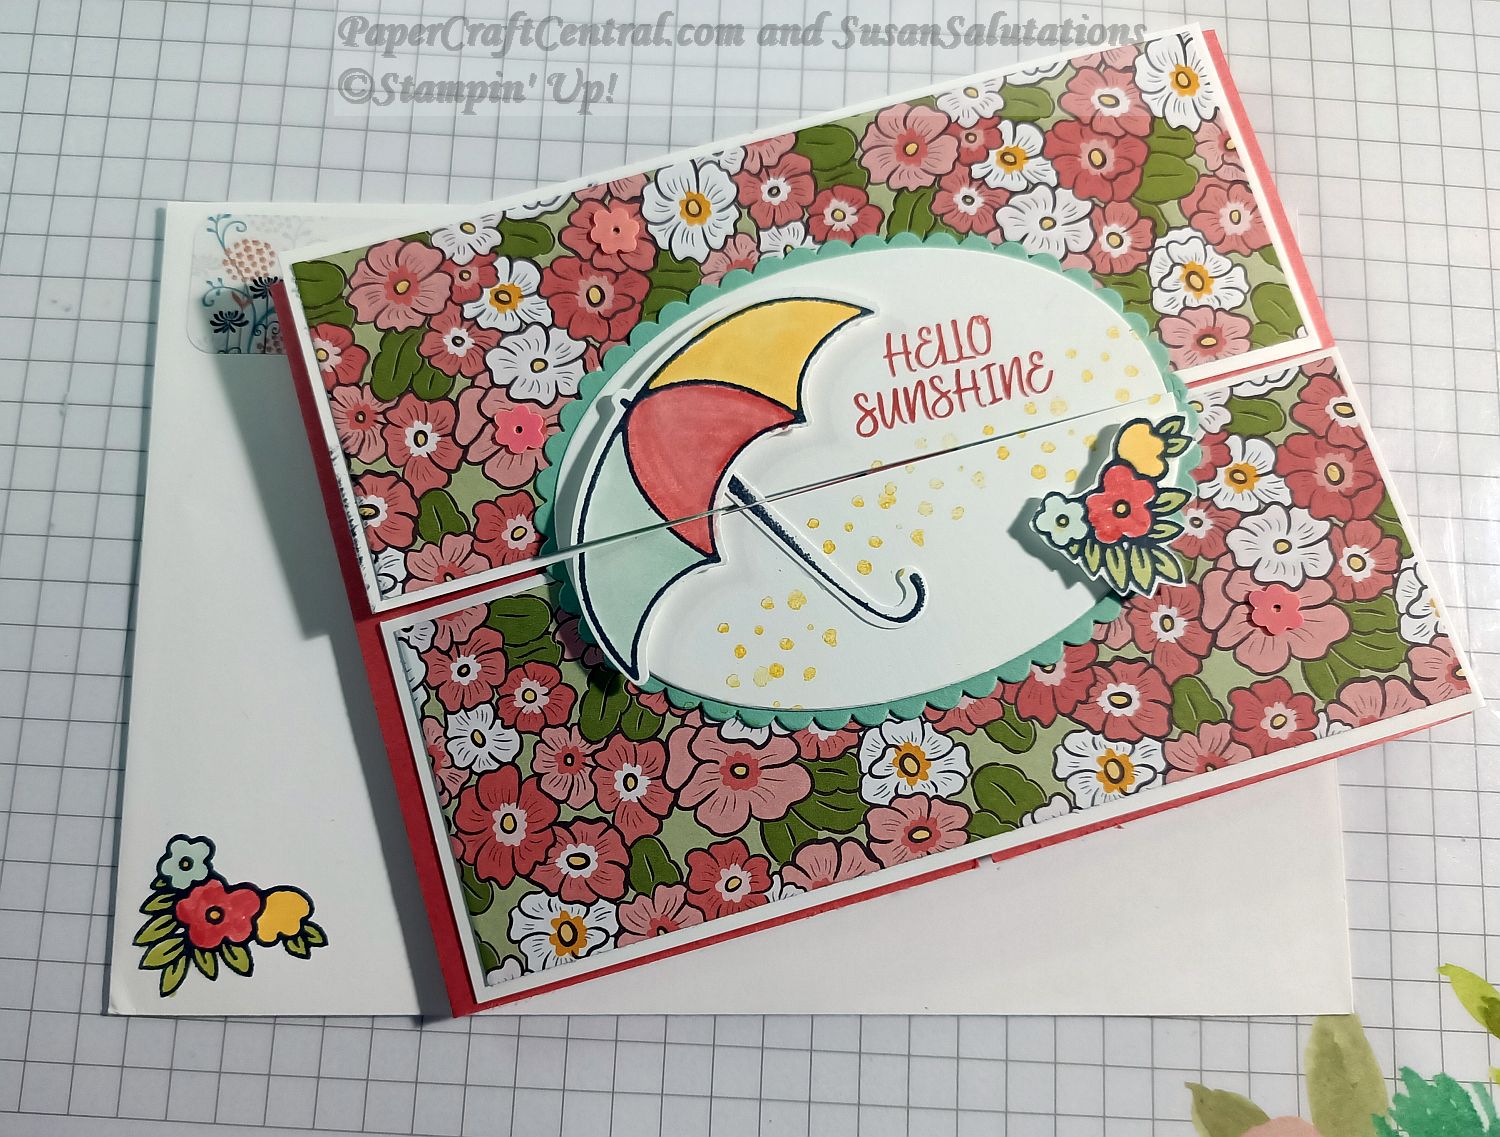
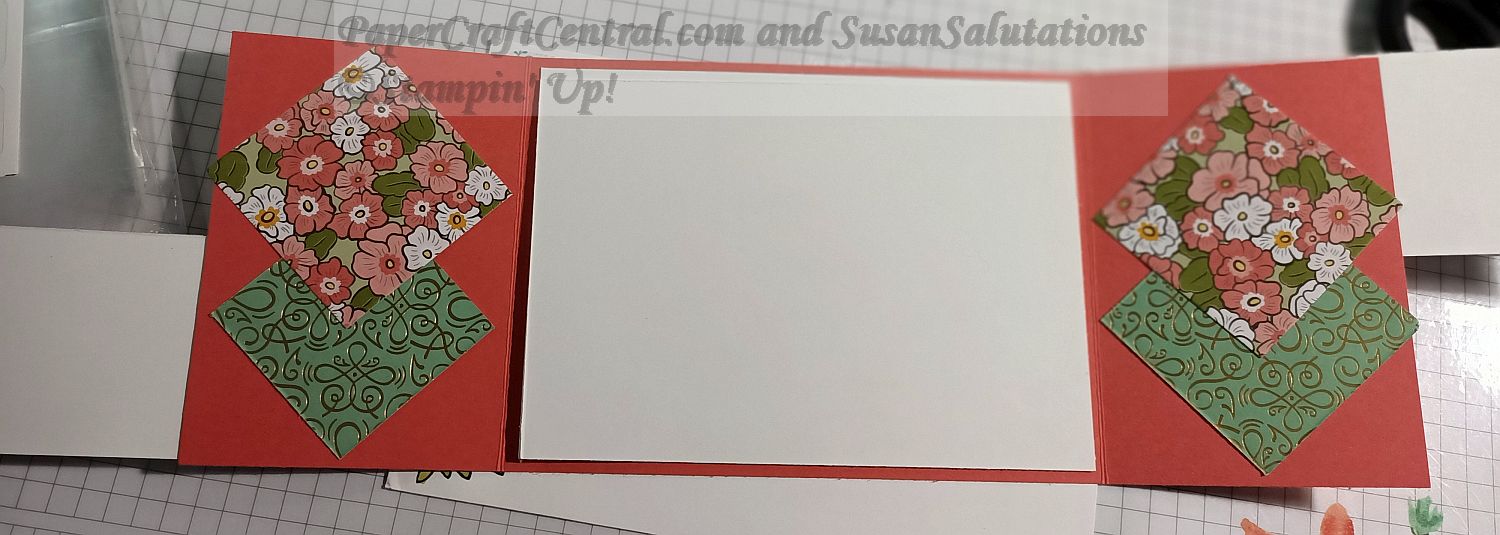
I made lots of other cards this month, but most of them I used now retired products. This was an exciting time of the year when we got a brand new catalogue from Stampin' Up! and I just loved playing with all the new products.
Here are a few more June card ideas in 2020 for you, bearing in mind some of the products may no longer be available. Maybe they will still spark an idea for you to make some cards of your own:
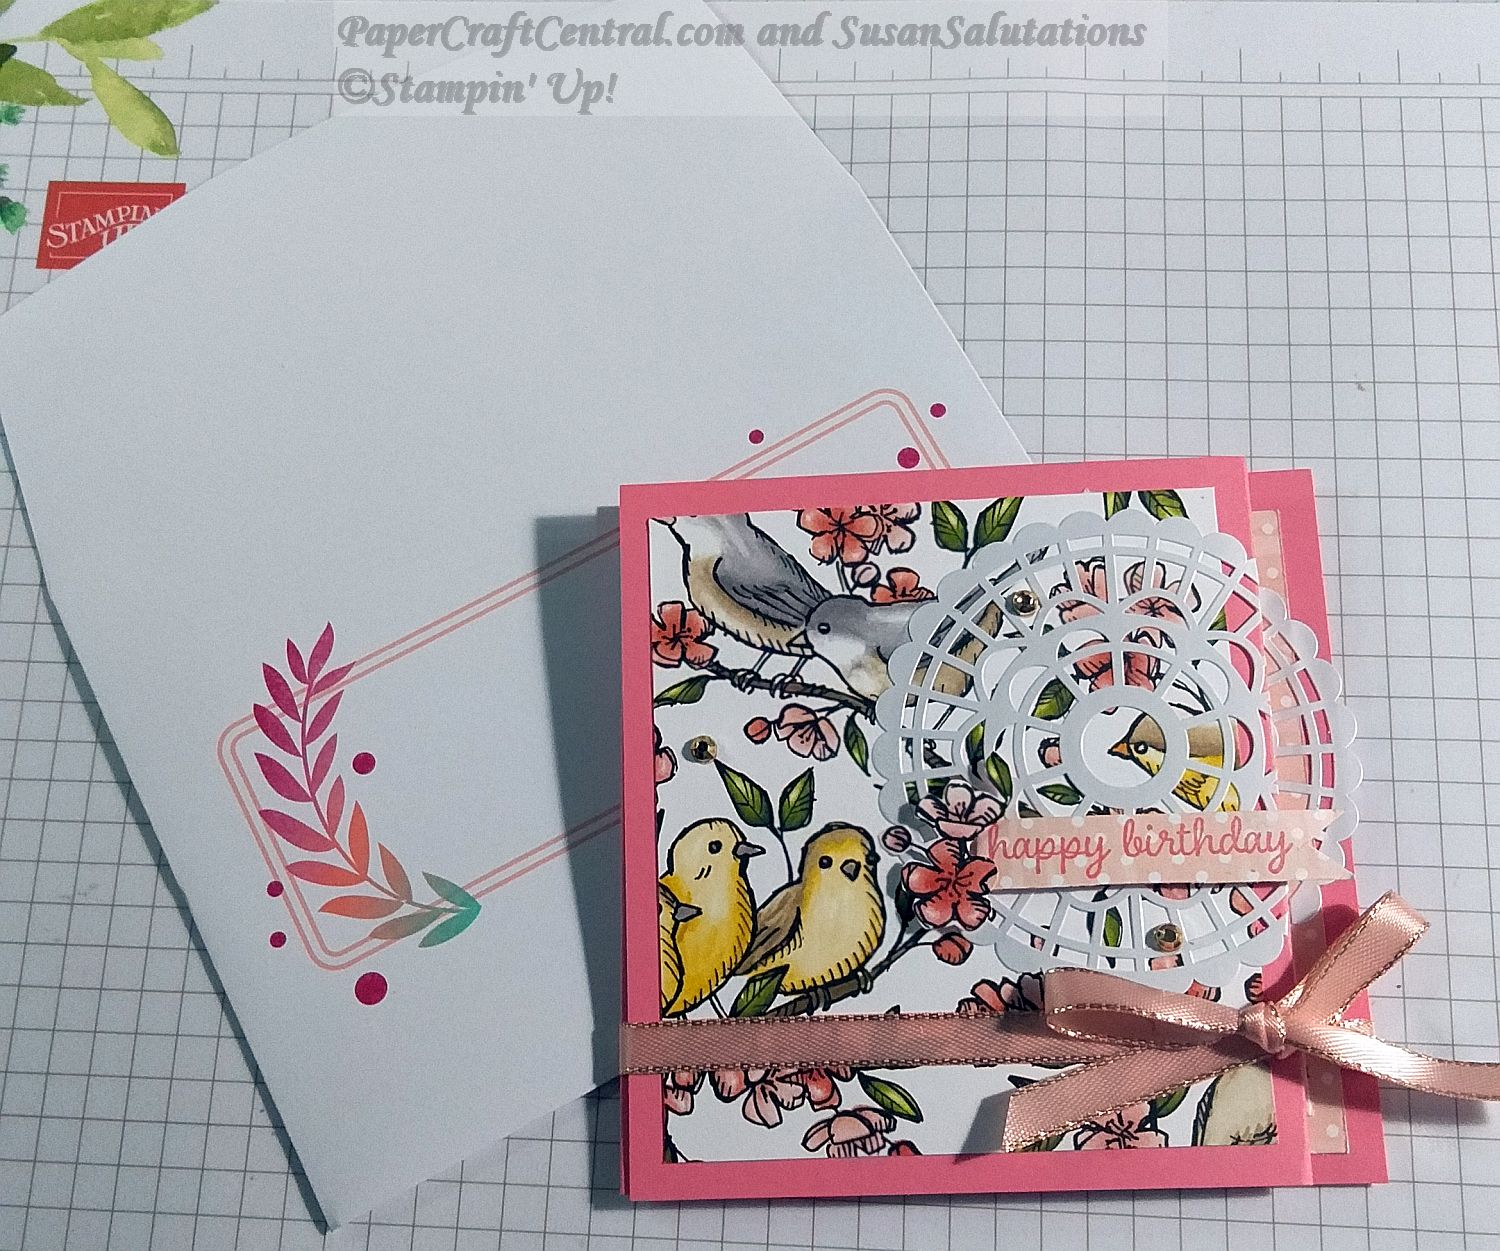
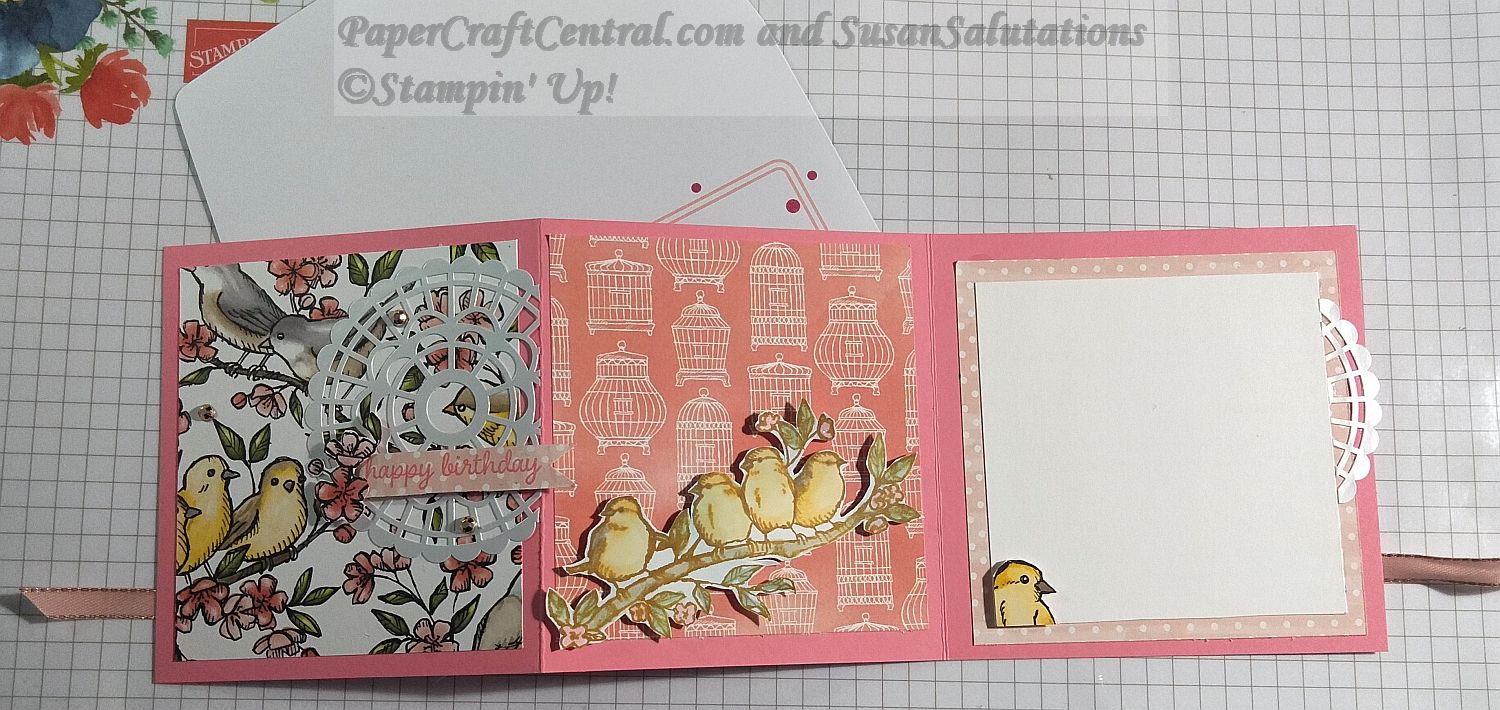
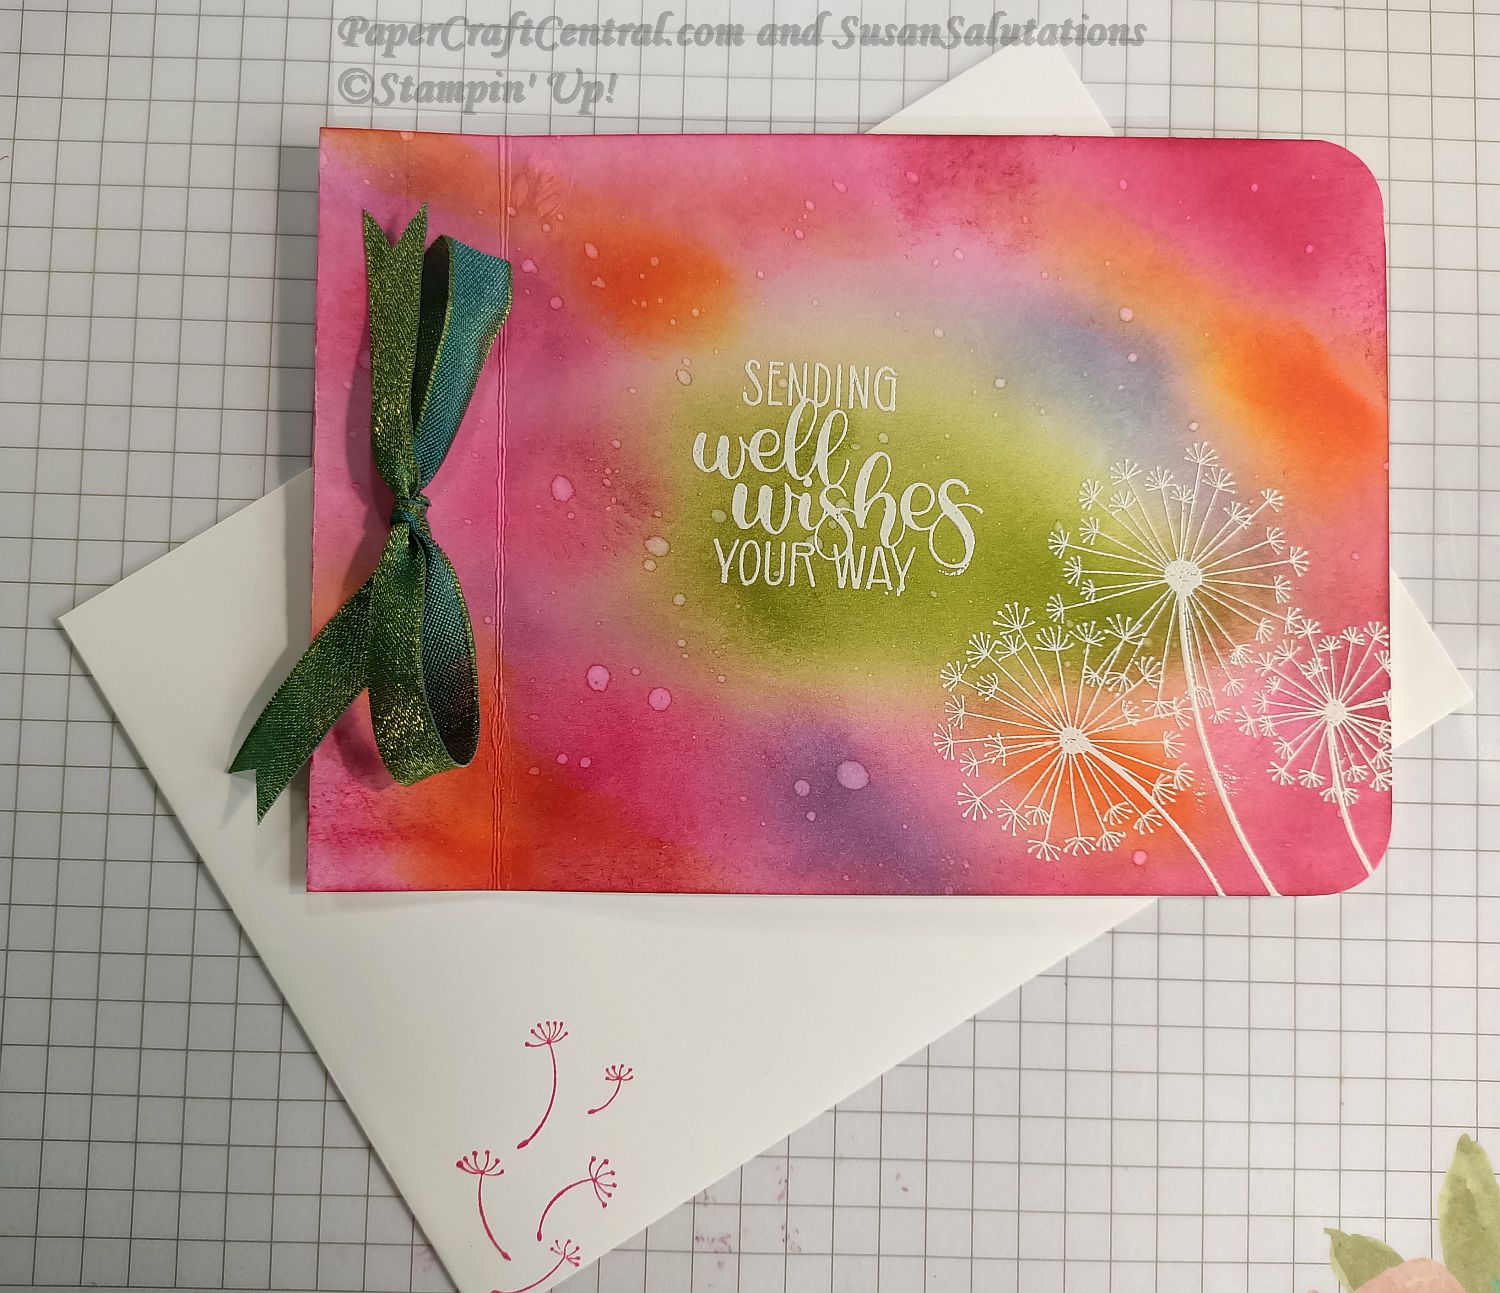
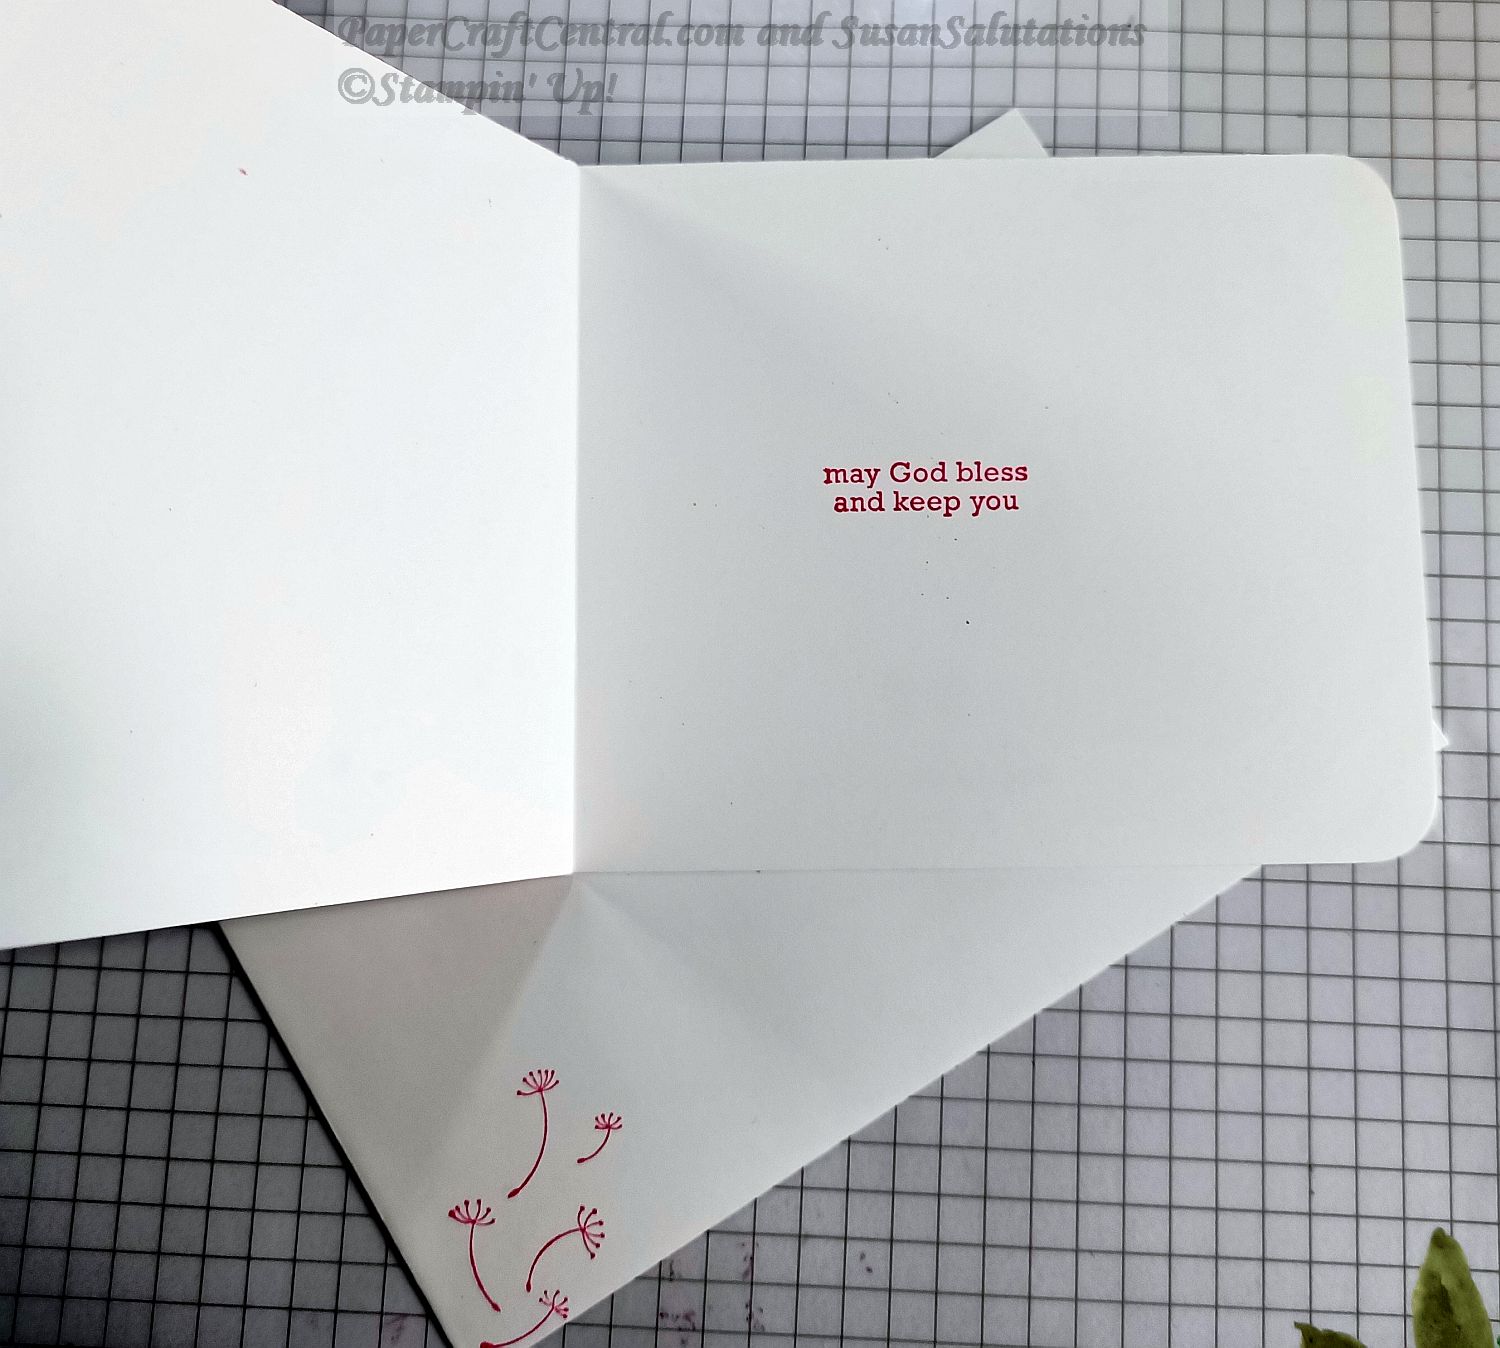
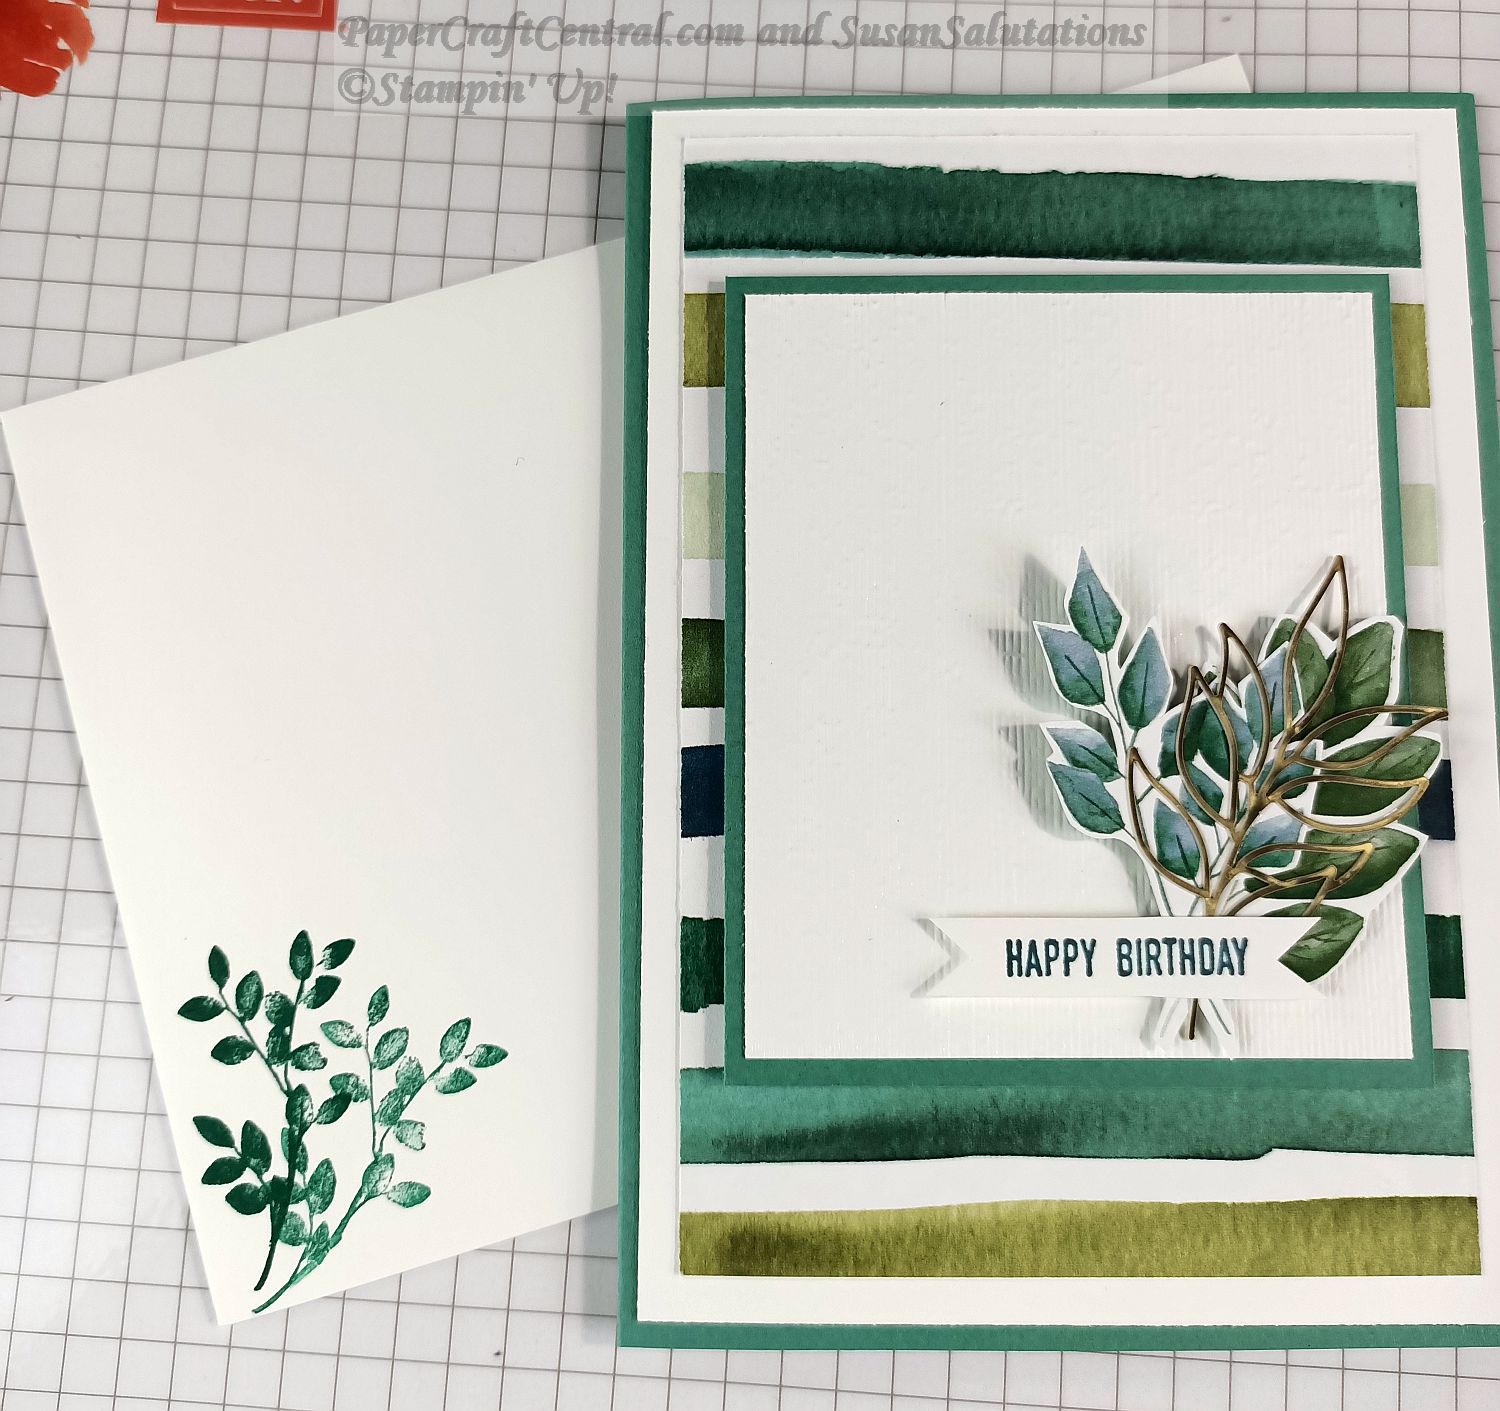
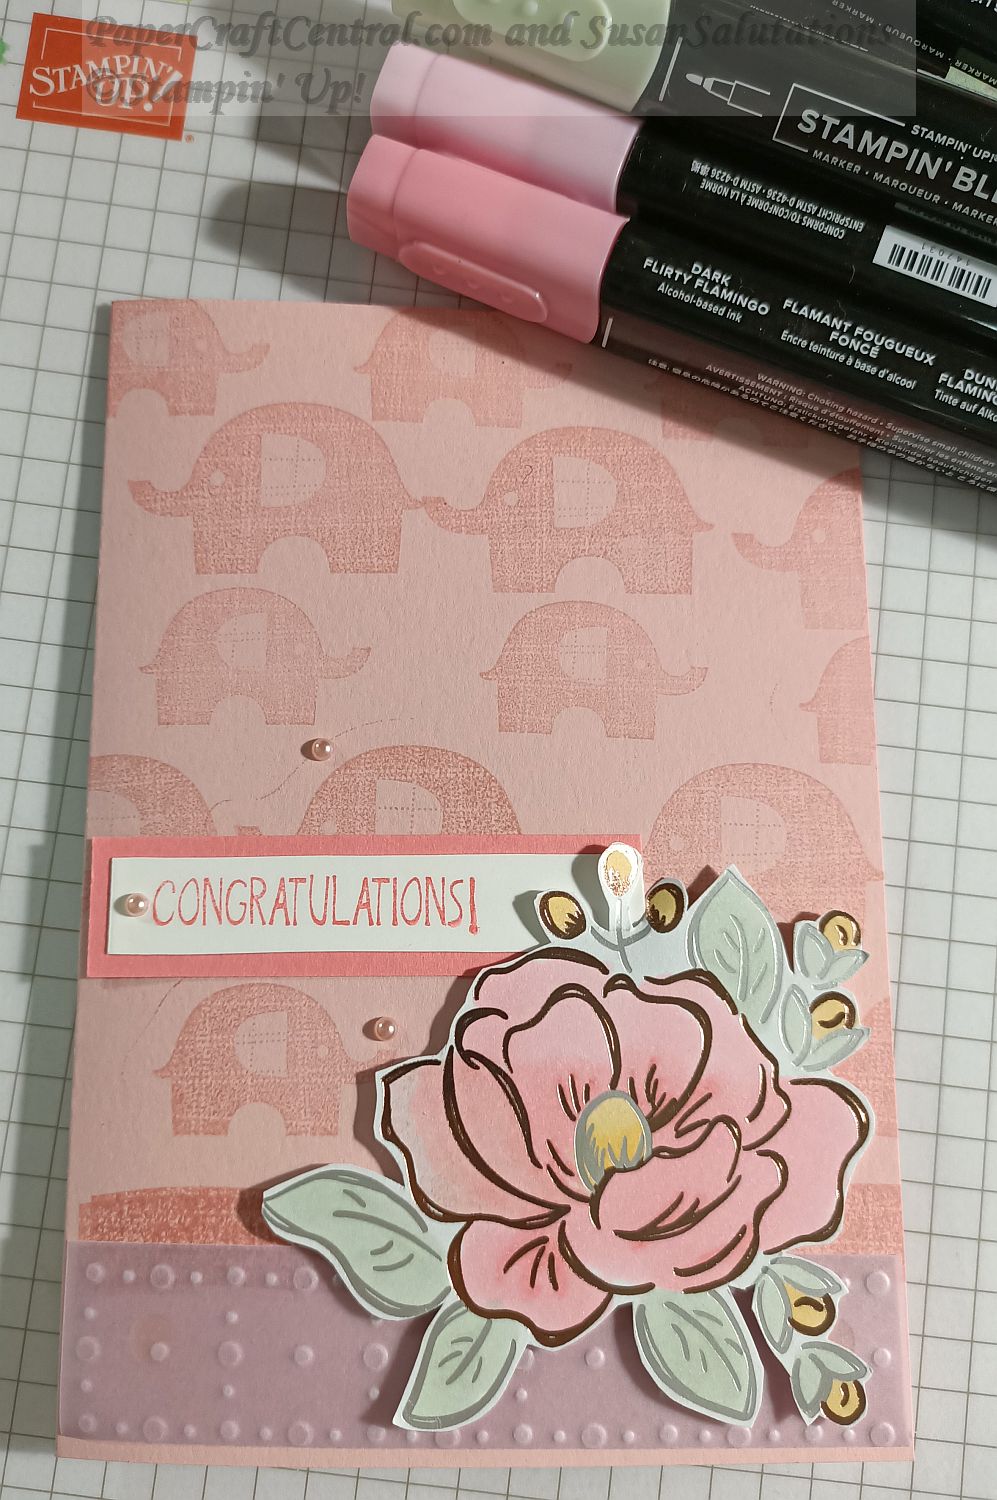
Project Ideas, May 2020
The card ideas I had for you this month were mostly all born during Zoom meetings I had been having with other crafters.
It had been great to socialise and swap card ideas in 2020 with others via Zoom.
If you haven't tried it yet, it might just be something that will help when you cannot get out and about as normal and want to craft safely with others.
The weather had cooled down a little in Australia so of course I love playing with paper even more. Hot weather discourages me sometimes! Lol! Nothing like your cardstock sticking to your hot hand...Lol!
Enough of that. Here's some more card ideas from 2020 for you.
Beautiful Friendship
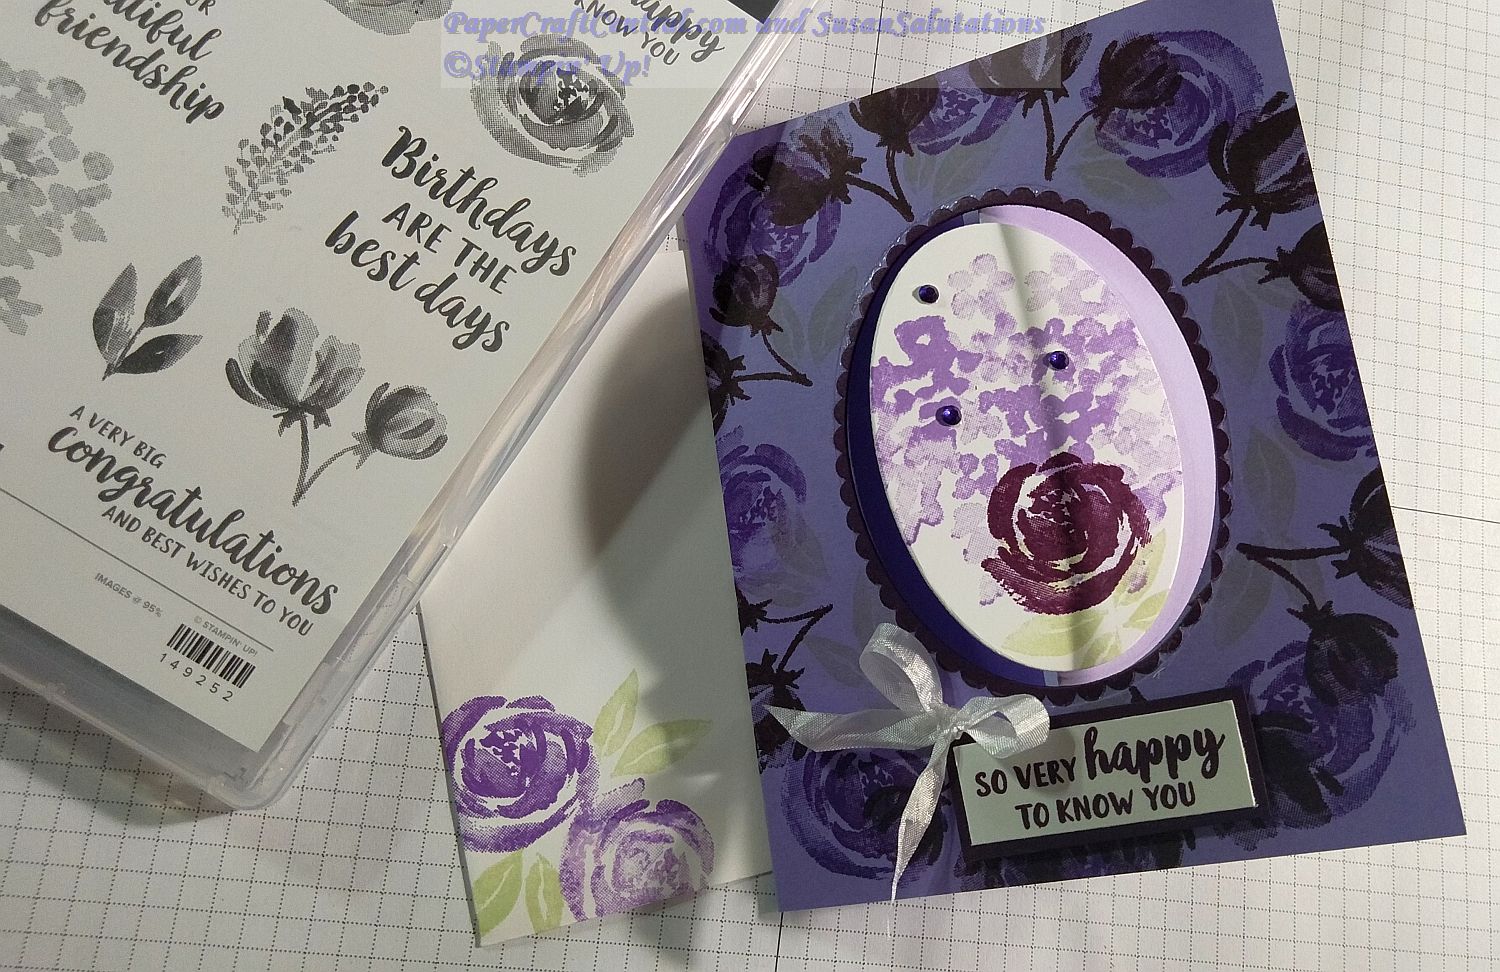
The Beautiful Friendship stamp set inspired me for quite a few card ideas. This one was my favourite for May though. It's a pop out swing card and when you open it, it has a surprise!
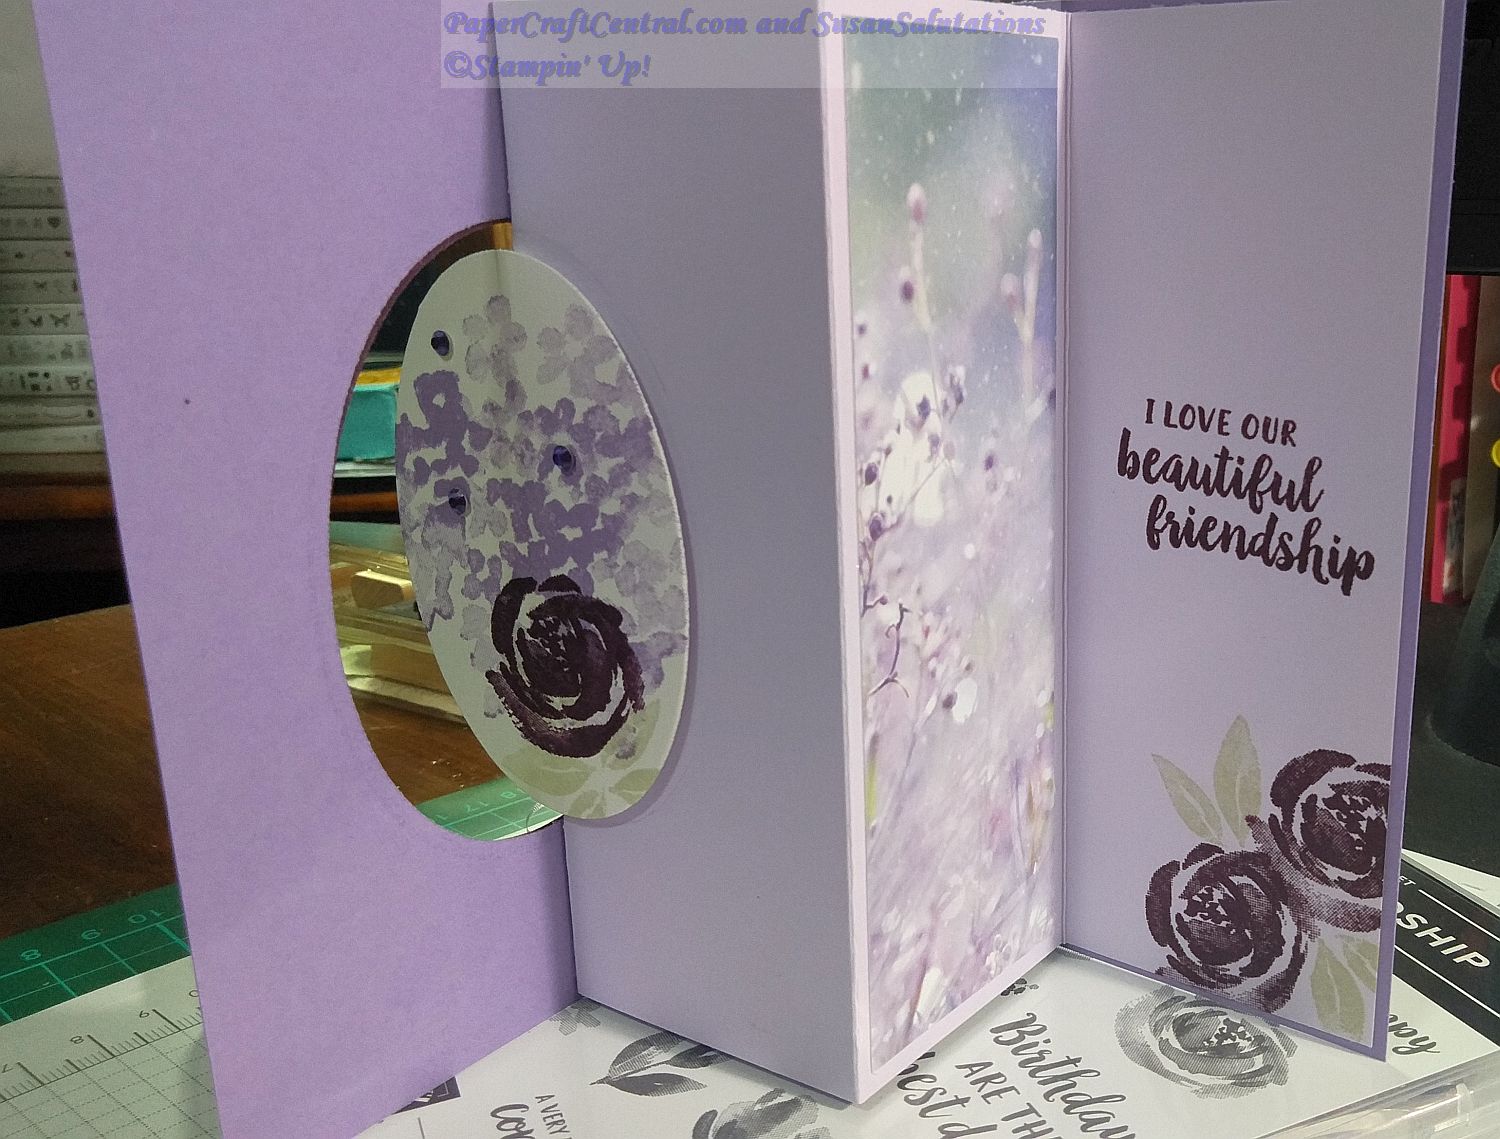
The card is really made up of two main pieces of cardstock.
Start with a normal card base, folded in half, portrait orientation.
Cut an oval shape in the front of the card with a die. Cut the next size down oval shape from Whisper White cardstock and stamp/decorate it.
Stamp and decorate the front of the card.
Make a smaller Z fold card for inside, making sure the fold in the middle is a mountain fold. I added a tab to the front edge of the inner card so I could glue it to my card front.
Stamp and decorate the inside card while it is able to lay flat.
Glue the inner card to the card base. Close the card.
Position your decorated oval piece on the inner card so it fits perfectly in the card front oval shape, and glue it there.
You're done!
Daisy Lane Bundle Cards
I love daisies. I loved that this stamp set allowed you to stamp and punch daisies with no limits.
I loved these little card ideas in 2020 too as they allow the daisies to shine.
Here is the card done in orange tones with the Tropical dsp (Designer Series Paper) behind them.
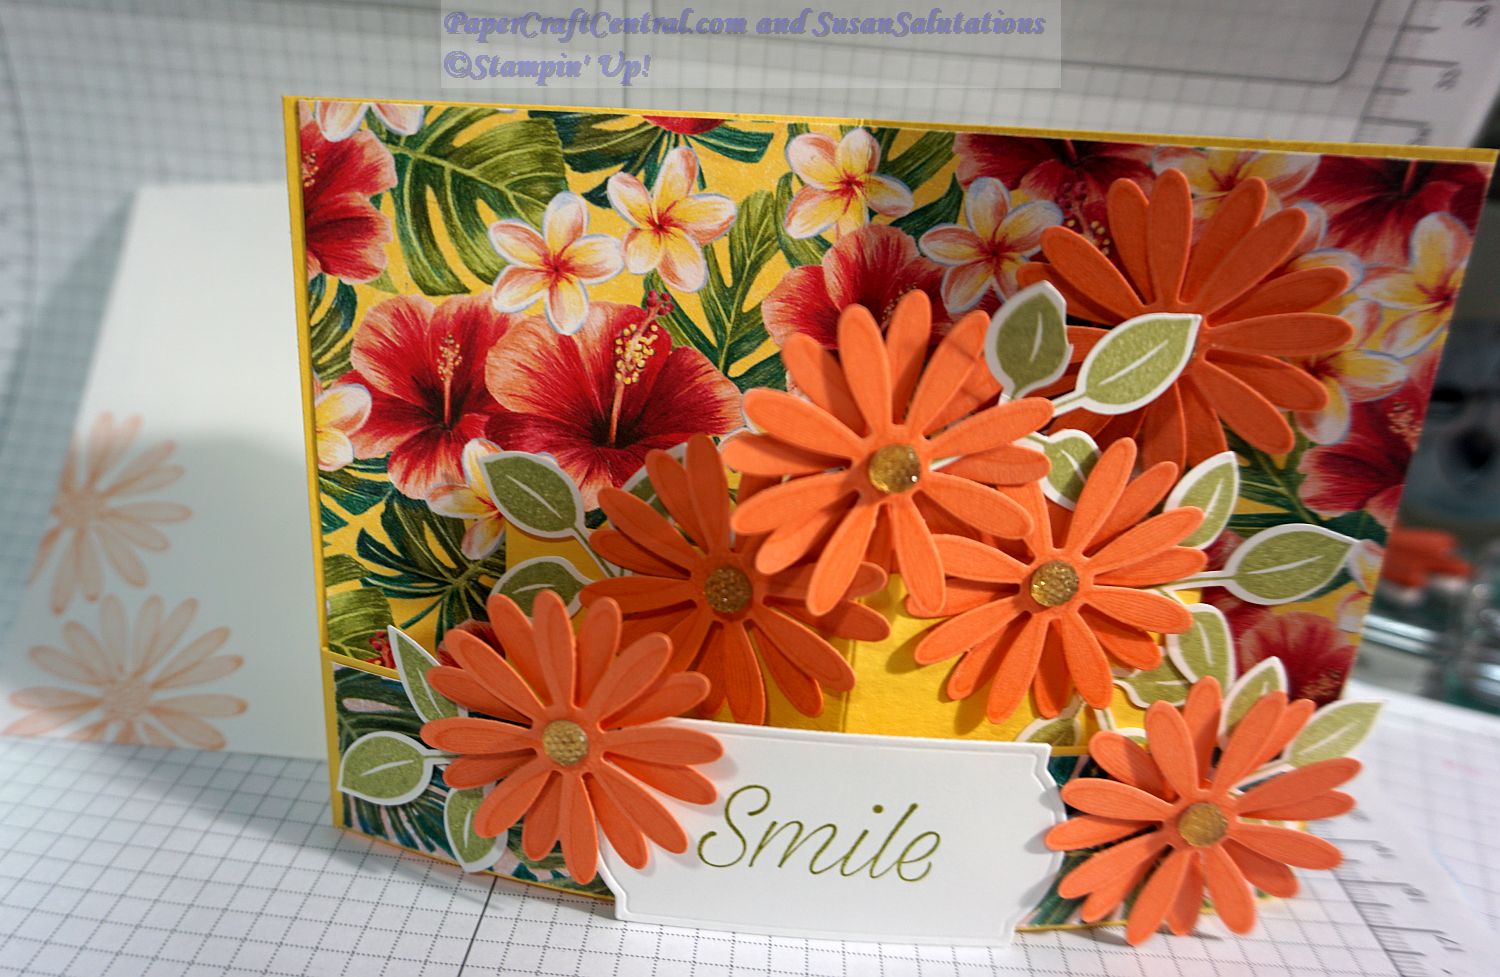
And here is the same design with yellow tones.
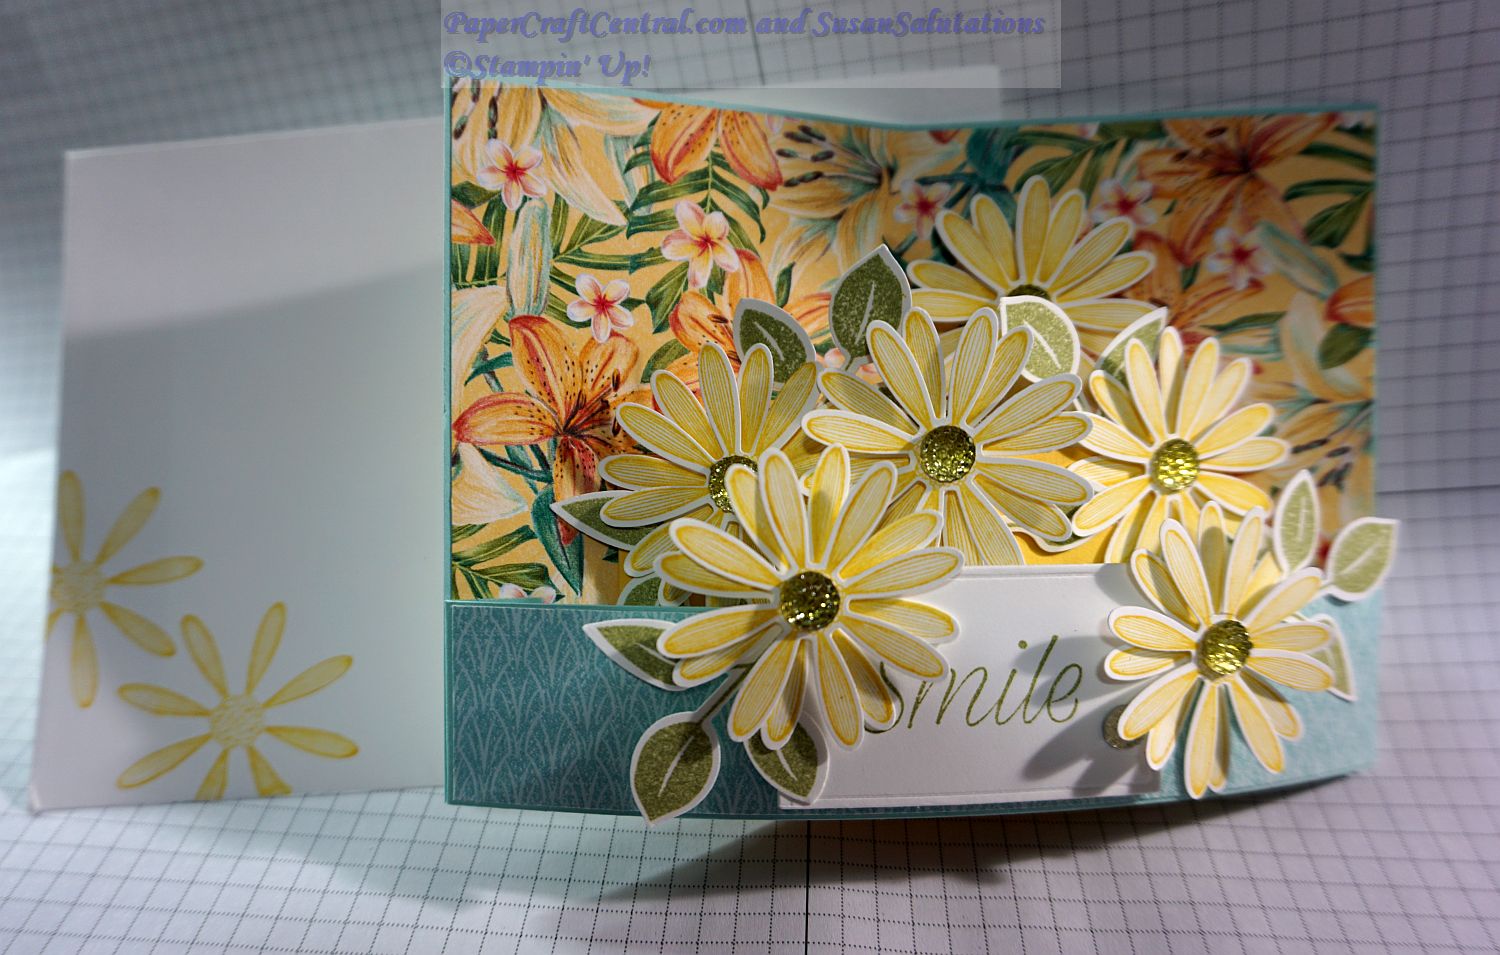
You start with a single piece of card stock, 10.5cm x 15cm. It should fit in your envelope easily. Score the piece down the middle, landscape orientation. Be sure this fold is a valley fold.
Decorate the front of the card stock with dsp cut a little bit smaller than your base. Score it lightly down the middle, landscape orientation, and adhere it to the cardstock. It should also be a valley fold.
Cut another piece of coordinating cardstock to be the 'vase' for your flowers. I made mine about 5cm high x 13cm long.
I scored either end of the long piece at 1cm and folded the tabs under. I scored the middle of the piece and made sure the fold was a mountain fold.
It is the So Saffron piece you can see in this picture. Stamp and punch daisies and leaves and adhere them to the vase, and make a few more flowers and leaves for the next step.
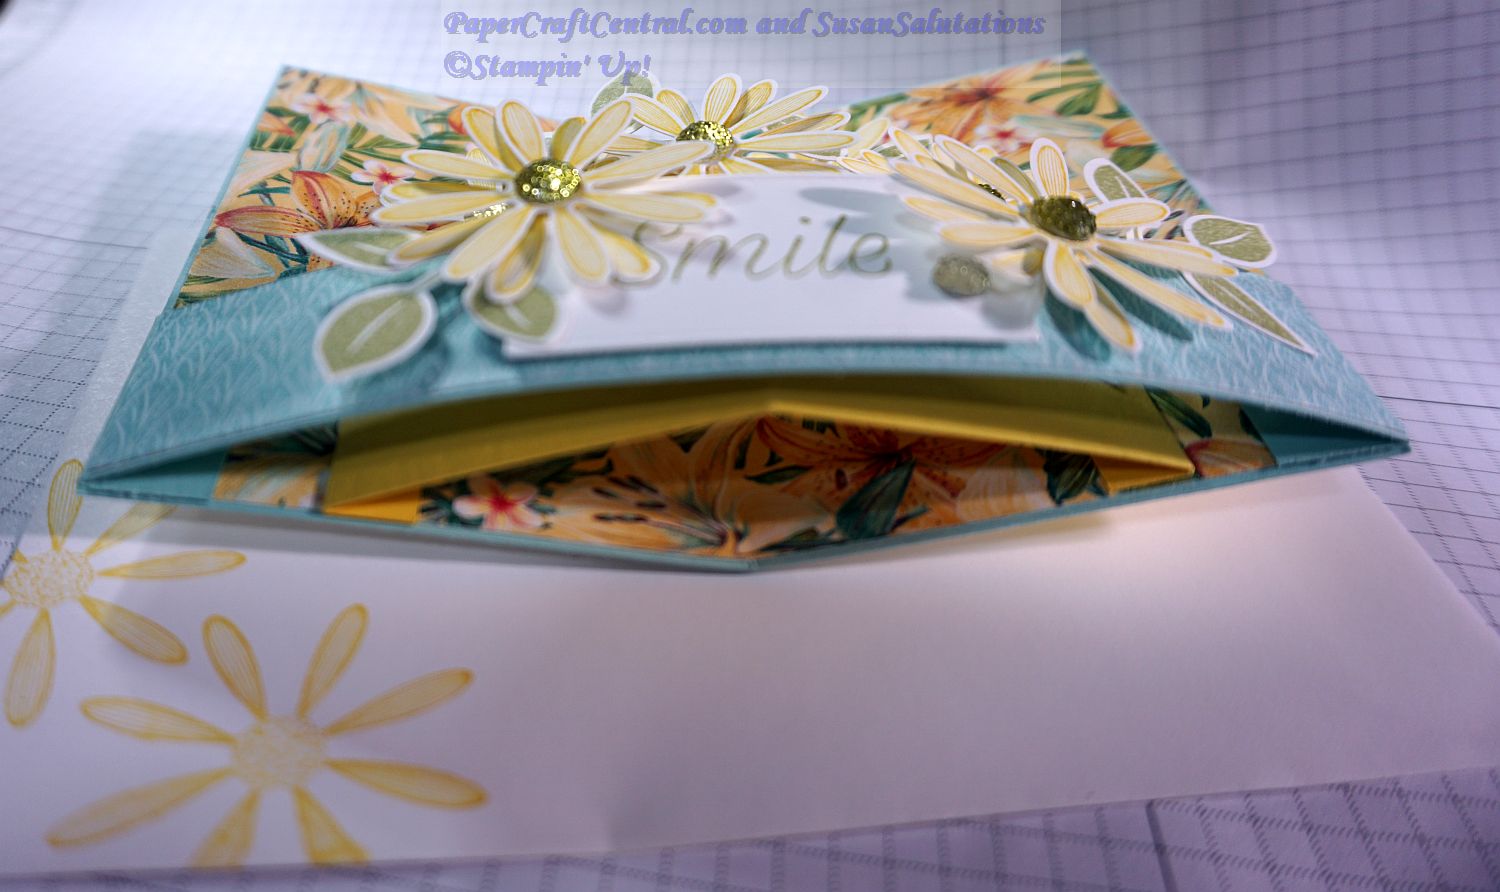
Then I cut a piece of coordinating cardstock (Balmy Blue) that was 3cm high by 157cm long. I scored each short end at 1cm and folded the tabs under.
I adhered this strip to the front of the card, making sure the card itself folded inward, the vase folded outward, and this allows the strip to bow gently out.
Add a piece of cardstock with your sentiment stamped on it to the bowed front, and finish off with more stamped and punched flowers. And bling, of course. I can never make cards without bling.
Now your card should be able to lie flat for posting, and when open it will stand up.
I added another piece of Whisper White to the back of my card with a sentiment, and I could write my message on it there too.
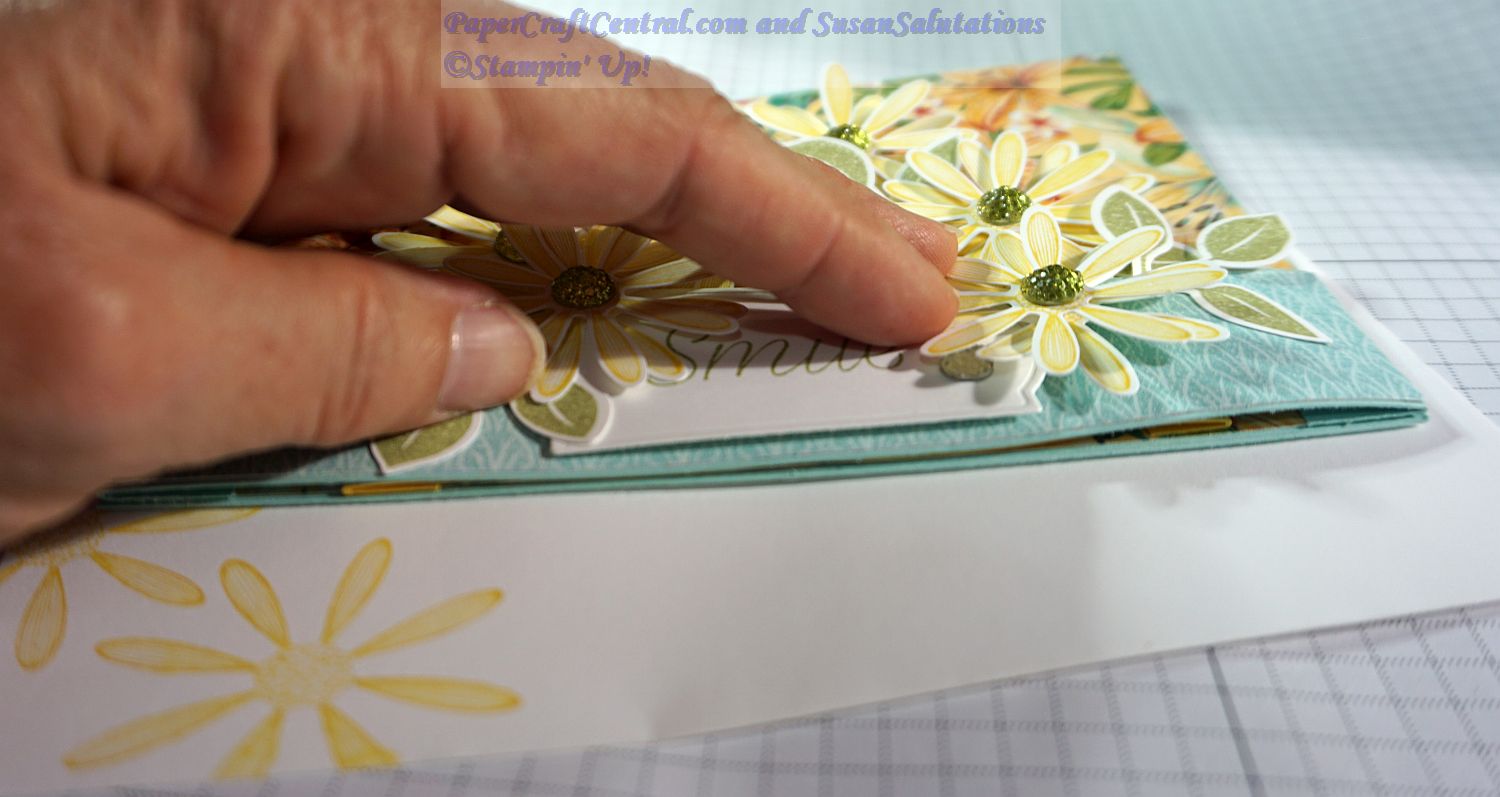
Ready for the next card ideas?
To a Wild Rose
These layered cards are beautiful in person, And they are really easy to make! I chose the To a Wild Rose stamp set to make these cards.
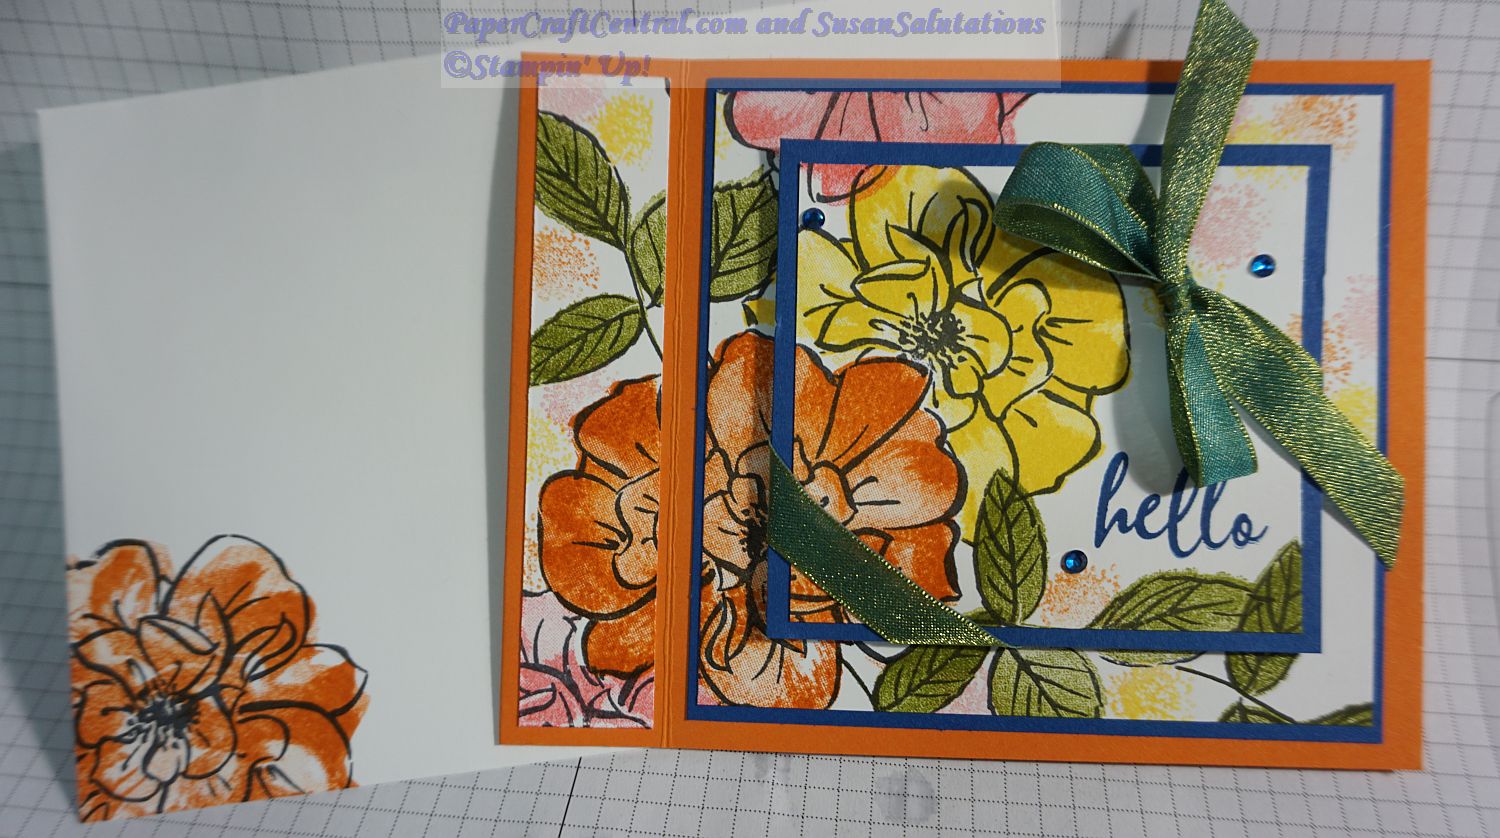
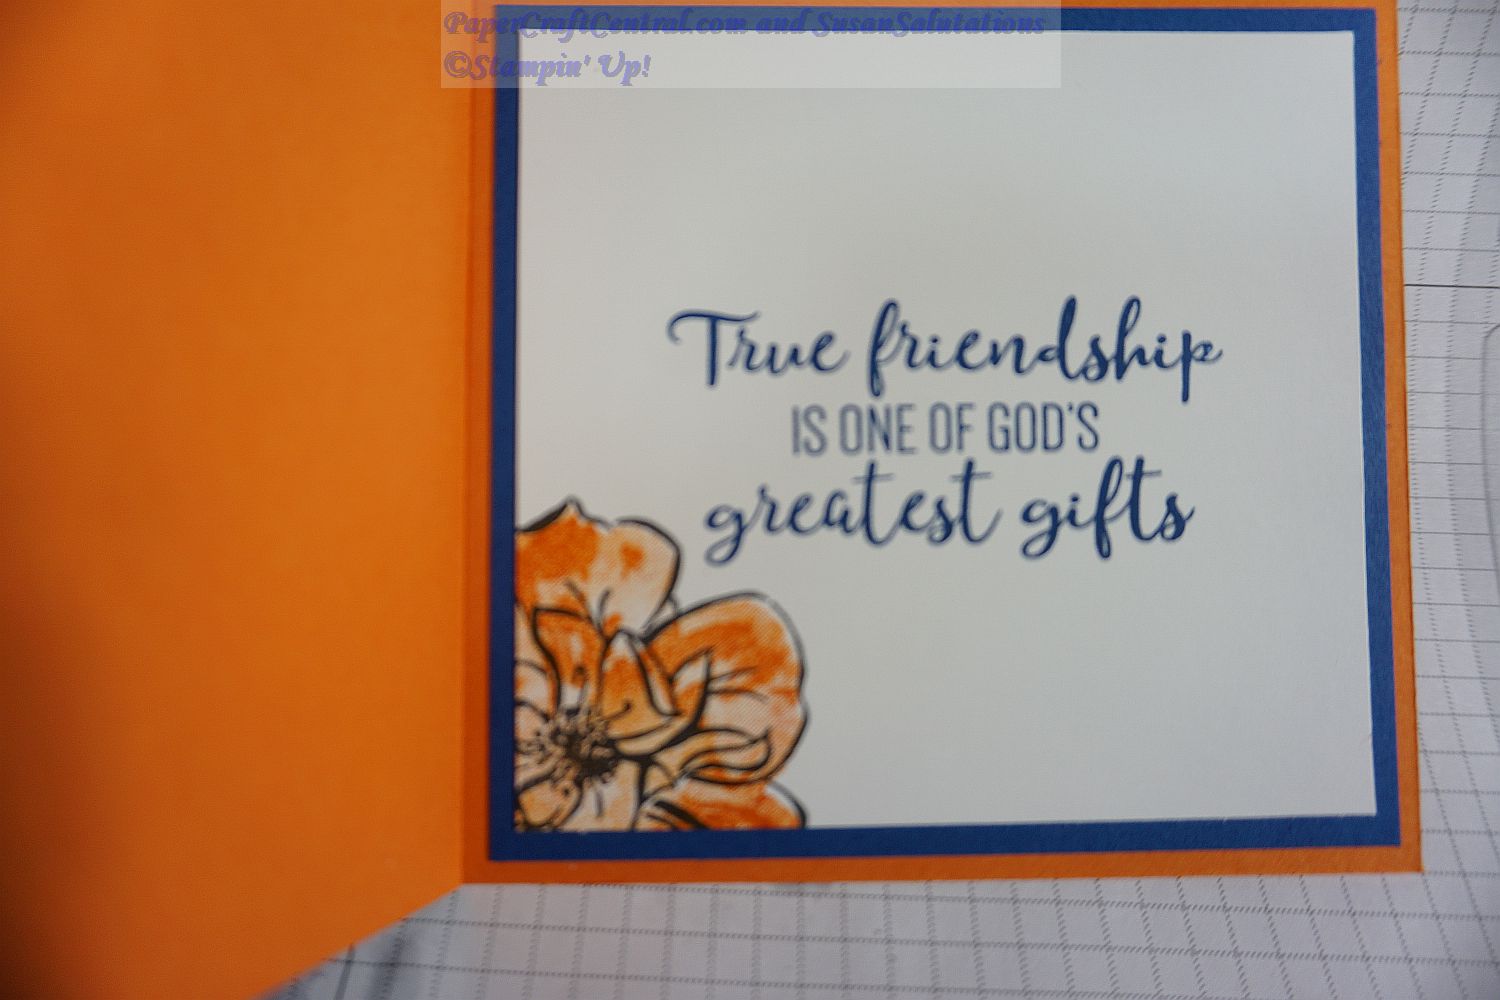
This is the layered inside of the card. I just love sending cards with this sentiment to special friends.
You start with a card base that is 10.5cm high and 29.5cm long. Score it in the middle landscape wise and fold it in half so it opens like a little book. I chose Pumpkin Pie as my card base colour.
Score the front piece 2cm from the centre score line. Fold the front flap out, in a valley fold.
Adhere the scores piece to the back of your card base so it is like a pinched spine.
Now take two layered squares of Whisper White cardstock and a piece that will fit on the spine of your card front. Layer the two squares together, and anchor the strip to the left of the squares so you can stamp your images right across all three pieces at once. Use washi tape to keep them in place.
Once you have finished stamping and colouring your images, add mats in a coordinating colour to the two stamped pieces of Whisper White. I chose Pacific Point for mine.
Then I added Stampin' Dimensionals to the top layer and adhered it over the second square, matching up the stamped flowers.
Glue the stamped strip to the pinched spine.
Layer and stamp your inner pieces as shown in the picture above.
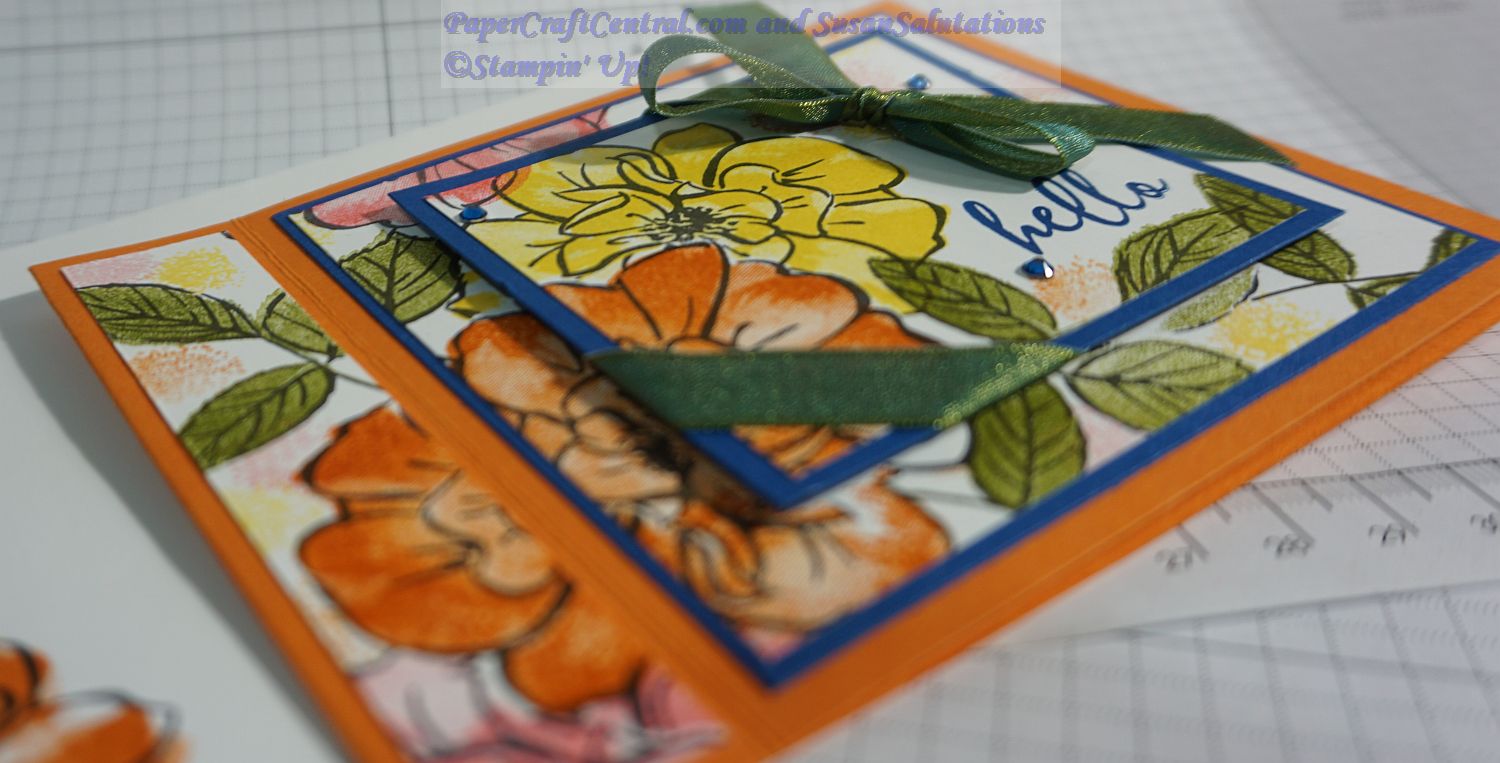
I added some Pretty Peacock/Old Olive multi-coloured ribbon to my top layer on the front of the card, and added a little bling to finish it off, of course.
I hope you enjoyed this month's card ideas.
Project Ideas, April 2020
How were you doing with being socially isolated due to COVID-19?
I was finding I had so many beautiful craft supplies to play with, I was never bored. I think crafters have that certain advantage, whether we are paper crafters, sewers, jewelry makers or other types of crafters. I moved between sewing and paper crafting, when I was not learning how to use Zoom to visit with my crafting friends!
However you spent this time at home, I hope you enjoyed crafting awhile.
Maybe sharing your craft with others helped brighten their days too.
Let me know if you have any card making ideas that cheered someone's day? I was thinking of you all!
Now for some April card ideas.
Positive Thoughts Card Ideas
This pretty stamp set was a Sale-A-Brations stamp set with coordinating dies. I just didn't get to play with it till this month!
It is such a pretty stamp set and it is so easy to create with it.
This time, I looked for the stamp set in the Seasonal catalogue and CASEd (Copied and shared) a project Stampin' Up! had made to adorn a pizza box.
I turned it into a card and made a dozen of these to cheer some of our church family.
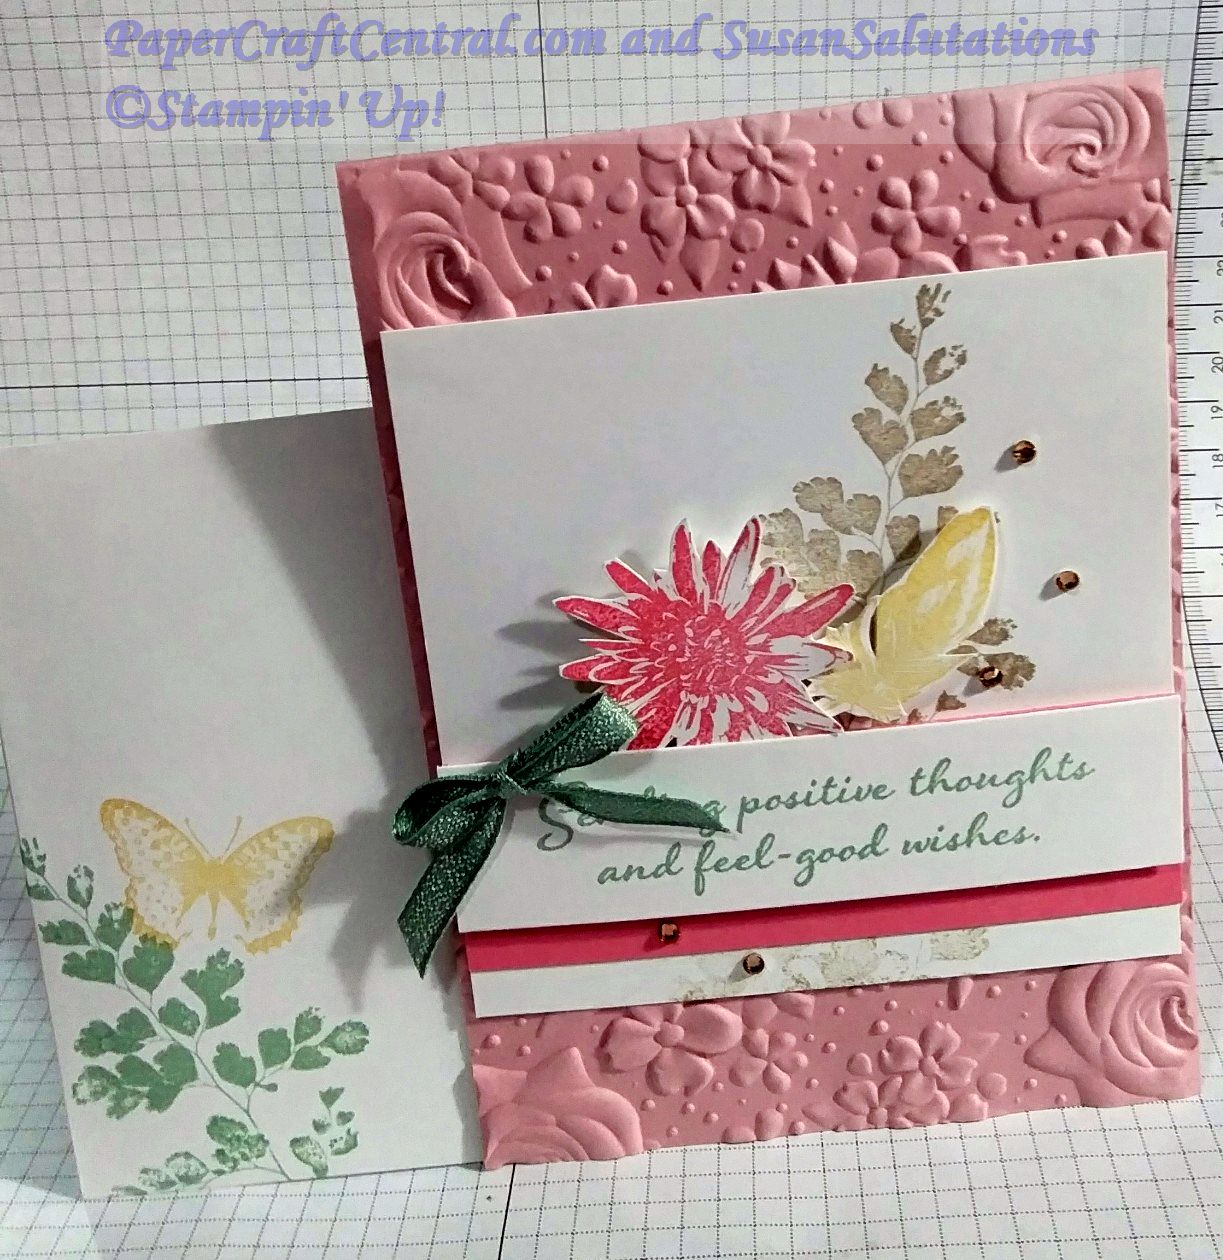
The change I made was to choose an ordinary sized card base which I embossed with the Country Floral 3D Embossing Folder.
I sprayed the card front with shimmer paint mixed with Isopropol Alcohol. It gave a subtle shimmer.
If you want to make this card at home, I used Blushing Bride, Whisper White and Flirty Flamingo cardstock, and the inks are Blushing Bride, Crumb Cake, Daffodil Delight and Mint Macaron.
Grace's Garden Card Ideas
I absolutely LOVED making the next card. It was a special friend's birthday and I knew that she loved purples, so I pulled out every purple in the Stampin' Up! range to make this project. The coordinating dies and stamps made it so much fun to make!
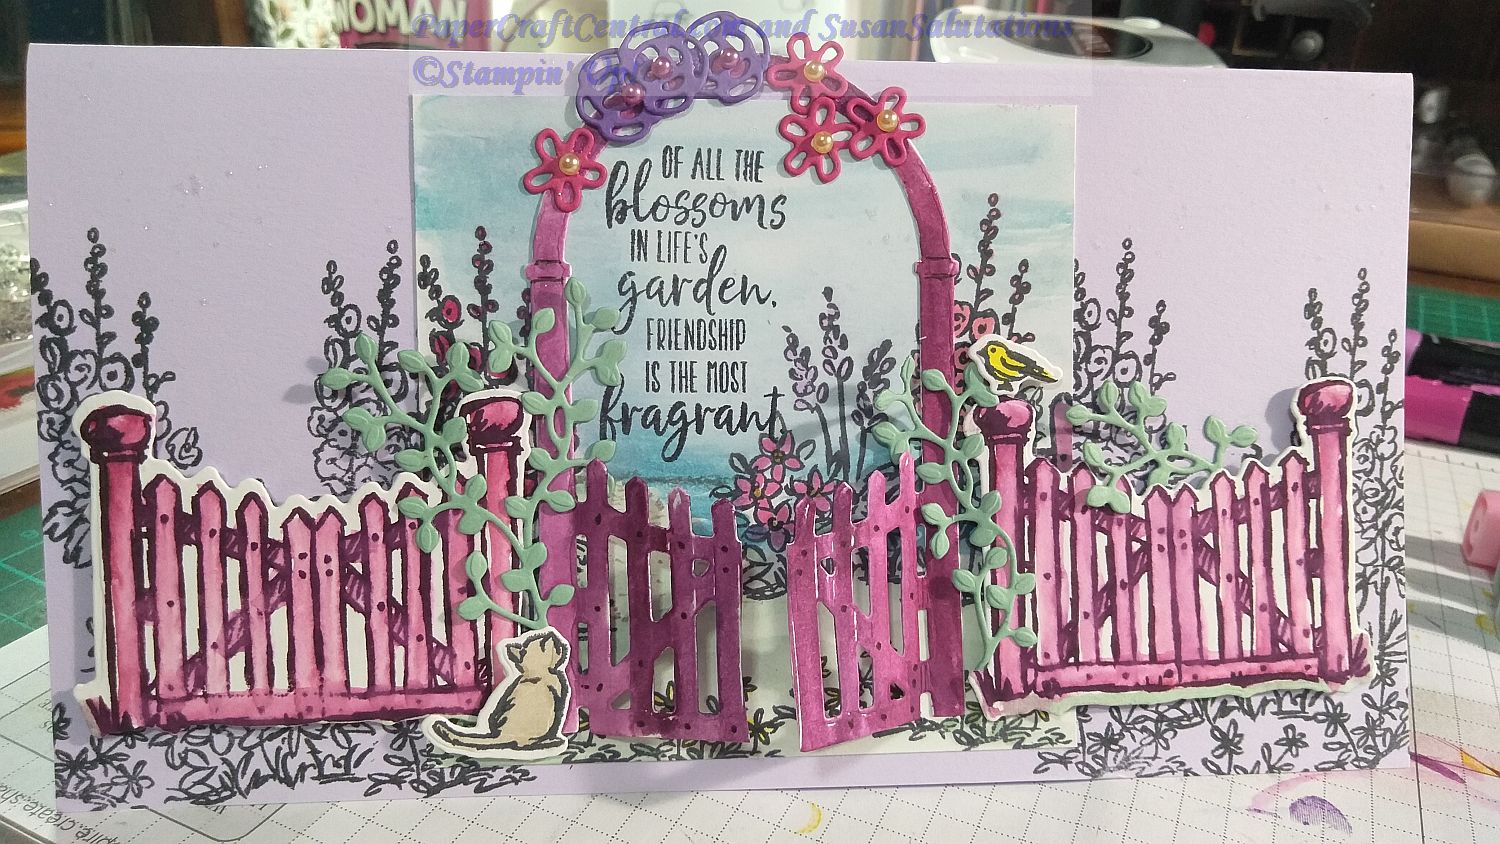
I decided to 'spotlight' the main images in the centre of this card. I chose Purple Posy cardstock for the base and stamped plain images on the front of the extra long landscape card with Black Memento ink.
Then I took a piece of Whisper White and stamped and coloured the garden I planted there with my stamps. I added a Balmy Blue sky and Mint Macaron grass with my aqua painter.
Then I stamped the fence and gate pieces partly in Blackberry Bliss, took my aqua painter and pulled the colour onto the fence posts. I added more details (nails etc) to the gate piece with a black Stampin' Write! marker.
The gate piece comes attached together, but I just snipped the gates apart. I coloured the back of the gates too as they are visible when someone looks at the open gated card.
I stamped the kitty and bird in Memento Black and coloured them (with Crumb Cake and Pineapple Punch Stampin' blends) , then set to cutting out all the fence pieces, animals and some leaves and flowers with the beautiful dies.
The die cut flowers were cut from Melon Mambo and Gorgeous Grape cardstock, and the trailing leaves from Mint Macaron cardstock.
I added some coloured pearls to the die cut flowers.
Then I highlighted stamped flowers with my Wink of Stella pen. I also spattered some Wink of Stella onto the sky right across the card front.
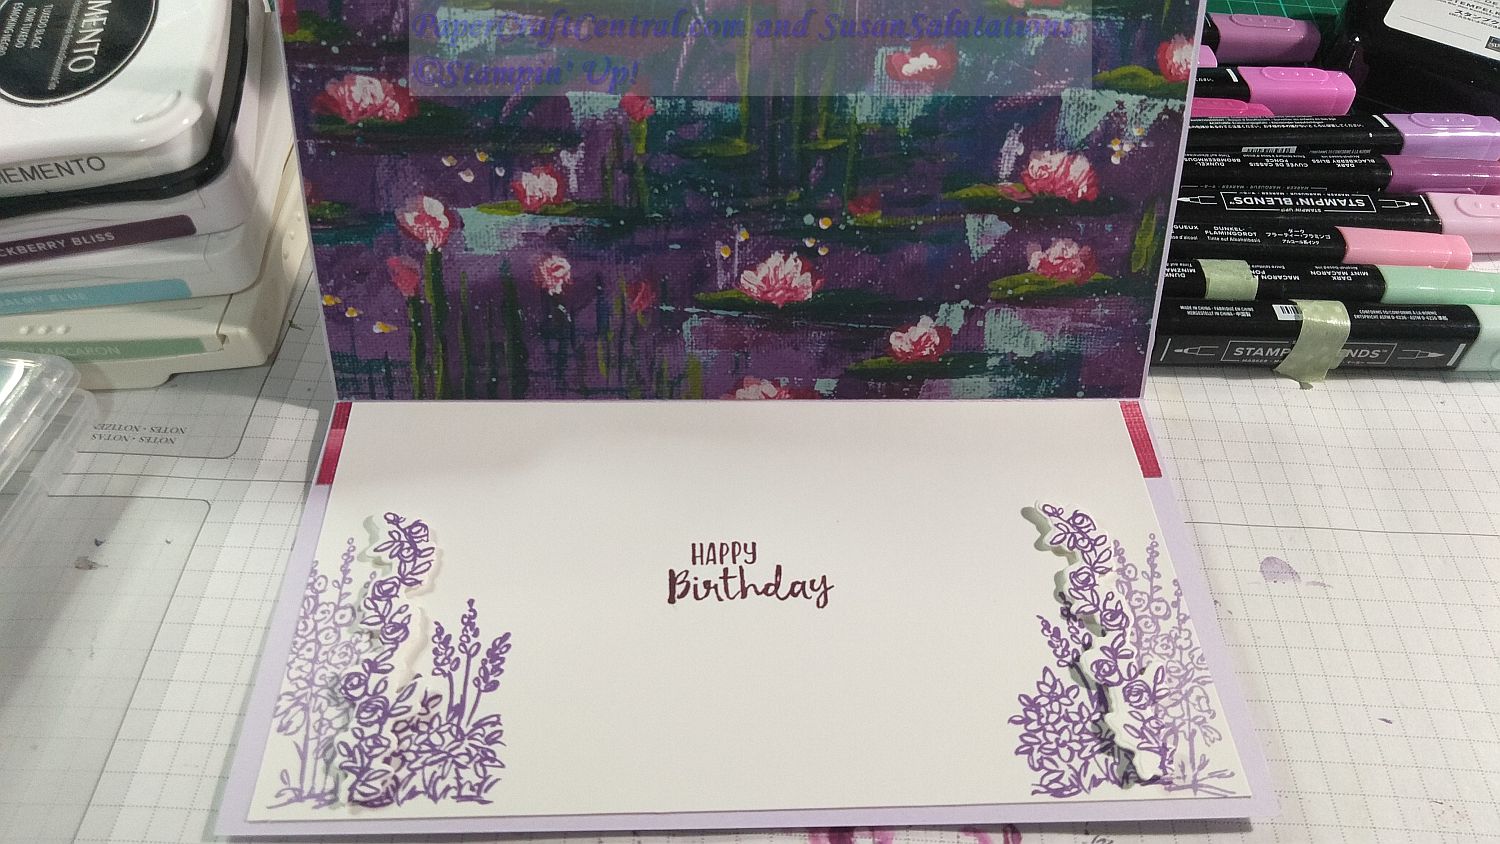
I had to make the inside of the card pretty and I wanted to strengthen it as well, so I added some of the beautiful Perrenial Essence designer series paper.
And the greeting was stamped in Blackberry Bliss, with Highland Heather and Gorgeous Grape flowers alongside. I popped some of the flowers up with a couple of die cut images.
I had some more card ideas in 2020 with this stamp set that I showed to you later in the year.
Bonanza Buddies Card Ideas
This card was fun to make!
I was thinking of my young grandson when I created this.
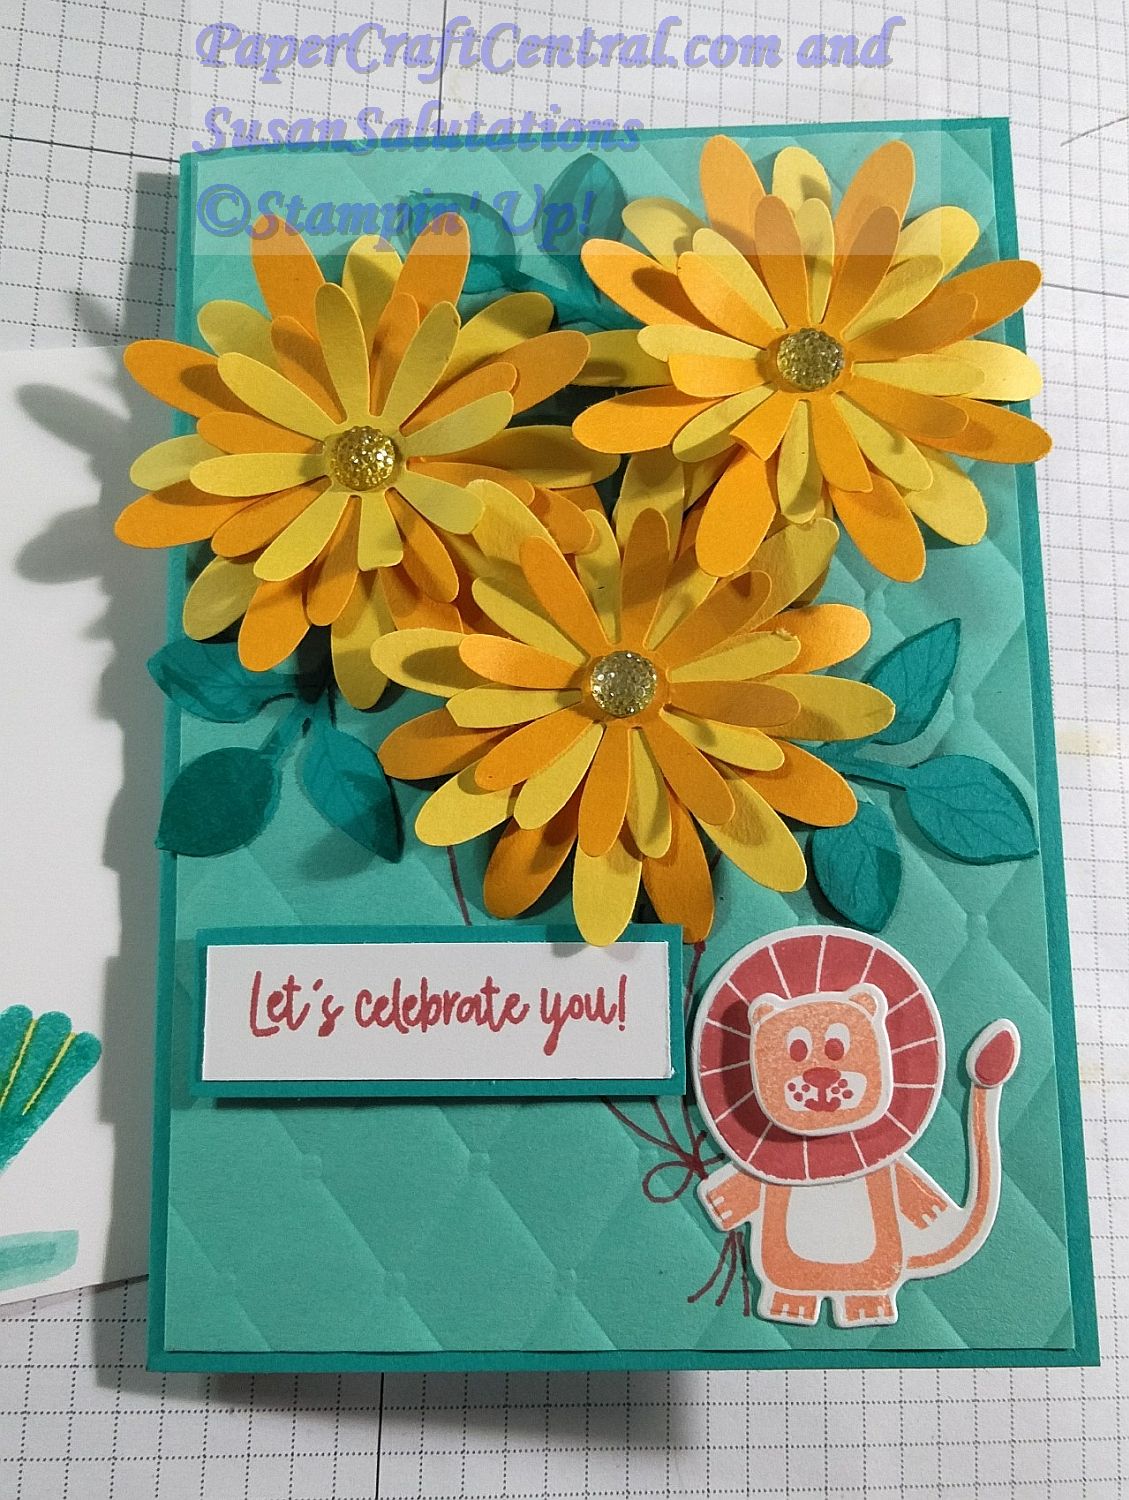
I combined the little lion image with some punched daisies out of Mango Melody and Daffodil Delight cardstock (there are two different sized daisy punches in my SusanSalutations store) and finished the flowers off with clear faceted gems that I coloured with Stampin' Blends in Daffodil Delight and Mango Melody inks.
The card base was made from Bermuda Bay and Coastal Cabana cardstock. I ran the mat through the Tufted 3d embossing folder before adhering it to the card base.
The leaves were punched with the Leaf Punch out of Bermuda Bay cardstock and I drew veins on them with a Stampin' Write! marker and dragged the edges of the leaves over my ink pad.
The little lion is stamped in Mango Melody (face and mane) and Daffodil Delight, then cut out with the coordinating dies. I drew strings to the flowers with my Calypso Coral Stampin' Write marker.
The sentiment comes from the Bonanza Buddies stamp set too.
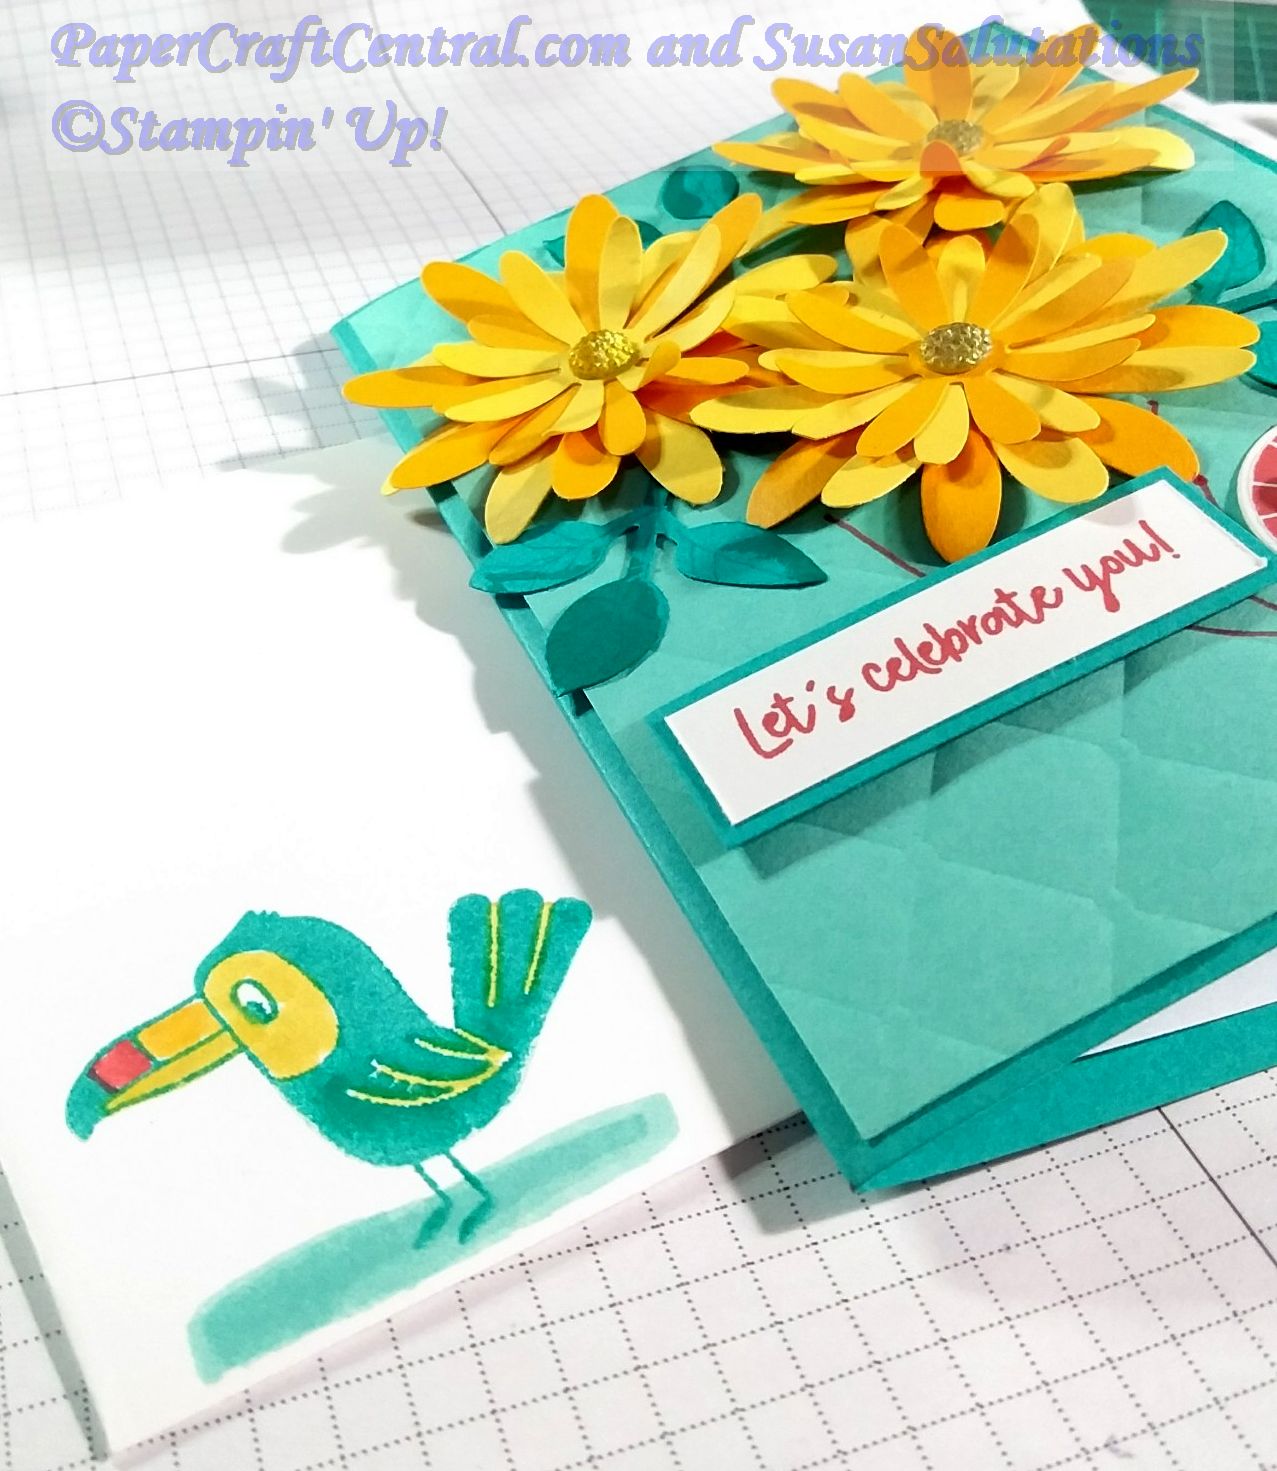
The envelope had to be decorated as well, of course. How can you send a naked envelope out into the world? Lol!
So to keep in the theme of the card, I stamped the Toucan in Bermuda Bay ink then coloured his beak and eye and feather lines with Stampin' Write! markers in Daffodil Delight, Mango Melody and Calypso Coral.
I hope you enjoyed these April card ideas. Happy Easter.
Project Ideas, March 2020
Timeless Tulips Stamp Set and Coordinating Punch
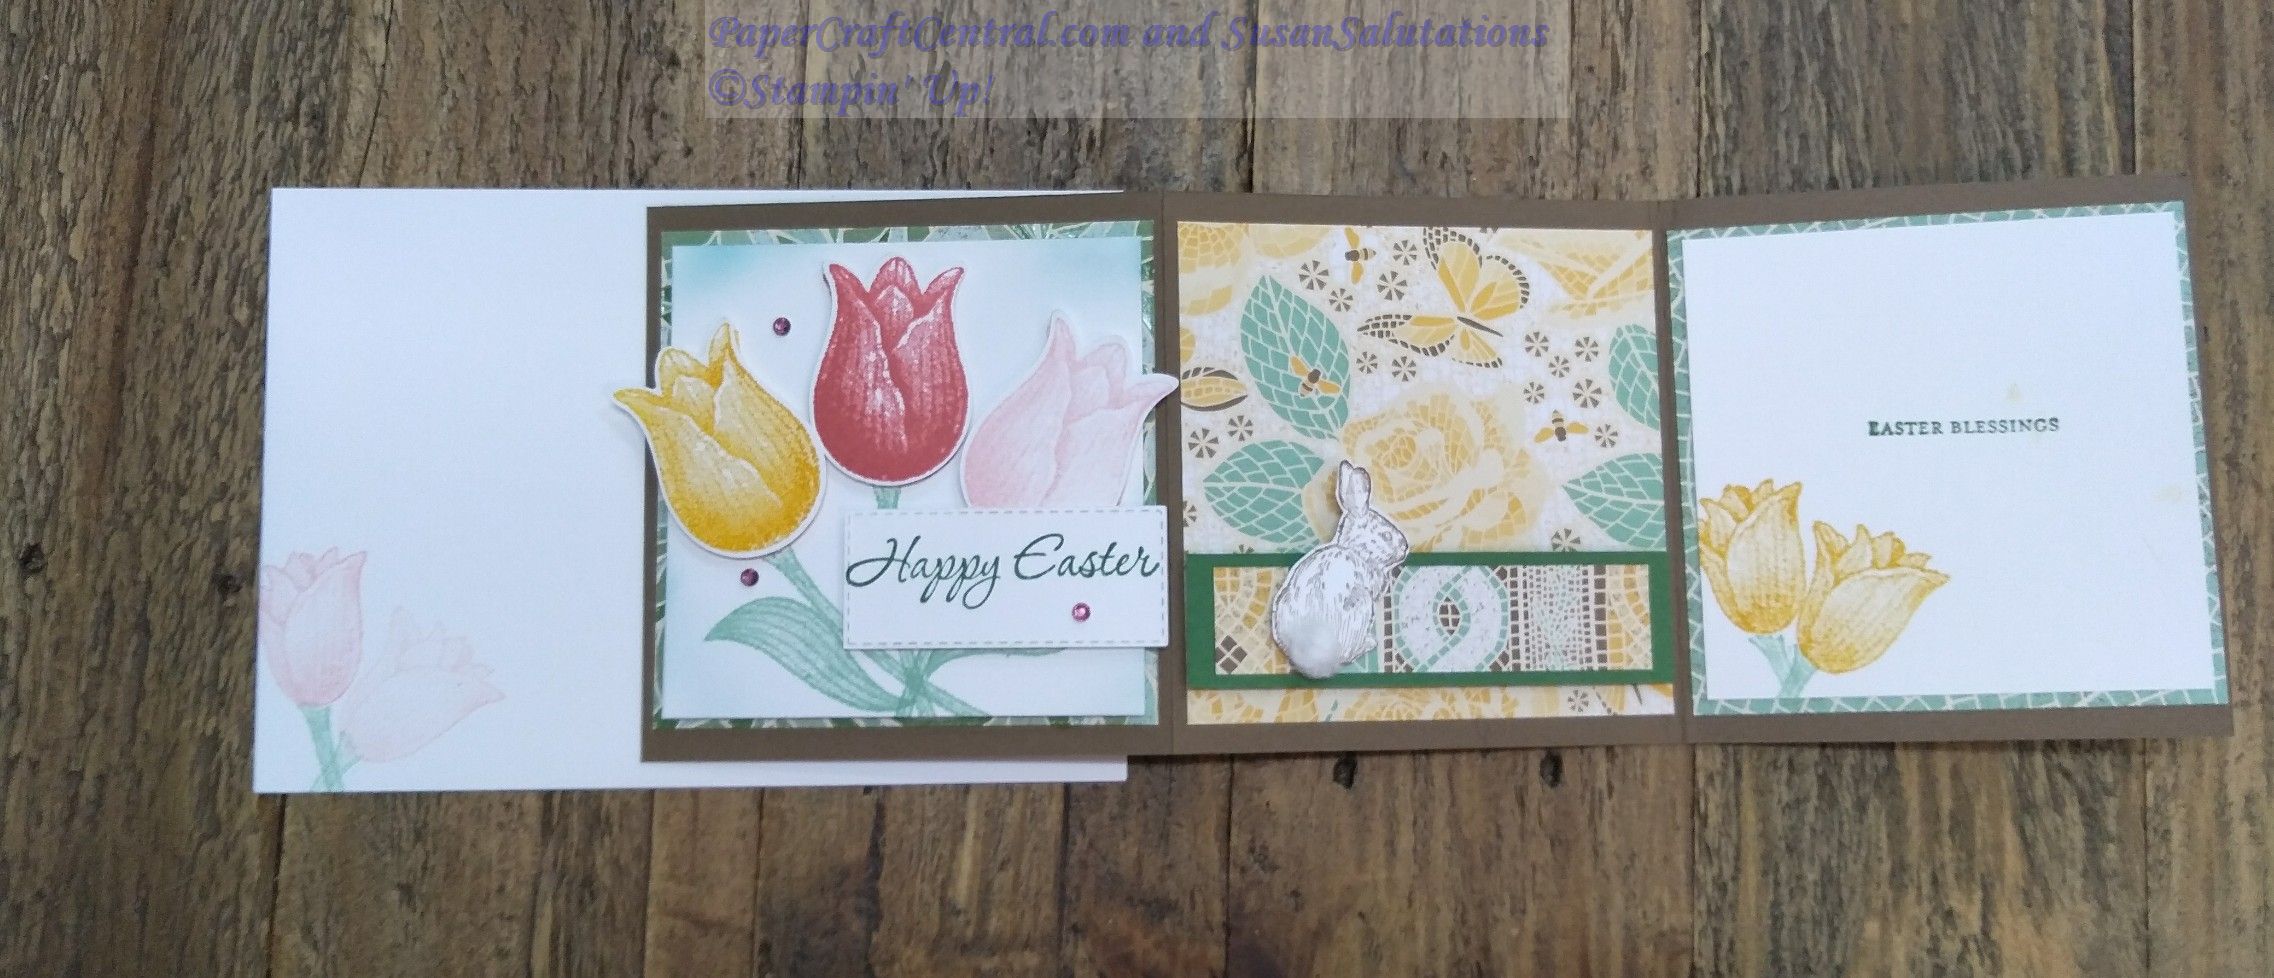
Easter was not far away! We made Easter cards with the Timeless Tulips stamp set and coordinating punch at card class in March just before the shut downs for COVID along with all the changes to our lives happened.
We also stamped images from the Nature's Beauty stamp set and some of the sentiments were from Itty Bitty Greetings. The main Happy Easter sentiment was from a retired stamp set.
The cardstock had been folded into a 'Z' fold so there were three panels to display for our finished cards.
The designer series paper used was Mosaic Mood Specialty Designer Series Paper and the sentiment box was cut out with a stitched rectangle die.
The fluffy bunny tail was made with small pinches of cotton ball.
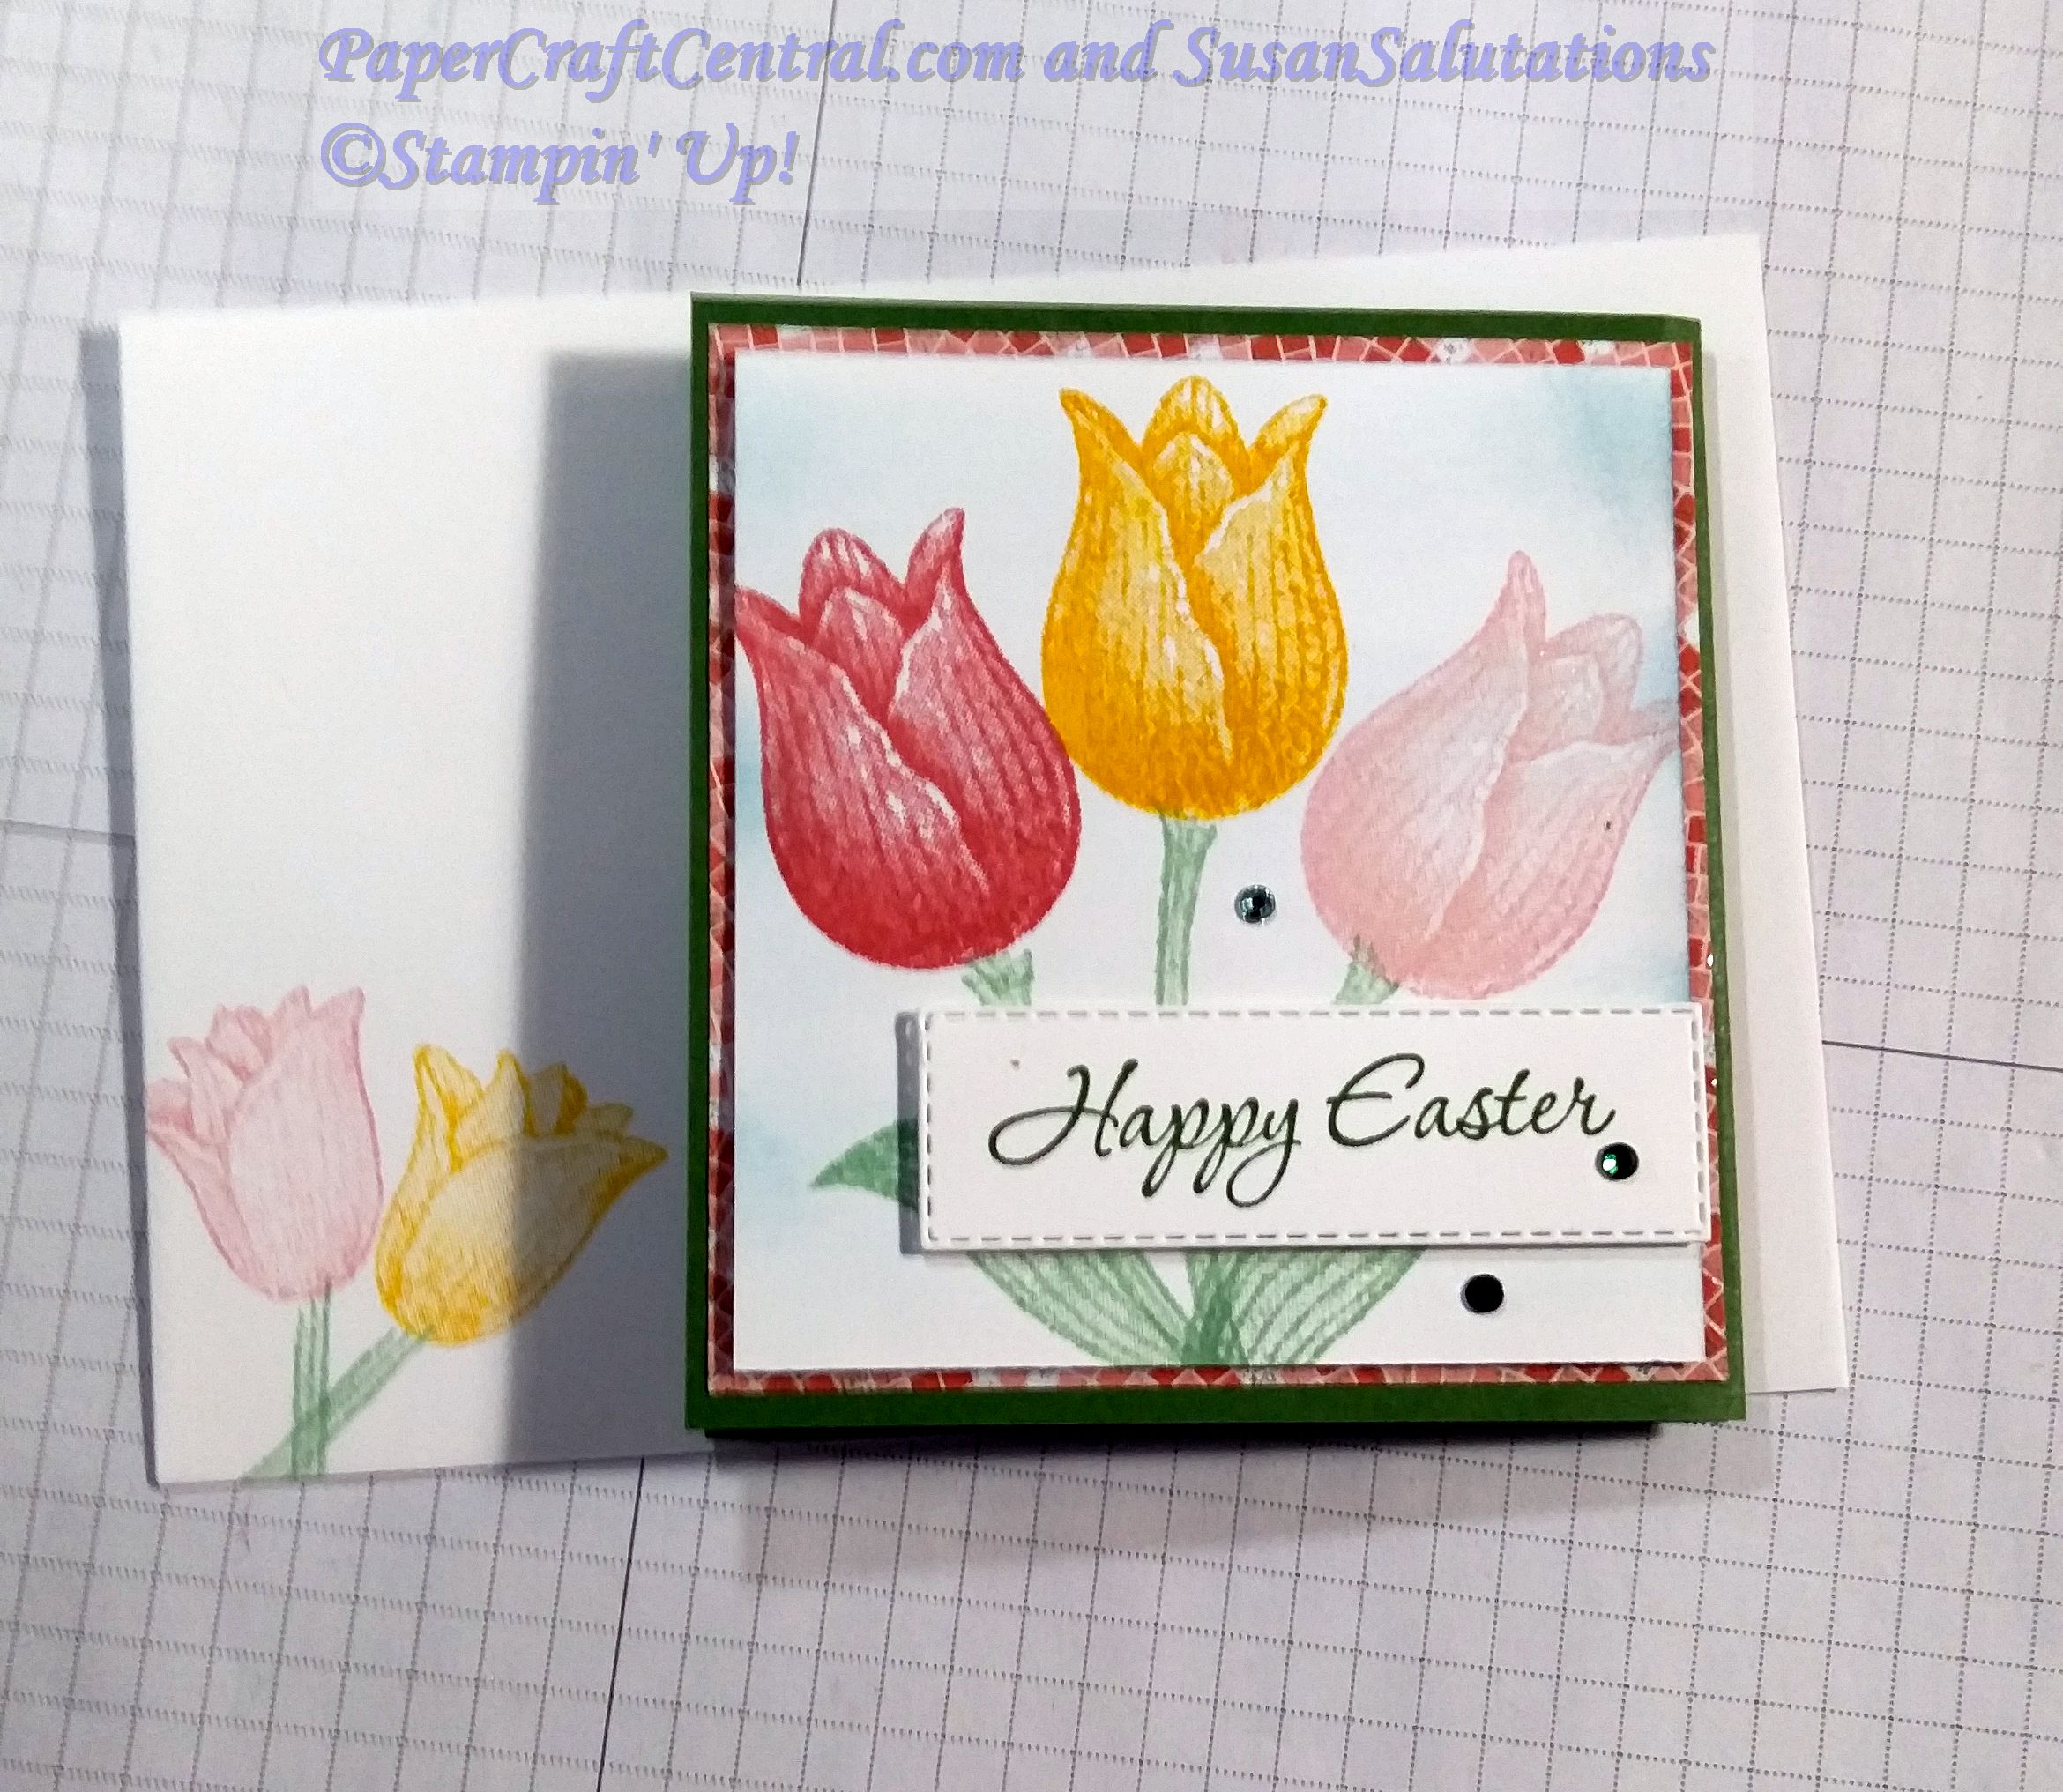
I added stamped, punched tulip shapes to the big tulips on the front of the card here.
Punch Art Bunny Card
These card ideas in 2020 are oldies but goodies. Use your punches to make this cute bunny disappearing down his rabbit hole.
I have instructions for how to make a punch art bunny face on another page.
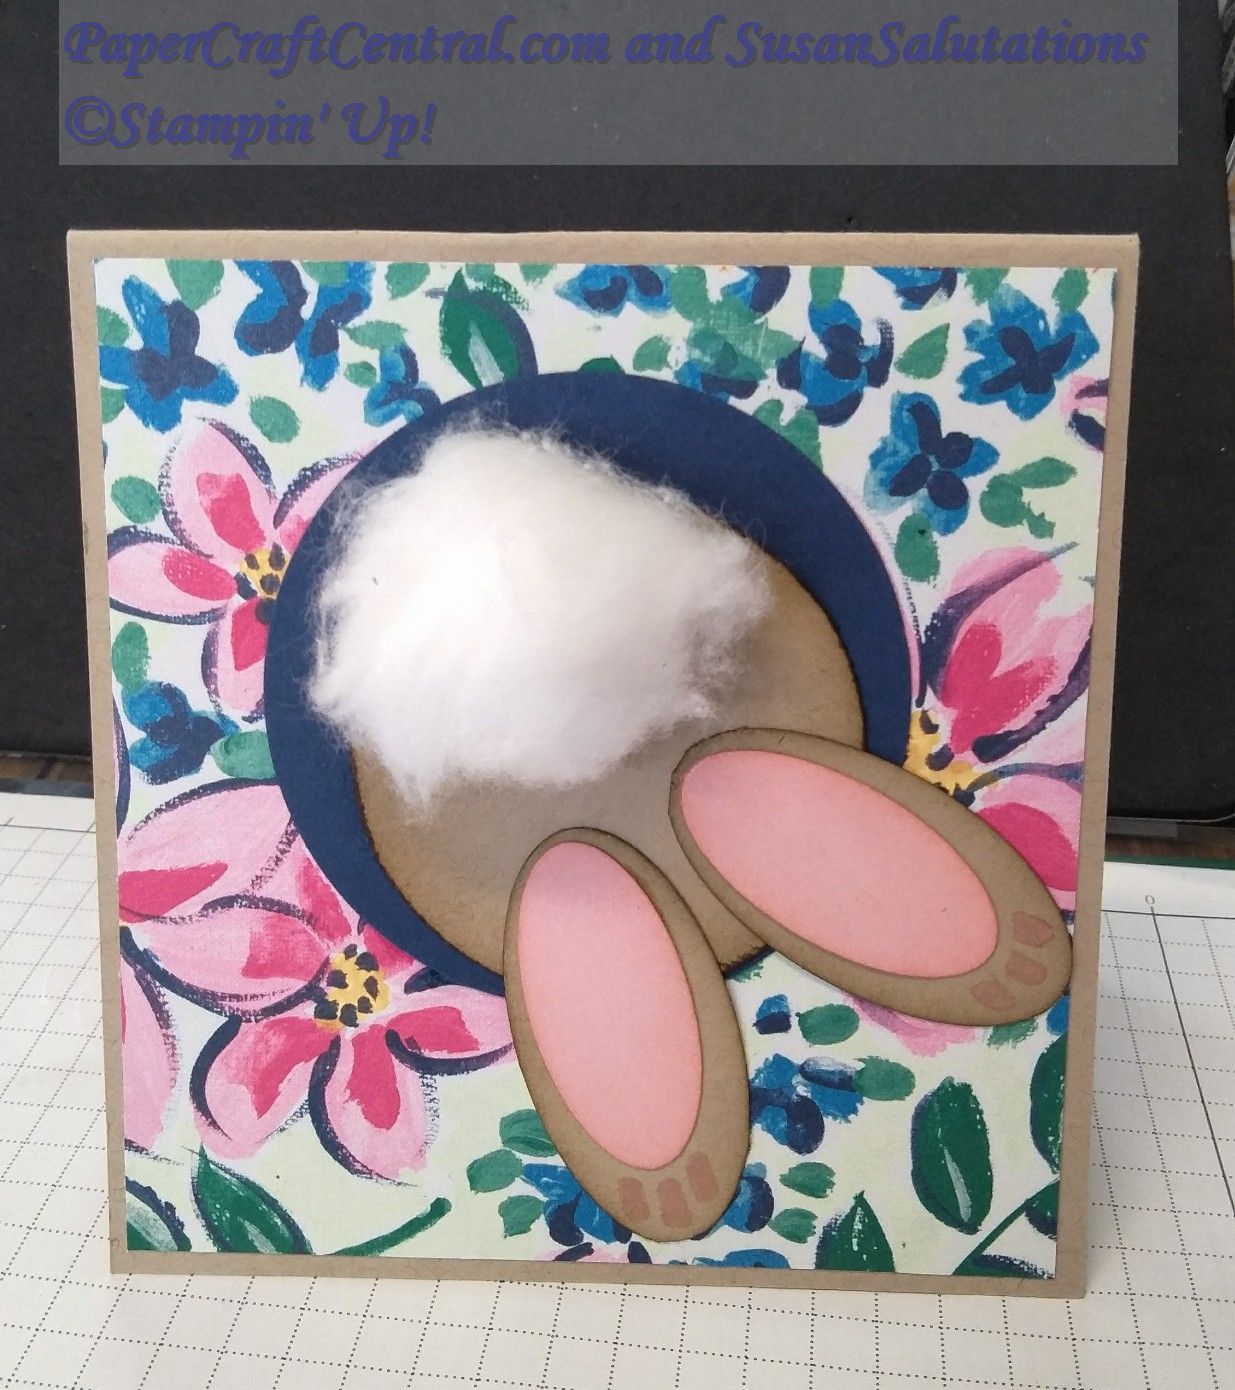
You make this bunny with circle and oval punches.
Use your largest circle punch for the rabbit hole.
Use a nesting circle punch for the bunny body.
I sponged Soft Suede ink on the edges of his body that I cut from Crumb Cake cardstock.
Then use nesting oval punches to make the feet.
Cut your largest oval from Crumb Cake and sponge Soft Suede ink around the edges, then cut the bunny foot pads from Blushing Bride ink to sponge around the edges, glue the two ovals together leaving room for bunny toes, and make marks with the Blushing Bride Stampin' Write marker to make those toes.
Adhere the body and feet together as shown, then add a fluffy bunny tail with cotton wool. I glued the tail on with Tombow Multipurpose liquid glue.
To make the hole even more three dimensional, punch a circle form the dsp and adhere the navy circle on the card base itself, then use Stampin' Dimensionals to pop up the dsp. Adhere your punch art bunny to the dsp so there is a little gap between the bunny and his rabbit hole.
We also drew his little toes in with a Blushing Bride Stampin' Write marker instead of using tiny punched shapes.
His tail is made of a slightly bigger puff of cotton wool!
You could use this punch art bunny to decorate Easter baskets or gifts too.
The Gang's All Meer
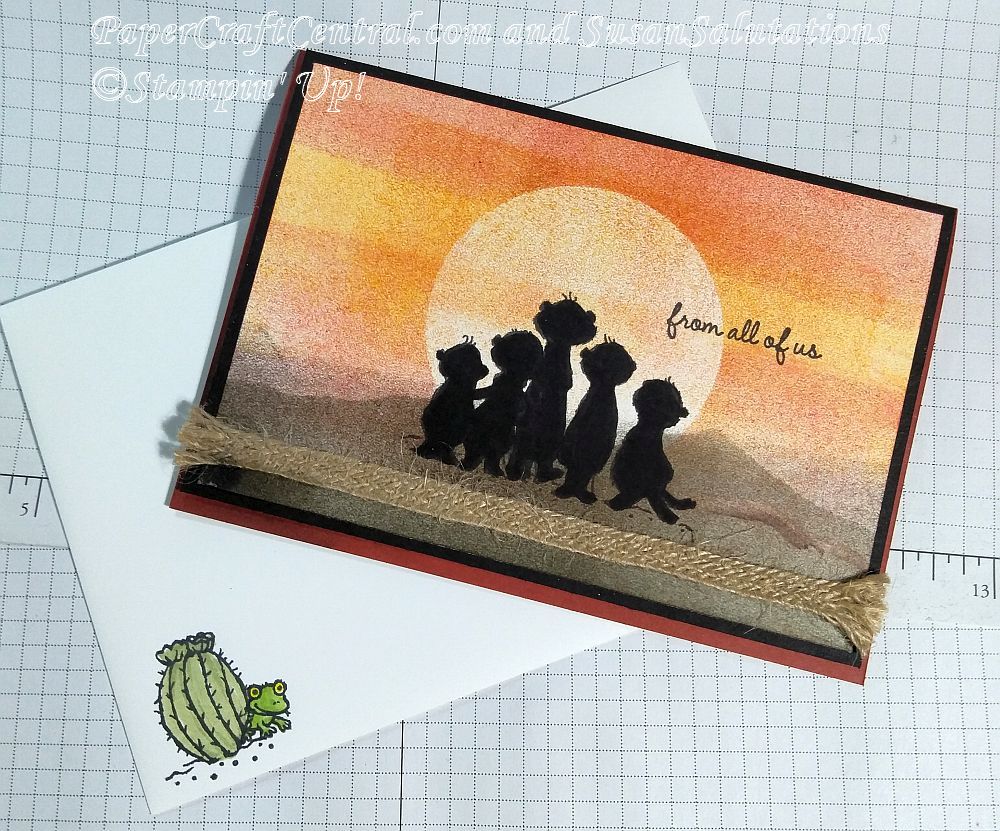
The Gang's All Meer is s stamp set you could earn by placing a qualifying order during Sale-A-Bration 2020 (it had to be in by March 31st and before stocks ran out).
I loved these little guys so much I decided to make an order just so I could get them!
In the first card, I built a scene first, then stamped my gang on top. To make it a silhouette, I coloured the figures all in with a Basic Black Stampin' Write! Marker.
The chameleon was placed behind the cactus using the masking technique.
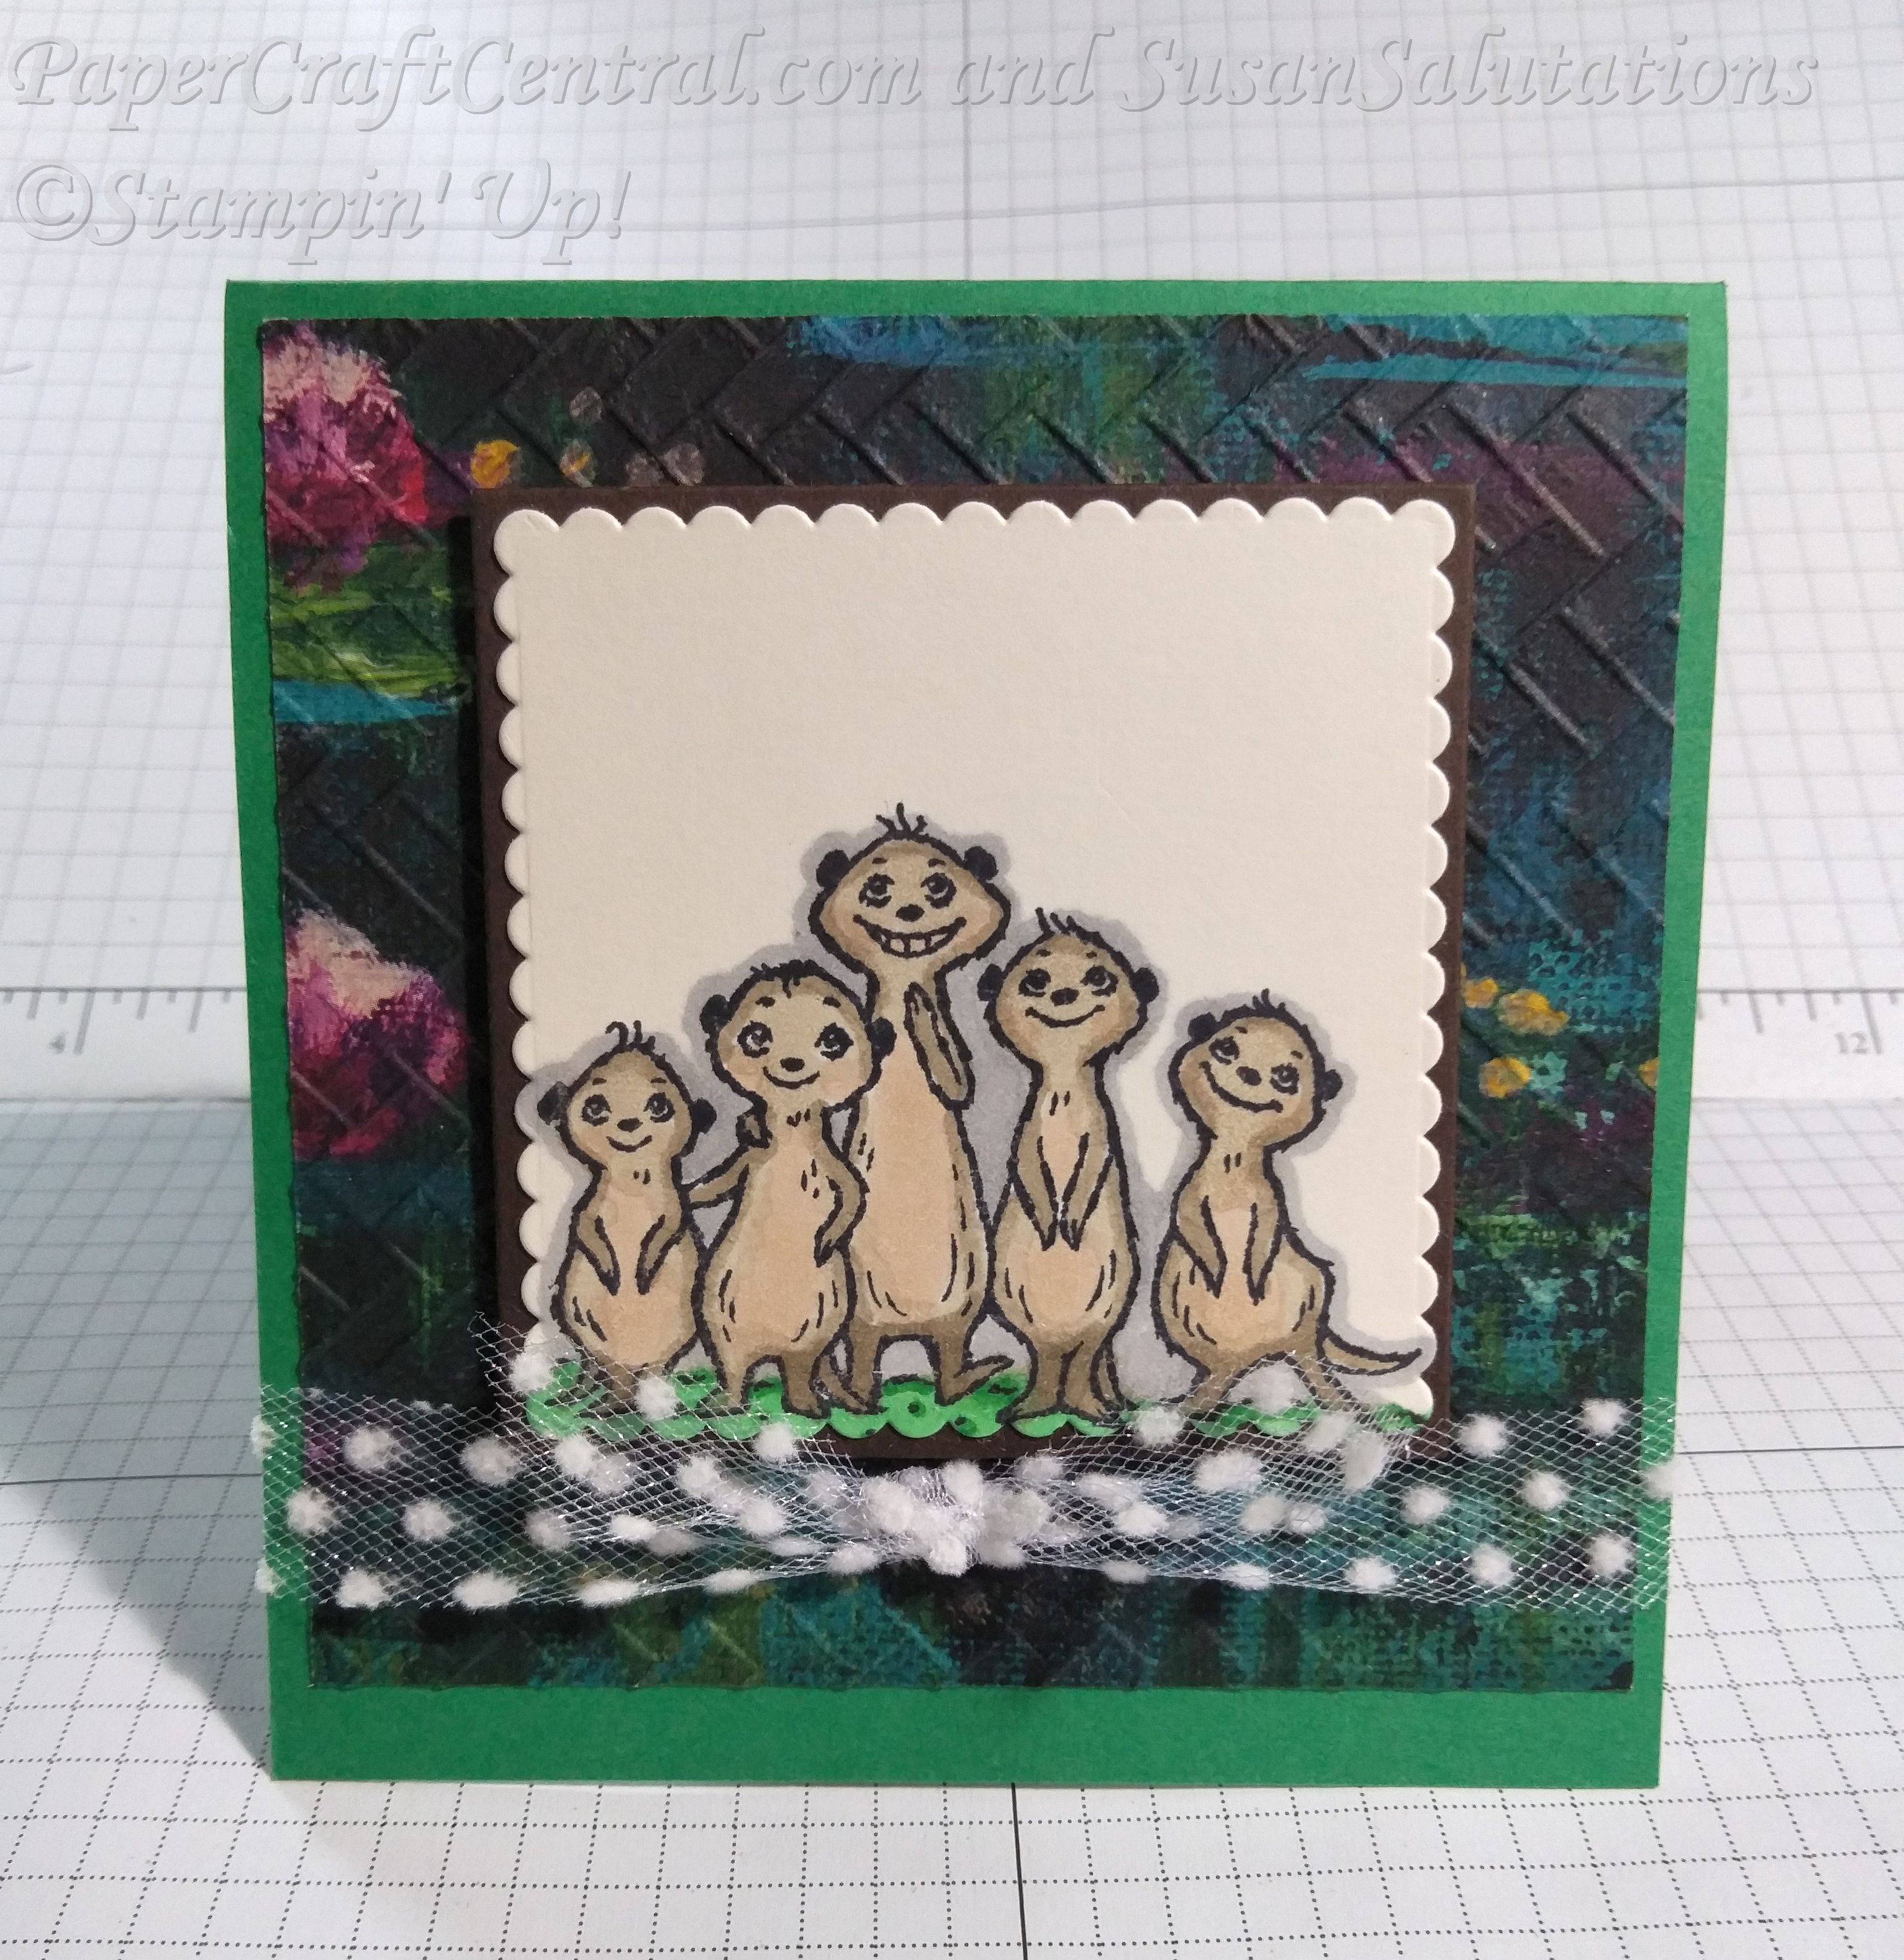
Then I could not resist showing off the gang's cute little faces and attitudes.
This is a simple to make card. I used Stampin' Blends to colour them in. I loved that I could shade their pelts darker and their tummies lighter that way.
I backed the coloured image with some beautiful Lily Impressions designer series paper. The paper was another Sale-A-Bration reward for a qualifying order before March 31st, 2020 or while stocks lasted.
I embossed the dsp with the Basket Weave Dynamic Textures Impressions Embossing Folder.
The ribbon is the cute whisper White Polka Dot Tulle ribbon.
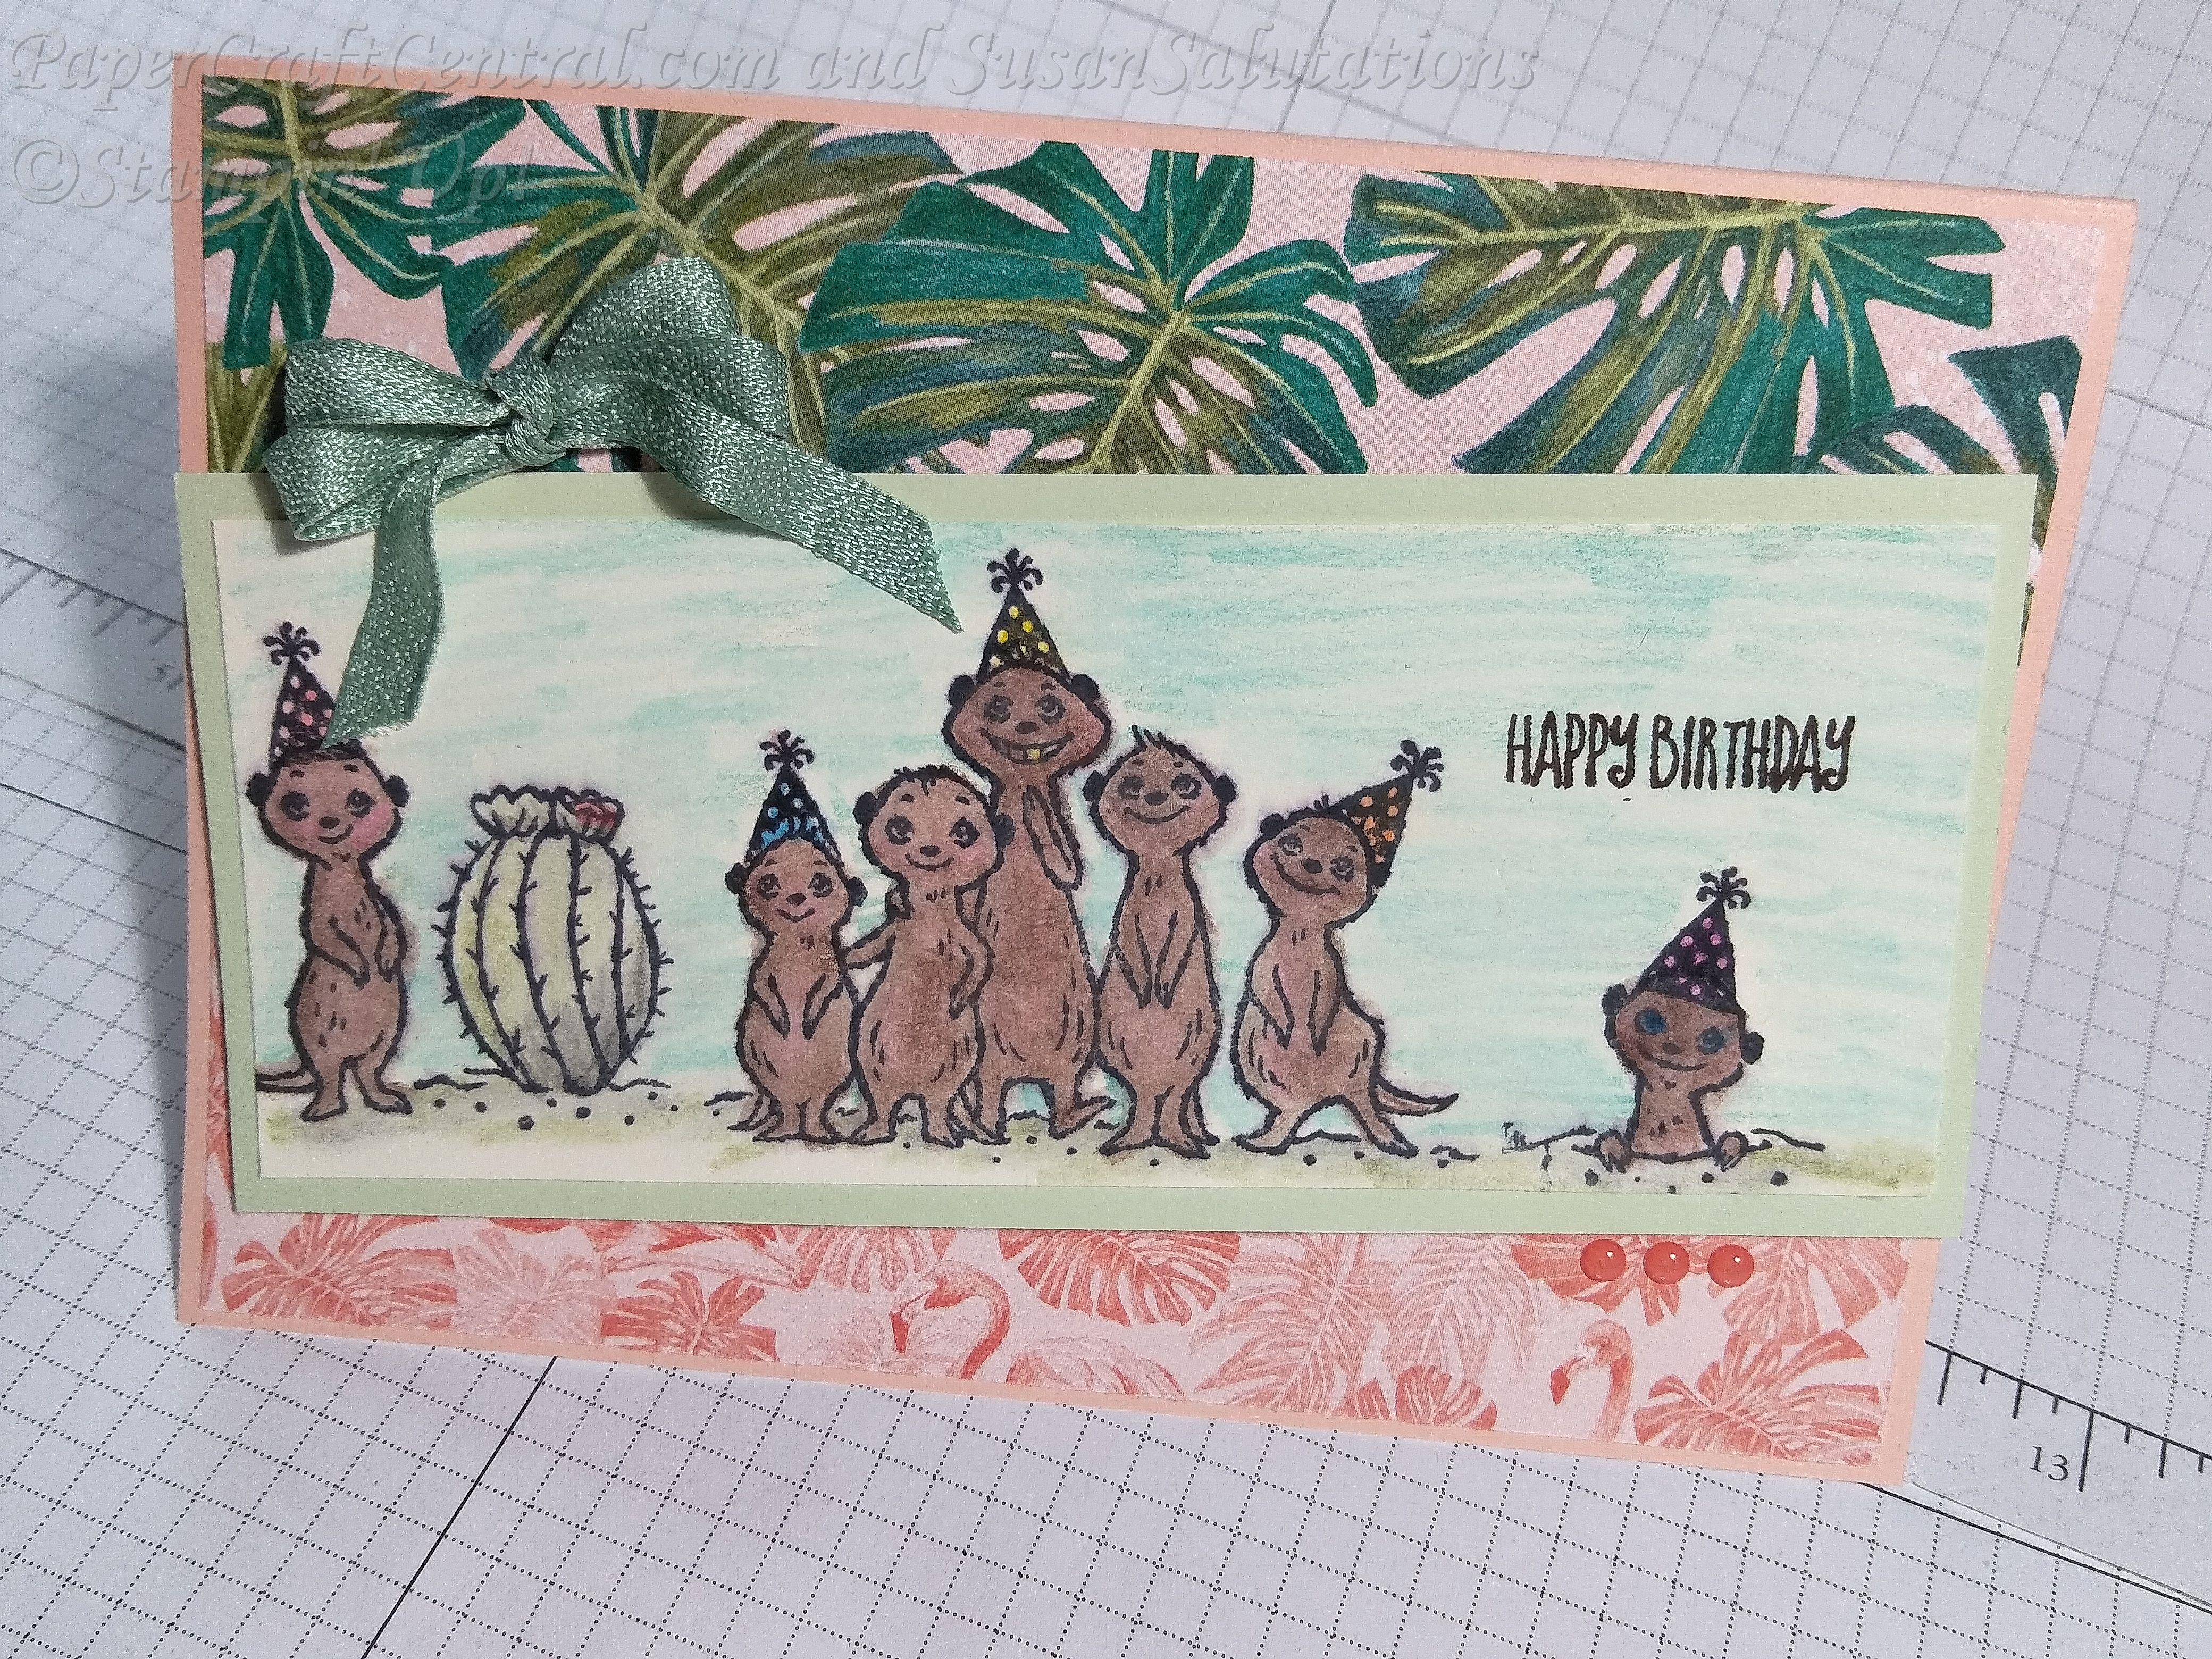
I decided to make a real gang for this card and used all the images of Meerkats in the stamp set. This time I used Stampin' Write@ markers to colour the little guys and their cactus. And I backed the image with pieces of Tropical Oasis designer series paper.
The Mint Macaron ribbon just set it off nicely for me.
Meerkats deserve double bows, don't you think?
Dressed to Impress
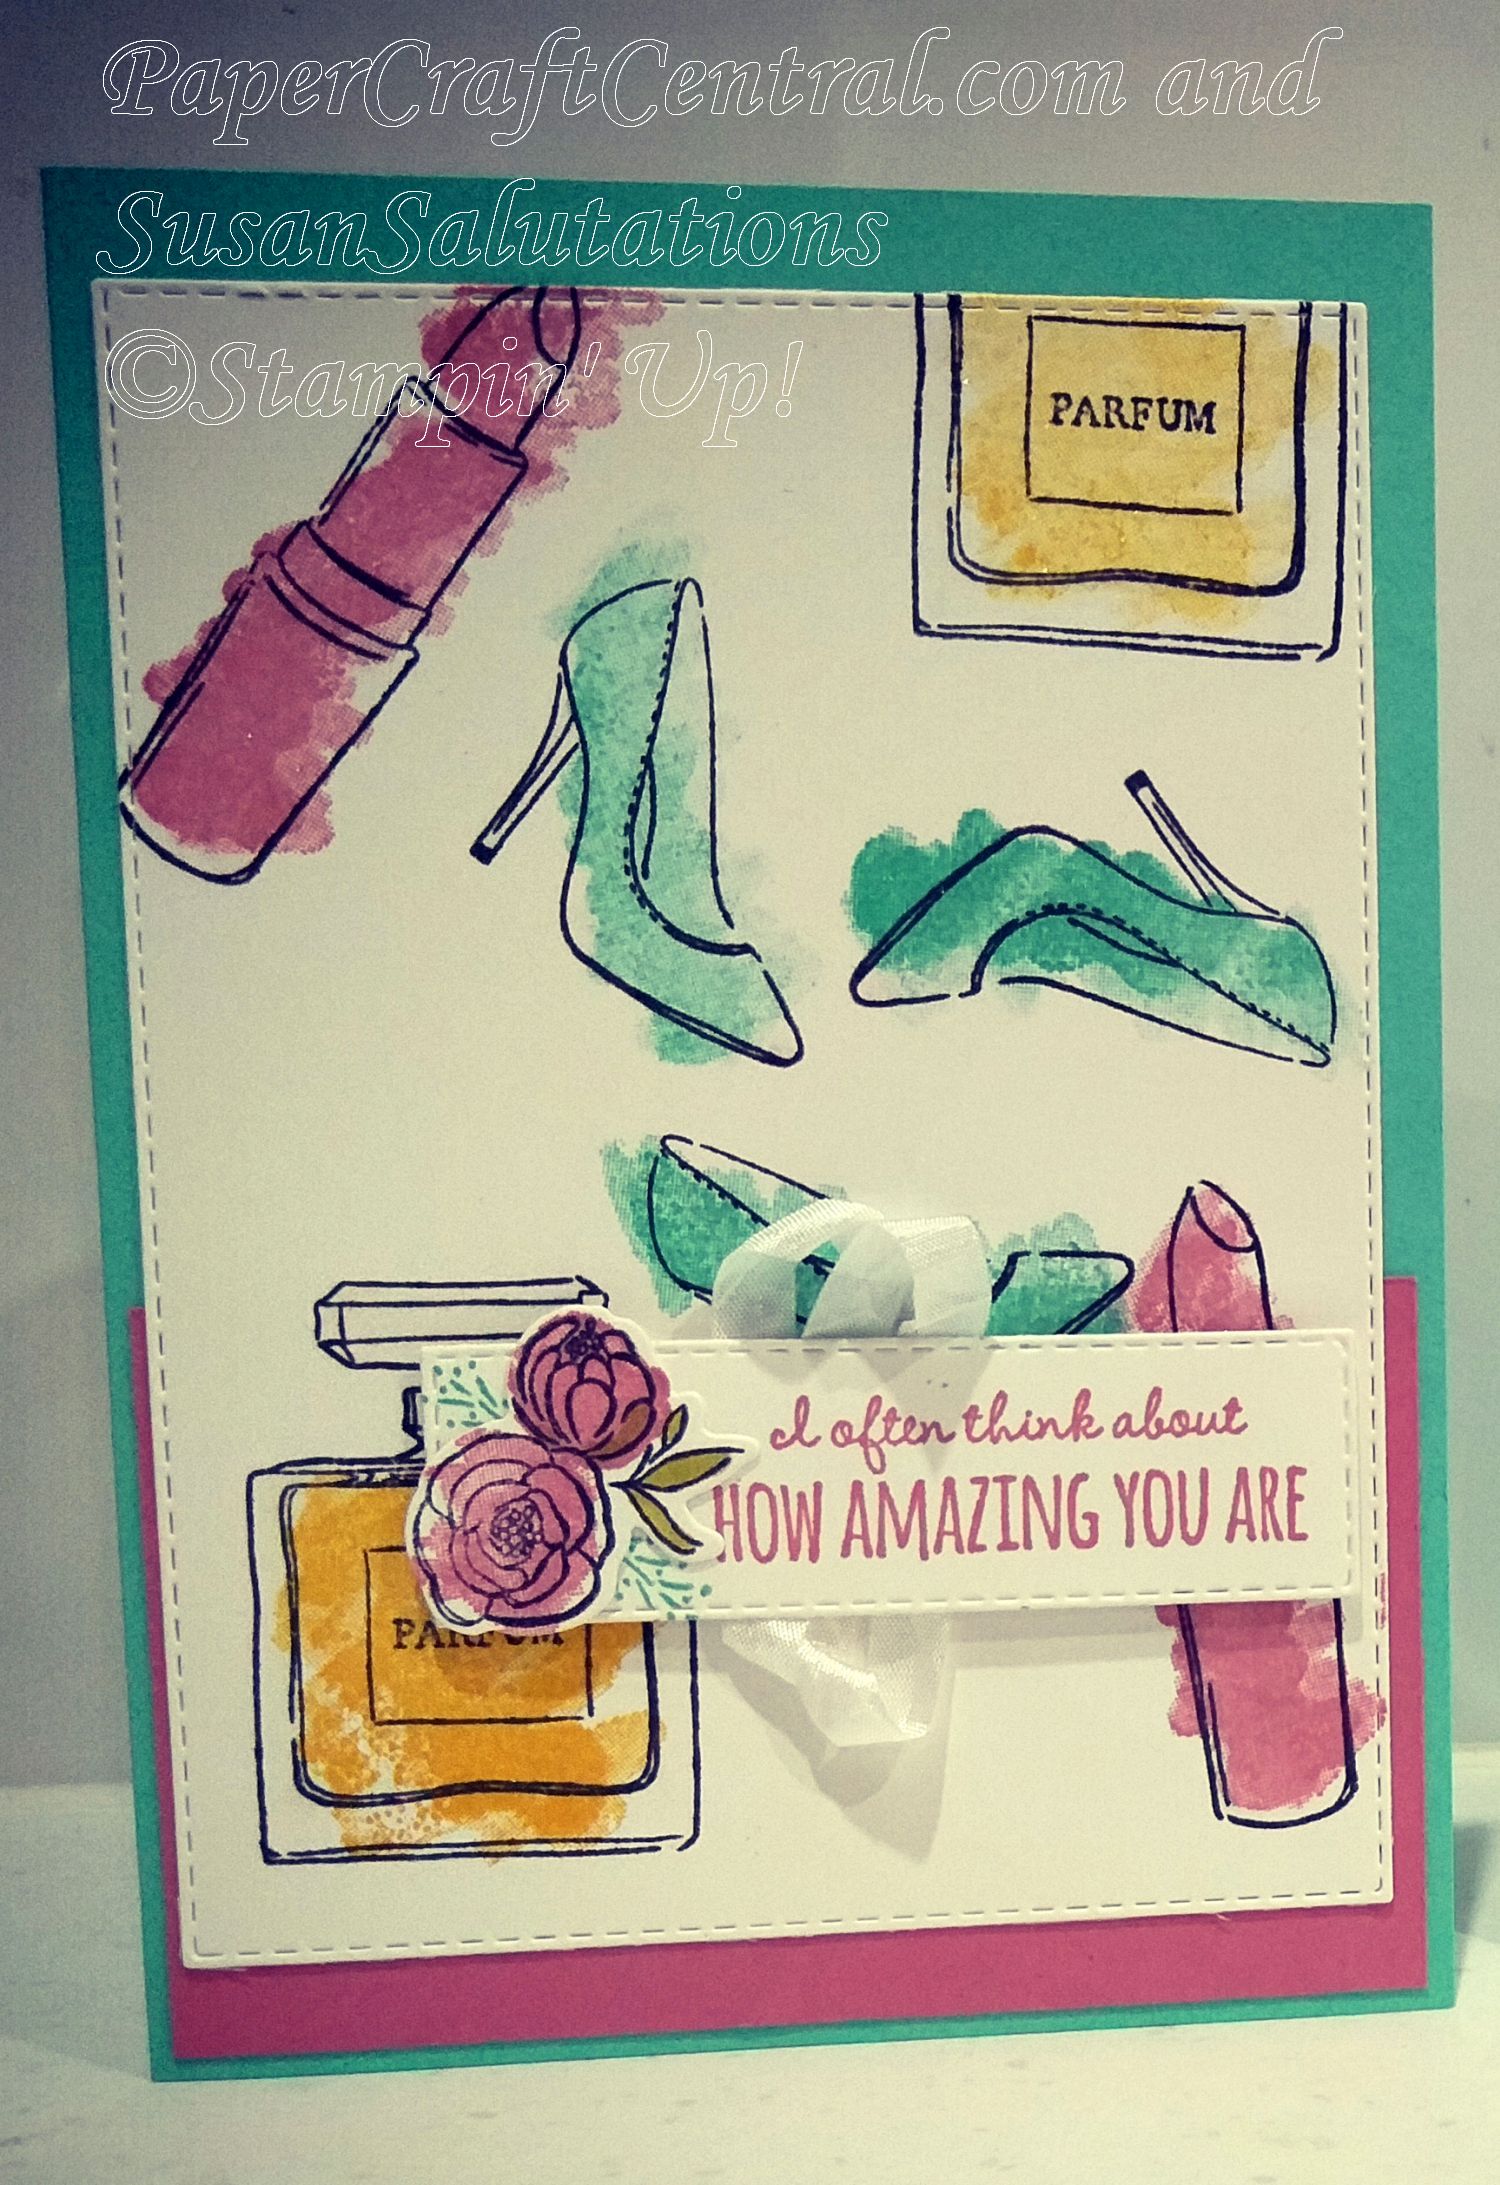
This card was so easy to make with the Dressed to Impress stamp set and coordinating All Dressed Up dies. I also used the Rectangular Stitched dies on this card.
The images are coloured with ink using the fill-in stamps from the set. Talk about quick!
I thought it was a fun card
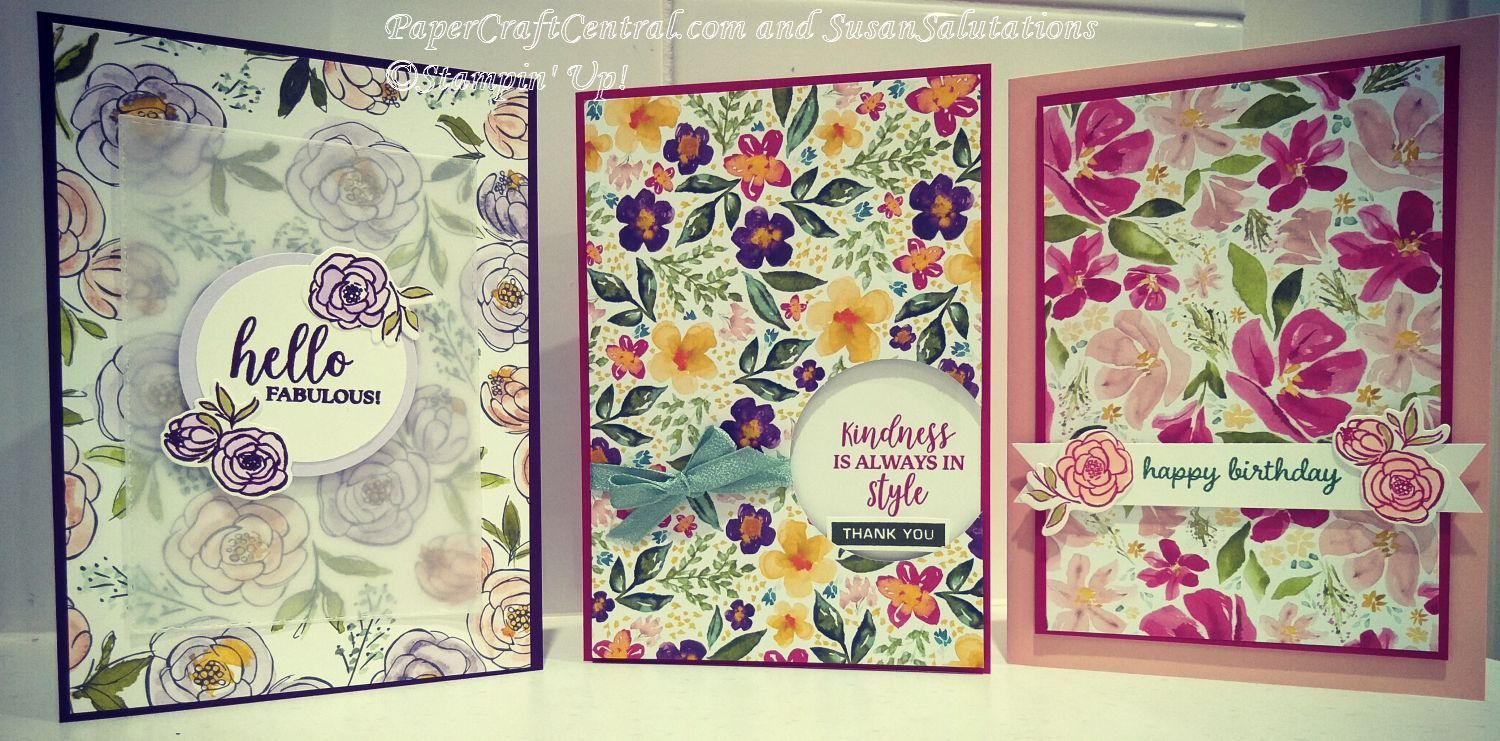
These cards all came together quickly too. The Best Dressed 6" x 6" paper stack had such beautiful flowers on it.
Here I used vellum on the first card, sticking it down onto the card with glue dots hidden behind the sentiment element.
I used a circle punch to punch out part of a circle from the front of the second card and stamped my greeting on a Whisper White piece which I glued to the card front, right where the circle punch out was.
Adding Stampin' Dimensionals to the dsp made the circle element pop.
The third card has been embellished with a Stitched Rectangle shape that I corner cut to make the ends look like a banner.
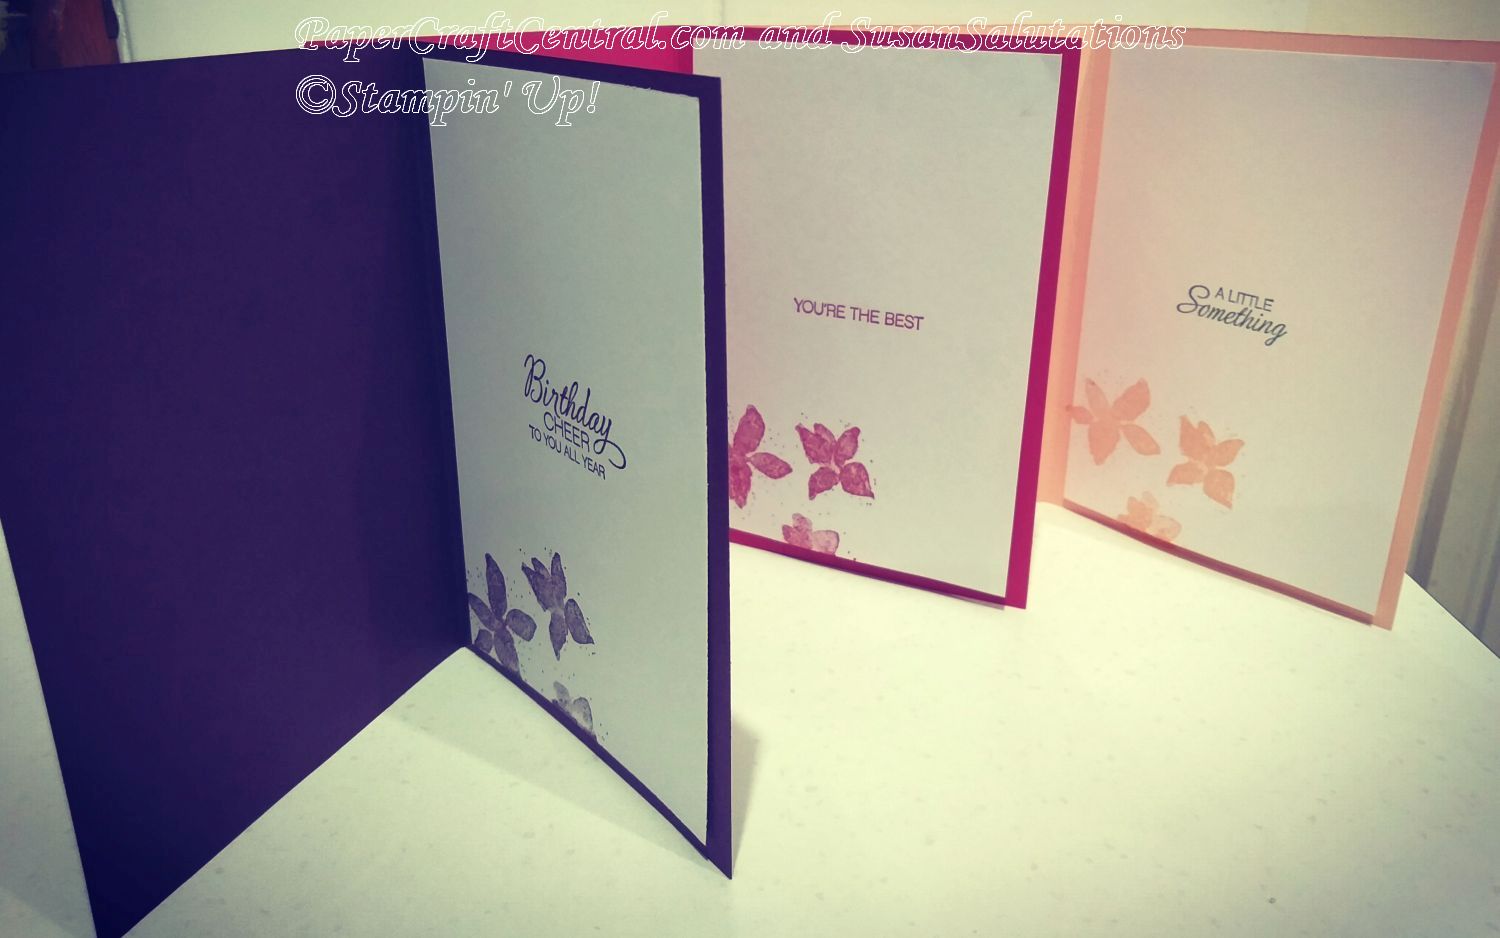
The insides of the Best Dressed cards needed to be finished too so this is how I did that for them.
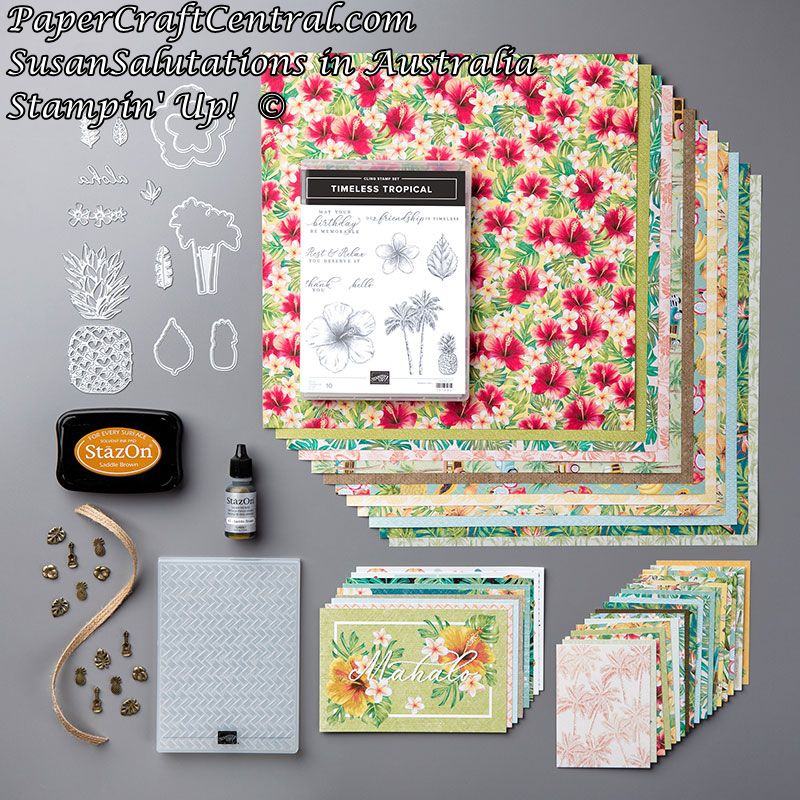
Tropical Oasis Suite Bundle
I loved this suite of goodies. I played with it quite a bit.
I made a simple card for a class using the stamps and designer series paper.
All you need is a 2" circle punch to make a place for your sentiment in the dsp. I doubled up on the Braided Burlap Trim to make a thicker row of trim to embellish the card.
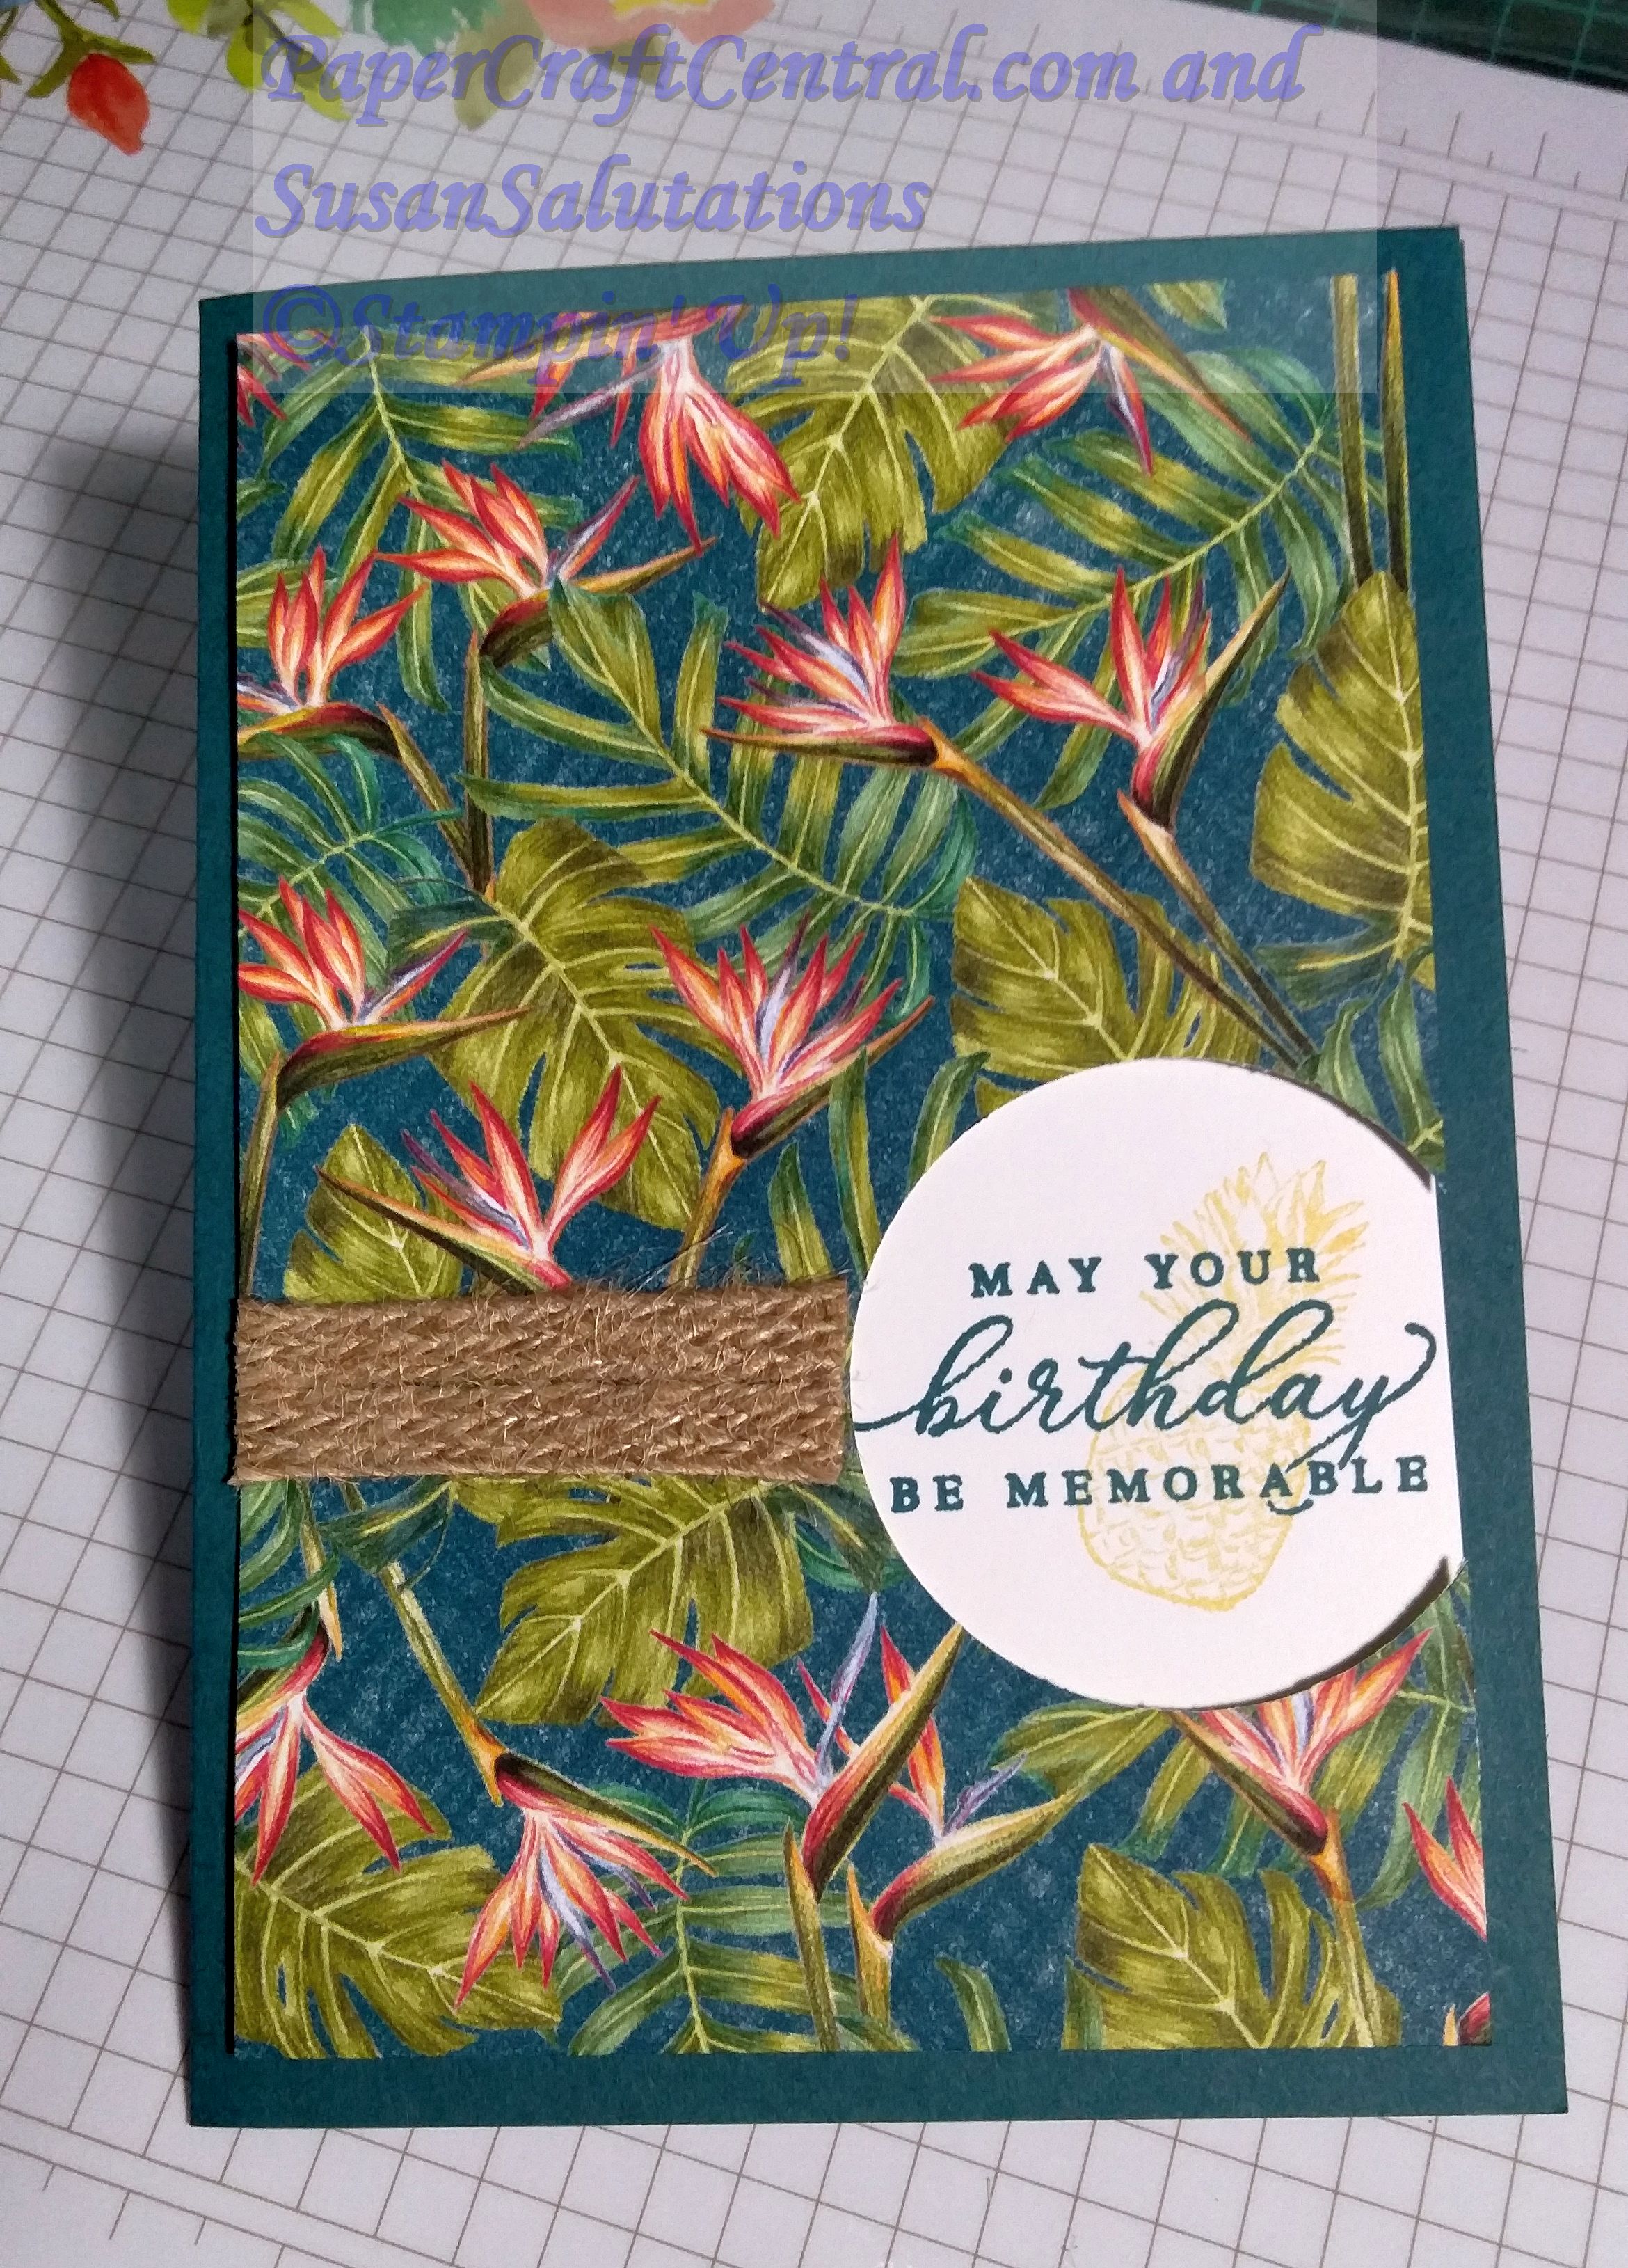
Then I started playing with the designer series paper again with the encouragement of my upline, and made an 8" square sampler. I framed it with a wide margin.
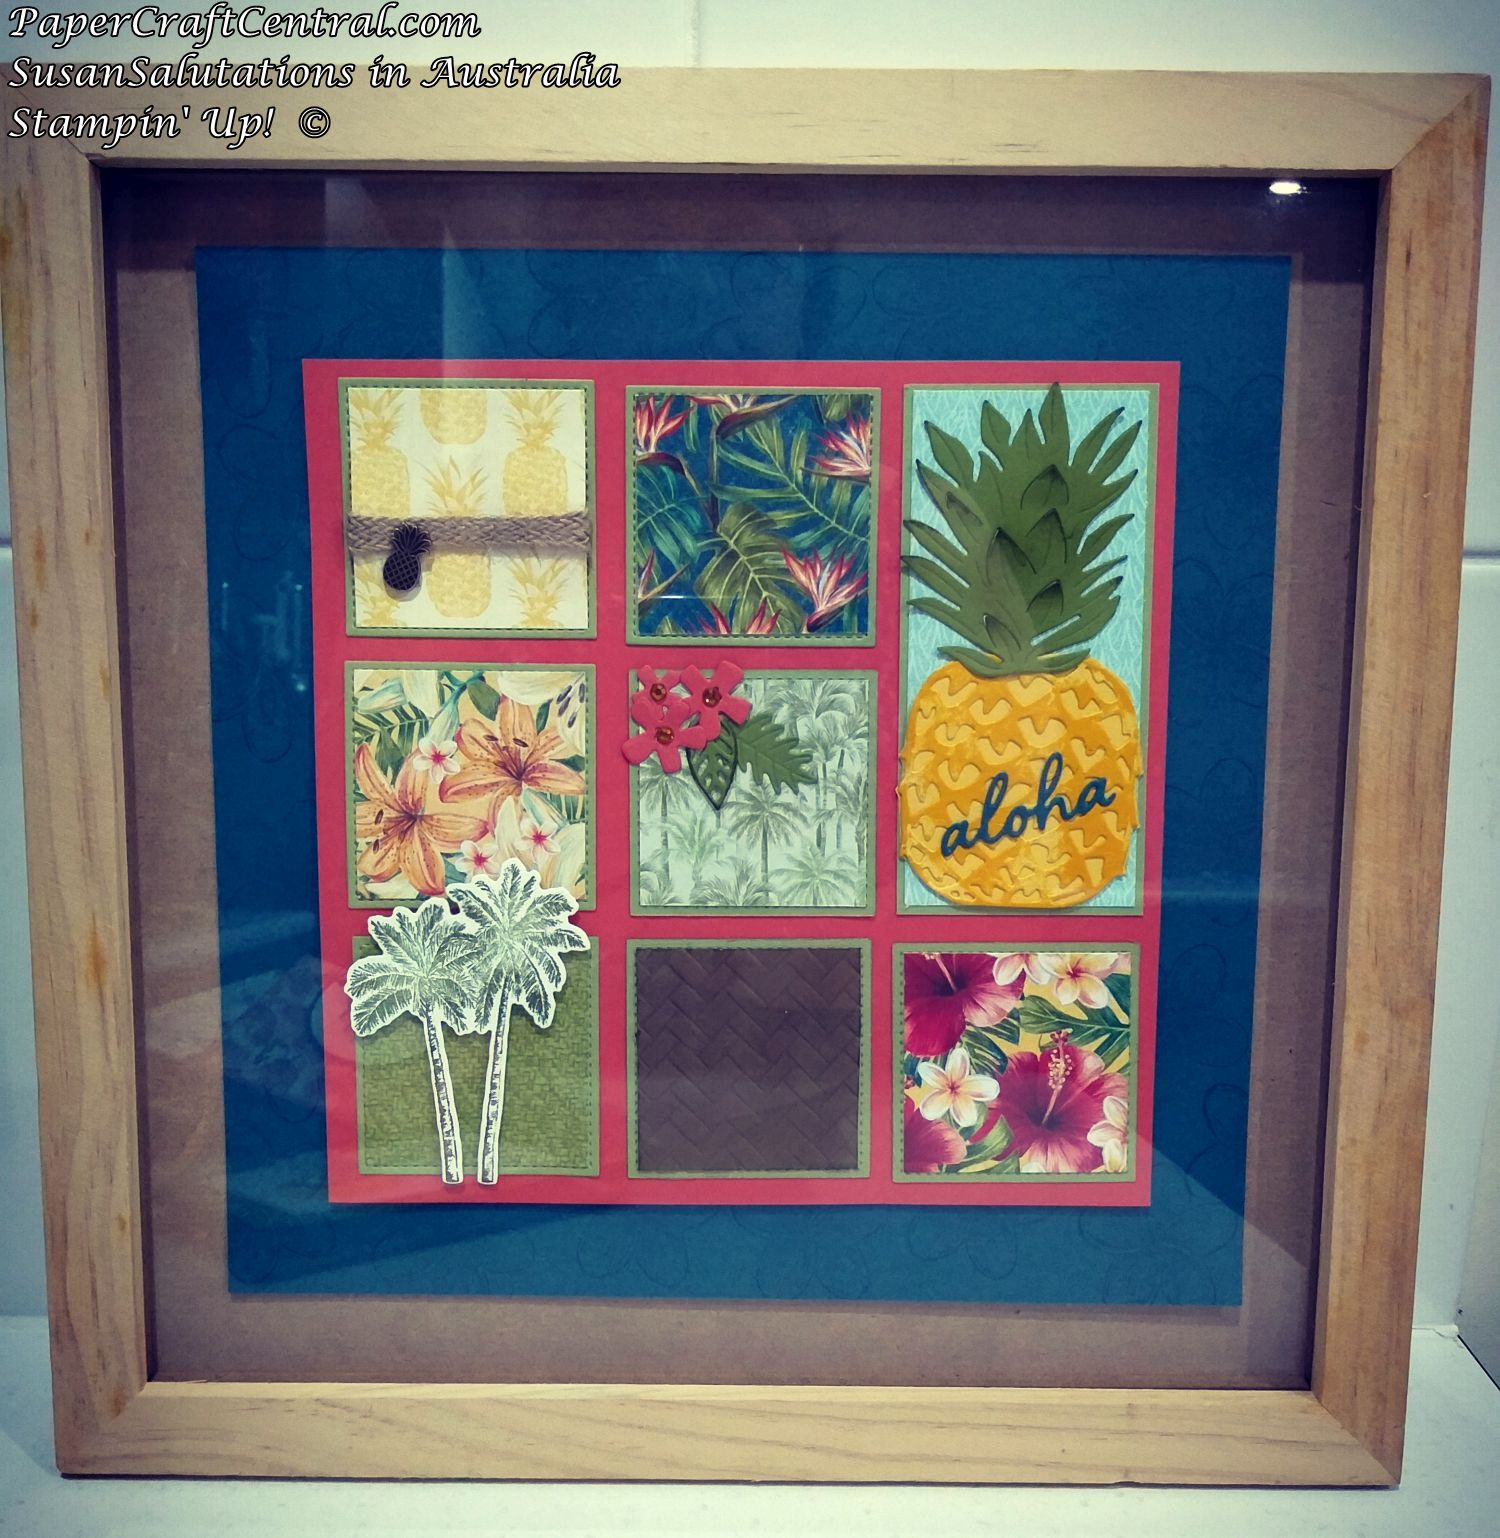
I love how it turned out! I need to find a good place on a wall in my house for it, but wouldn't it also make a good gift?
Scroll down to see more card ideas in 2020 made with the Tropical Oasis suite.
Project Ideas, February 2020
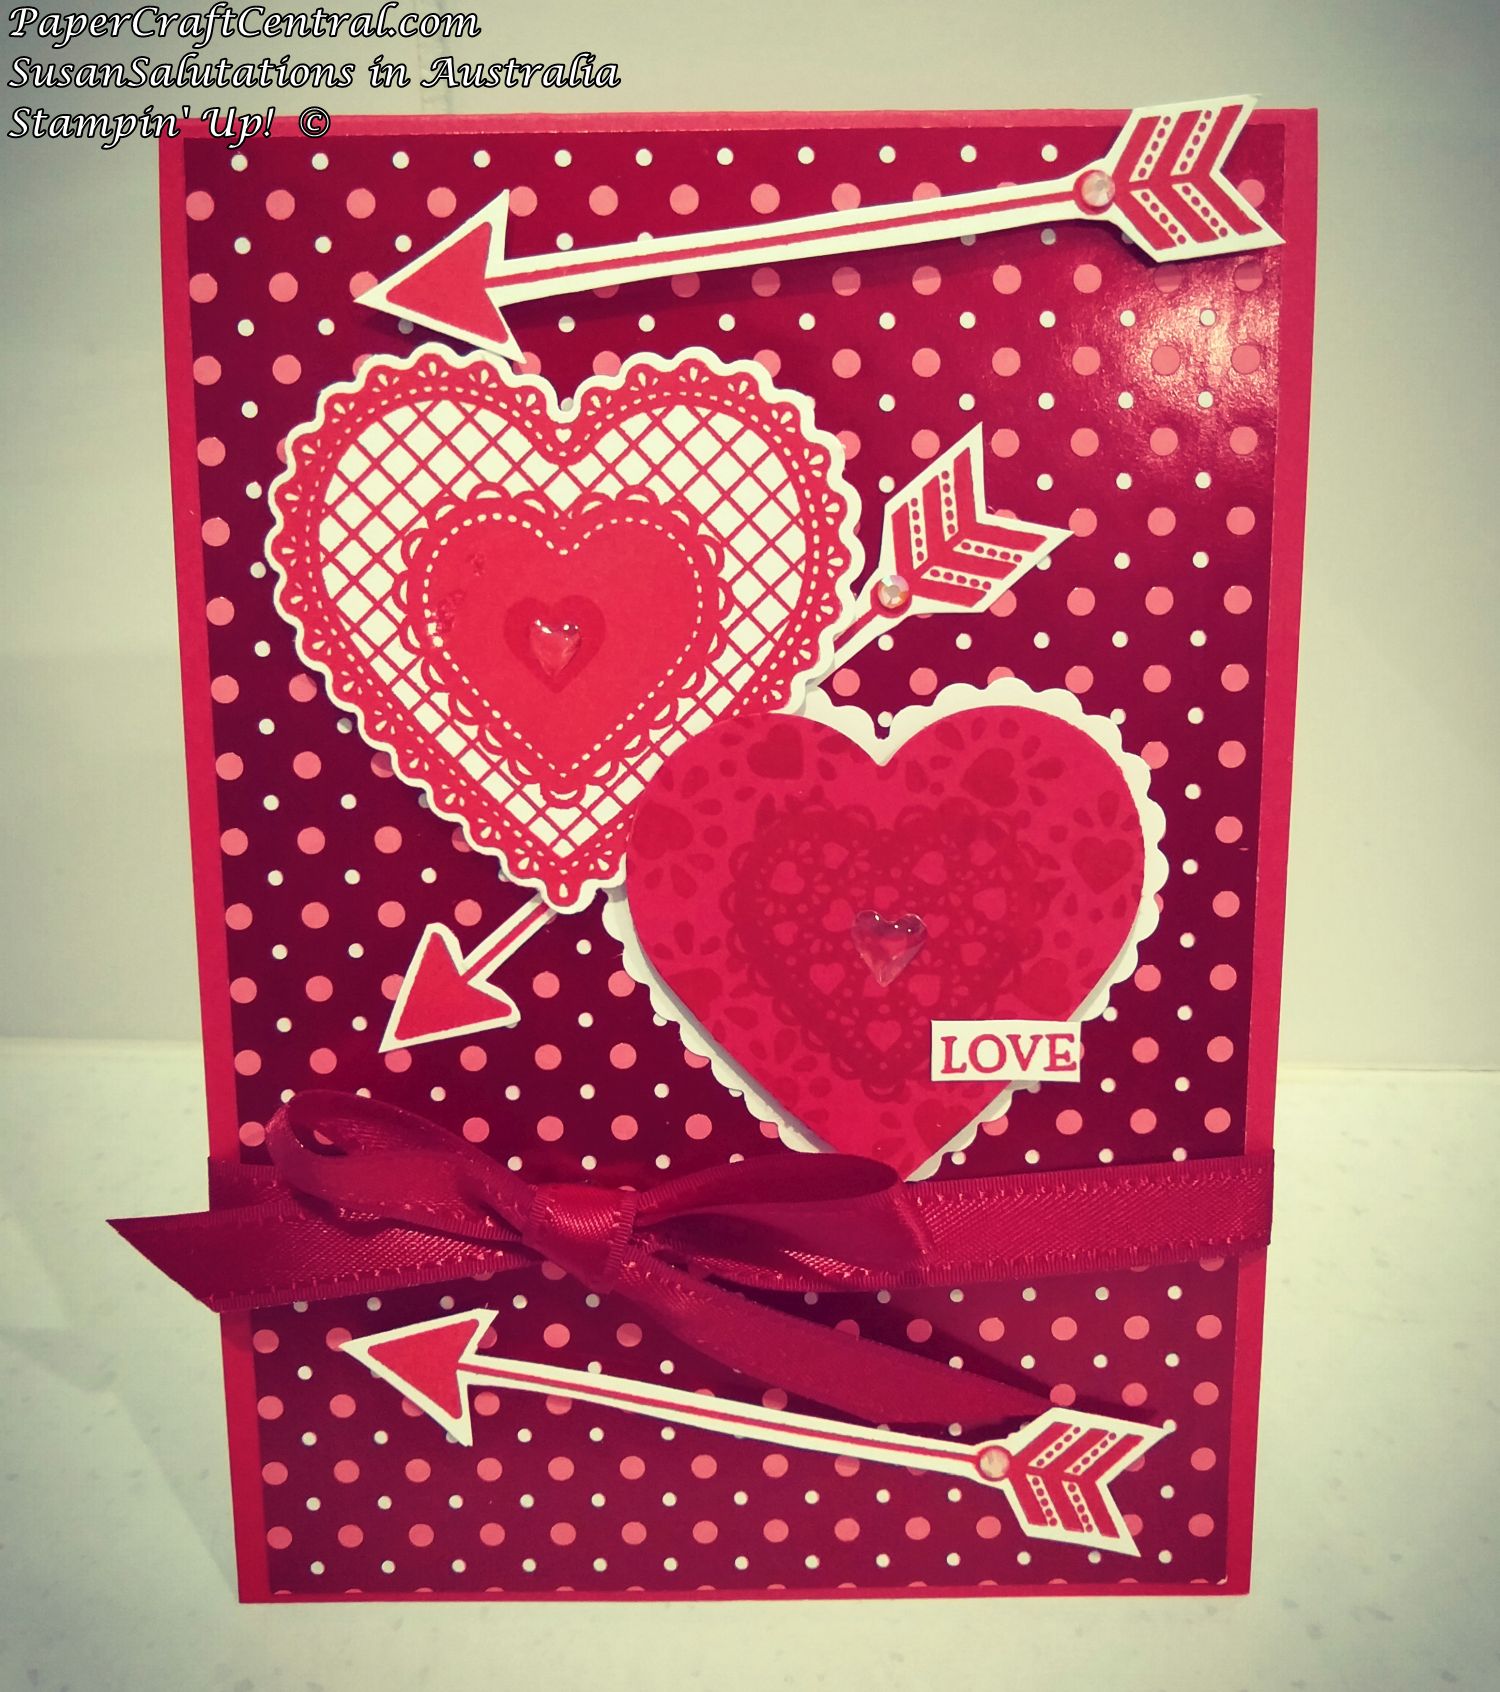
Valentine's Day Card Ideas
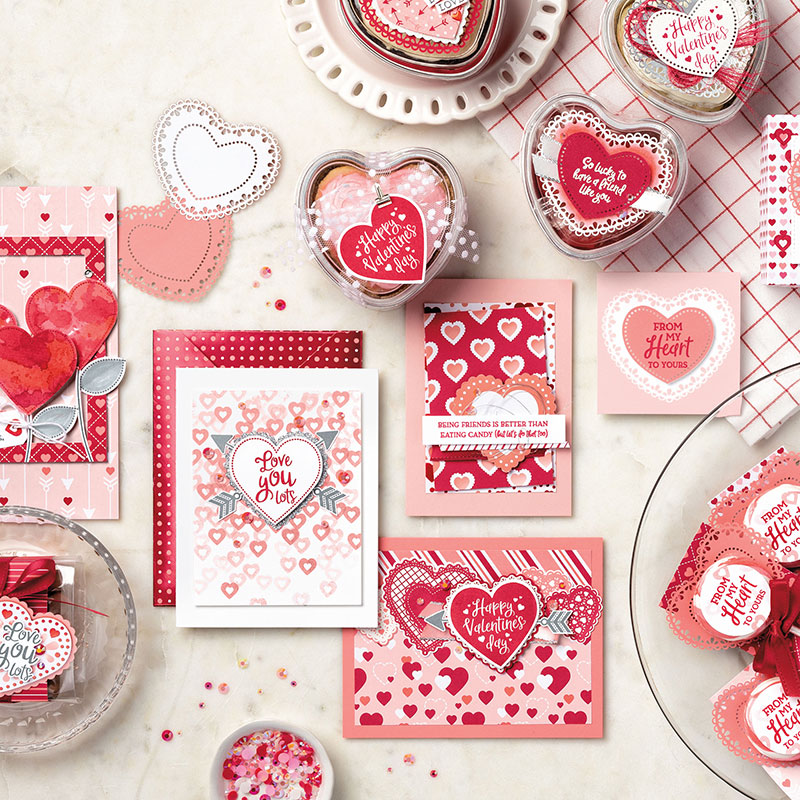
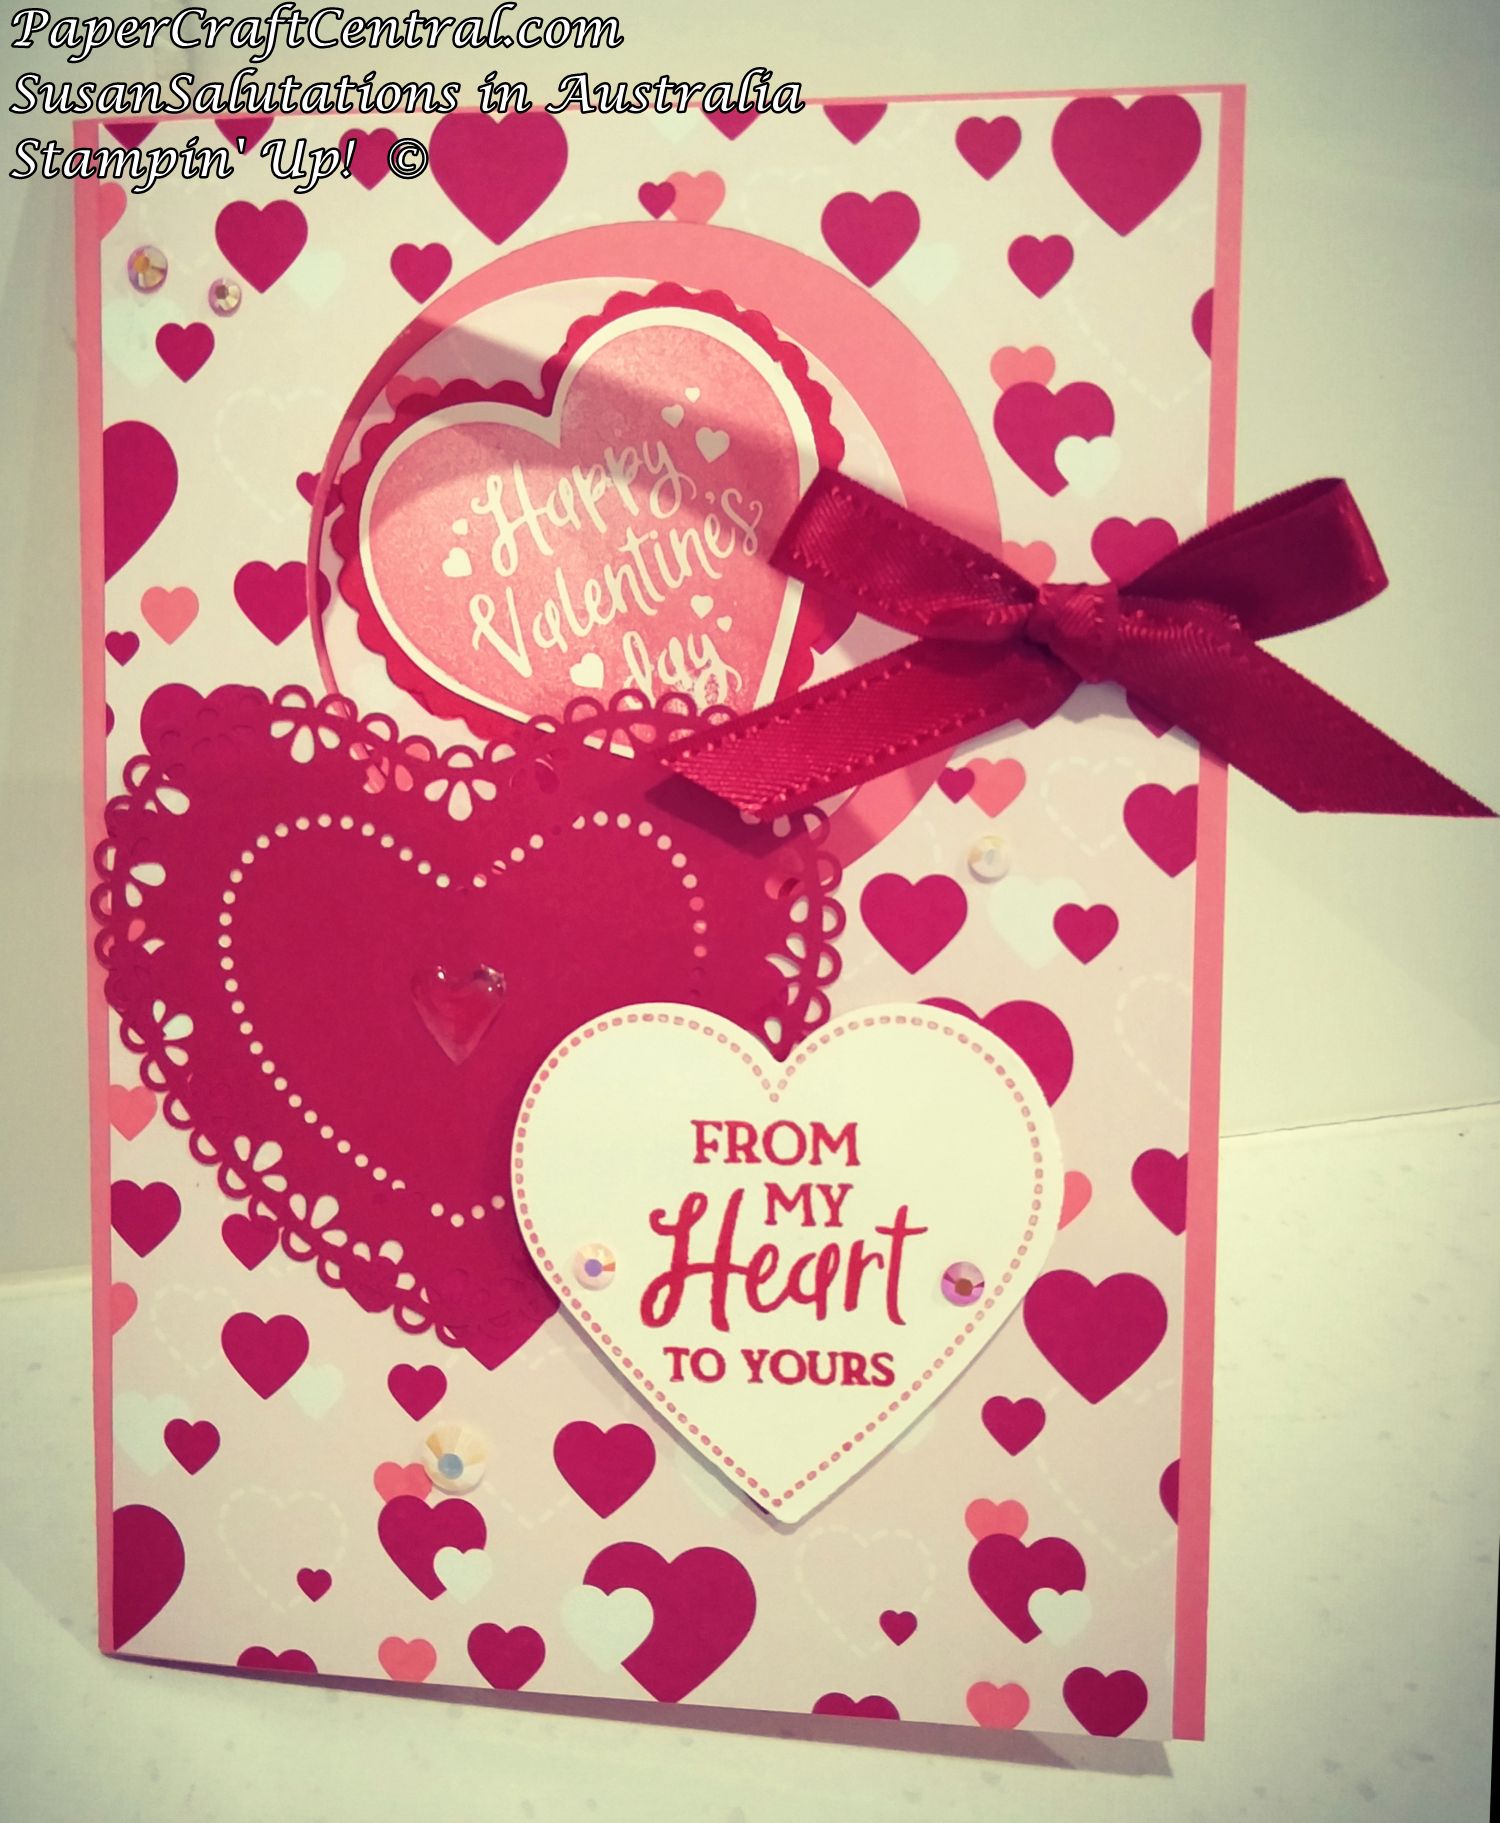
The suite I found most wonderful for Valentine's Day cards and projects was the From My Heart Suite Bundle.
Here are a couple of idea for you to use for card sketch ideas or to CASE:
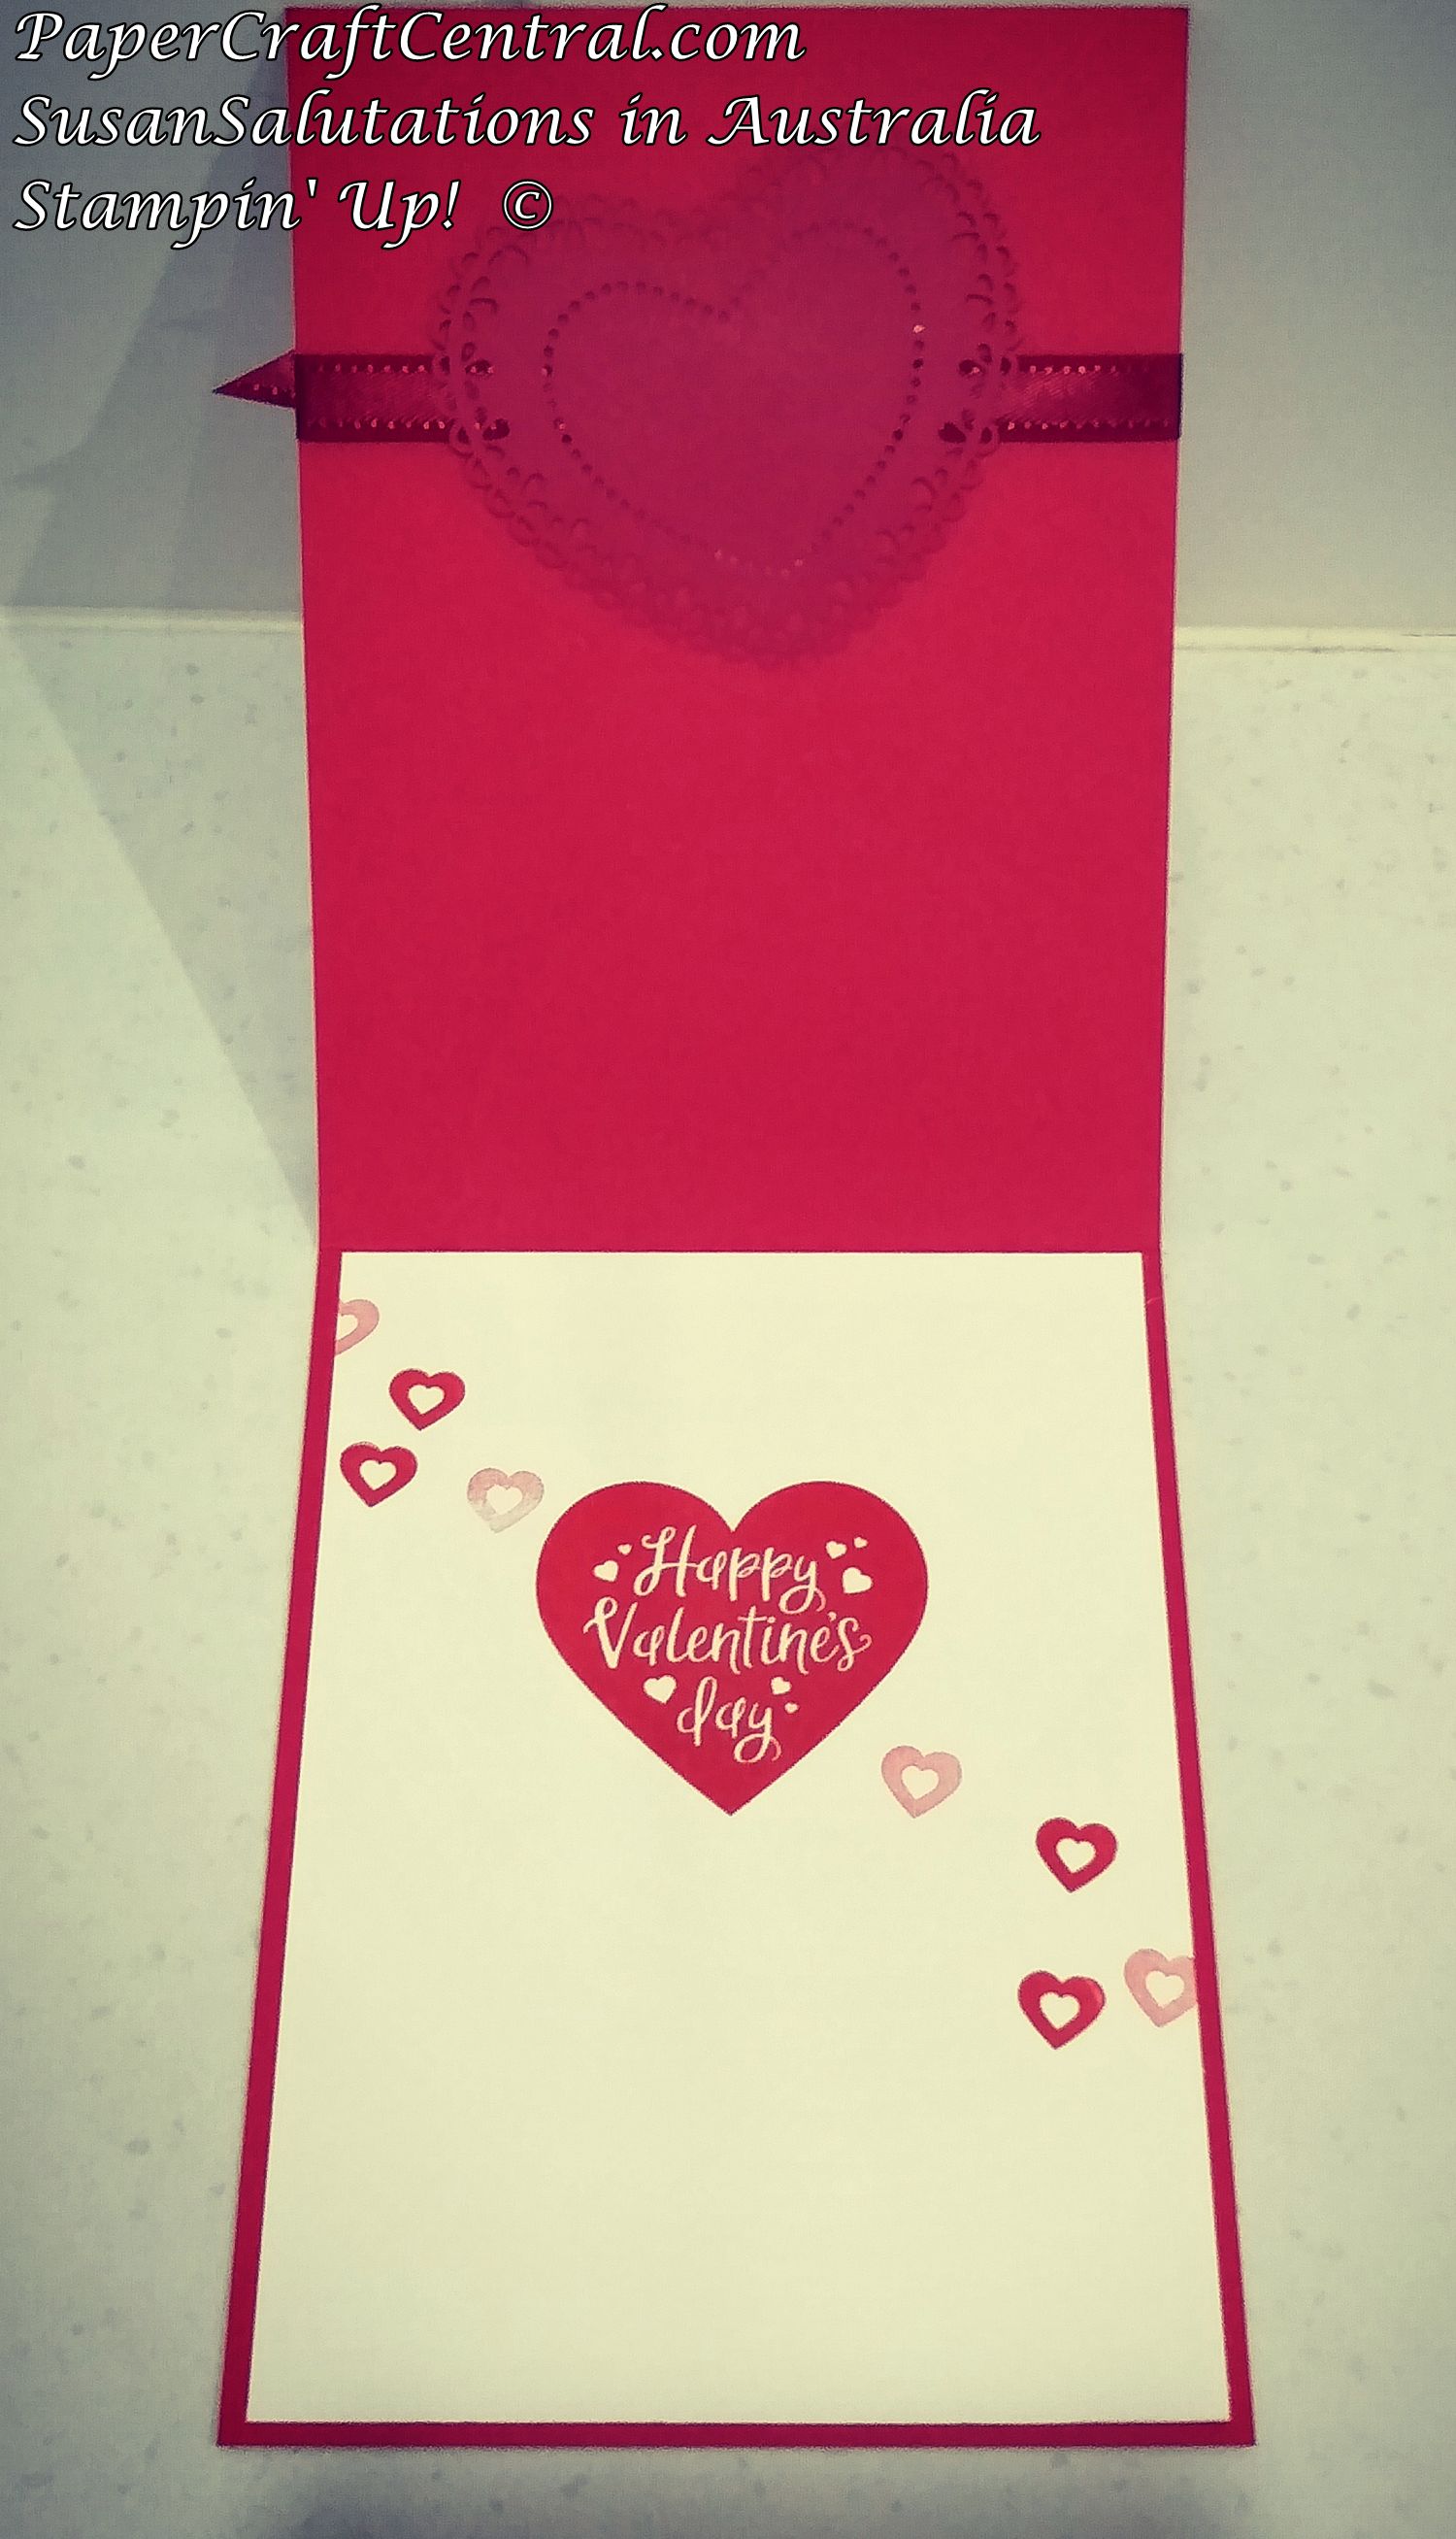
Here is the inside of the card shown above:
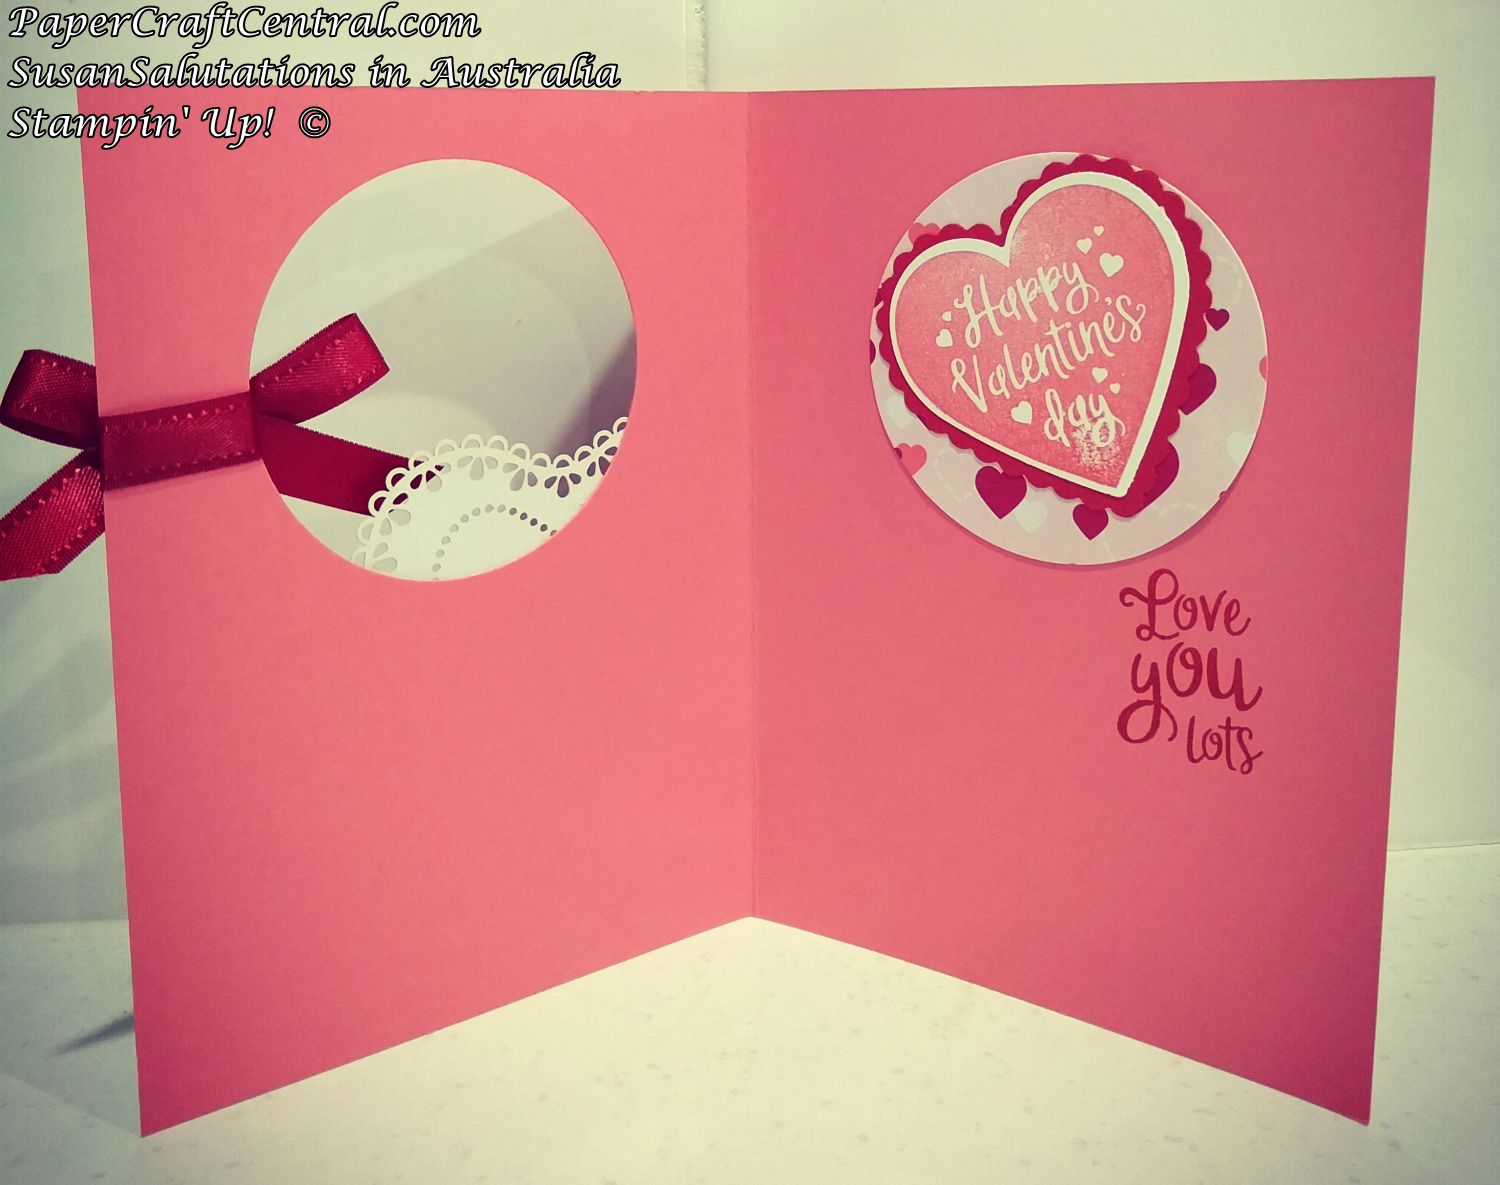
Here's another card layout where I used the 2" circle punch on the front, then added the cut out piece to the inside of the card:
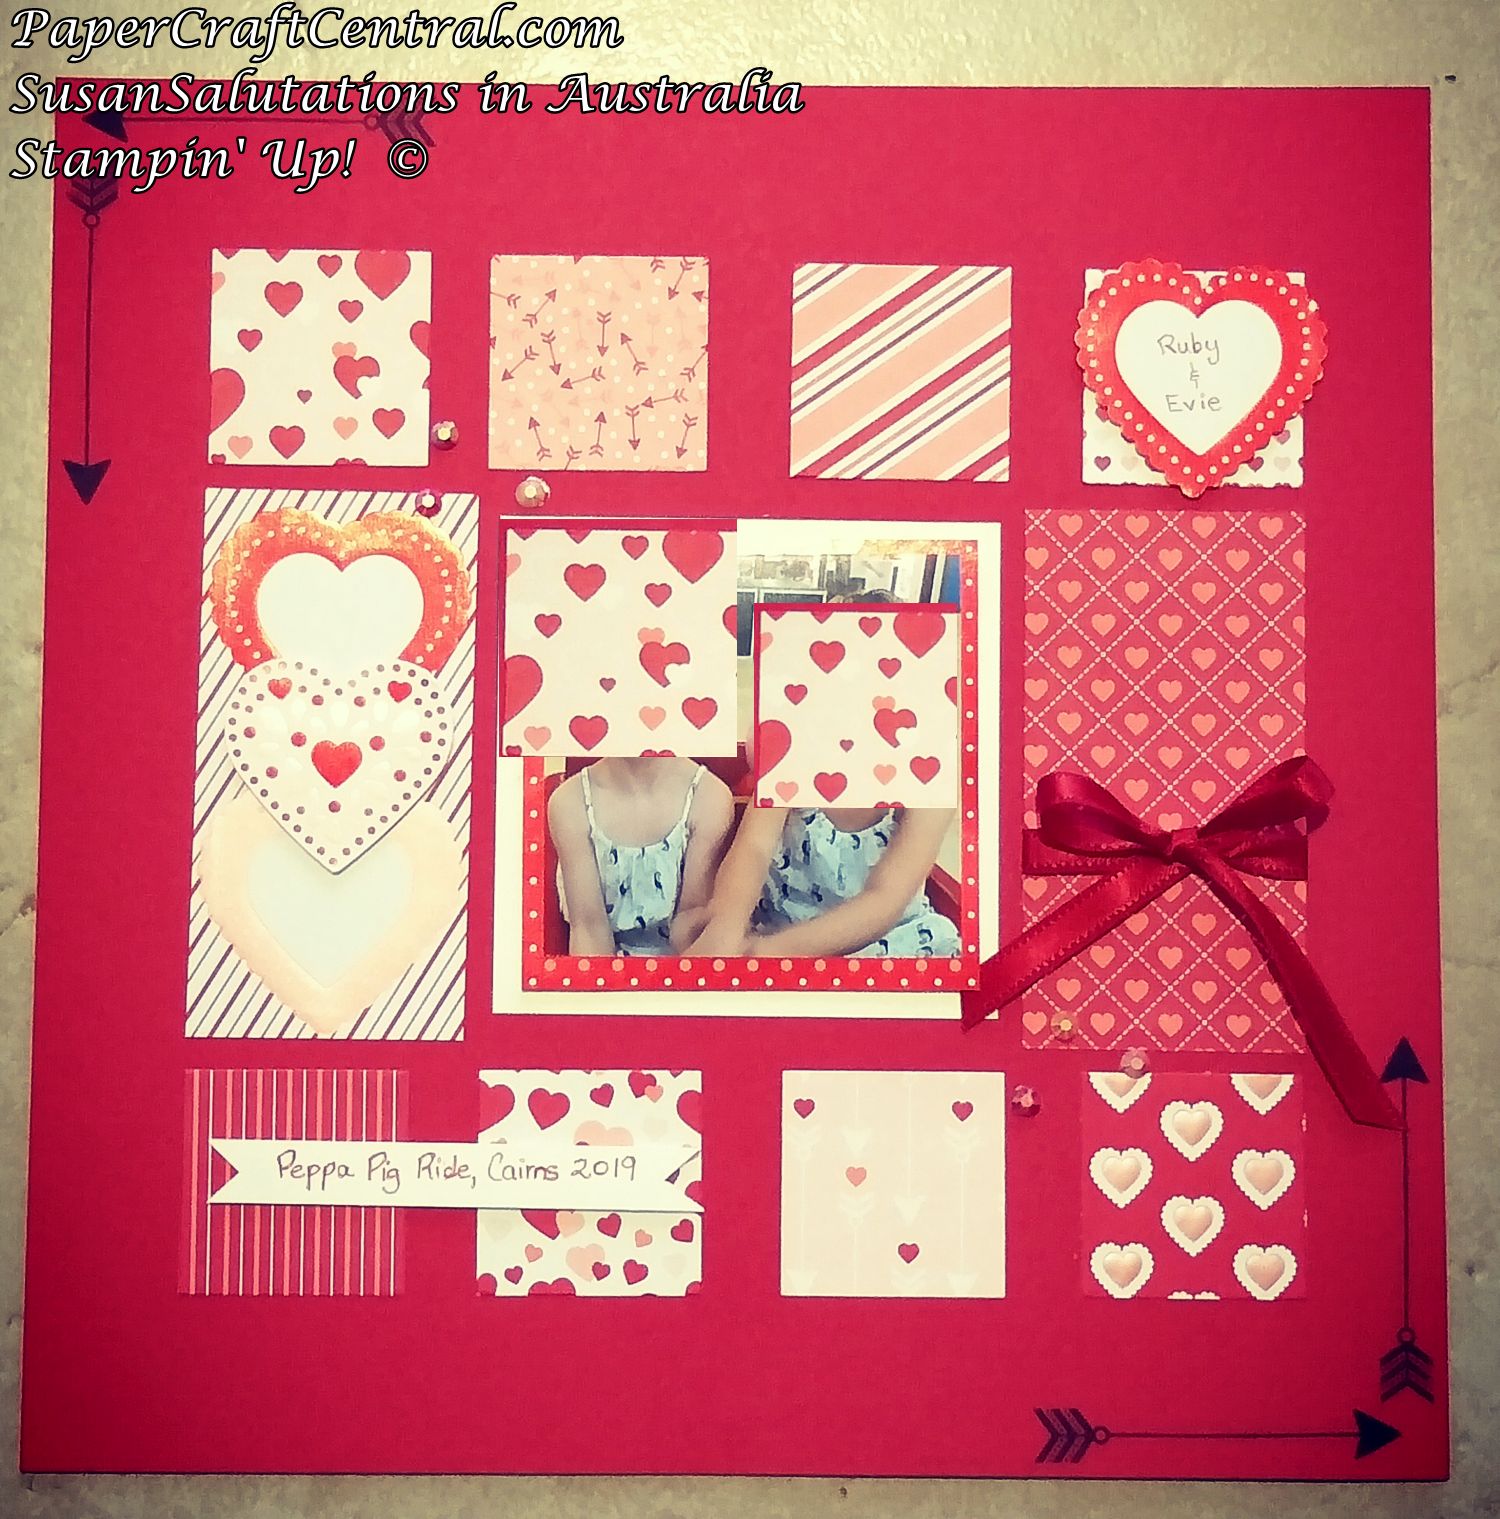
A Scrapbook Layout Idea using the From My Heart Suite Bundle
I know this isn't a card, but I scrapped this month and really wanted to show you the result!
I have to mask the pictures, I'm sorry, but I think you can still tell how this layout would look with a photo of your own in the centre.
I loved that I had die cut hearts, bling, stamps ribbon and designer series paper I could use to enhance my layout, all from the From My Heart Suite bundle.
It's not just for Valentine's Day!
PS: I did use a sketch idea I found from the Scrapbooking Global Facebook group to inspire my page.
Peaceful Poppies in February
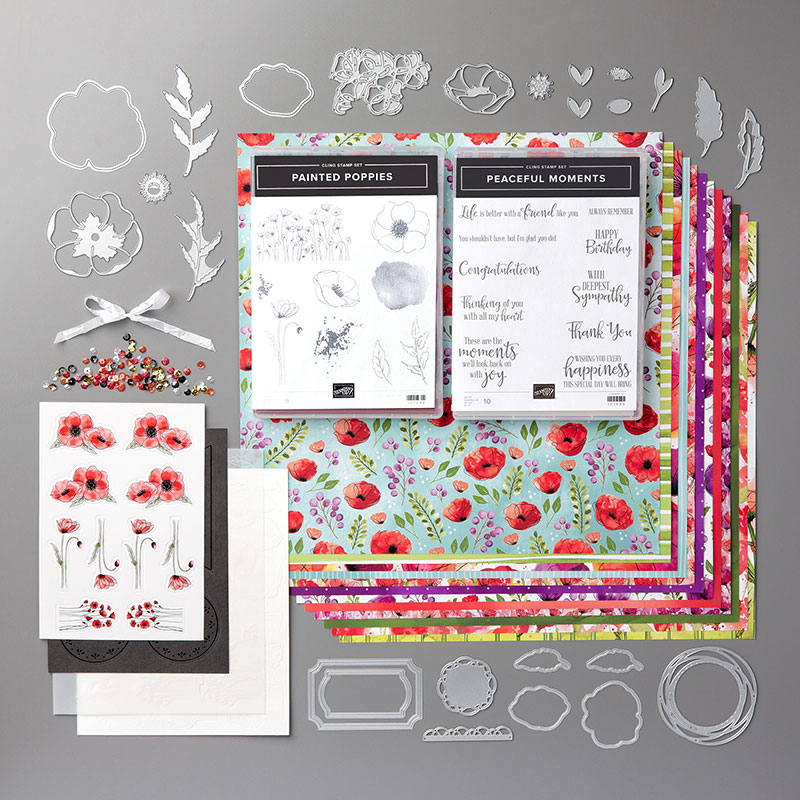
The Peaceful Poppies Bundle is featured in the following projects as card ideas in 2020 for February. I loved that you got stamps and die cuts in the bundle to help you create such beautiful flowers.
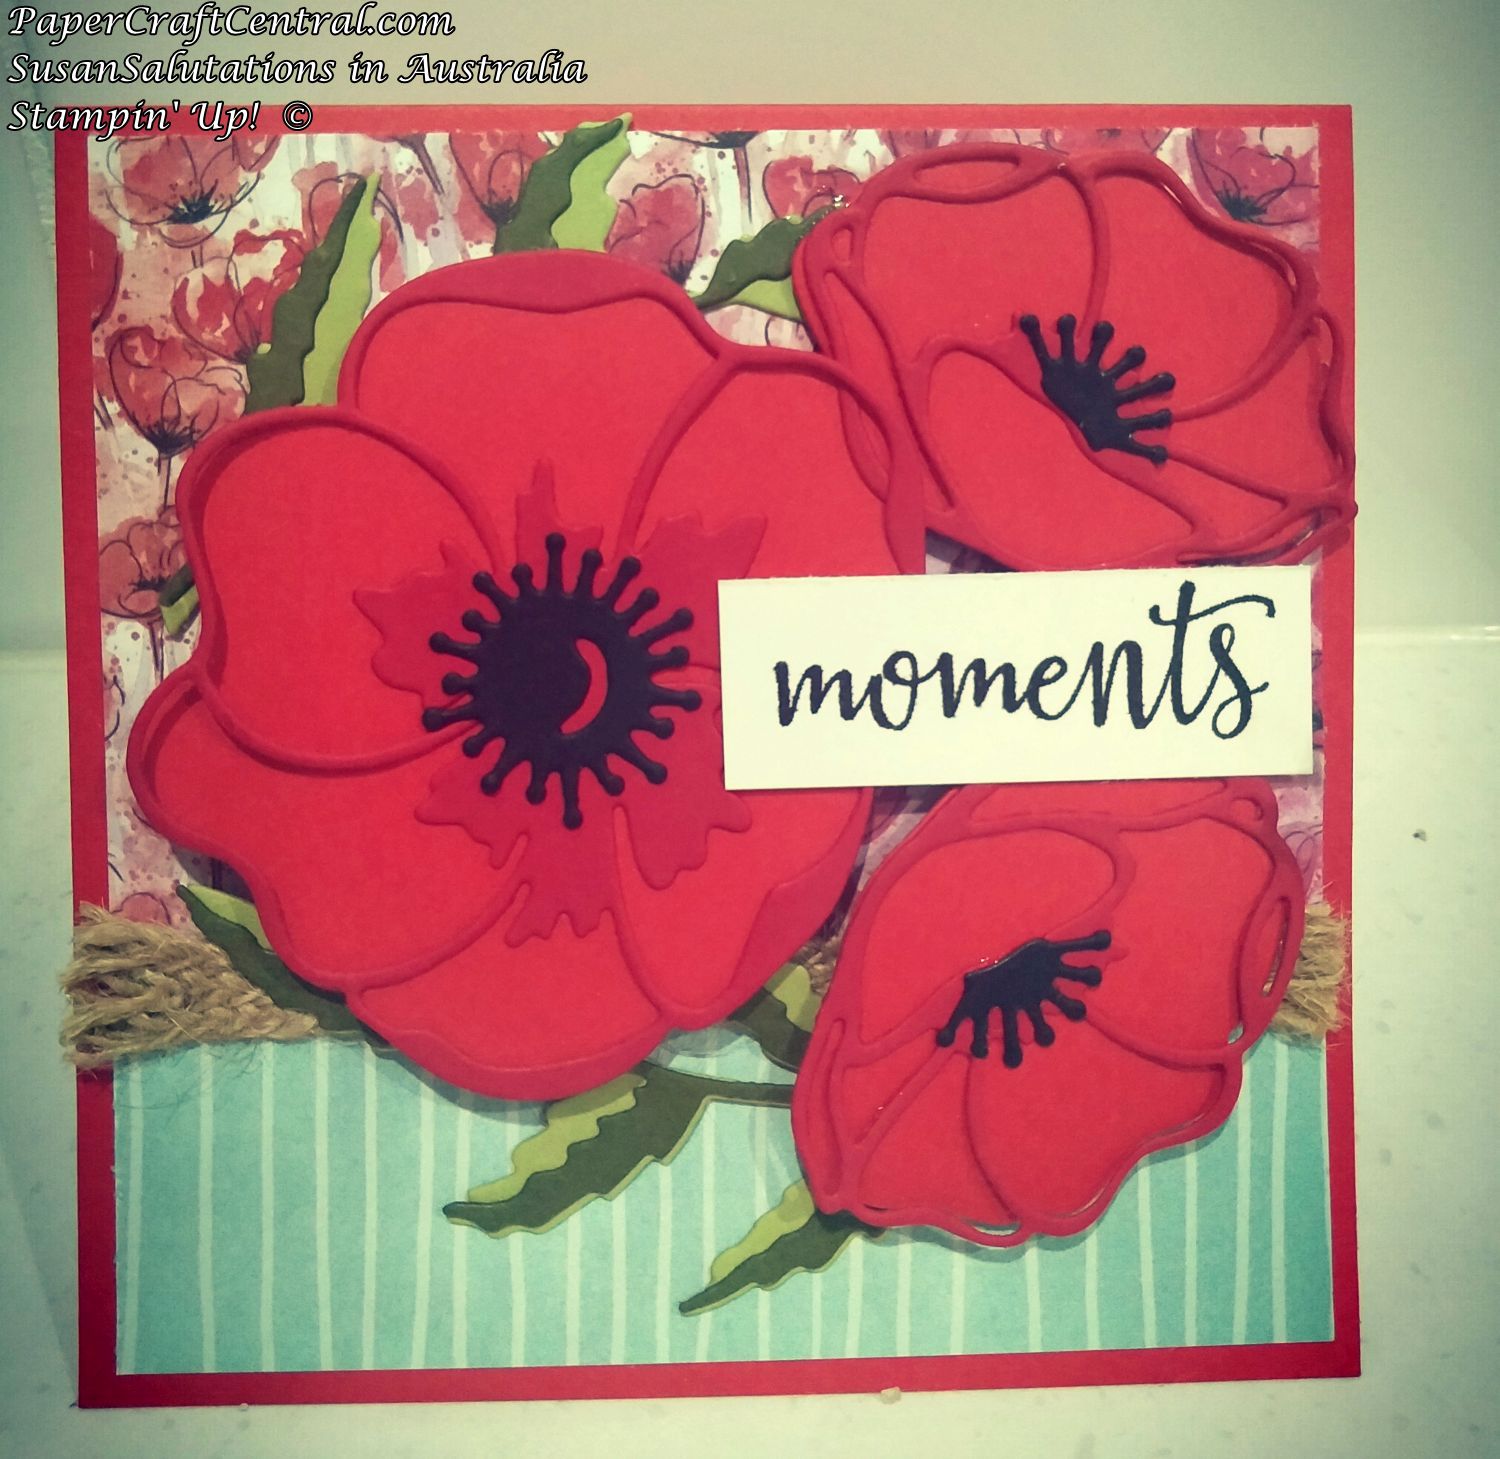
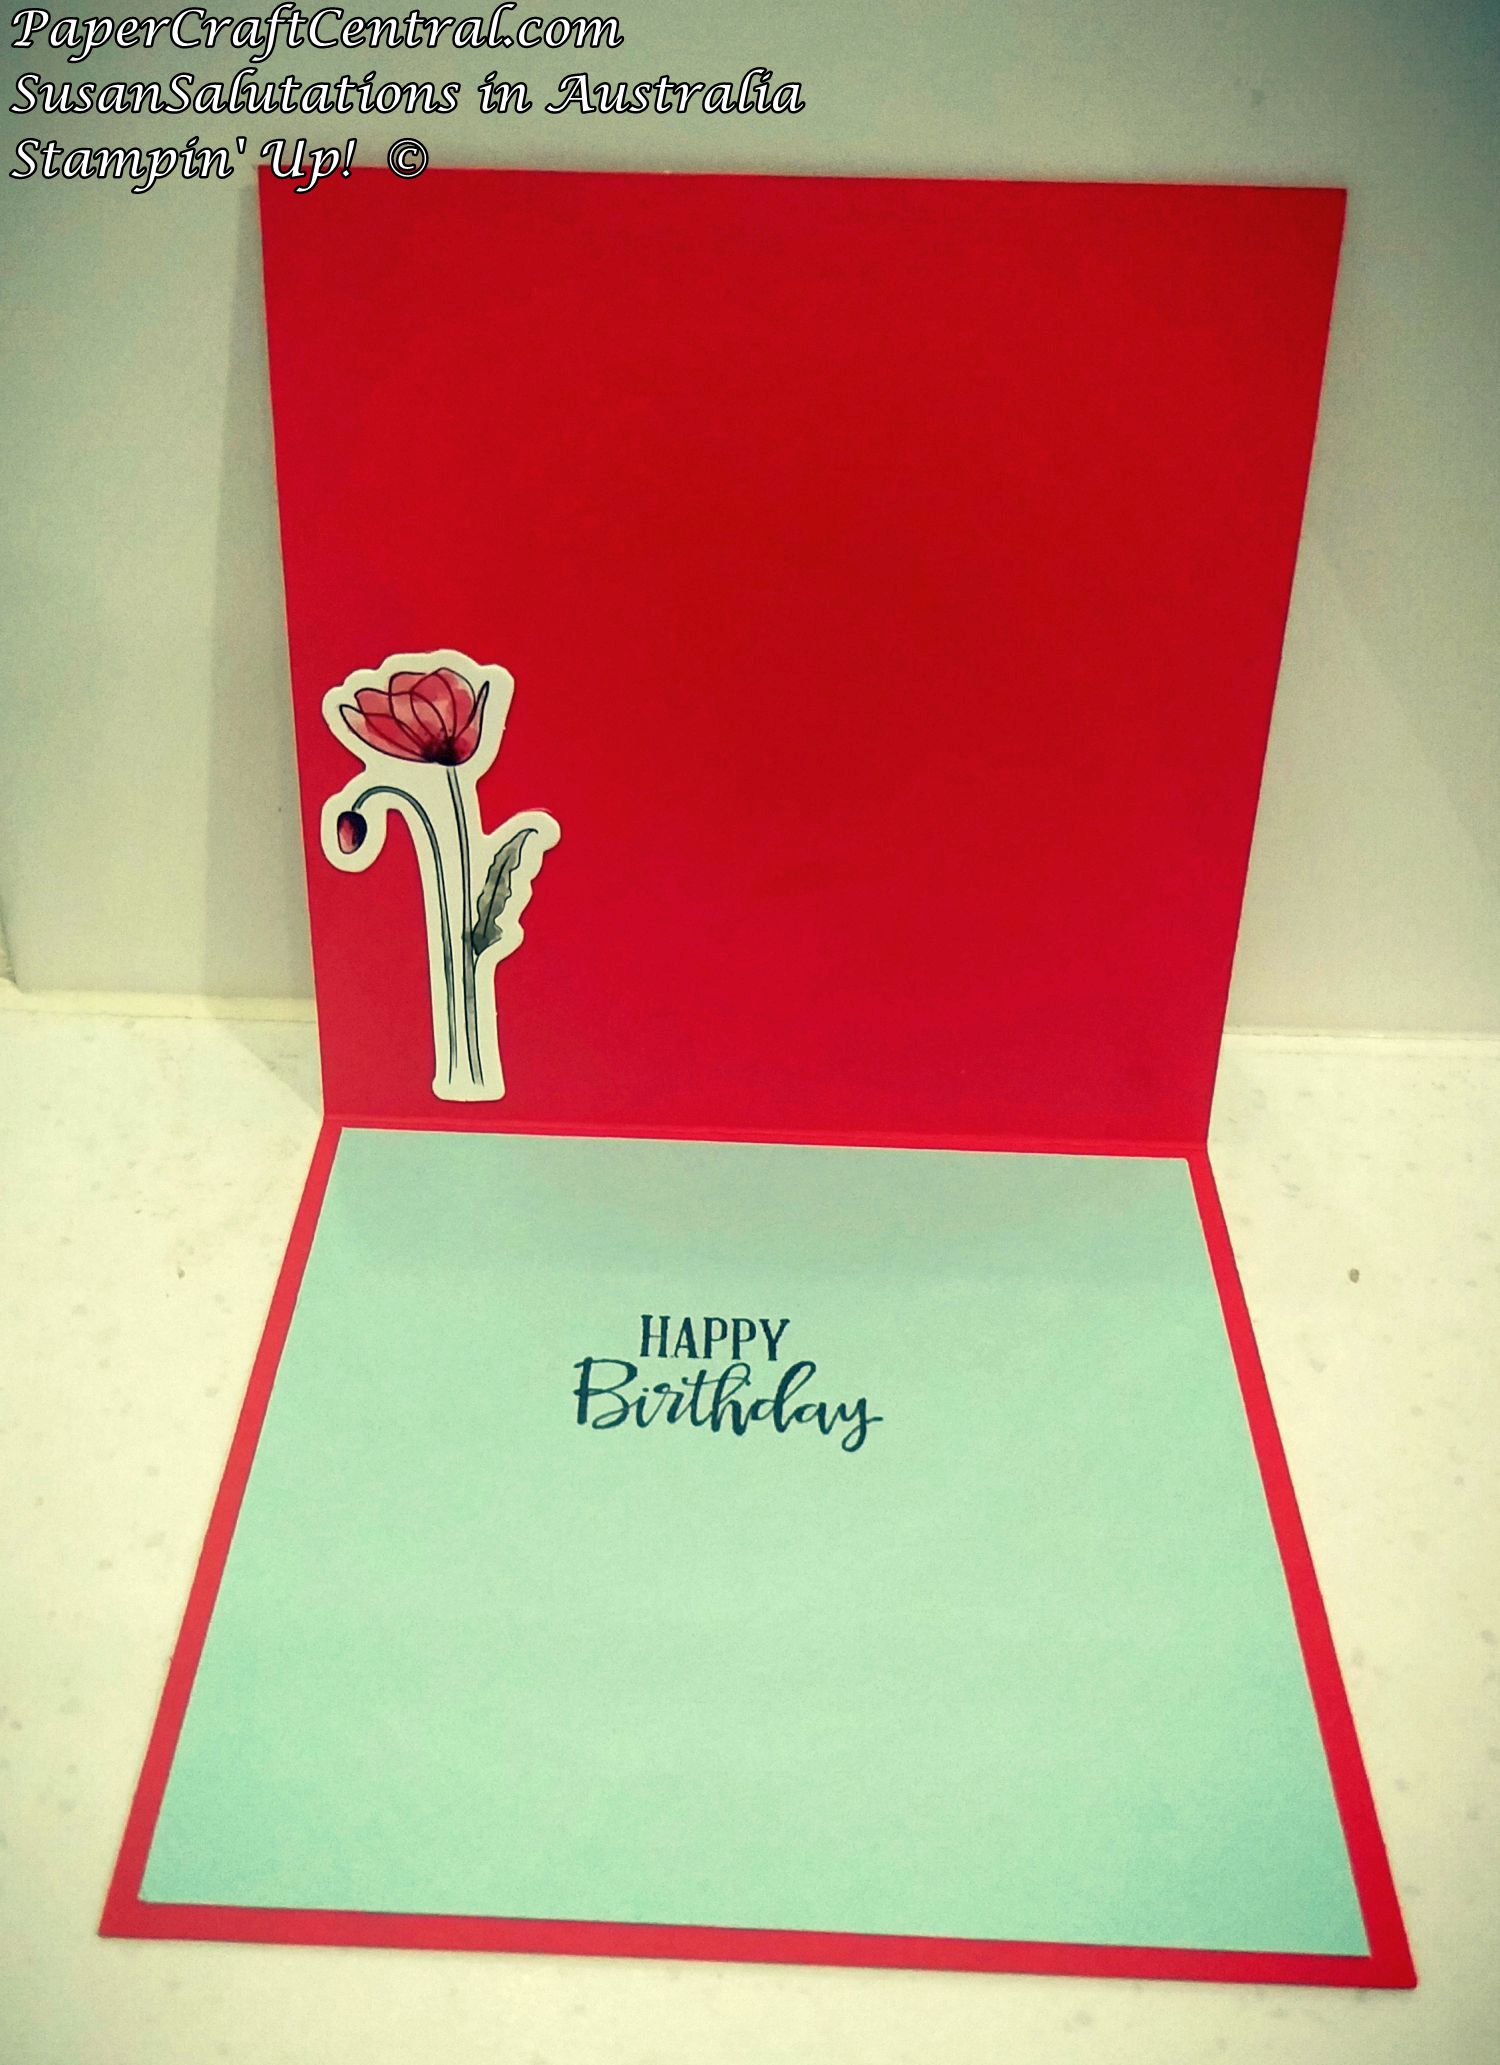
You even goet die cuts in the kit, ready to be added to your project like I did here.
I thought the little poppy flower finished off the inside of my card nicely.
Dutch Fold or Barn Door Card Ideas
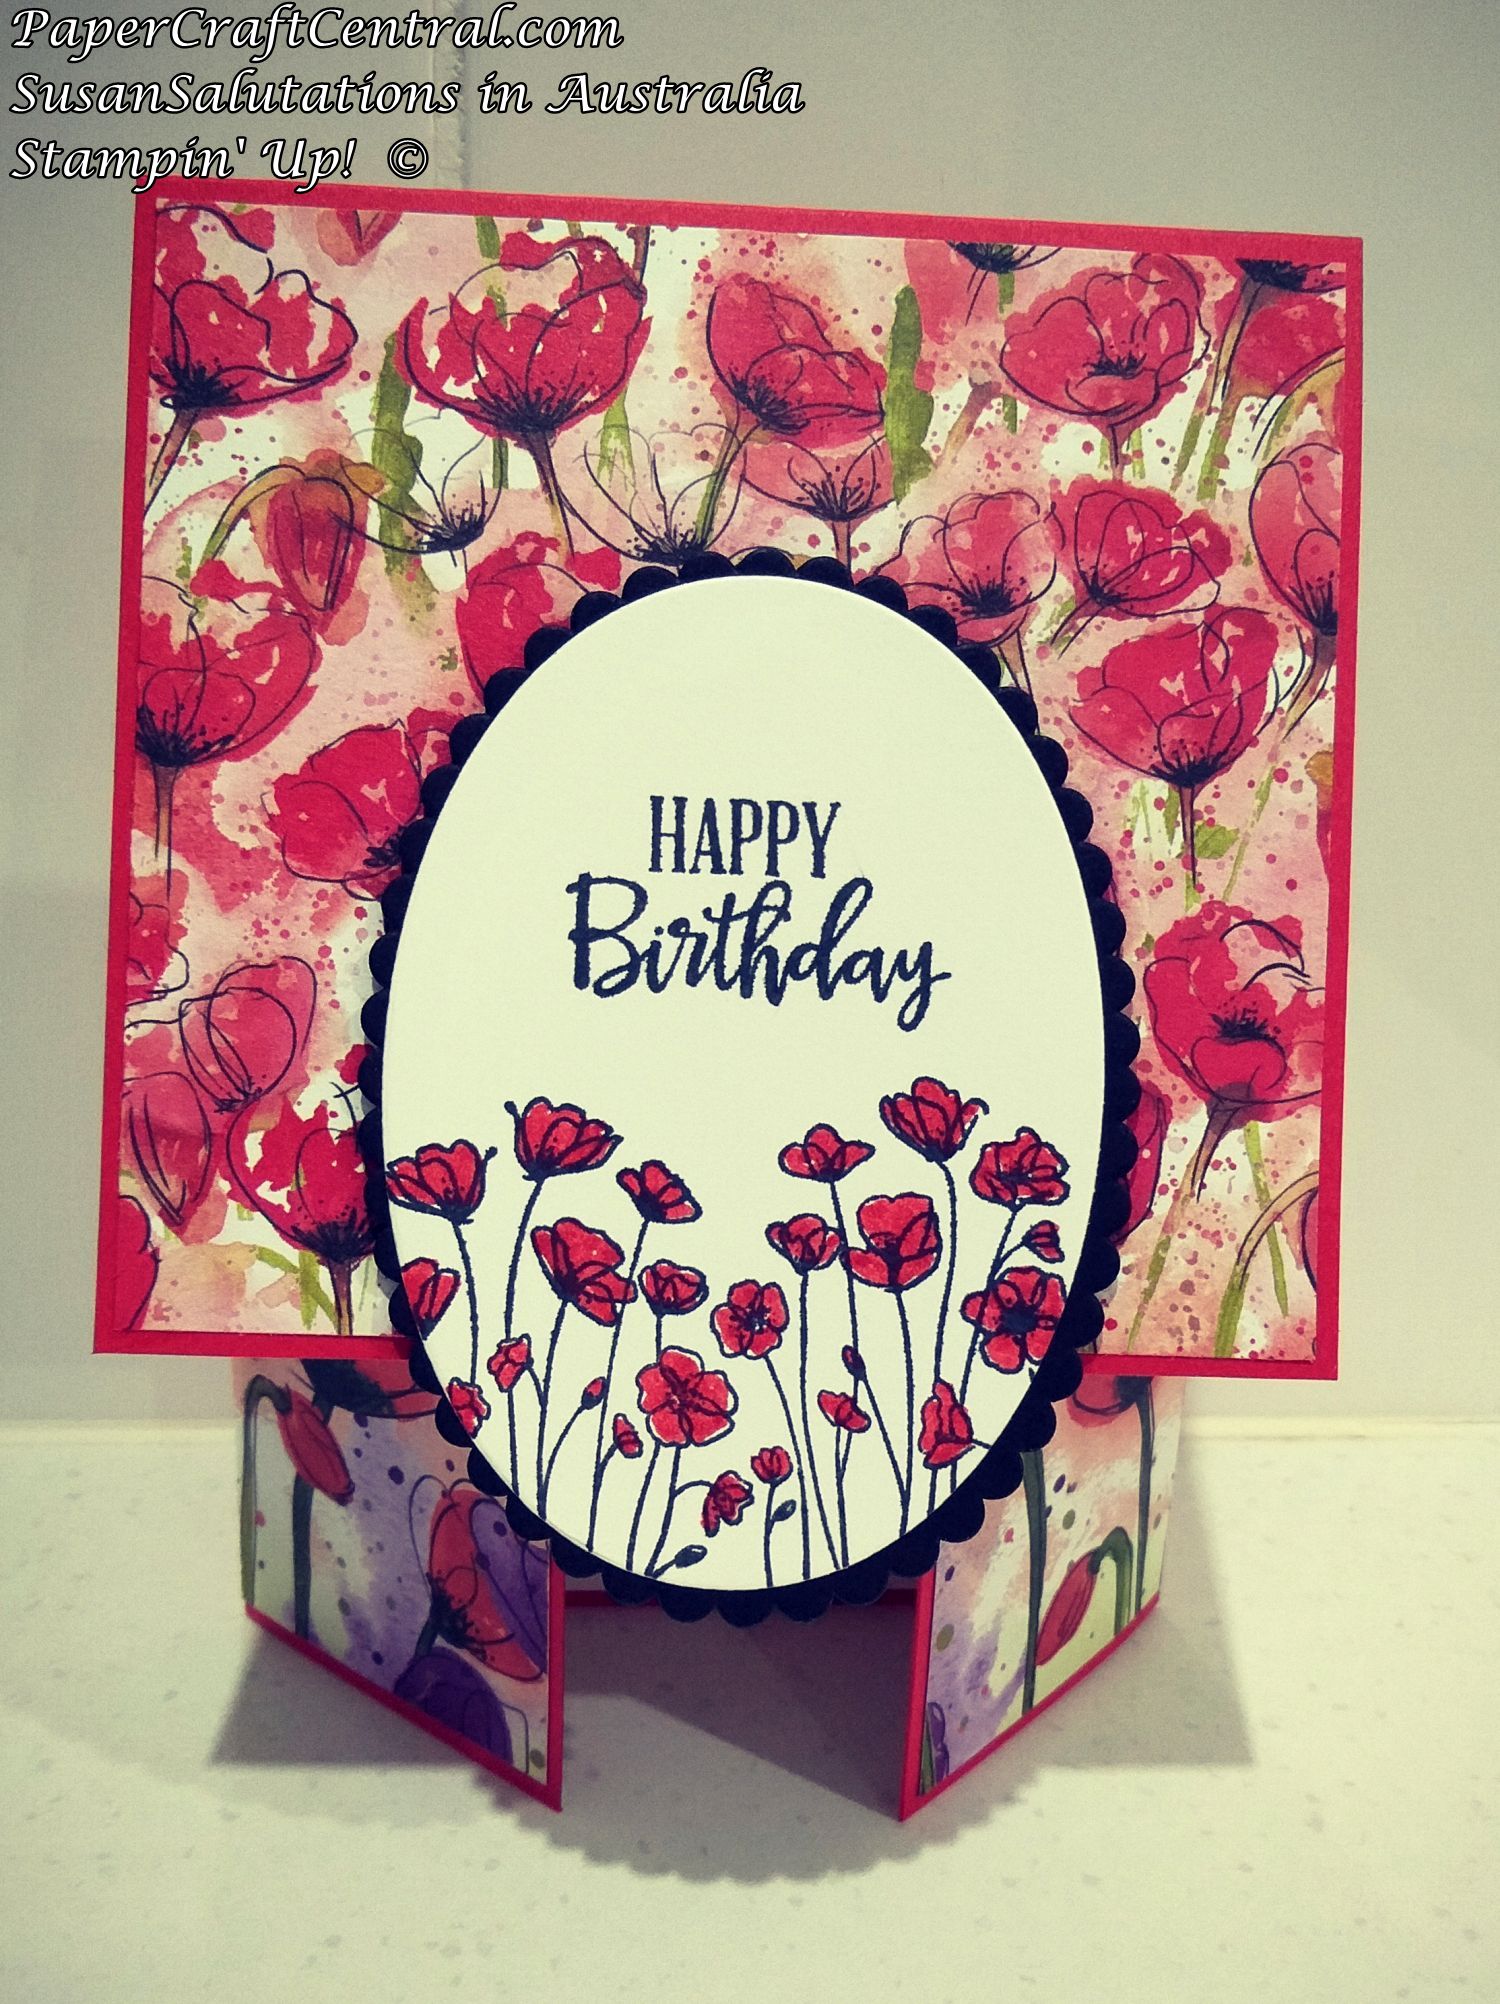
For card ideas in 2020 that were a little different, you could make this Dutch Fold card.
All I did was start with a normal sized card base, then I cut off 5cm from the bottom of the front, and I made a wrap around piece for the bottom so it could be scored and folded to meet in the middle.
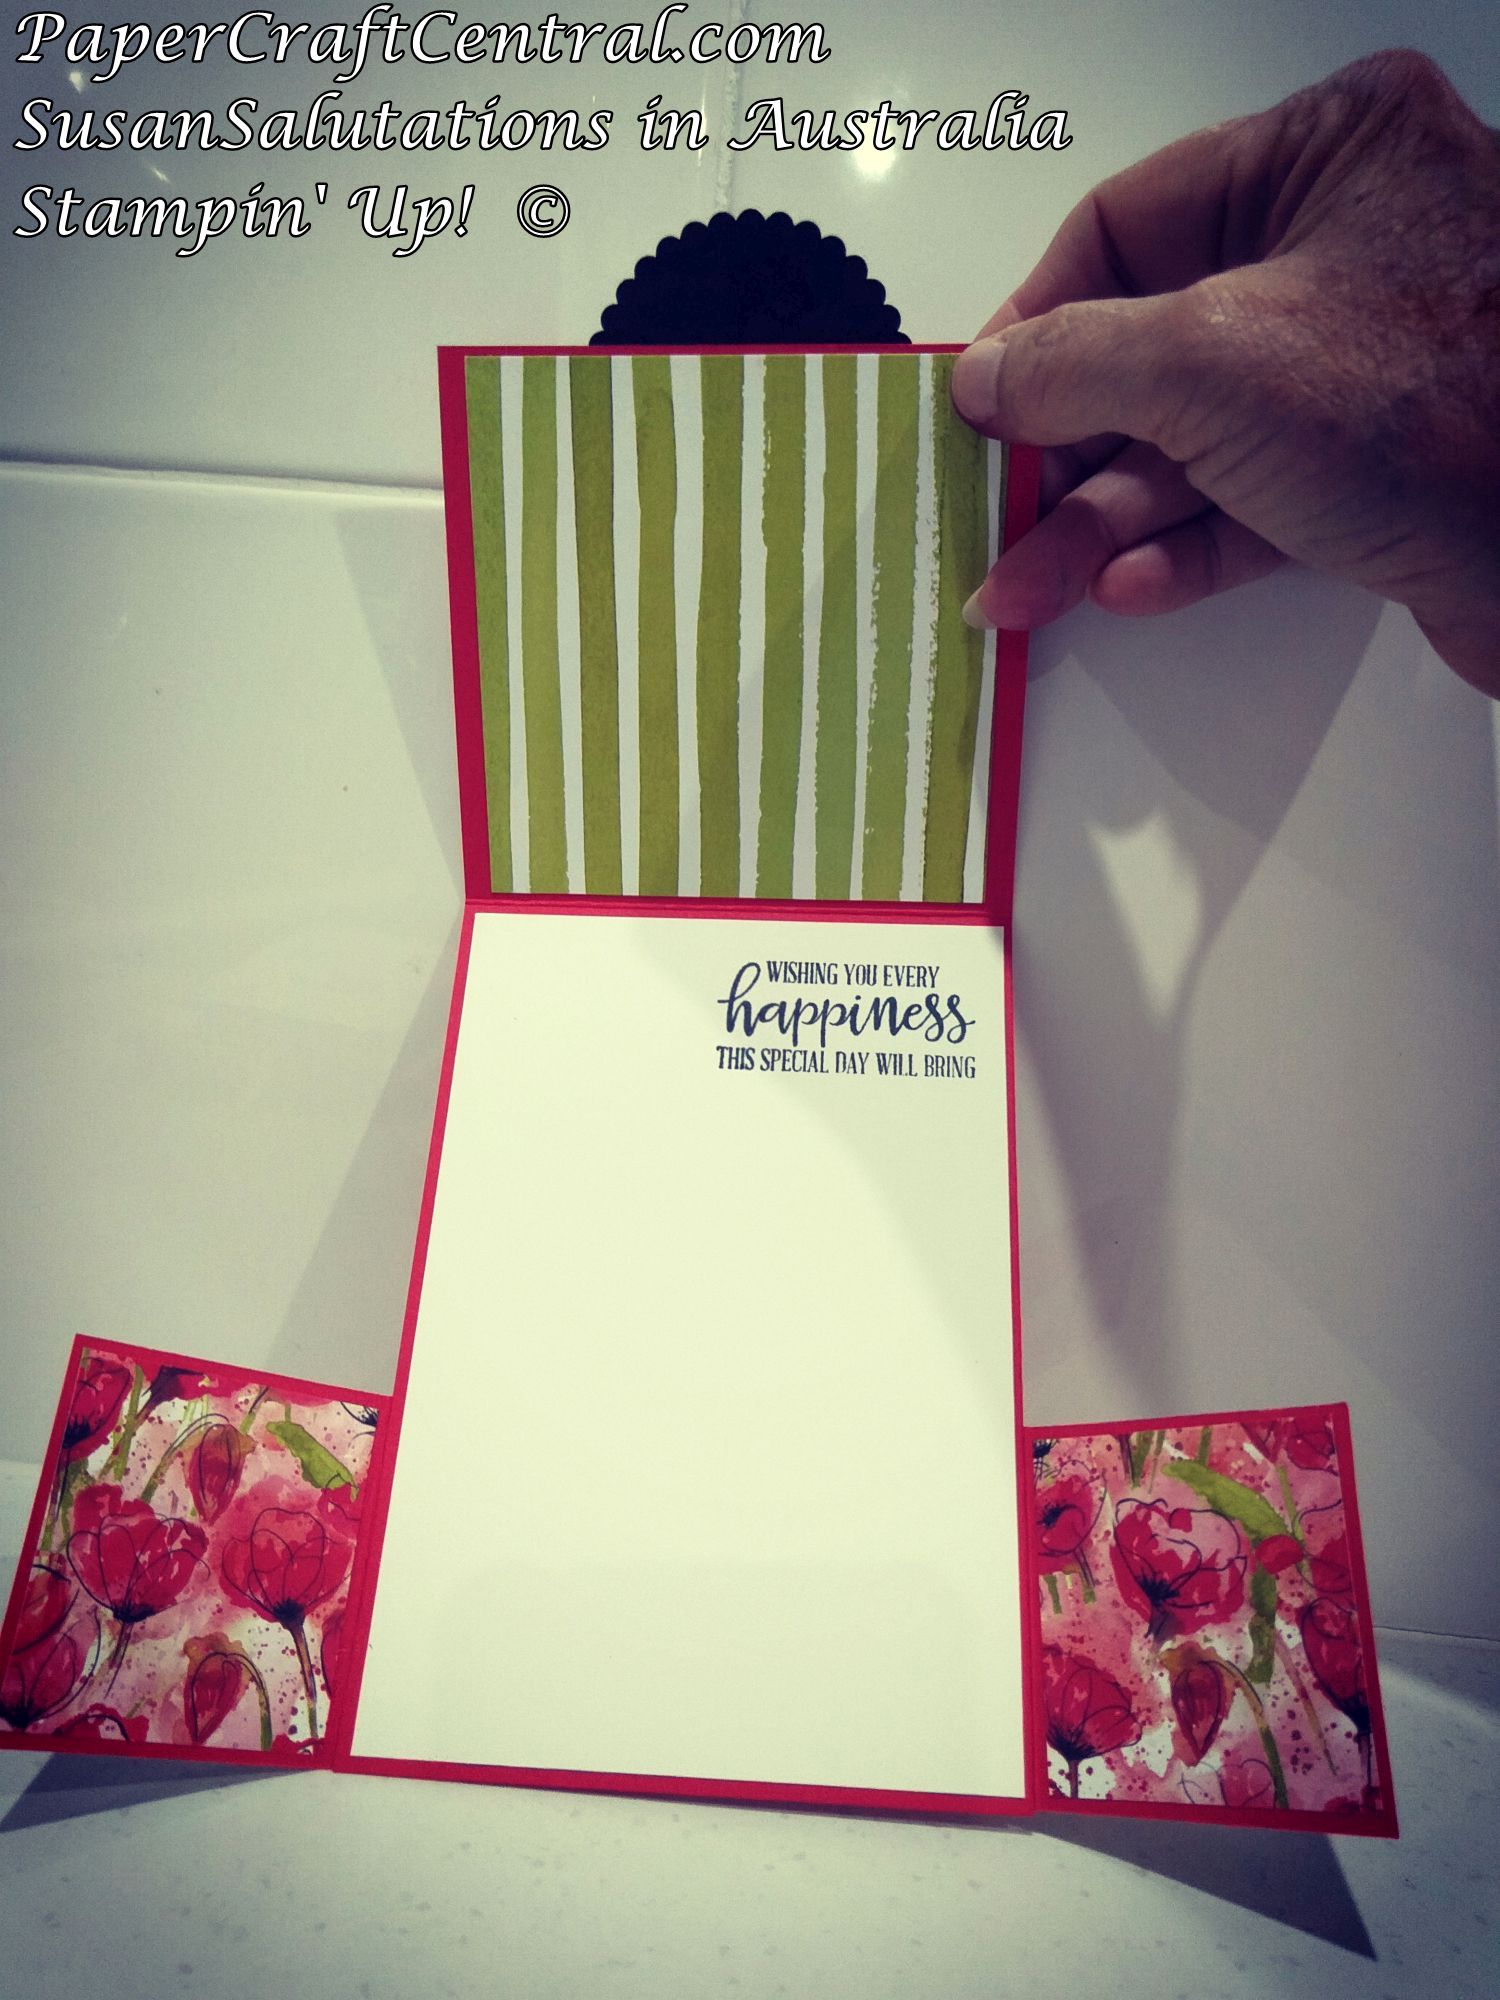
These became my little 'barn doors' and I added some designer series paper to both sides of the doors as I thought it looked so pretty.
Add some more designer series paper and a piece of Whisper White cardstock to complete the inside of your card.
Project Ideas, January 2020

Some new product is always inspiring, isn't it? If you read all about Sale-A-Bration you may have wanted to earn some of the products I was showing you for free from January 3rd to March 31st 2020. Sale-A-Bration happens every year in the Stampin' Up! world, so do look out for it.
Many items I am showcasing come from the new January - June 2020 Mini Catalogue which was a gorgeous catalogue...
In the case of the Tropical Oasis Suite of products, they definitely gave me some good card ideas.
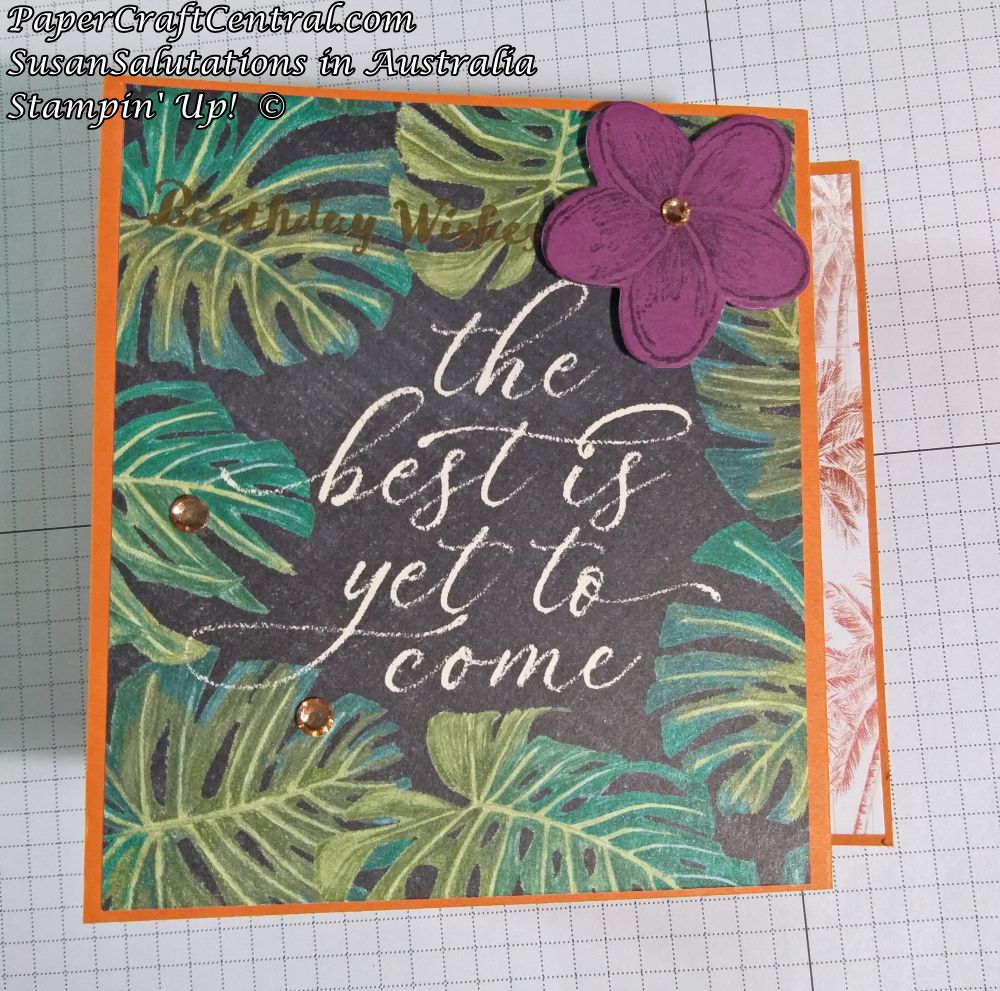
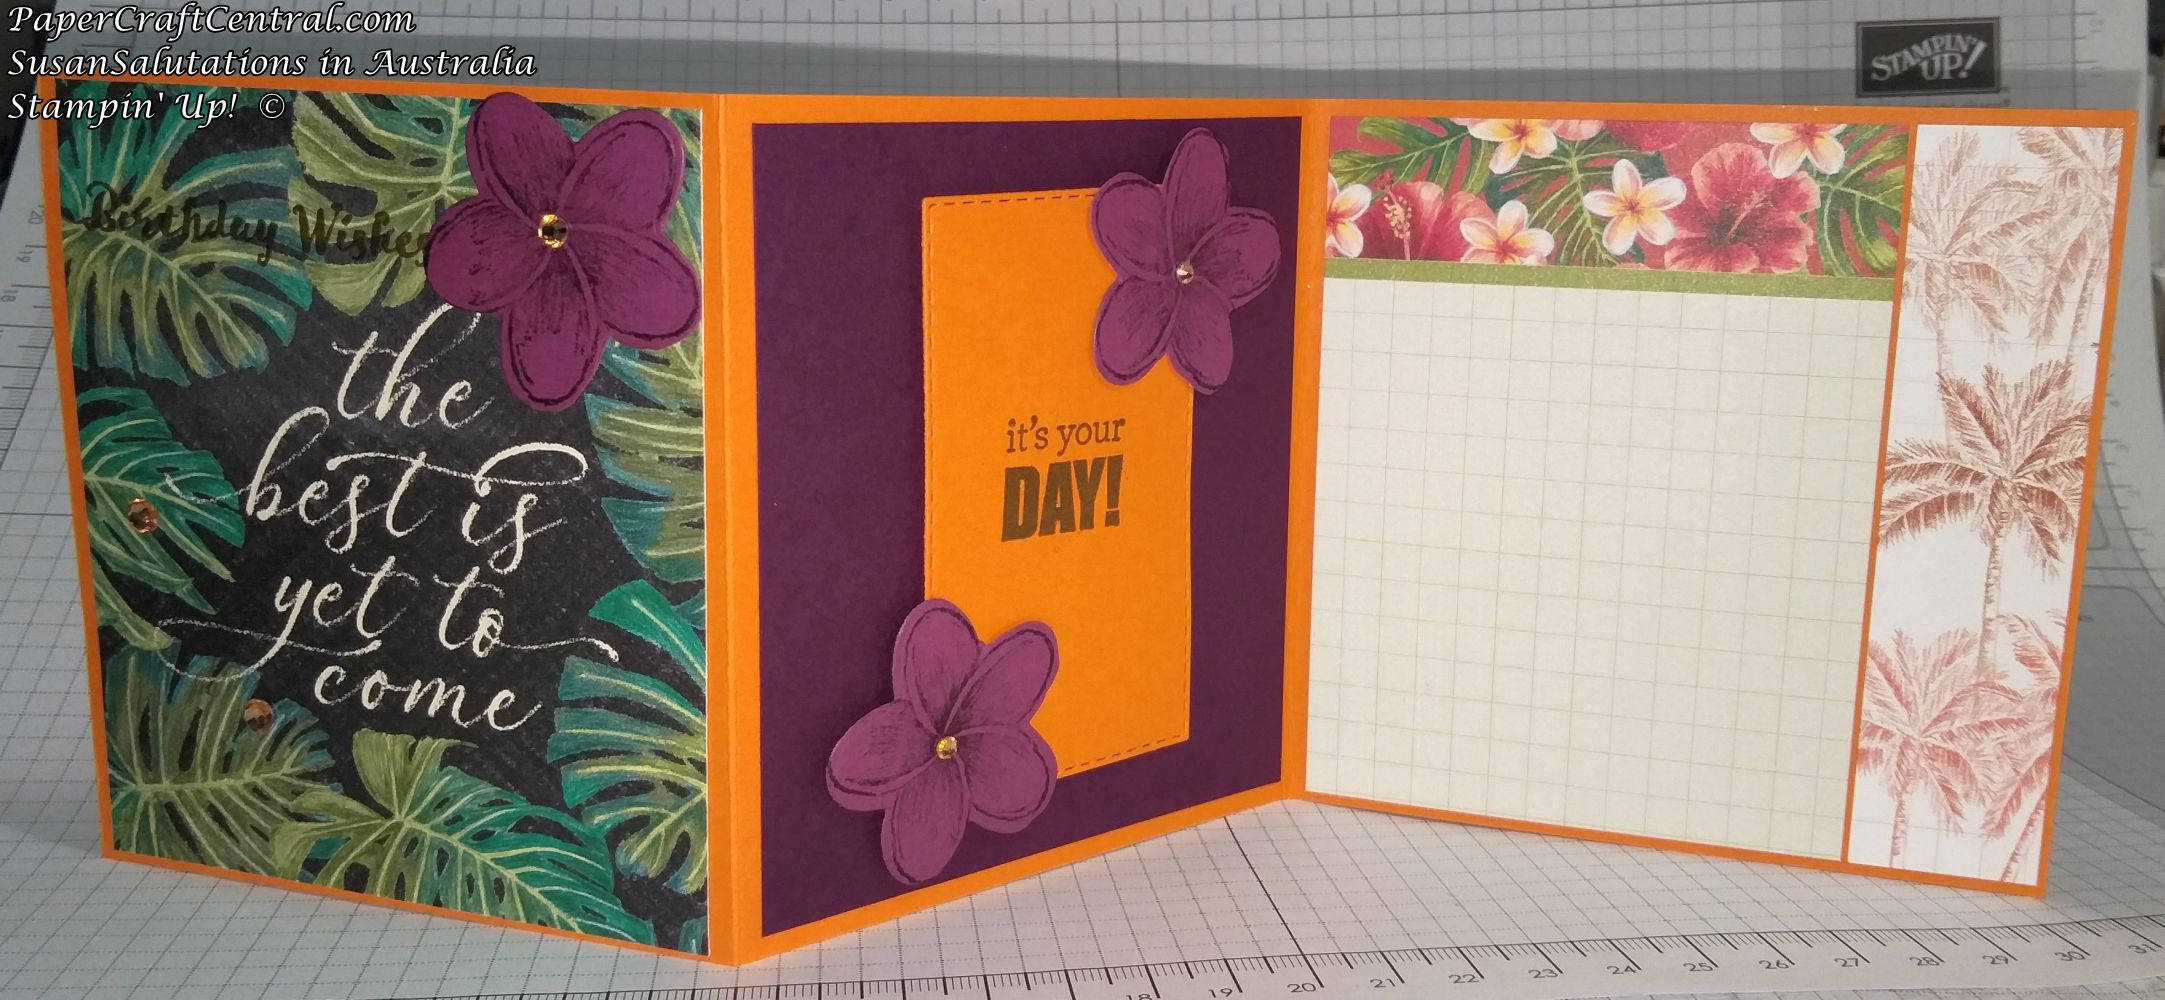
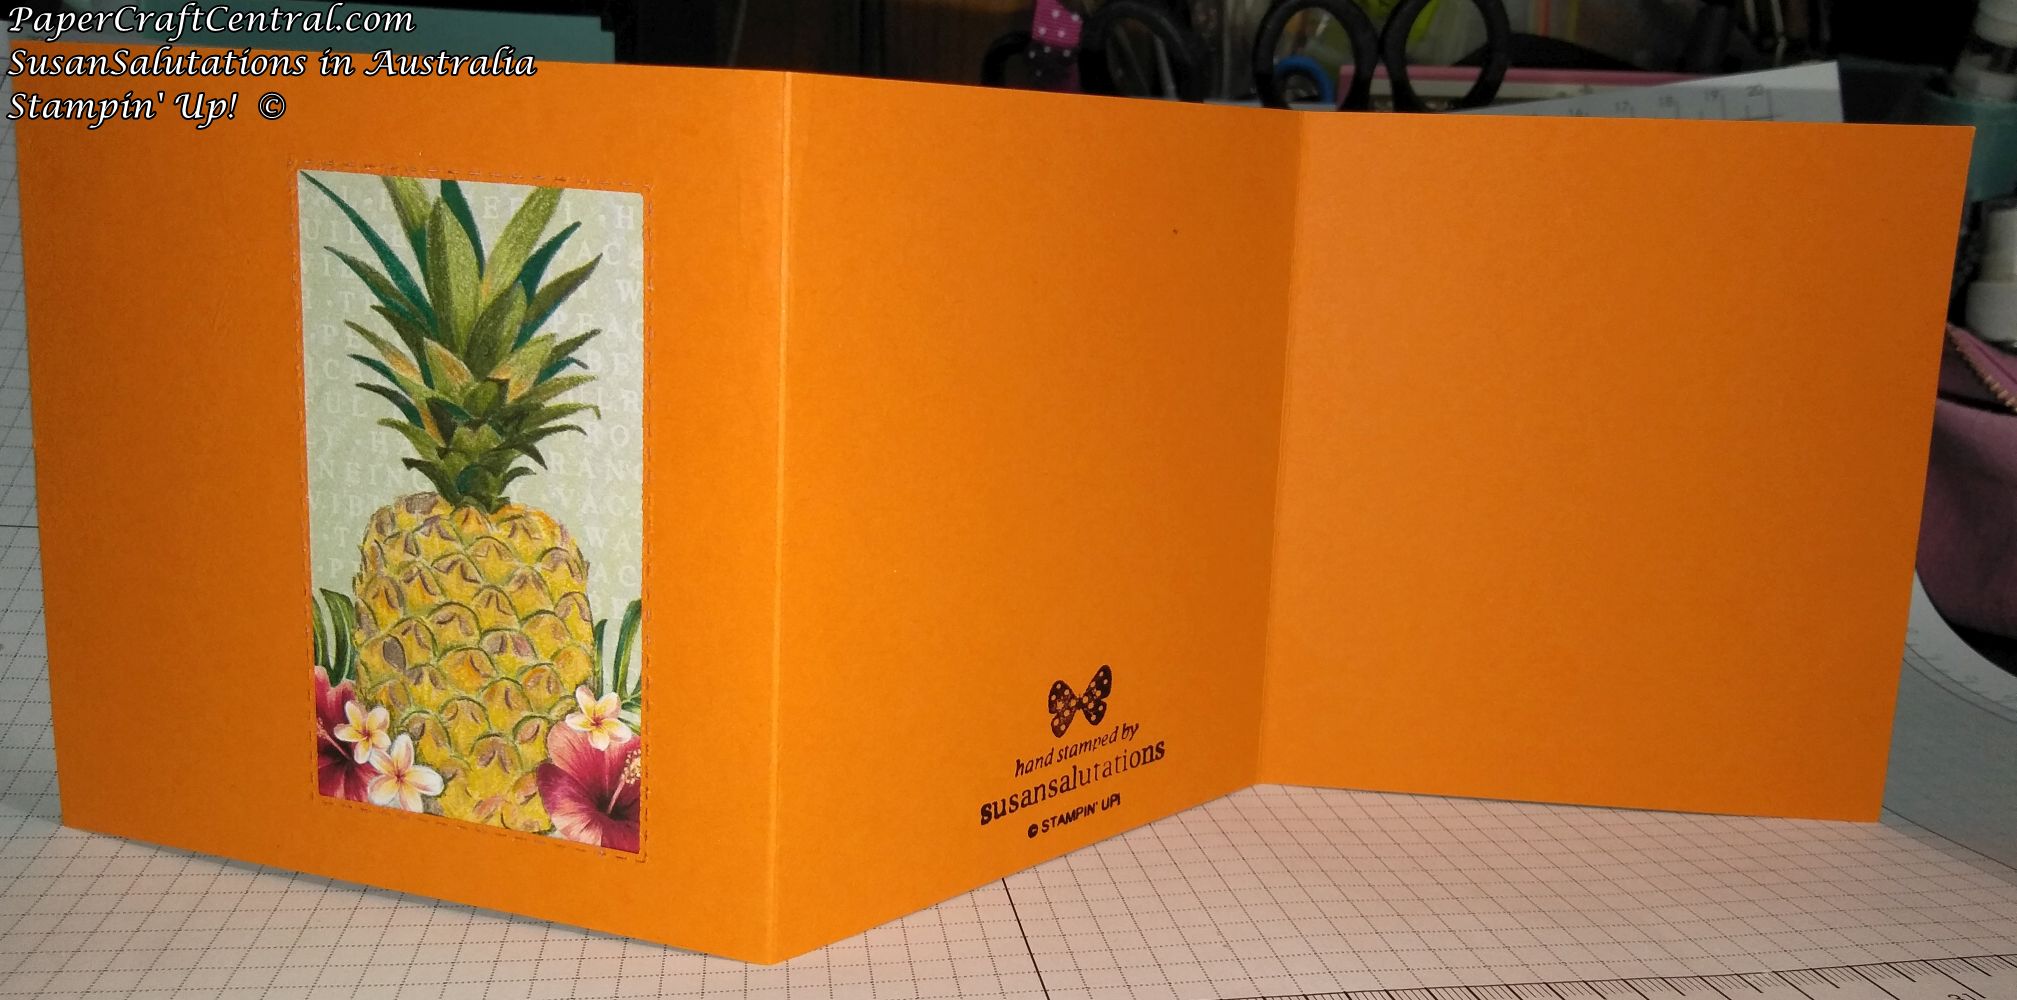
I decided to make a special birthday card with some of the Memories and More pack of cards. I made it an accordion fold-out card with a window cut in the back of one section so I could show off both sides of the cards.
Here's how it turned out:
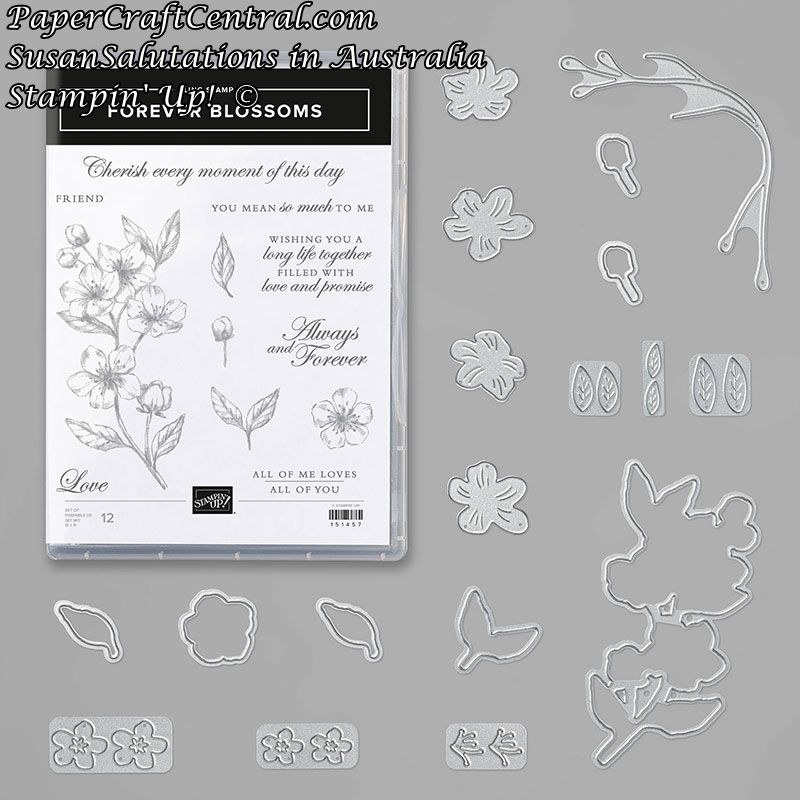
Another beautiful stamp set I had been playing with was the Forever Blossoms one. I just loved the beauty of the flowers in this stamp set.
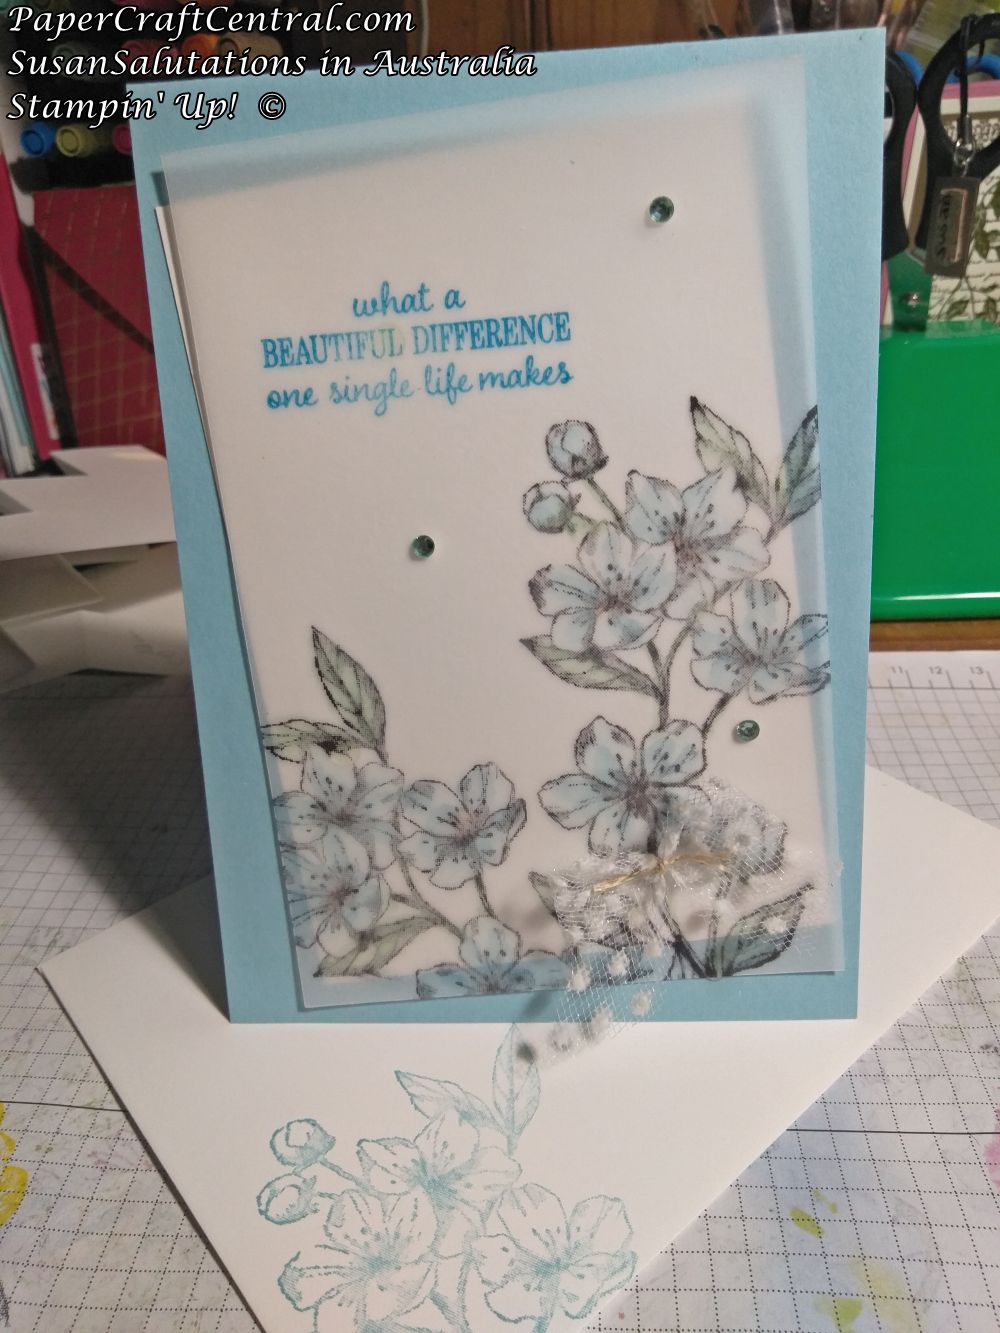
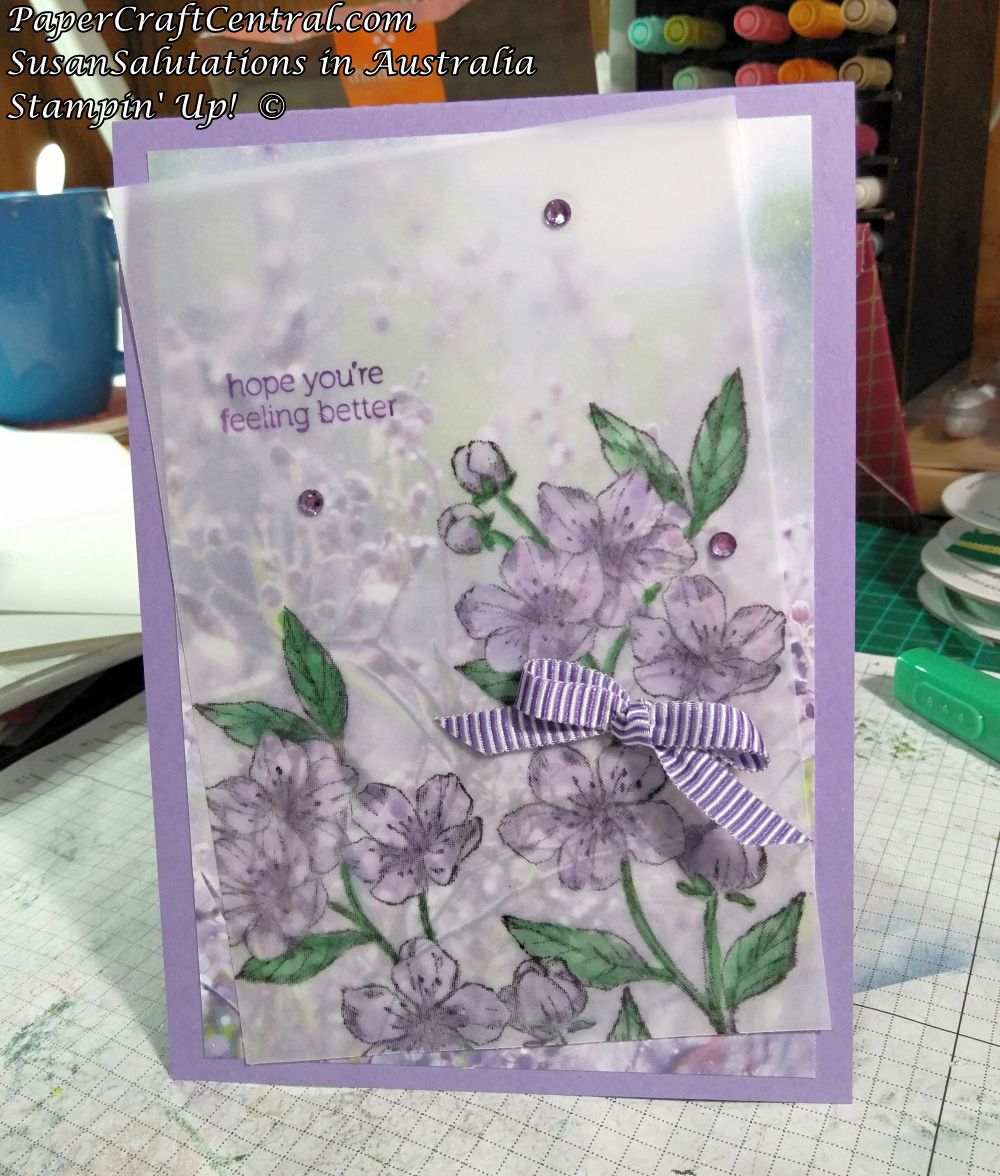
I didn't even use the dies this time! Next time!
The next stamp set I loved is the Little Ladybug one. You could earn this set for free during Sale-A-Bration 2020, while stocks lasted. It sold out quickly.
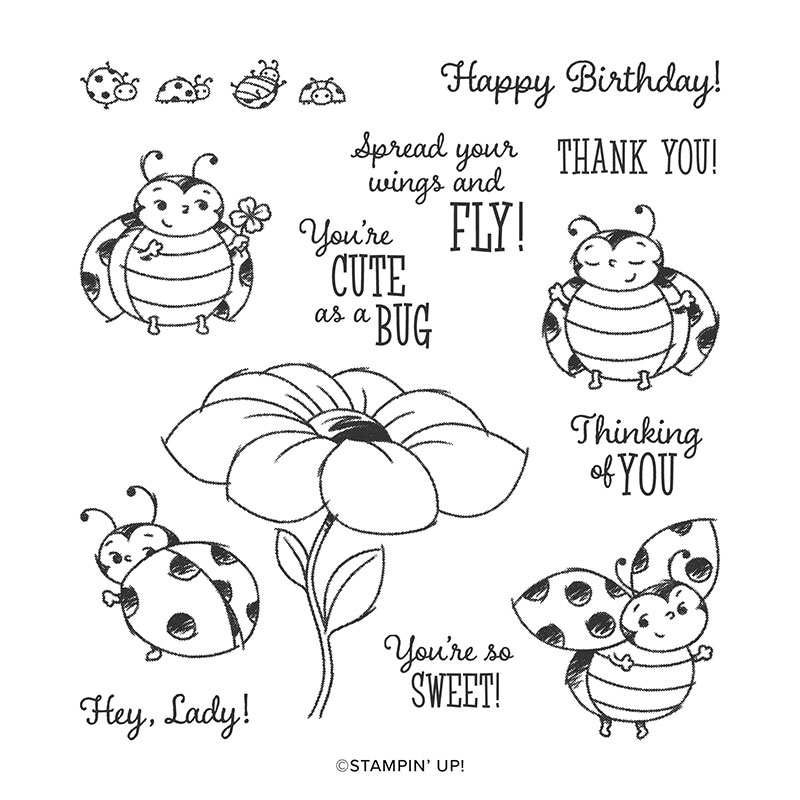
I just love these images and had to make a special card for a little 8yo lady in hospital who needed cheering up.
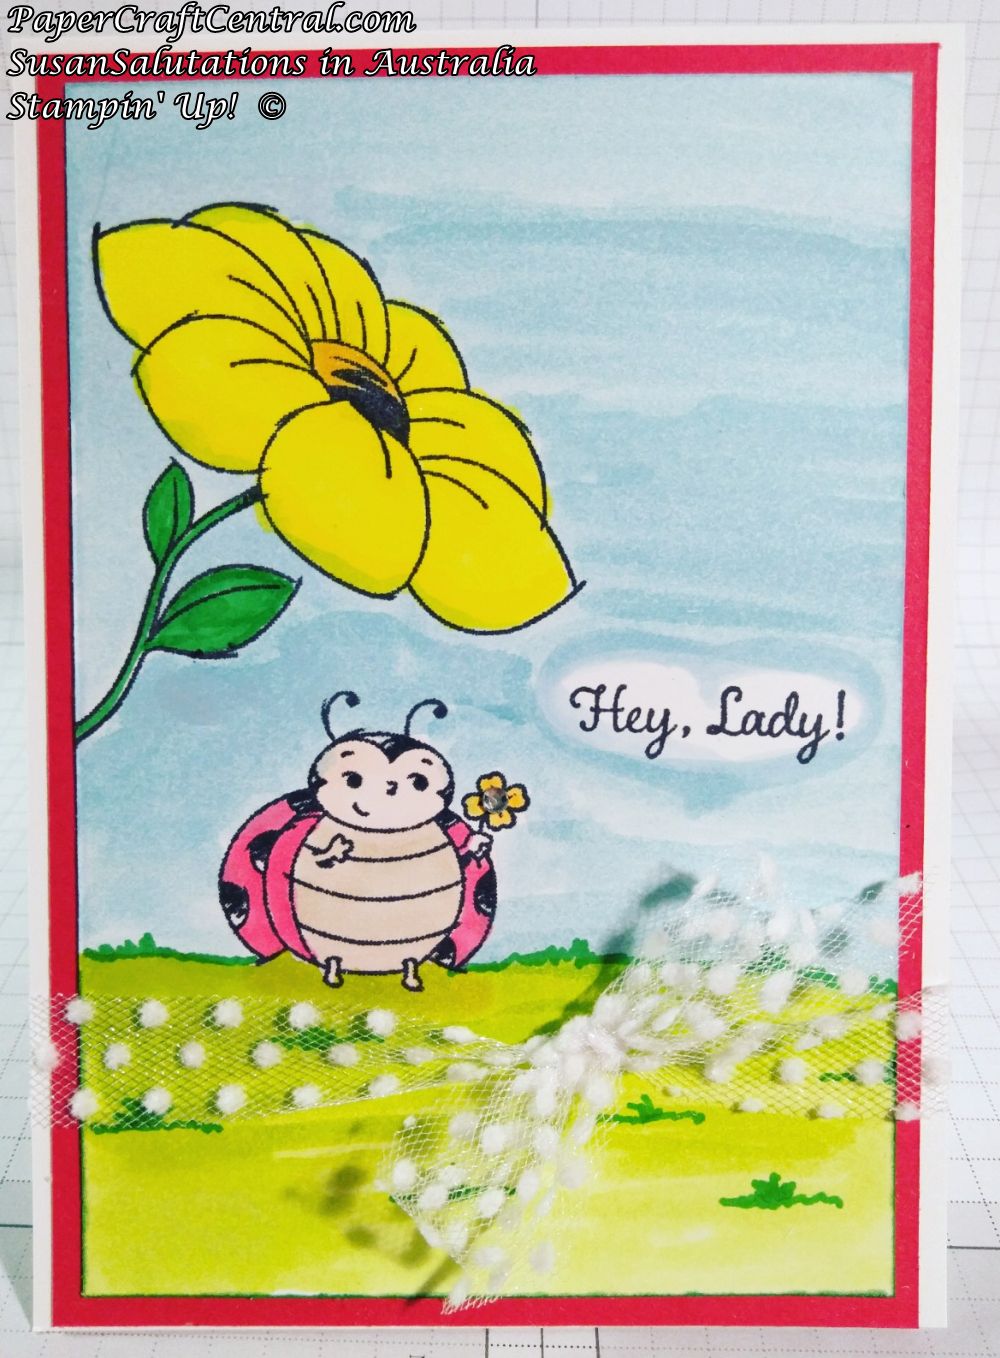
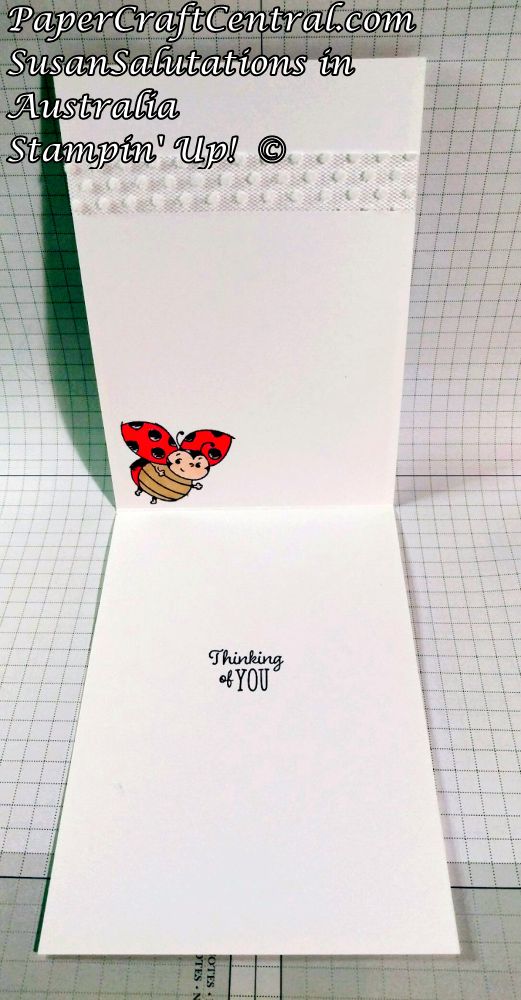
I loved the card ideas in 2020 I got to find out by being a Stampin' Up! Demonstrator and getting to turn my passion for papercrafting into a lovely hobby business
Be sure to check out the Stampin' Up! News page for the latest specials and find out how to Join My Team, too. You'll love the discounts, getting products early, making new crafty friends and even starting your own business if you wish.


New! Comments
Have your say about what you just read! Leave me a comment in the box below.