- Home
- Papercraft Adhesives
- Spinning Elements
Card Spinners or Suspension Spinners
Written and Created by PaperCraftCentral Susan
Card spinners or suspension spinners add a lot of interest to a card and are so easy to make!
“If you love someone,
put their name in a circle; because hearts can be broken,
but circles never end.”
~Karen Amanda Hooper, Grasping at Eternity
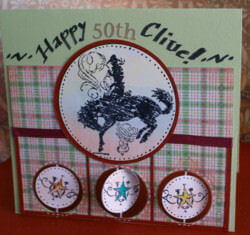
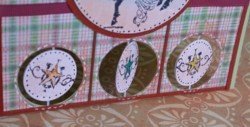
I had a 50th birthday card to make for a friend, and this card came together pretty quickly once I remembered the spinner idea. I already knew I wanted to make a bucking bronco card for my friend as he was having a cowboy themed birthday party, and the spinners fit right in with that theme in my own head!
Oh and these cards are also called Suspension Cards.
Here's what I used:
- Stampin’ Up! 'Bronc Buster' stamp set (retired)
- Certainly Celery (retired) & glossy white cardstock (retired)
- Black Stazon ink
- White, copper, gold and green gel pens
- Rust coloured cardstock
- Ink spot pads in cocoa, lemon yellow and green
- ordinary pencil
- Dental floss or linen thread, or something thin and strong like a gold twisted thread from your stash
- strong Double sided tape
- Black calligrapher’s pen and black fine felt tipped pen
- Gold letter stickers
- Designer series paper of choice
- Layering Circle punches or dies
Step-by-step instructions for making Card Spinners:
- You don't have to use the particular paper punches
I used to make your spinners but do make sure you have circle punches
that allow you to make two different sized circles that are not too
different in size for layering them together. The Layering Circle Dies and your Die Cut and Embossing Machine might suit your purpose instead of paper punches, especially if you have nesting dies.
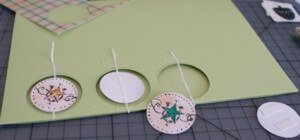
- Decide on your card front cardstock size and colour. Decide what cardstock or designer series paper you want to use as the first layer on your card and punch your largest hole in the paper where you want to put a spinner. Make sure you can reach the card front base with your paper punch or dies as you will need to cut out similar circles in it!
- Now lay this topper cardstock or designer series paper on your card blank front where you want the holes to be. Pencil in the circles by tracing around them so you will know where to punch next
- Punch the holes in the front of your card blank. If you cannot reach the circles easily with your paper punch, use your sharp pointed paper snips to pierce a hole in their centre, then work out to the pencil marks to carefully cut out your circles by hand.
- Stamp the images you want to make onto the top layer of your spinner circles. (You will need two of each image)
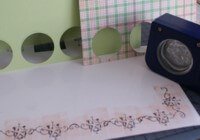
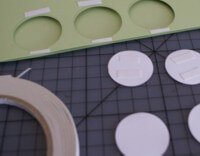
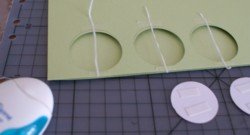
r
Other things to try
- Make your spinners from transparent material with pressed flowers fixed in the middle
- Make your suspension circles out of cork or foiled pieces
- Make your circles out of embossed cardstock
- Make the circles into little domes
- If you like cards with moving parts, try making a penny-roller or slider card
- If you like your cards to provide a bit of a surprise, try making an Explosion Card!
However you make them, enjoy making your Card Spinners! Here are a few more spinner card ideas from Pintrest.


New! Comments
Have your say about what you just read! Leave me a comment in the box below.