- Home
- Papercraft Adhesives
- Fancy Explosion Fold Tutorial
Special Card Folds
Written and Created by PaperCraftCentral Susan
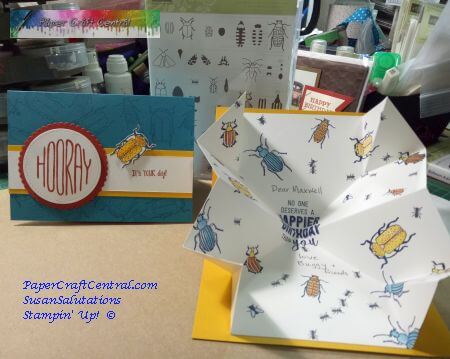
One of the easiest and most effective special card folds I have ever made is an Explosion Card. I love to make them when I want to surprise someone with a special greeting.This explosion card fills the bill for surprise very nicely!
One friend loves bugs, for example, so I took the (now retired ) Beetles and Bugs stamp set from Stampin' Up! and made him one crawling with them!
Talk about special greeting card folds! Lol!

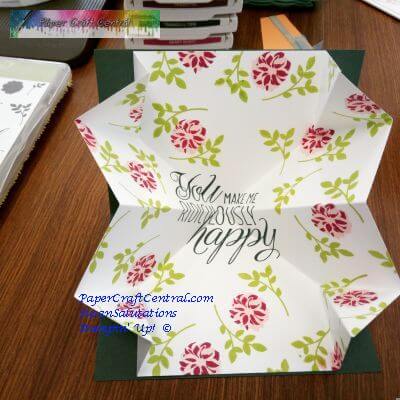
You can make these cards much more beautiful than this, however. I love how this one turned out, using the Lovely Friends stamp set.
This time, I chose a stamp set with flowers and leaves and a nice sentiment to make my card. While the stamp set I used is retired now, search your stash for similar stamps and sentiments when you decide to make a card like mine.
Here is a video I made for you showing you exactly how to fold your cardstock after you stamp it so it will fit inside your card and become a fancy fold. I also provided written instructions for how to make this card below the video, so if you miss any of the measurements in the video, check out the written tutorial below.
Video Instructions for the Fancy Fold Card
If you need a video to show you how to make this special card fold, here's one I made for you with more how-to tips:
Here's How to Make a Special Card Fold Explosion Card.
These are the fancy fold card tutorial written instructions. There is a video above them in case you like to see the way this works.
Step-by-step, this is how to make your card:
1. Choose a card base. An ordinary sized card base is fine to use for this project. Mine is 15cm x 21cm (about 6" x 8.25") folded in half.
2. Take a piece of Basic White card stock measuring 20cm x 20cm (about 8" square)
3. Stamp your design on the Basic White cardstock piece. I usually stamp my greeting in the middle of the piece first so I know I have it exactly where I want it to be, then I use decorative stamps around the sentiment.
TIP: Always start with your biggest decorative stamp first, then add smaller stamped images around that. It just helps you fill in the space with an emphasis on the main images.
4. Decorate the front of your card. I usually make my surprise pop up cards with a simple card front. It adds more to the surprise when it is opened, somehow.
Now comes the trickiest part. This is where you might want to watch the video above.
Lay your stamped square face up in front of you, with the sentiment reading the right way up.
1. Fold the square corner to corner, diagonally. Crease well with your bone folder. You can even fold this line back on itself and crease it. Fold out flat.
2. Do the same with the opposite corner - fold diagonally, crease well, fold backwards on itself, crease with your bone folder. Unfold the square to be flat again, the right way up.
3. Now fold the bottom edge up to meet the top edge, crease with your bone folder horizontally. Fold the cardstock back on itself and then refold it up the right way again.
Now it gets a little tricky. Again, refer to the video above.
4. Invert the edge points of the horizontal line and allow the cupped paper to meet in the middle. Crease the folds flat with your bone folder.
5. Now push each corner in to make a cup that folds along the diagonal lines. The points will meet in the middle. Crease the folds flat again using your bone folder.
You are done folding, but not quite done with your card.
Imagine your folded cardstock looks like a house. To adhere your explosion piece inside the card, place adhesive along the flat house face and position it inside the card, with the point of the house facing towards the card base fold line.
Extra Tip: Keep the point a little distance from the fold line to give it room to move.
Run the adhesive down the middle of the house, from the roof tip to the floor, in a straight line.

Now your card is made, all you need to do is enjoy surprising and delighting someone with your finished explosion greeting card!
PS For crafters who make cards to sell, do show this one to your customers. It might be the very special card design they are looking for! I have actually shown this to several customers who have asked me to make them more, customised their way.


New! Comments
Have your say about what you just read! Leave me a comment in the box below.