- Home
- Papercraft Adhesives
- Folded Greeting Card
Fold Greeting Card
Written and Created by PaperCraftCentral Susan
A two fold greeting card is easy to make and looks so interesting! See my easy tutorial for making one below.
"But friendship is the breathing rose, with sweets in every fold"
~Oliver Wendell Holmes
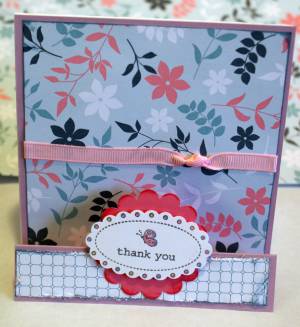
How to Make a Stair Step Fold Greeting Card
This kind of card is sometimes called a stair step card, or it could also be known as a variation of an accordion card.
All you need to do is start with a longer card front and add another two folds to that, and you will have added a whole new dimension and a whole lot of interest to your handmade salutation.
You will see that the choice of designer series paper (DSP for short) also makes a huge difference to how interesting this one looks. I love that Stampin' Up! DSP is usually two sided AND it coordinates with whatever is on the other side!
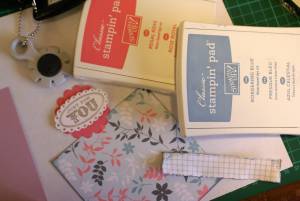
Here are some of the papercraft tools and supplies I used to make this greeting.
Do you know about complimentary colour choices? I ask because I started with some complimentary colours in inks, card stock and designer series paper. Choosing basic colours for your card will also help you make other decisions about what will fit on your card.
Then I found a sentiment stamp that fit within an oval scalloped punch and that could be layered onto a scalloped circle cardstock shape, used my distressing tool to add interest to the strip of paper for the front fold.
There was plenty of double-sided tape and stampin' dimensionals used as well.
Please note: All supplies used for this project are from Stampin' Up! and a number of them are now retired. Always remember you can choose items from your current stash and just use this tutorial to make an entirely new card! Yours does not have to look like mine, OK? That way you can choose to work in your favourite colours and patterns, or make the project for a special occasion and person you have in mind.
The fold greeting card idea could be used for any special occasion. Think how special Christmas cards would look on display in your friends' and family's home, for example. Just change the colour of your card base, find a coordinating DSP and sentiment/images, and find some matching bling. Stair step Christmas cards would be very special.
Here's what to do to make a stair fold greeting card:
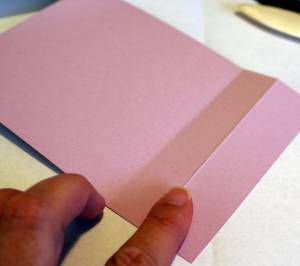
- The front of the card is based on the idea of creating an accordion fold. To create the accordion part of your card, first make a card blank with a front piece about five centimeters (2") longer than the back.
- Score and fold the long bit that overhangs the back of your card base at 2 1/2cms (1") and 5cms (2").
- Now fold along the scored lines. Be sure to fold the first fold as a mountain fold (it sends the fold in the cardstock up towards you) and the second fold as a valley fold (sending the cardstock fold down away from you).
- Crease these folds well with a bone folder or the back of a teaspoon.
-
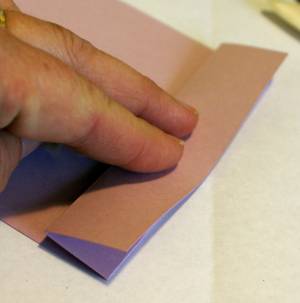
You will want the front of the card to be capable of folding flat, like I am showing you in the picture below, so you can easily place it in an envelope. This also makes it stand up well when unfolded, so crease the folds well and perhaps leave them under something heavy and flat for awhile, like a heavy book. It helps the fibres of the paper to relax along the scored line when you do this.
- Another tip is to fold the creases back the other way, back and forth, a few times. This helps make the paper learn the way you want it to go by helping the fibres relax more.
- Warning: be careful not to fold the creases back and forth TOO many times as the fibres will begin to break. The thinner the cardstock, the easier it will be to break by folding it back and forth too many times.
- After you have the basic card base done, go ahead and decorate your card.
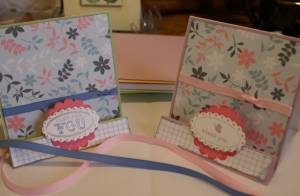
- I chose to cut a piece of plainer designer series paper for the very front of the card (on the lower fold) and to distress the edges of that with my distressing tool.
- Then I chose a more decorative piece of designer series paper for the main part of the card and wrapped a ribbon around that.
- I put stamping dimensionals on my stamped, embossed and punched sentiment and adhered it at a slight angle to the very front of the card.
Isn't that a simple way to make an interesting card?
Go ahead - make yourself a two fold greeting card or stair step card today!
If you enjoyed this project, you might like to make an explosion card or try out some of the other origami projects for cardmakers that are available on papercraftcentral.com


New! Comments
Have your say about what you just read! Leave me a comment in the box below.