- Home
- Papercraft Adhesives
- Clear Acrylic Stamps
Clear Acrylic Stamps Blocks
Written and Created by PaperCraftCentral Susan
Have you had trouble using clear acrylic stamps blocks (stamps mounted on clear blocks) before? Would you like some tips on how to use them?
"The beginning is the most important part of the work"
~Plato
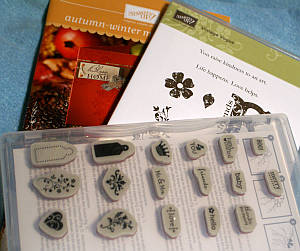
Stampin' Up! has brought out clear mount stamps! You can now often choose between
wood mounted, photopolymer and clear-mount sets when you purchase them.Clear mount stamps are made form the same rubber as wood block mounted stamps, and you need to use clear acrylic stamps blocks to use them.
You may like to know how to assemble your unmounted stamps once you get them? Find out what to do here.

You may not have used clear mount stamps before, or you may have trouble getting them to stick to the clear acrylic stamps blocks.
With this thought in mind I have listed my own tips and hunted down experiences others have had to find you ways to turn out beautiful, sharp images with this style of stamp.
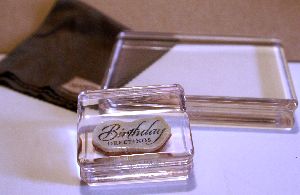
First, you need to mount them on a clear acrylic block such as those you can buy from Stampin' Up! (Go to SusanSalutations if you live in Australia and want to order any. The blocks are moulded to fit your fingers so don't slip as easily as the chunky flat style).
Some people have trouble with this step so I am going to tell you some troubleshooting tips.
Here are my Eight Great Tips for Using Clear Acrylic Stamps Blocks:

Here are the tips I have collected about mounting your clear mount stamps to acrylic blocks. You may find one or more of these tips helpful, and if I have missed any out, please do let me know what works for you:
- Prepare your clear blocks. Make sure they are really clean. Use a stamp block cleaning cloth to polish them after each use.
- Prepare your clear mount stamps. After adding their image stickers to them, rub the stamping image sides with a white eraser or an alcohol free baby wipe first to remove the release agent used in molding them.
- Then place stamps face down on your craft table and press the block down onto the image sticker firmly, keeping the pressure up for about 10 seconds to really give them a chance to grab on. Then make a few impressions on scratch paper with Versamark ink to condition the stamps further and make sure the stamp is adhered to the block properly. There is not much worse than having your stamp fall off on your project leaving ink where you didn't want it to be.
- Prepare your photopolymer stamps. Condition them by cleaning the raised images and/or going over them with an eraser. Photopolymer will stick to acrylic blocks pretty well without much encouragement, unless they are dirty. You can safely wash your photopolymer stamps in warm, mildly soapy water, then rinse them and allow them to drain dry on a lint free cloth. They should stick better then.
- Practice making images on a piece of scratch paper before committing your stamps to cardstock. Get to know your new tools a little as stamping with acrylic blocks is different to stamping with the wooden blocks from Stampin' Up!
- For both photopolymer and clear mount stamps, stamp lightly, or lighter than you would with a red rubber stamp mounted on a wooden block. Acrylic blocks a slightly heavier than wooden ones so they help you stamp. Give the acrylic block a settling, single tap with your fingers when you have the image where you want it, then lift the stamp and block straight off your paper or cardstock.
- Use even, all over pressure when stamping with clear block stamps to get a complete image. This is especially important when you are using a large image.
- Use the paper piercing mat, a face-down mouse pad or a piece of thin foam under your cardstock while stamping with the photopolymer stamps. The cushioning can help to produce a clearer image. I find this works with wood mounted or clear block stamps as well as long as you use a light touch, but the clear mount and wood mount stamps already have cushioning rubber on them while the photopolymer ones do not.
Here is a video from Stampin' Up! showing how to use the acrylic blocks with clear-mount stamps:
Now you should be all set for using your clear acrylic stamps blocks.
Let me know how you go and if you have any more questions, I will see if I can answer them for you.
Happy Clear Block Stampin'!


New! Comments
Have your say about what you just read! Leave me a comment in the box below.