- Home
- Papercraft Adhesives
- Decorative Box
Decorative Box
Written and Created by PaperCraftCentral Susan
A custom made decorative box dresses up a special present for a special someone. Change the designer series paper and embellishments to agree with the occasion. You can even vary the depth and size of the whole project so you can make something unique as a present container. The possibilities for embellishment are endless too and your recipient is likely to keep using your decorative box long after the special occasion has passed.
Scroll down to see how I made one of mine.
"The greatest gift is a portion of thyself"
~Ralph Waldo Emerson
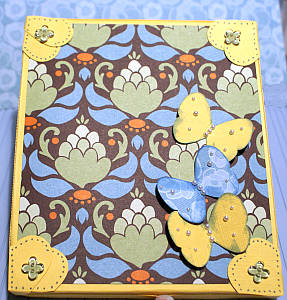
A decorative box makes a special gift extra special. Every chef knows that presentation makes excellent food even more desirable. I believe thoughtful presentation is half the pleasure of receiving a gift. When you make things yourself, you can make the packaging fit your present exactly.
NOTE: You will need various papercraft tools to make this box, but scroll down to the bottom of the page see the supply list for this project.
How to Make a Decorative Box
Measuring the dimensions of your gift are important. When you have something special you want to wrap, use the item itself to tell you how big your gift packages should be.
TIP: Instead of using a ruler, I always use the item itself to ensure my packaging will be perfect.
NOTE: All supplies used in this project came from Stampin' Up!
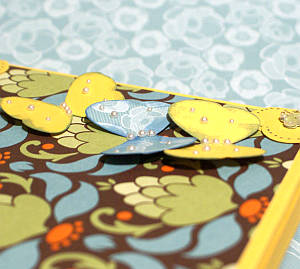
In this instance, I wanted to wrap up a couple of Big Shot embossing folders for a friend. I could have just wrapped up the plastic boxes they came in, but I wanted the gift to be memorable and show my friend I had taken time to create a lovely experience for her.
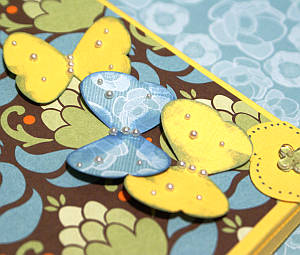
I made this special package with its own lid.
First I made the bottom section, using the two stacked Big Shot dies as a guide for how deep, wide and long to make it. The dies needed to fit inside the package without it being too snug a fit.
Allow a little room for your gift to be placed inside and taken out comfortably, even when wrapped with tissue paper (another little touch to make it memorable).
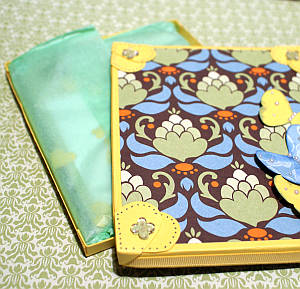
I made the lid a little bigger than the base, just adding about 2mm to the measurements of the base to make it.
Then I just chose my favourite designer paper of the moment and started covering the lid. I added matching grosgrain ribbon to the base to cover any small flaws I may have made in constructing the lid (not telling if there really are any flaws! Lol!) and to add texture and style to the finished item. Ribbon also adds to the lid's strength when wrapped around the thin edge.
I covered the corners with large punched hearts that I cut down the middle and overlapped, then doodled some detail on them after adhering them down. I added Itty Bitty clear buttons and punched Daffodil Delight shapes to the corners too.
Inside, I added some punched paper shapes to make my own confetti and placed them inside the tissue paper used to wrap the dies. I then punched a tag and decorated it, adding a personal message and wrapping it inside the tissue paper as well.
If your recipient is also a paper crafter, s/he will appreciate having the little punched shapes for a project of their own.
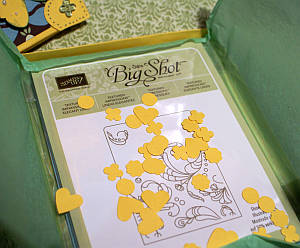
Of course, adding bling (pearls, gems, glitter, shimmer) will finish your project off beautifully. This time I used pearls on the punched butterflies, but the choice of bling is always yours.
You could always make some handmade paper flowers as another decorative touch.
If you make a decorative box please do share it with me by adding it below. I would love to see it.
Do You Have A 3-d PaperCraft Project To Share?
Do you make 3-d PaperCraft items? I'd love to see your work. Please do share below.
Supplies used for this project:
Everything I used was from Stampin' Up!and many of the supplies are now retired (NLA). Just substitute other colours and papers and embellishments for your own project:
- Daffodil Delight cardstock
- Garden Gala Designer Paper(NLA)
- Daffodil Delight grosgrain ribbon
- Pearls, Itty Bitty Buttons(NLA)
- Baja Breeze ink (NLA) and Stampin' Write marker (NLA)
- Heart and butterfly punches (NLA), Punch Pack (NLA)


New! Comments
Have your say about what you just read! Leave me a comment in the box below.