- Home
- Papercraft Adhesives
- Embossing Folder Techniques
Embossing Folder Techniques
Written and Created by PaperCraftCentral Susan
Knowing some embossing folder techniques for you Big Shot or current die cutting and embossing tool can help you get more from your papercraft supplies and help you enjoy your crafting time too.
That's why I put together some little tutorials for you based my on my own experiments and sleuthing. I'll keep adding embossing folder techniques to this page as I try them out for you.
There are four techniques shown below so far. I hope you enjoy them!
Embossing Folder Techniques
1. Embedding Die Cuts
This is the first of several Embossing Folder Techniques
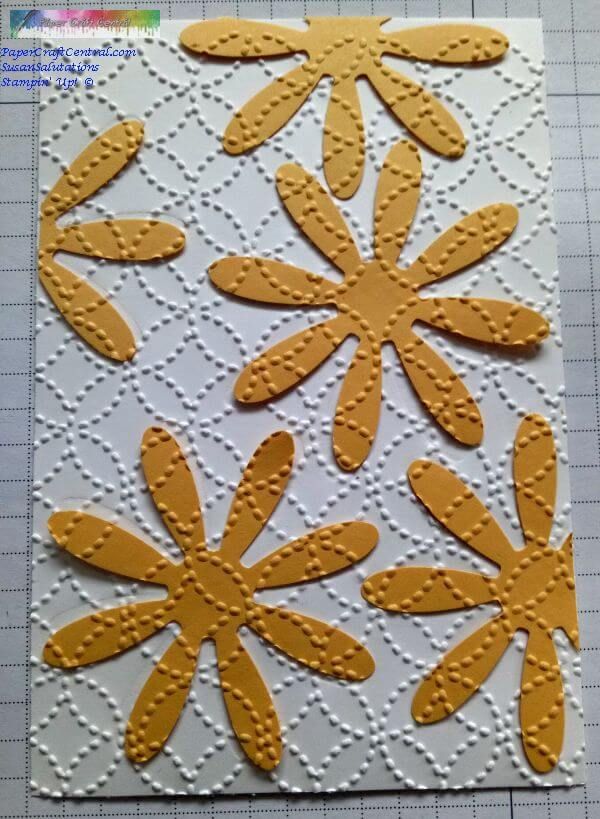
Did you know you can embed die cuts into your projects with your embossing folders? I love this embossing folder technique myself. You can cut out a shape with cardstock or designer series paper then add texture to it and it to your project by impressing two layers together.
Is that hard to visualise? Here's what I mean.
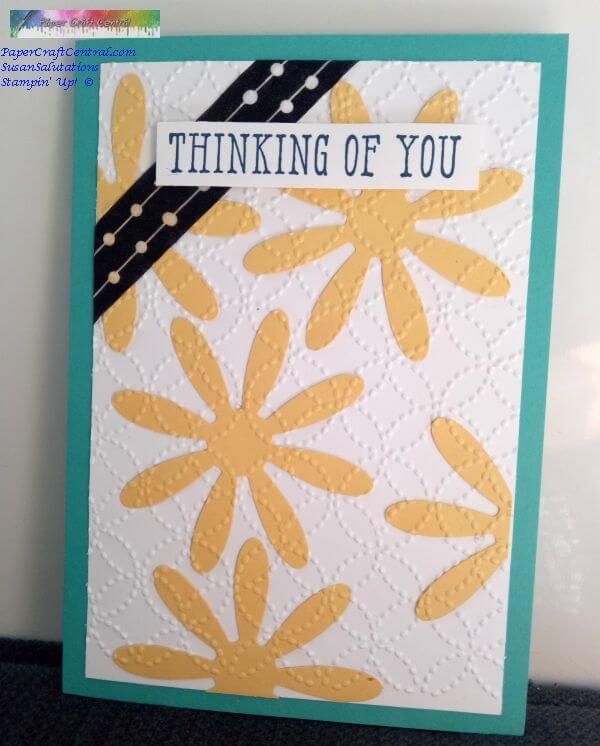
Those daisies have been die cut, tacked to some Basic White cardstock with double sided tape in the middle part only, then run through my die cutting and embossing machine inside an embossing folder!
How to make this card:
- Get out the Big Shot machine of choice and your embossing folder plates
- Cut out your die cut shapes and choose a background paper
- Then select an embossing folder with a denser pattern and few open spaces on it, especially where you want to do the embedding bits
- Cut out your die cuts and adhere them to the cardstock. In this photo, you can see I did not adhere the petals well. I only adhered the flower centres. Later I added a bit of extra adhesive to each petal as I did not want them to pop up. You may wish for them to do so, it is a personal choice
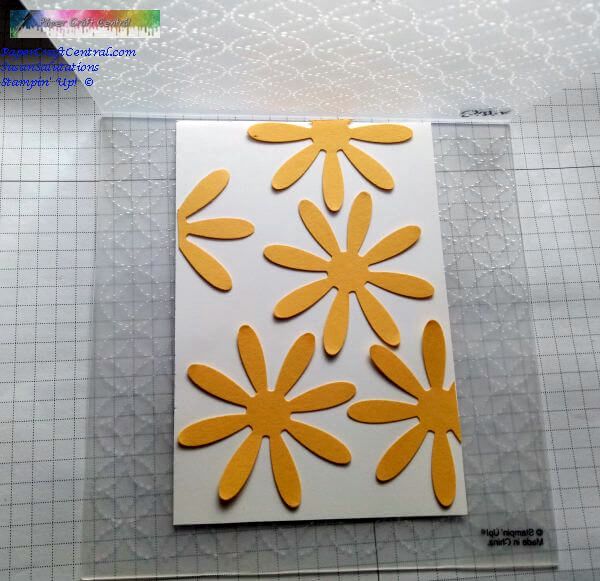
- Place your main cardstock piece into the folder. Close the folder
- Place the folder in between two embossing folder plates on top of your main embossing machine platform to make a sandwich
- Now run your sandwich through the machine
- Remove your finished piece and add to your handmade card, box or scrapbook page
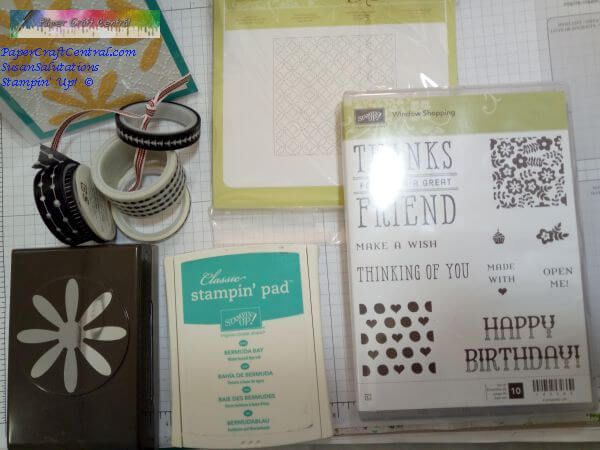
Here are the Stampin' Up! supplies I used in this project to embed shapes with an embossing folder:
2. Using Ink on your Folders
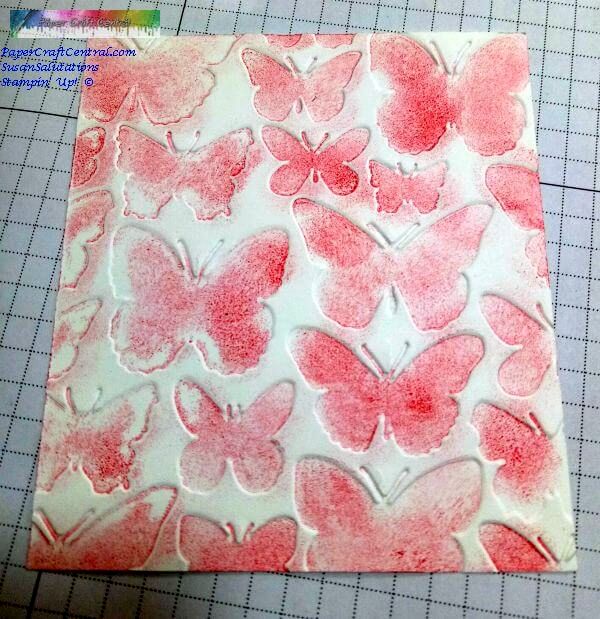
Did you know you can use water based stamping inks on your embossing folders? You can!
NOTE: with these embossing folder techniques, if you choose a permanent ink such as Stazon or Memento, you could stain your folder or leave dried ink in the design, and also this type of ink is more quick-drying than water based ones are. I choose not to use permanent inks for these reasons, but if you are quick with getting the folder through the Big Shot after you ink it up and are prepared to scrub out your folder immediately with permanent ink remover, then there is no reason not to use it.
You can either use this embossing folder technique to ink the foreground or the background of your finished piece. It all depends which side of the folder you ink. The raised bits will be inked. So decide which side you want to be inked on your paper and choose the raised side of that to ink.
Here's what to do:
- Get out the Big Shot machine and choose your embossing folder
- Choose
your cardstock. I like to use a lighter cardstock for this technique
such as Stampin' Up!'s Basic White or Very Vanilla but it would work
on darker cardstock too
- Choose your ink colour or colours
- Take a sponge dauber, foam roller or brayer and ink it up, then apply the ink to the raised pattern you want inked on one side of the folder. You can use more than one ink colour if you wish
- Here I am using a sponge dauber to add Flirty Flamingo ink to the butterflies. There will be ink in the debossed butterflies as I am inking the raised part of the butterfly
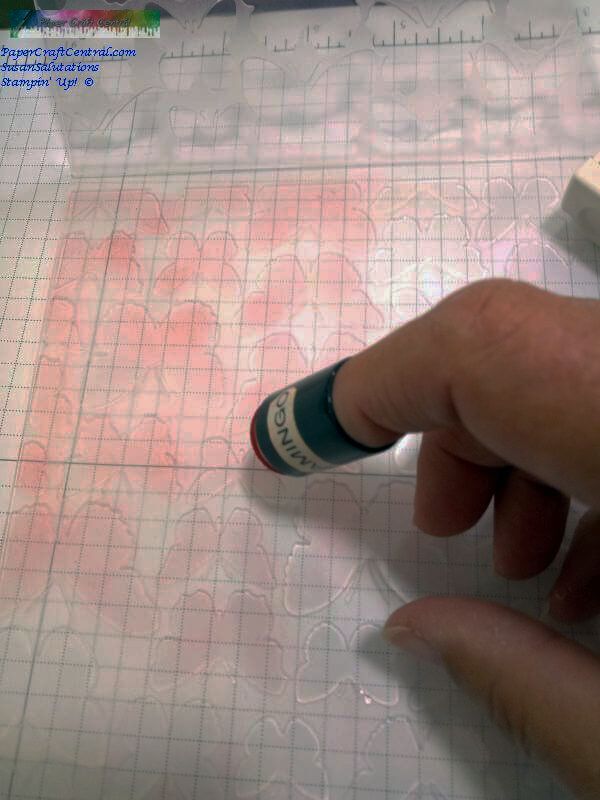
- Carefully lay your piece of cardstock over the inked side of the
embossing folder, and close the other side on top. Don't let the
cardstock slip anywhere at this stage as it will cause ink smearing
- Put your embossing folder into its sandwich
- Run the sandwich through your embossing machine
- Carefully remove the folder from your sandwich, then open it and lift the cardstock straight up away from the ink
- Trim if desired and add your finished piece to your project

- To
clean your embossing folder, run it under water and use a soft , lint
free towel to pat it dry, and allow it to air dry awhile before using it
for a project that does not use ink.
- NOTE: A little water dampness may give you a softer inked effect, even a watercoloured effect if you choose to use it straight away, or you can deliberately spritz water on your inked folder before you position your cardstock and run it through the Big Shot
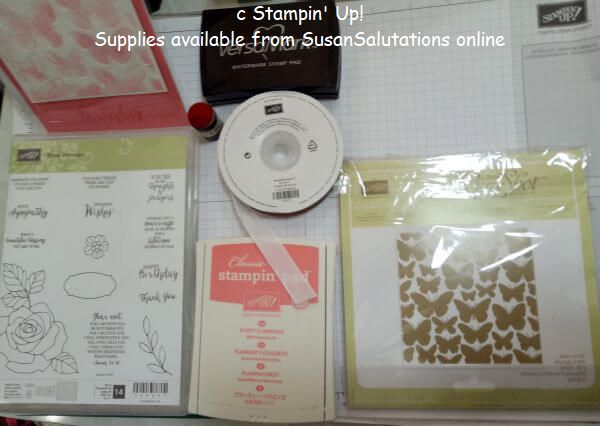
Here are the supplies I used in the inked, debossed butterfly card:
3. Stamping on your Folders
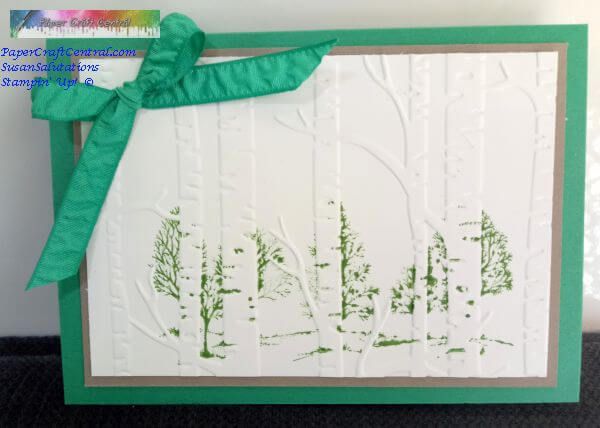
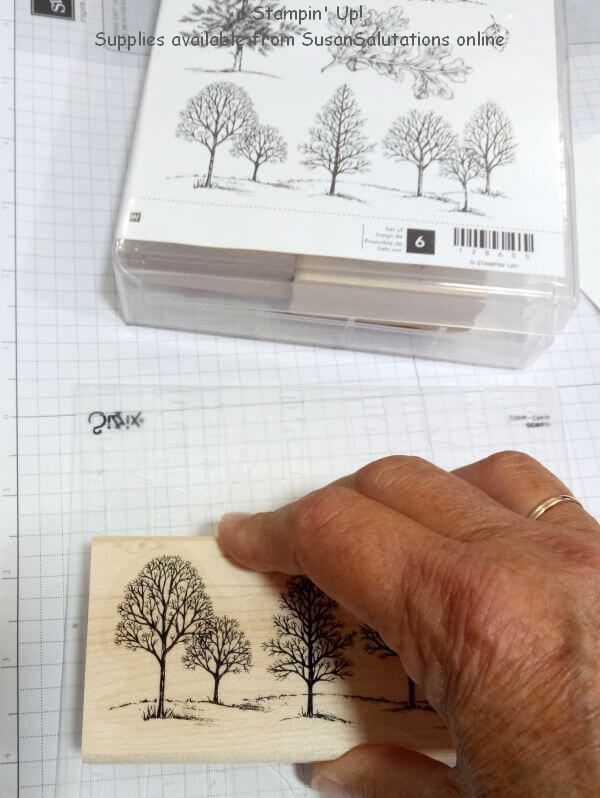
Did you know you can stamp on your folders with your rubber stamps? You can!
This embossing folder technique allows you to make images appear behind trees, for example.
Here's what to do:
- Set up your Big Shot machine
- Choose an embossing folder where there are spaces between the main embossed images. For example, choose circles, stripes, trees, even flowers that are just in the corner or one side of your folder
- Choose stamps with images that you want to appear behind your embossed images
- Choose an ink colour for your stamped images
- Now decide which side of the folder has your raised images impressed or sunken into it. This is the side you will stamp on
- Stamp your images so they are on the flat bits of the side with the impressed images
- Place your cardstock carefully on top of the stamped images and close the folder
- Place the folder carefully between the two B plates and place these on top of your main Big Shot platform
- Run the sandwich through your machine
- Carefully open the folder, and remove your cardstock straight off the stamped side so the ink doesn't smudge
- Add your completed stamped image to your papercraft project
- Clean your folder by running it under water and drying it on a soft, lint free towel
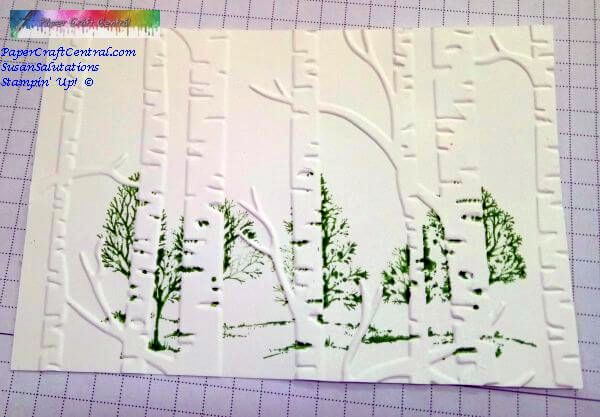
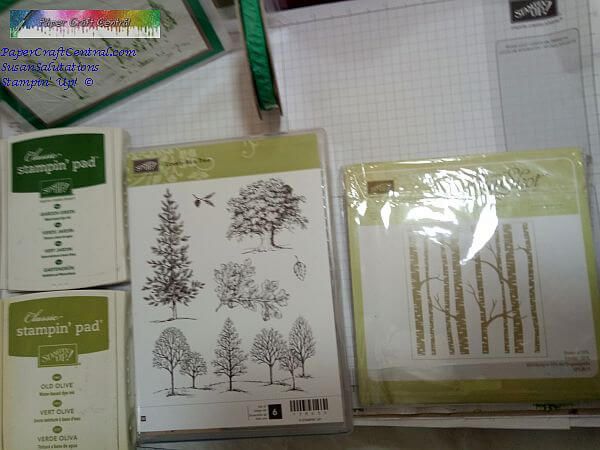
Here are the supplies I used to make my card with the embossing folder stamping:
4. Heat Embossing with your Folders
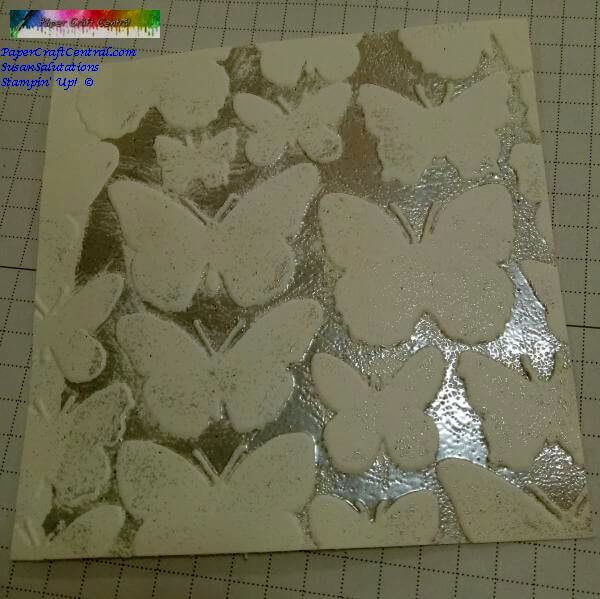
Did you know you can use your embossing folders to create heat embossed patterns? You can!
What great Embossing Folder Techniques!
Here's how:
- Set up your Big Shot machine
- Set up an embossing
station to be ready as soon as you take your cardstock out of the
folder. You want to be able to immediately tip embossing powder on your
cardstock when it comes out of the Big Shot machine
- Use your Versamark ink to ink up either the background or the foreground of your embossing folder
- Place cardstock onto the inked side of the folder, place this in a sandwich and run it through the Big Shot machine
- Carefully remove the cardstock from the folder and immediately go to the embossing station to tip embossing powder over it
- Heat set the embossing powder
- Clean your embossing folder by running it under water and drying it with a soft, lint free towel

Here are the supplies I used to make my card using stamping on an embossing folder, except for the silver embossing powder. It should be there too:

I hope you try some of these embossing folder techniques. I would love to see your projects if you do try these. You could also ask me about other ways to use your folders. If I know how to do it, I will write instructions for you.
Happy crafting!
PS You can see 15 more embossing folder techniques in this video by Stampin' Up! Demonstrator Connie Stewart
Do You Have A Favourite Handmade Card to Share?
Do you make greeting cards? Please do share it with me.
Last edited by PaperCraftCentral Susan on 17th January 2022


New! Comments
Have your say about what you just read! Leave me a comment in the box below.