- Home
- Papercraft Adhesives
- Bleaching Your Images
Stamps Craft 1 - Bleaching Technique
Written and Created by PaperCraftCentral Susan
In Stamps Craft 1, we try Stamping then Painting with Bleach:
The first in this series, Stamps Craft 1, is about stamping with bleach.Yes! You can combine your stamps, ink and paper with a bleaching technique using a tiny amount of ordinary household bleach.
I first saw the technique on SplitCoastStampers and since I thought it turned out so well, I decided that I would share it with you.
"Definition of Bleach:
the whiteness that results from removing the color from something;"
~Wordnet
Learning new techniques and methods of using our images is so interesting, not to mention economical. I hope you will enjoy learning a little more about stamps craft from this page.
You can use your rubber and acrylic or polypropylene stamps
to get all sorts of different effects and not wind up making the same
images with the same tools or mediums over and over again.I just love how versatile our stamps are when we know a few techniques. No need to just stamp the image and leave it at that, unles that's the look you are going for.
One of the various mediums I use with stamps is bleach.
Did you know you can also stamp with acrylic paint, Stampin' Write! markers, and you can even stamp into mediums like embossing paste and embossing powder?
More about those techniques another time.
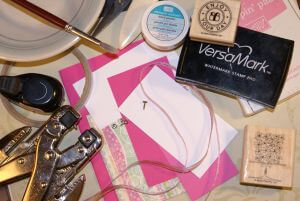
Here's What You Will Need to Stamp then Paint with Bleach:
First, gather your supplies. Search your stash for this list of materials. You will probably already have all if not most of it in your house, especially if you are not new ot crafting. You may need a quick trip to a craft store or you can shop online with me if you live in Australia for many of the supplies needed for this project. I'll link some of the items to my store so you can at least see what they look like even if you cannot shop with me.
- Choose a larger, more intricate image stamp. Flowers with distinct petals work well with this technique as you can get a shading effect depending on where you put the bleach. I chose a cake image for my project.
- Versamark Ink pad and some clear embossing powder.
- A heat tool.
- Ordinary household bleach (about half a teaspoon is all you will need for this project).
- A small paintbrush.
- Coloured Cardstock, punches and embellishments such as rhinestone gems or pearls of your choice.
Here's What To Do:
Follow these step by step instructions for this project:
- First, stamp your image in Versamark on cardstock. You will be lightening the cardstock with bleach, so choose a nice colour that you will like even when it is faded.
- Some cardstocks turn different colors when bleached, so you may be in for a surprise with the results. Try a bit of cardstock with the bleach first before committing to your final image, if you are concerned about what colour you will wind up with. I tried this on black cardstock and wound up with an orangy colour once it was bleached, for example!
- Note: white cardstock won't work in this case, though you could experiment with it and see what effects you can get with the bleach. Black or other colours of cardstock will work though.
- I chose a bright pink here so I would be sure to at least wind up with a lighter colour where I bleached it, if not a completely different colour.
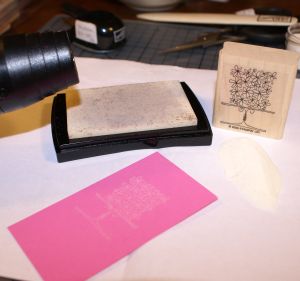
Now cover the image with clear embossing powder and
heat set it. You want to be sure there are no unheated areas next as these will brush off and make your image look patchy.
Be sure to heat all the embossing powder just till it melts as you can overcook it if you heat it beyond the melting point and it will look dull and cakey instead. That's a part of stamps craft 1 that you will learn if you heat emboss enough!
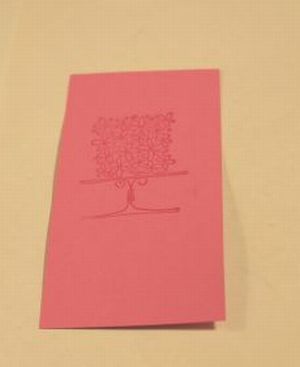
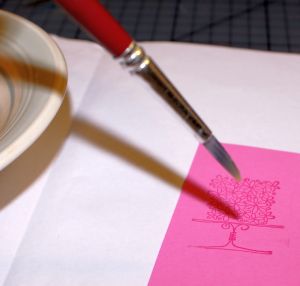
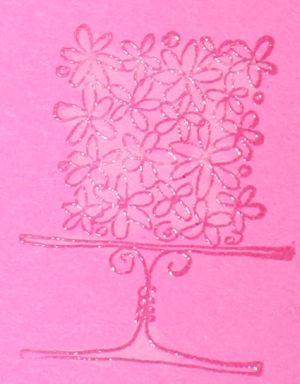
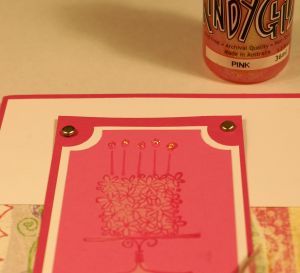
After you have your main image the way you want it, continue using your stamps craft skills to complete your card. Here's what I did to finish my own card
I hope you enjoyed the first in the series of techniques for stamping. Continue to Stamps Craft 2 if you would like to try another technique now.
Do You Have A Favourite Handmade Card to Share?
Do you make greeting cards? Please do share it with me.


New! Comments
Have your say about what you just read! Leave me a comment in the box below.