- Home
- Papercraft Adhesives
- Rub On Transfers
What is a Rub On
Written and Created by PaperCraftCentral Susan
What is a Rub On?
"Here's a way to add pizazz to your pages without using any glue!"
~PaperCraftCentral Susan

A rub on is a form of sticker, dry transfer or decal that you can place anywhere you like on your paper craft projects.
They can be found in most scrapbooking or craft stores in flat packets with a little ice cream or paddle pop stick included for helping you transfer the images or words to your project.
Unlike stickers, rub-ons usually do not have a peel off top and a sticky back, however. They are usually printed on the 'wrong side' of a piece of smooth, clear acetate.
They can become permanent fixtures on your projects so make sure you position them exactly where you want them to be forever. It is diffivult to remove them afterwards if you attach them as they are meant to be attached, which can be a good thing.
Some types of rub on transfers can be semi permanent or temporary, however. Be sure to read the manufacturer's instructions and description when you purchase them.
You can seal them with a water-based sealant on almost anything but mirrors, but do be sure your craft item can take the sealant by testing on a small patch first or I recommend actually testing on a piece of scrap paper or a scrap of the material you are using in your project. Then you will know if the sealant can be seen, or if it alters the colour of your project or doesn't go on smoothly.
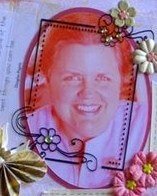
When using a rub on, I chose a frame one for the photo above. It was easy to apply right over the photo. I think it helps to emphasise the layout's focal point, don't you?
Putting frames around things is a good way to draw attention to the most important bit of a handmade card or scrapbook page. It kind of defines the area you want people's eyes to notice the most.
What is a Rub On Used For?
The print in itself is a little sticky so the rub ons will be resting on a non stick backing sheet when you buy them. Keep them on the backing sheet till you are ready to use them, then carefully cut away the one you want to use at the time. Leave the backing sheet intact to continue protecting the other rub ons for you.
When you want to use one of the words or graphics, simply and carefully cut around that image and remove it from the backing sheet. It is then very easy to apply pressure to the 'right' side of the acetate to encourage the words or graphics to adhere to another surface.
The way to apply this type of decal is to use a firm, smooth pressure with something like a clean, dry, Popsicle stick or your bone folder to rub the words or pictures on to the surface you want them to appear on.
You can apply them to flat paper, cardboard, plastic, smooth wood surfaces, anywhere that is smooth, hard and relatively non-porous.
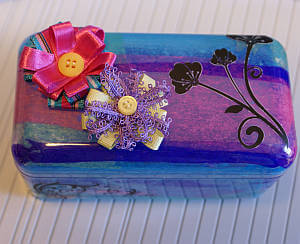
I used some on a hard plastic chocolate box that I decorated inside with tissue paper. The rub on went right on top of the plastic without any trouble. The longer you leave the transfer without scratching or rubbing it, the harder and more durable it seems to get.
I wouldn't deliberately try scratching an old transfer off though, unless you don't want it there any more. They are made of a vinyl like substance so cannot endure too many hard knocks.

I advise you to be careful when applying Rub Ons as they are delicate. It often takes very little pressure to make them adhere to another surface. Some can be harder to adhere than others. I sometimes find white ones harder to adhere than black ones, for example, so do be sure to check that all of the image has been applied before you totally remove the acetate. Just lift a corner of it to see if any of the image is still attached to the acetate, and replace it exactly where it was for more rubbing if need be.
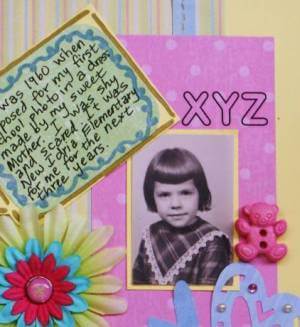
Here's a final example of how to use them below. You can actually make your own dry transfer designs, which is what I did here. I added some little alphabet outline stickers to the background here.

I wrote a page showing more about what is a rub on and how to use them if you want to explore some more.
So, what is a rub on? I hope you now know how useful and versatile they can be in enhancing your papercraft projects.


New! Comments
Have your say about what you just read! Leave me a comment in the box below.