- Home
- Papercraft Adhesives
- Cat Cards
Cat Cards and More
Written and Created by PaperCraftCentral Susan
Cat cards are fun to make and they appeal to a wide variety of people. You can make them fit almost any occasion by accessorising the animals. Christmas cats, birthday cats, thinking of you cats, all are possible with a little imagination and clever stamping.
"Cats are anthropomorphised in art because they are so laid back that you automatically attribute human thoughts and feelings to them."
~Jim Davis
PS: Don't miss the cat table favours shown further down this page!
How to Make Pretty Kitty Cat Cards
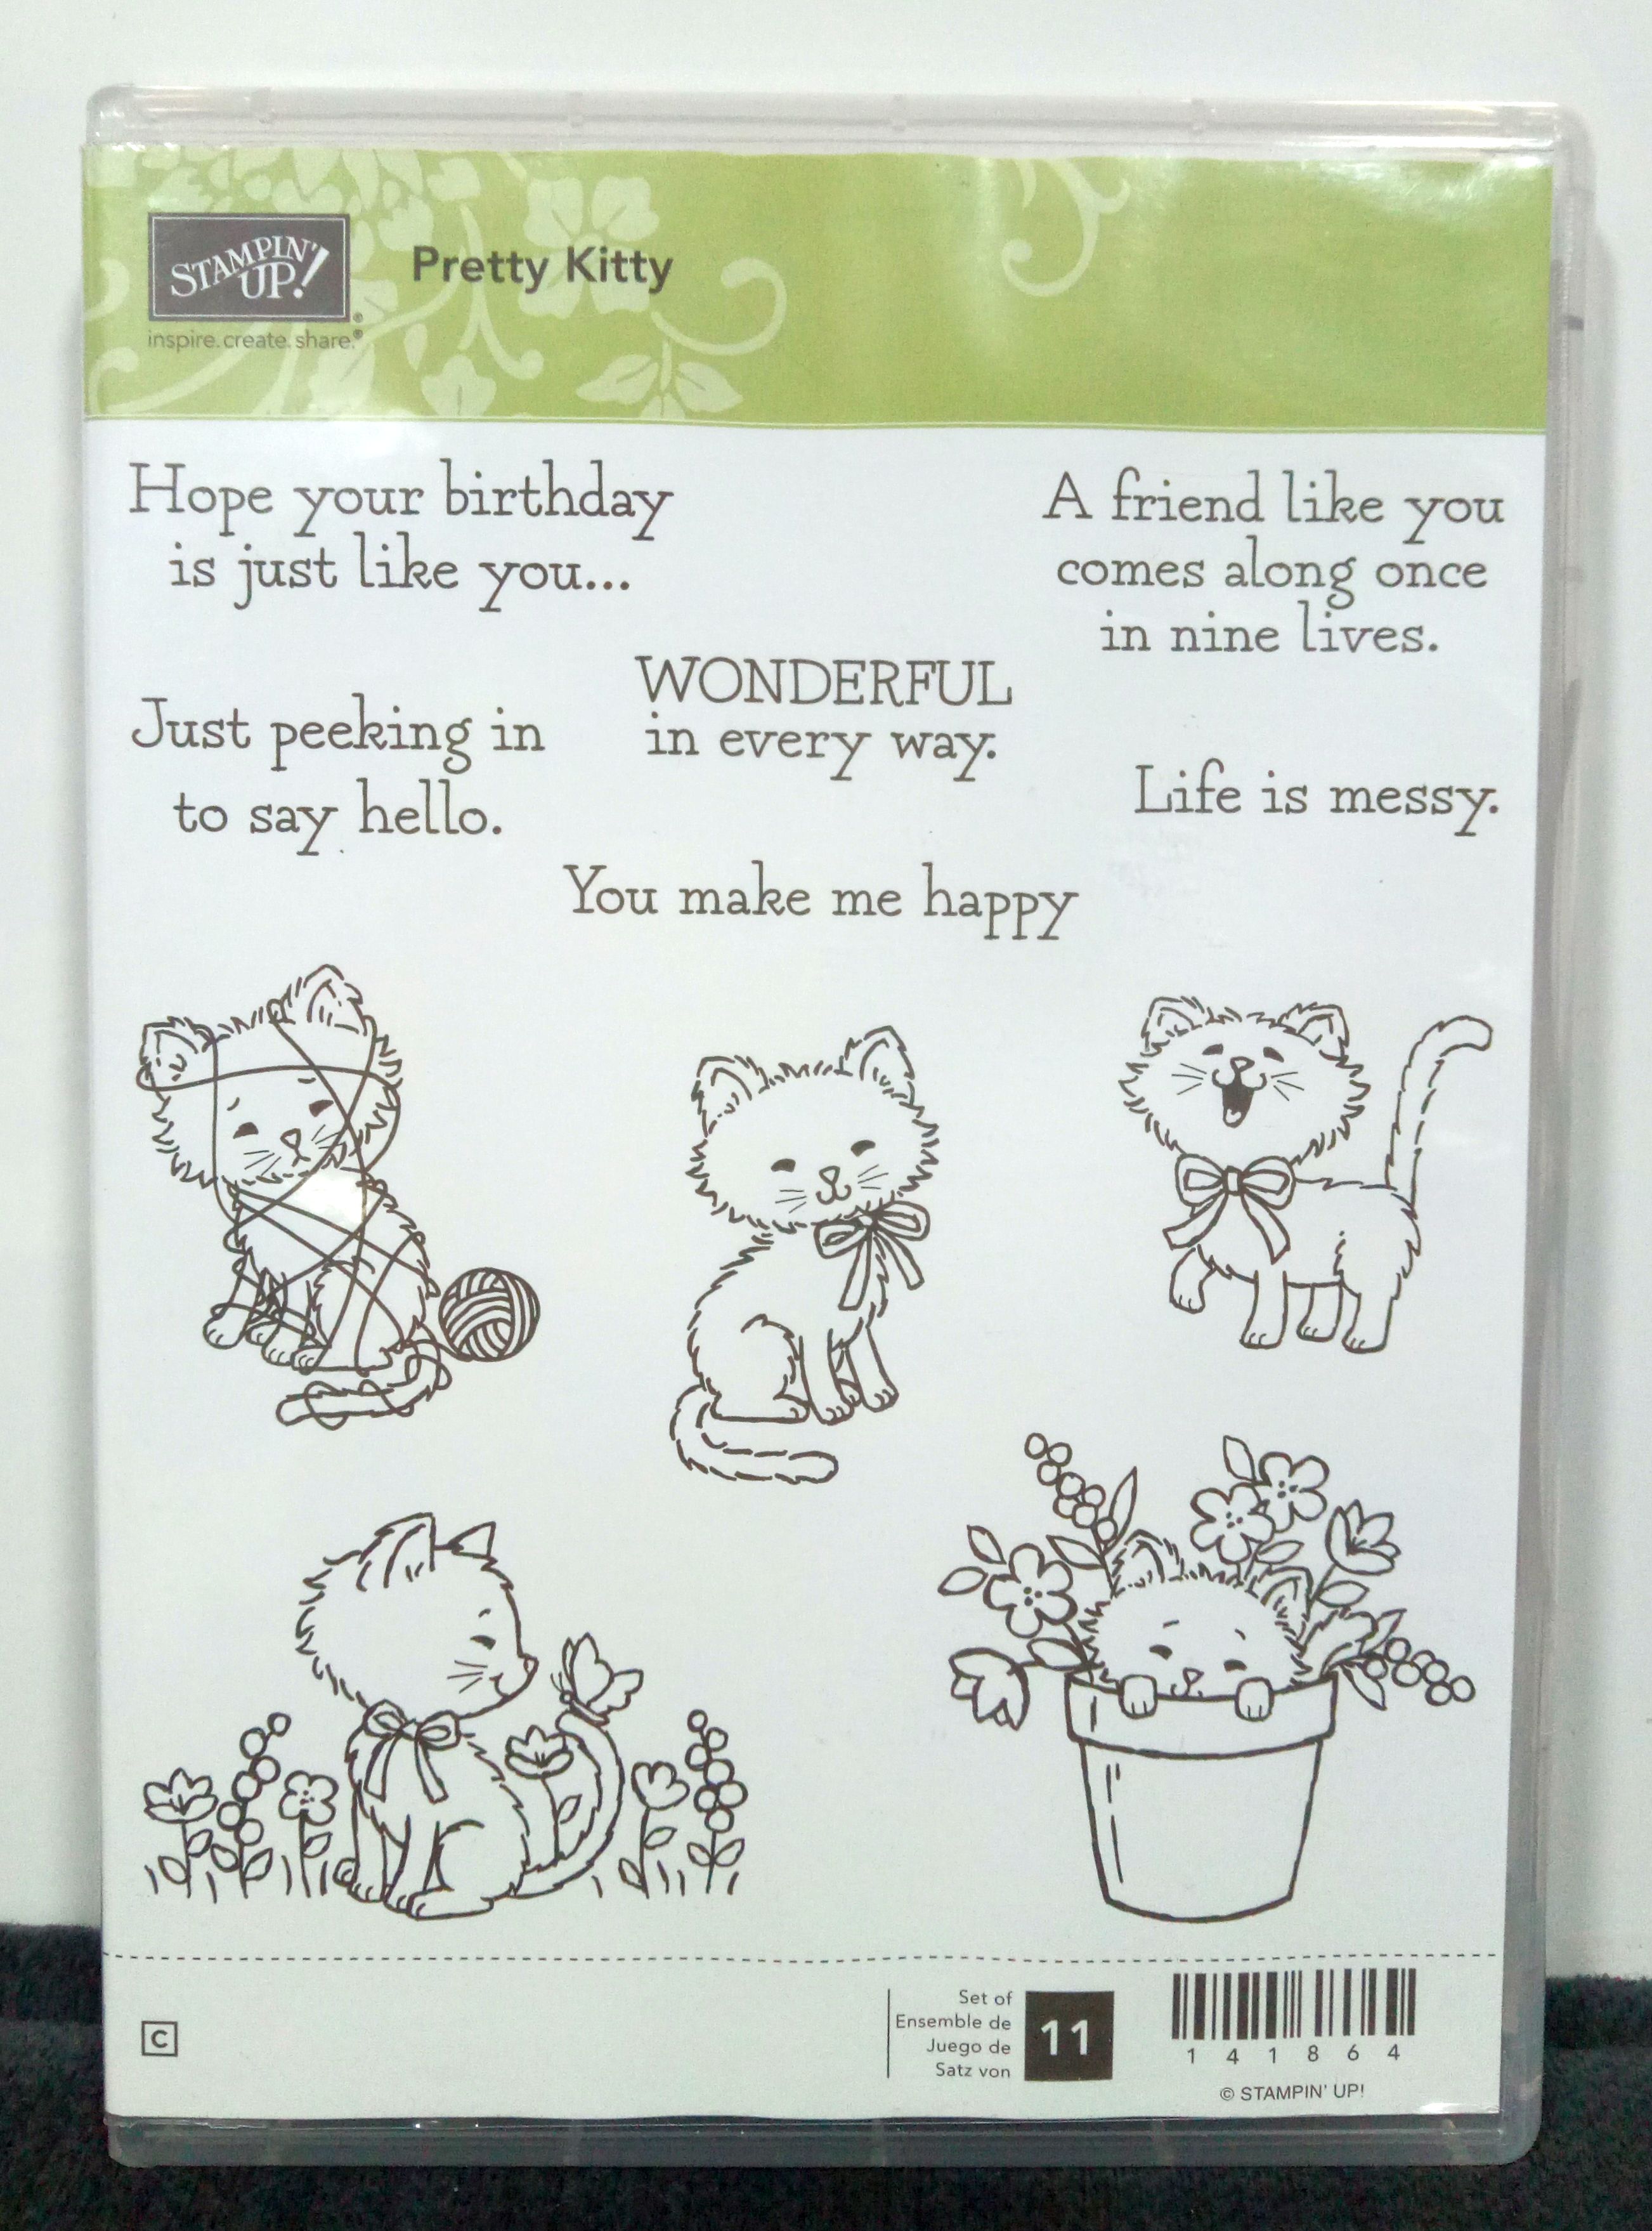
The Pretty Kitty stamp set from Stampin' Up! has a wonderful collection of cat images. They are so cute and playful.I think I used every one of them on my card and envelope.
I like the sayings too.
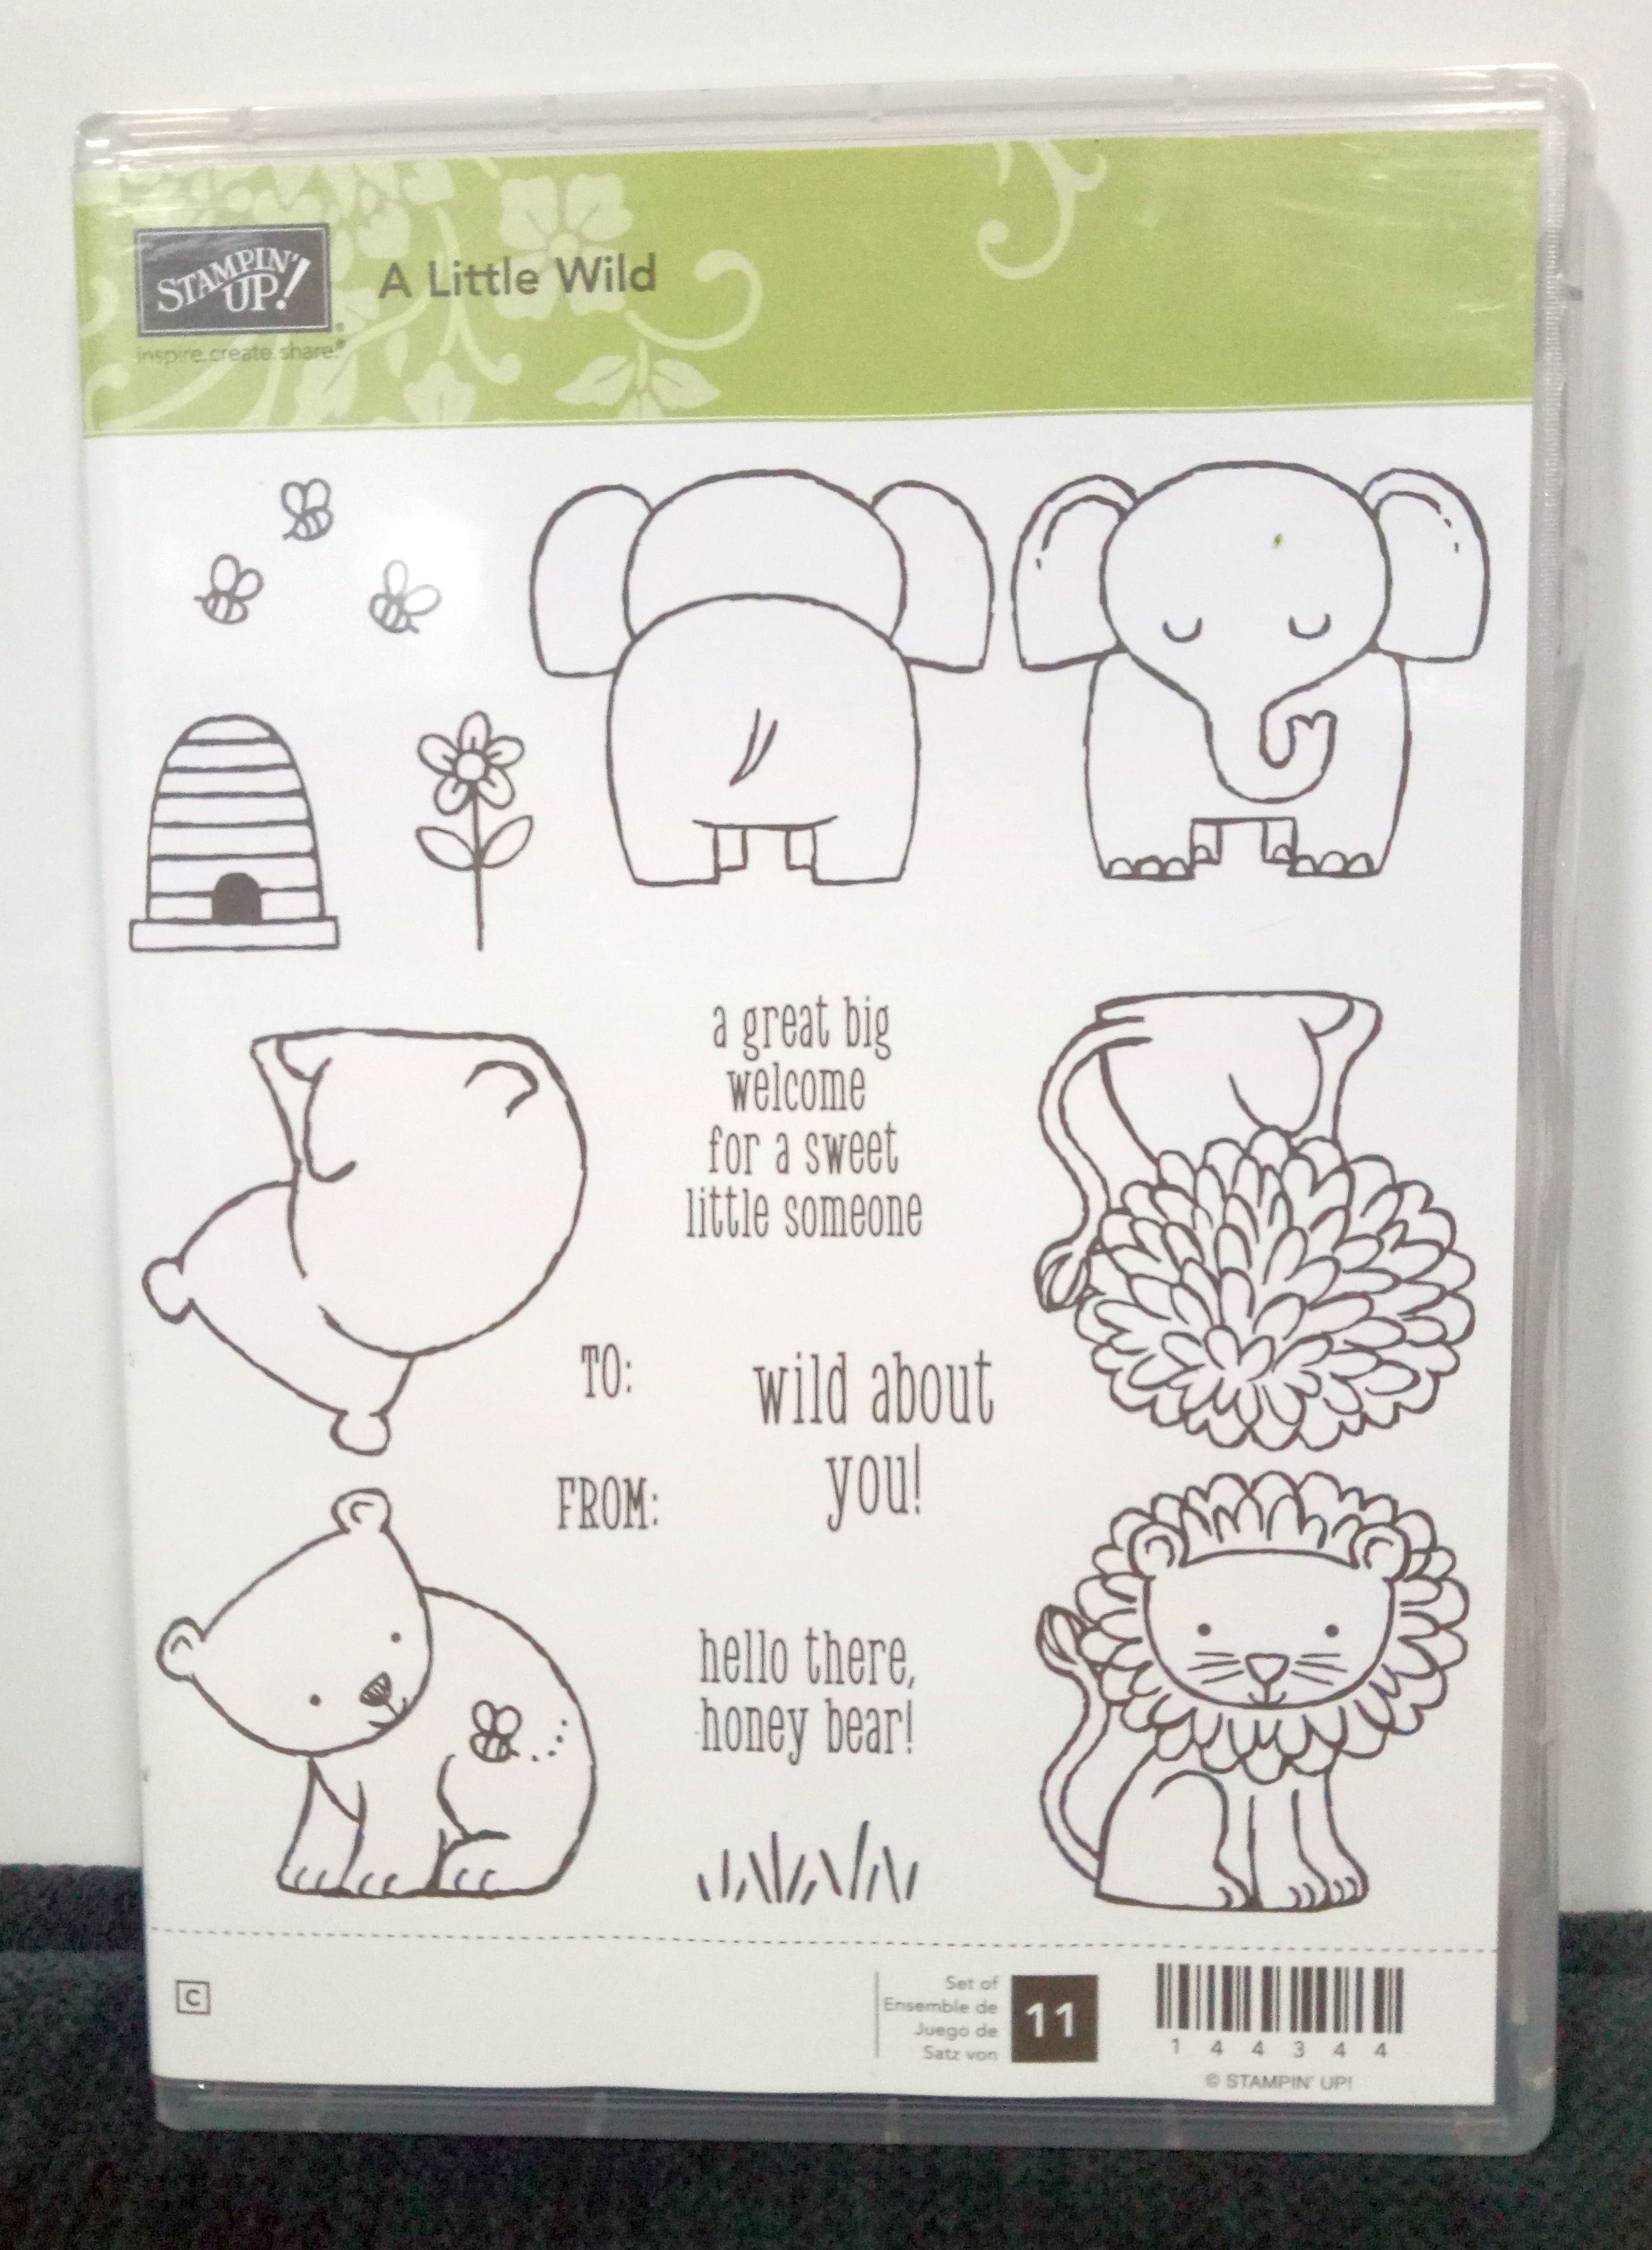
Then I picked the bee stamp from A Little Wild to help fill in some of the areas on the card front and to add a bit of extra movement.
How I Made My Card
Supplies List:
- A portrait style card base (Whisper White) measuring 21cm x 10.5cm, folded in half
- Light Pink (Petal Pink) background cardstock measuring 9.5cm x 14cm
- A piece of designer series paper (Share What You Love) measuring 6cm x 9.5cm
- A mat of cardstock (Rich Razzleberry) measuring 4.5cm x 8cm
- A piece of Whisper White cardstock measuring 4cm x 7.5cm for the main image
- An extra piece of coloured cardstock (Rich Razzleberry) for the Stitched Framelits die cut mat. Make two if desired, one for the inside of the card.
- An extra piece of Whisper White cardstock for the Stitched Framelits die cut sentiment. Make two if desired, one for the inside of the card.
- Big Shot Machine
- Lovely Lipstick ink pad
- Watercolour pencils
- Aqua painter
- A Little Wild and Pretty Kitty stamp sets
- Petal Pink Rhinestone Gems
- Papercraft tools - paper snips, bone folder, stampin' blocks, adhesive
Step by Step
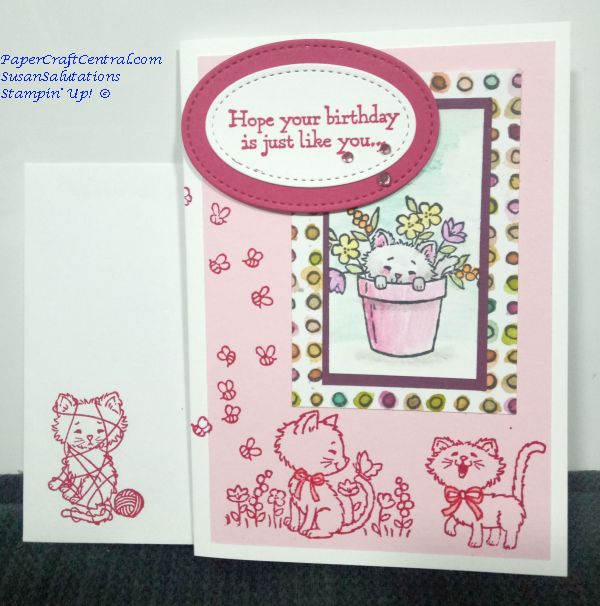
- On the Petal Pink cardstock, stamp some kitties along the bottom of the piece
- Stamp your main kitty on the 4cm x 7.5cm Whisper White and colour it in with the aqua painter and watercolour pencils
- Adhere the Petal Pink piece to the card front, then adhere the designer series paper to the front near the right corner. Leave a little border of pink around the designer series paper.
- Glue the main kitty image to the Rich Razzelberry rectangle and adhere it to the designer series paper.
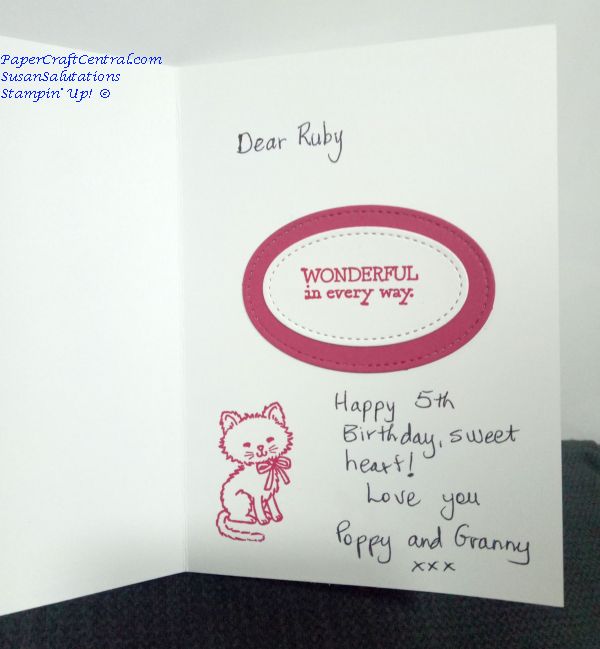
- Using Lovely Lipstick ink, stamp a kitty on the inside bottom left corner of the card.
- Stamp two sentiments on your spare Whisper White cardstock, one for the front and one for the inside of the card, leaving room for you to cut around them with a Stitched Framelit.
- Stamp a cat on your envelope.
- Cut out the sentiments with a smaller Stitched Framelit oval.
- Cut two Rich Razzelberry oval framelits with your Stitched Famelits Big Shot dies, bigger than your sentiment shapes.
- Adhere the sentiments to the Rich Razzelberry mats, then pop the front image up with Stampin' Dimensionals and adhere it to your card front.
- Glue the second sentiment inside the card.
- Glue the Petal Pink layer to the front of the card,
- Finish stamping a few bees from the A Little Wild stamp set onto the card, allowing a couple to fly off the edge of the card.
- Add a few rhinestones to the card front.
Here's how I stamped and finished the inside of my cat card for my granddaughter:
I hope you enjoy seeing some cat cards ideas and get a little inspired to make some of your own now.
Hint: You can combine other stamp sets to make your cats have hats for Christmas or other holidays. Change the season with accessories: add scarves to them for winter, or flower leis for a summery feel.
Use the masking technique and the Stamparatus to stamp accurately when combining images from different stamp sets.
See my Halloween cat card ideas.
If you make cards with cats on them, I would love to see what you make, especially if you use Stampin' Up! products in your crafting.
Do You Have A Favourite Handmade Card to Share?
Do you make greeting cards? Please do share it with me.
Cat Punch Idea
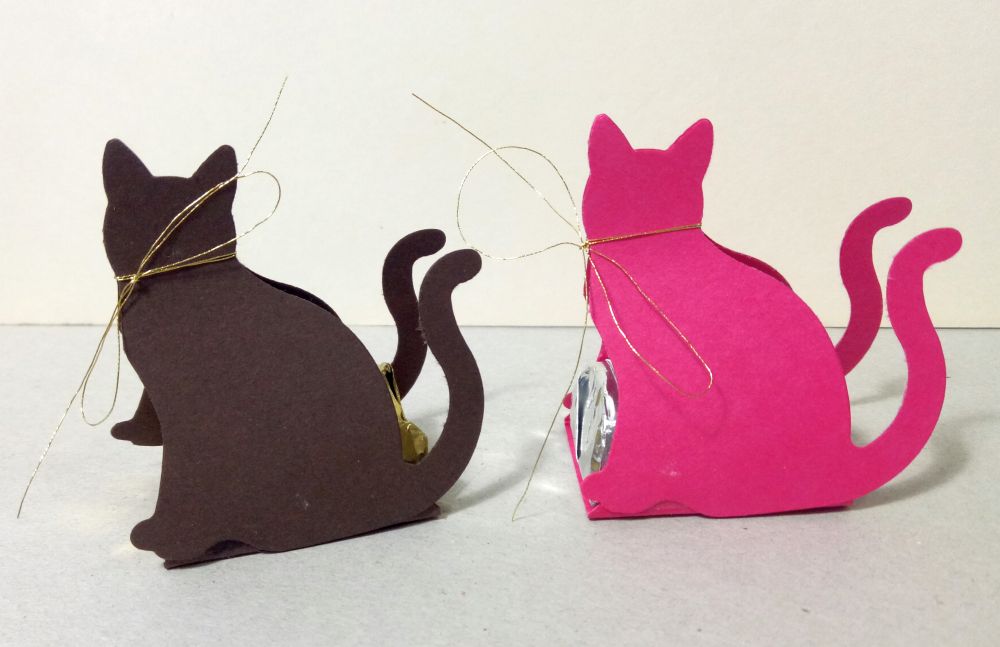
You can use paper punches on your cat cards and you can also use them to make little treats.
Here I punched two shapes, added a small 'boat' the size of a Hershey Nugget plus some extra to glue the boat to the cats at the bottom, and added said wrapped Nugget to the 'boat'.
Cat Favor Instructions
You will need:
- Cardstock
- Designer series paper (dsp)
- Cat punch from Stampin' Up! (Check the catalogue shown in the right hand margin to see if the cat punch is still available)
- Strong adhesive such as liquid Tombow Multi and some glue dots
- Hershey nuggets
- Paper trimmer and snips
Here's what to do:
- Choose what cardstock you want, and a coordinating designer series paper.
- Cut out two cat images from the cardstock with the punch.
- Wrap the nuggets in dsp cut at 1" x 9"
- Cut a piece of cardstock 1.5" x 1.5" and score opposite sides at 1/4". Fold the sides up and adhere your wrapped nugget to the boat with glue dots.
- Line up the two cat shapes and glue them together at the ears
- When the glue is dry, glue the cat bottoms to the Hershey Nugget boat on each side.
- Decorate as desired
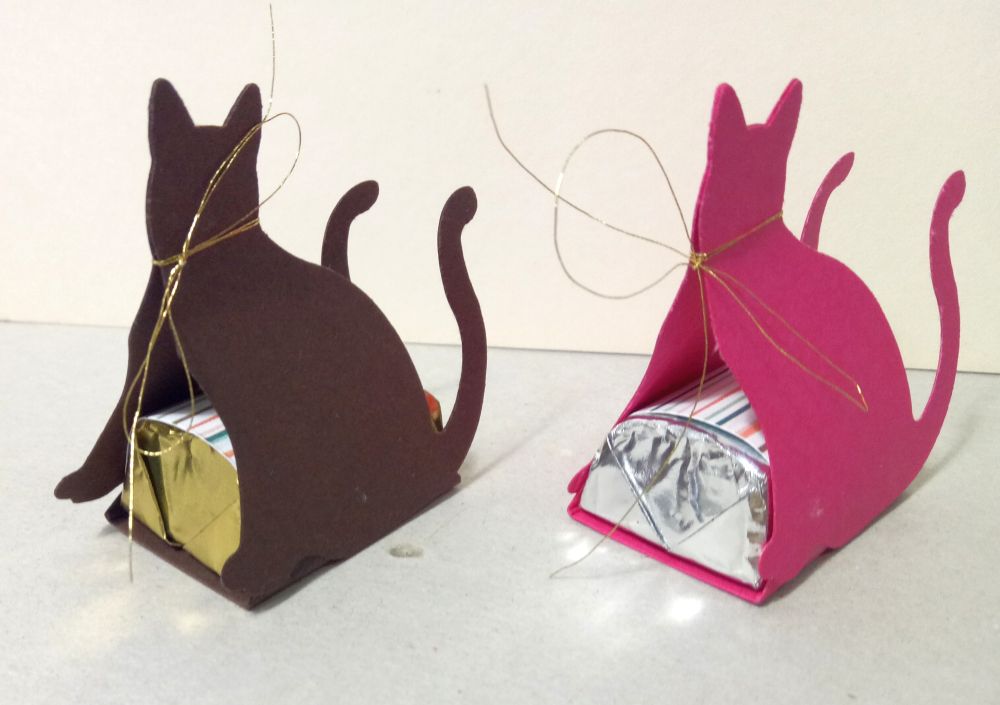
I use these as little table favours when I have crafty friends over. It's a small way to spoil them!
I have another cat card idea to show you soon. It involves the moon. Lol!


New! Comments
Have your say about what you just read! Leave me a comment in the box below.