- Home
- Papercraft Adhesives
- Anniversary Card Ideas
Framelit Anniversary Card
Written and Created by PaperCraftCentral Susan
Make a framelit anniversary card (now referred to as DIES) in a jiffy using your Stampin' Up! nested heart dies (retired) or similar and your Die Cutting and Embossing machine.
"Marriage is the most natural state of man, and... the state in which you will find solid happiness".
~Benjamin Franklin
Making a framelit (die) anniversary card can take some thought, but in this case, it didn't take too much thought!
I know we have a whole year between anniversaries to think about how to make our loved one feel special, but sometimes the date rolls around and we find we're not really prepared. Or maybe you don't get much time without your spouse being in the house, so it is hard to surprise him/her.
The nested heart dies (or similar, since these are actually retired now) from Stampin' Up! and your Die Cutting and Embossing Machine can come to the rescue in situations like this.
Here's the sweet greeting I made for my husband with some of them:

Here's How I Made my Framelit Anniversary Card (Note: Framelits are now just called Dies):
All of my supplies came from Stampin' Up! and can mostly be ordered from my SusanSalutations shop.
Timesaving Hint: You can secretly assemble everything you need before you start making your card. This makes it easy to go ahead and make all the layers, and it saves time if you have limited time to craft before your spouse sees what you are making.
But hey, you can always quickly hide the unfinished (or finished) card under your craft mat if you hear him/her coming! Lol!
Ask me how I know :)
You will need:
- An A4 sheet of Basic White cardstock
- A quarter A4 sheet of Crumb Cake cardstock
- A quarter A4 sheet of Real Red cardstock
- A scrap of Cherry Cobbler cardstock for the bow
- Designer series paper of choice
- Embossing folder of choice (I used the Lovely Lace Textured Impressions embossing folder, now retired)
- Nested Heart Framelits/dies (now retired), Bitty Banner Framelits/dies (retired), Wonderful Wreath Framelits/dies (retired)
- Sentiment and heart stamp sets (I used the heart out of Project Life Let's Get Away and sentiment from Teeny Tiny Sentiments, both retired)
- Basic pearls
- Die Cutting and Embossing machine
- Papercraft tools, inks and adhesives
NOTE: If you don't have the suggested supplies, you can substitute using any other stamps and patterns that appeal to you. The basic instructions for this card remain the same. Yours will therefore be a unique design
Here's What to Do:
- Start with a normal card base made from half a sheet of A4 cardstock, scored down the middle. Fold the card base closed and lay the large, scalloped heart on it, allowing the edge of your heart to overlap the fold a little so you will still have a connecting hinge for your card. Cut out the scalloped heart shape and you have your card base prepared.
- Cut
a full scalloped heart from the other half of your Basic White A4
sheet. Stamp little hearts on each scallop in Real Red ink.
- Cut
a large, smooth edged heart out of Crumb Cake and another one the same
size out of your designer series paper. Adhere them to your scalloped
and stamped heart, making them slightly off centred and overlapped.
- Using the next sized down heart framelit (die), cut a Real Red heart out. Run the red heart through your Die Cutting and Embossing Machine with the embossing folder. Adhere this to the front of your designer series paper heart.
- Cut out a bow from scraps of the Cherry Cobbler cardstock using the Wonderful Wreath bow framelit (die).
- Stamp your sentiment on a scrap of Basic White cardstock then cut it out using a Bitty Banner framelit (die).
- Adhere your bow and sentiment to the embossed heart, popping up the sentiment banner with Stampin' Dimensionals.
- Add pearls to accent some of the embossed design and bow.
- Adhere your card front to your card base and then you can add your own secret and romantic message to your loved one to the inside. Or go funny. My man loves it when I make him laugh.
Variations:
You can
- add a real ribbon bow instead of the framelit/die bow,
- pop up more of the
layers with Stampin' Dimensionals,
- add another layer to the card back,
- vary the
colours you use,
- add sparkle instead of pearls with rhinestones,
- use this idea for Valentine's Day,
- add a lacy paper doily instead of or as well as the designer series paper.
Make this card your own!
Adding to your Framelit/Die Anniversary Card with a gift:

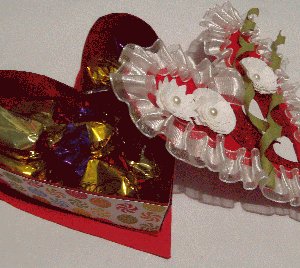
- Make a pretty heart-shaped box
with the same framelits/dies and fill it with chocolates or something that
your love just loves. Mine loves pistachio nuts, so I could add a little
cellophane bag of them to the inside of this box, for example. Tie your framelit/die anniversary card to the top.
- Make a romantic album to give your love and add your card to it.
- Make a chocolate slider sleeve as a gift and attach it to the envelope you put your card in. Make your own envelope to put your card into.


New! Comments
Have your say about what you just read! Leave me a comment in the box below.