- Home
- Papercraft Adhesives
- How to emboss with glitter
Glitter Embossing
Written and Created by PaperCraftCentral Susan
Glitter embossing is a lovely technique you can easily achieve with Heat & Stick powder and Dazzling Diamonds Stampin' Glitter or similar, since Dazzling Diamonds is now retired.
Here's how!
"All that glitters is not gold"
~Ancient saying
Making your projects special with glitter embossing is only a step beyond ordinary heat embossing. All you need is Stampin' Up!'s Heat & Stick Powder, a Versamark or Craft Ink pad, and a heat tool.
Oh and you need some glitter of course, and the cardstock you want to
add your image to.
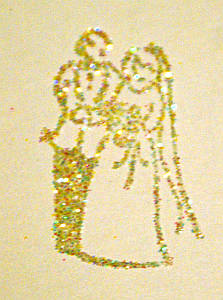
Here I used Dazzling Diamonds (retired), also from Stampin' Up! to make a wedding image, but you can use any glitter if you have the Heat and Stick powder:

It's so hard to capture glimmer and shimmer on a stills camera, isn't it? If any of you know how to help me capture this type of thing better please say so!
Also, this image shows the glitter as being gold in colour. It is really more silver, which I think I captured better at the bottom of this page.
Anyway, on with the tutorial.
How to do Glitter Embossing:
I love glitter embossing at Christmas.GLitter and Christmas just go together in my mind.
To create this glittery effect, just go one step further in the heat embossing process. It's really that simple!
Heat and Stick powder is the extra step you need to learn about for glitter embossing.
Here are the instructions for using Heat 'n Stick Powder:
- Stamp an image with VersaMark ink or with your Craft Stampin' Pad. The ink will stay wet for a time so no need to rush this steptoo much, but you want to add the Heat 'n Stick powder before the Versamark ink dries.
- Have a sheet of paper folded in half to catch the excess powder. Place your stamped image on the folded piece of paper, face up.
- Apply Heat & Stick powder to the inked image, as if it were embossing powder. Shake off the excess powder onto the folded piece of scrap paper and funnel it back into its container. You can set this aside till you are ready to apply the sparkle
- Once you have a pot of glitter open, keep it away from the heat tool so it won't blow everywhere, and heat your heat 'n stick image with the heat tool just until the powder turns
to liquid. Do not overheat at this point. You may like to heat the image from
underneath rather than on top, just to avoid overheating it. You can see the powder change into a liquid better if you heat the image from underneath.It will be sticky at this stage.
- Pour Dazzling Diamonds or your glitter of choice onto the inked image, making sure that the image is coated completely
- Gently shake off excess glitter and funnel it back into the container
- Heat the glitter on the Heat 'n Stick powder again briefly to set it.
Now you should have a nicely glittered and embossed image that you can add to a handmade card.
Changing the Colour of Dazzling Diamonds
Did you know you can change the colour of your Dazzling Diamonds or clear glitter a couple of different ways? Here are some ideas to try:
- Mix a little glitter with some ordinary embossing powder and use as above. This could allow you to make gold or black glitter embossing!
- Stamp your image in Versamark and coloured pigment ink, pour on Heat 'n Stick Powder and tap off the excess, use the heat tool to set, and then add Dazzling Diamonds or other clear glitter before it sets, heating a little again to set in the glitter. The underlying ink colour will show through.
- Take a plastic container and plastic spoon, add some Dazzling Diamonds to the container, add a drop of Reinker to the container, and work the colour through the powder till it is evenly coloured. Allow the glitter to sit for a couple of hours to dry out, stirring it through occasionally. Use as above.
If you have not tried these techniques before, I hope you will play with them now. If you do, please do share your project with me. I'd love to see what you make.
Do You Have A Favourite Handmade Card to Share?
Do you make greeting cards? Please do share it with me.

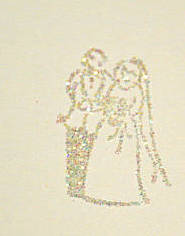
Is this one a better image, or worse? Lol! Now I feel like an optometrist!
I think this one is more 'true to life' as the Heat 'n Stick powder with the Dazzling Diamonds creates more of a silver effect than the gold one shown above.
If you liked this tutorial, you may like to try dry embossing or other forms of heat embossing. You may also like to see how to get different effects with your embossing folders and Die Cut and Embossing Machine.


New! Comments
Have your say about what you just read! Leave me a comment in the box below.