- Home
- Papercraft Adhesives
- Grad Card Ideas
Graduation Greeting Cards
Written and Created by PaperCraftCentral Susan
Graduation greeting cards can be as unique as you want them to be. You could consider making an accordion card to really make an impact with your heartfelt congratulations message.
"Life is my college. May I graduate well, and earn some honours!"
~Louise May Alcott
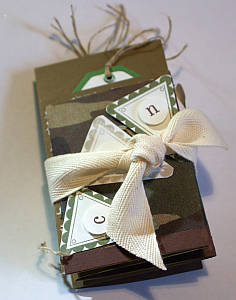
Making accordion cards for your graduation greeting cards is as easy as folding them over and back. Another name for an accordion fold is a fan fold, so if you have ever made paper fans, you will know what I am talking about!
If you tap the link I just putting in the last sentence, you will find a tutorial for making a fan fold card as another idea. You could also customise a fan fold card to make it a graduation card.
For the project on this page, I made a pocket accordion message here and will show you how to do it too.
Instructions for Graduation Greeting Cards
Here's what you will need:
- Designer series paper and cardstock of choice
- A pennant stamp (or make your own) and some letters to spell out your message (I used the Party This Way and Calendar Alphabet and Numbers stamp sets from Stampin' Up!, both now retired, but see if you have something similar in your stash. You could also just cut out triangles for the pennants and hand letter your card with marking pens))
- Some thin twine (I used Stampin' Up!'s Linen Thread)
- Stampin' Dimensionals, glue, glue dots, inks, punches, the normal paper crafter's toolkit
There's a place for you to show me your project at the bottom of this page. Scroll on down to see it!
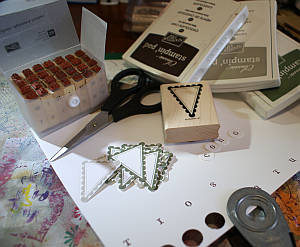
I started with half an A4 sheet of cardstock cut lengthways so I had a long strip to work with. I covered that with designer series paper, leaving a small border around it.
Then I worked out the maths of my message. It's easy. Here's how I did my maths:
1. The word "Congratulations" has 15 letters in it, and I had five folded card faces, so I knew I needed to have five panels with three letters on each.
2. I scored my cardstock and designer series paper strip into five equal parts.
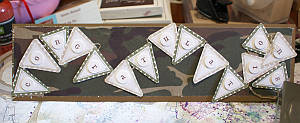
Next I stamped out my pennants and letters and punched them out to form my message, then strung them together with double sided tape and twine.
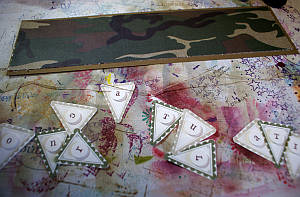
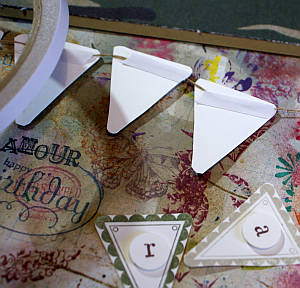
I placed the pennants in bunches of three on the panels of my cardstock and adhered them down.
Some of the pennants overlapped and I decided that didn't matter.It made it more visually interesting and you could still read the word.
TIP: If you have a longer message, you might like to use A3-sized paper.
Next I made a second piece of scored cardstock to fit on the back of my decorated piece. I wanted to make pockets to hold some tags with more messages on them. I made the tags first with a two different sized tag punches, adding some eyelets with my Crop-a-Dile and then adding some linen thread to link them all together.
You could also use Baker's twine to string the pennants, or some fine ribbon, embroidery cotton or even sewing thread. The card won't have a lot of stress or strain on it so you are looking for a visual effect raher than for strength in the twine.
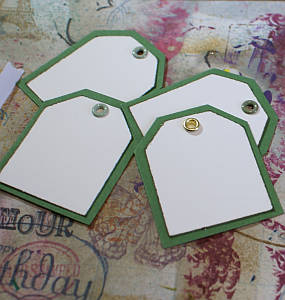
Remember to write on your tags. I added messages that said how proud we were of our son, recognising his hard work and how far he had come, and how bright the future looked for him.
If you wanted you could provide a tag for each person sending the card to write a message on.
Next I added double sided tape to form the pockets (use the score lines to guide you and the tags to measure the depth of the pockets) and add the front decorated piece to the back.
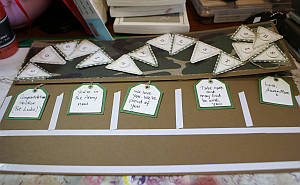
Now fold along your score lines and stand up your card.
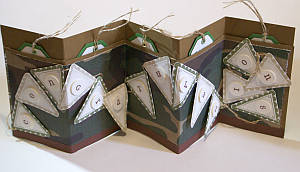
As you can see in the first photo, you can now fold the card up and tie it together with tape or ribbon. It will fit neatly into a box this way.
You can see how to make the footlocker box under my 3d Papercrafts section.
I'd love to see your Graduation Greeting Cards when you make yours!We all need new ideas for celebrating those loved ones who achieve. Let me know if you have other ideas for how to make cards to do just that.
I would also love to know if you make one of these accordion fold banner cards as a graduation card. Maybe you will customise yours with colour, prints, banner elements and greetings. I'd be so glad to see you using this idea.
Do You Have A Favourite Handmade Card to Share?
Do you make greeting cards? Please do share it with me.
Now you might like to try a few more folded card ideas. Here are a few to spark your creativity:
Enjoy our time here at PaperCraftCentral.com and if you like what you see, tell your friends!
Return from Graduation Greeting Cards to Special Occasion Cards | Return to PaperCraftCentral Home page


New! Comments
Have your say about what you just read! Leave me a comment in the box below.