- Home
- Papercraft Adhesives
- How to Make Inchies
Inchies
Written and Created by PaperCraftCentral Susan
What are Inchies?
They are small works of art that have quite an appeal amongst papercrafters.
Got an afternoon free for crafting? Find out more here and then why not try making some miniature art yourself?
"When life gives you scraps,
make something with them".
~Author Unknown

Have you ever made inchies before? Is this term unfamiliar to you? Let's fix that :)
Or maybe you already know about this miniature form of art? They are fun to make, aren't they.
This form of scrapbooking challenges paper crafters to work with very small surfaces. 'How small?', I hear you ask. Most people are quite amazed when they find out the answer to that question.
How to Make Inchies
Suggestion: If you find the work surface of an inchie too small to craft with at first, try making some Twinchies and build yourself up to the smaller size with practise.

Here's How to Start:
First, get together your supplies. You might like to start with a theme for your project, as a group of these little squares mounted on a canvas or in a frame can pack quite a punch.
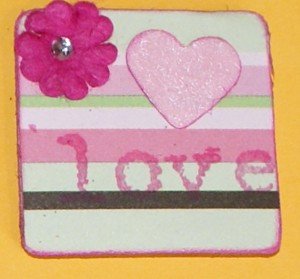
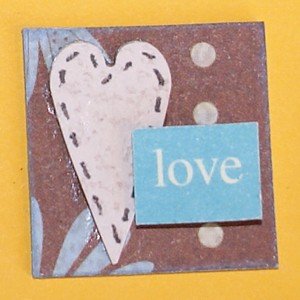
For today, let's choose the theme 'Hearts'.
You will need:
- Some chipboard squares* measuring 1" x 1". Choose lightweight chipboard and cut it with a craft knife and a metal ruler, or buy it pre-cut. Or recycle your empty cereal box.If cereal box cardboard is too thin, glue a couple of layers of it together. You want your inchie to be sturdy and have a little dimension
- Some small heart embellishments. Try brads, stickers, stamps, die cuts, punched shapes, cut outs from old cards, magazine pictures, etc, as long as they will fit on your square
- Some paint, glitter, ink and/or paper for the background
- Other embellishments such as small pieces of ribbon, lace, foil or anything else that appeals to you with the hearts and the background you have chosen
- Optional: Some fine-tipped felt pens (like Stampin' Write Markers) to add words to your squares, or to edge the squares, or embellish them in other ways such as with doodles or stamps
- Adhesives and papercraft tools
- Some patience!
*If you don't have any chipboard don't let that stop you. Find an old cereal or tissue box and cut 1" squares from that. Glue several layers of this cardboard together till you have squares that are as thick as you want them. Allow the adhesive to dry thoroughly, then sand the edges a little to finish and then you can start decorating.
Here's What To Do:
- First, make your background look the way you want it to. You may like to work with several 1" squares at once to get a more uniform look, or you may want each one to look different.
- Colour or cover the chipboard in a way that pleases you and edge each square with ink to make it look more finished. Sometimes I edge mine in gold or silver embossing powder
- Now adhere some ribbon, twine or lace as an embellishment and write or stamp on the words you want to add
- Attach your hearts last as they will then be on top of all the other embellishments, as a major feature
Once you have done a set of these it will be easier to think of some other themes.
What about a series on
- famous women (print out small photos of women you find on the Internet), or
- a series of storybook ideas, or
- choose a feeling word like 'serenity', or
- pick a colour and work only in those tones with different subject matter?
- Another idea is to try using the tiny photos you get when you ask for an index print at the photo booth.
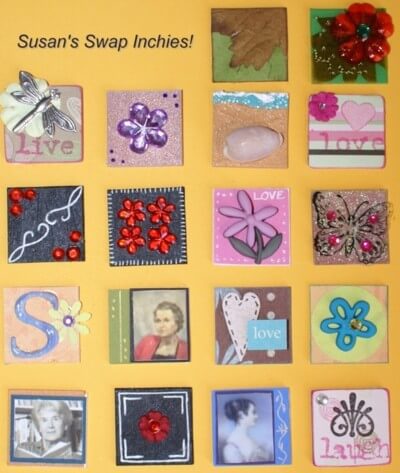
Once you have a collection of Inchies completed (I started with a group of nine) you can group them together in a lovely piece of artwork.
Try mounting them:
- to a canvas that you have painted in contrasting or coordinating colours
- to a clear acrylic block that you can stand up on your desk or use as a paper weight
- inside a picture frame that you have decorated
- on a note book or album cover
- on a scrapbook layout to enhance a special page
- across a card front - make a feature of just one and mount it on several layers of cardstock, or go wild and add nine or twelve little squares
- on a hand made gift box or as a gift tag
- as a swap idea with your crafty friends
- Use fabric or another medium than paper to make them
More ideas can be found on Pintrest Boards like this one.
Use your imagination and enjoy the miniature world of Inchies.
And if you make some, do share them with the rest of us.
Have A Favourite Altered Art Piece?
Do you have a piece of altered art you have created? I'd love to see it.
You might like to try some different techniques now:
Return from Inchies to Scrapbooking | Return to PaperCraftCentral Home Page


New! Comments
Have your say about what you just read! Leave me a comment in the box below.