- Home
- Papercraft Adhesives
- Paper Wreath Making
Curled Paper Wreath
Written and Created by PaperCraftCentral Susan
Have you seen a beautiful curled paper wreath and wondered how to make one?
I admired one for a long while and decided I just had to take the plunge to make one myself. I like being able to add to my own home decor in a personalised way.
When a girlfriend said she was making one herself, I asked if I could join her to make one similar to hers. I figured it would be good to have company while we assembled our decorations, and it was.
Bonus! And neither of our creations would look exactly the same. You sure would not find them in a store, either. Triple bonus!

Before I went to my friend's house, I prepared what I needed so the project was all ready to be assembled when I got there. This is what I did at home (I put the Stampin' Up! item numbers after each supply for you to make ordering easier, if you are thinking of making a similar decoration. Some items go on the Retired List pretty quickly so if you try to order them and can't, that will be why. Lots are standard items and alternative supplies will be available though):
1. Cut six sheets of Winter Frost 12" x 12" designer series paper (retired) or designer series paper of your choice into 1/2" strips, then cut a 'v' into the end of each strip. I chose designer series paper with silver embossing on it.
2. Remove the backing from a 12" x 2" piece of silver glimmer paper (retired), and cut it into 1/2" strips
3. Reserve another piece of 12" x 12" silver glimmer paper for cutting out some snowflake shapes, along with some Island Indigo (retired), Smokey Slate (131291) and Pool Party cardstock (124391), for the same reason
4. Found three of my Frosted Finishes embellishments (retired) but you can use other pretty brads or buttons
5. Cut one sheet each of Island Indigo, Smokey Slate and Pool Party A4 cardstock into 1/2" strips and notch each end of each strip with a 'v'
6. Made three rosettes with the Rosette Bigz XL Die (retired) using two pieces of Island Indigo cut at 2 3/4 x 12", one using two pieces of Smokey Slate cut into 2 1/2" x 12" strips, and one made of two strips of Pool Party, cut into 2 1/2" x 12" strips.
7. I used my bone folder (102300) to curl each /12" strip of designer series paper and cardstock. You need to find the middle of each strip and curl one end from the middle, then curl the other end from the middle
8. Found my hot glue gun and spare hot glue sticks
9. Found my silver embossing powder (sold in a three pack with other colours) and Versamark ink pad (102283)
I had all my curled papers in a plastic tub, ready for assembly, and packed up the rest of my supplies in the car before I headed out the door to my friend's house. This really sped up the process and made it happen, since I had an agreed deadline. Lol! Also, you can catch up on all the news and eat chocolate together when you arrange time to paper craft with a friend. Which we did of course.
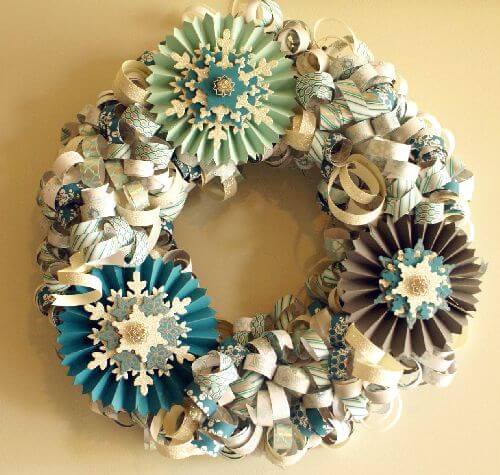
At my friend's house, she had found us each a white foam 12" plain Styrofoam wreath. I fund more at Spotlight, a craft store in Australia. My friend also had the Festive Flurry stamp set and Dies bundle (now retired), which we used to make the snowflakes.
A couple of the layers of the snowflakes were stamped and embossed in silver. We hot glued the layers together and finished each snowflake with a Frosted Finishes embellishment.
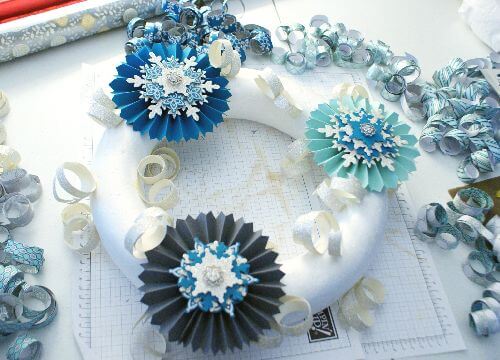
Then we hot glued our snowflakes to the rosettes, and hot glued the three finished rosette/snowflake embellishments to the bare foam shape in a triangular arrangement.
Now we were ready to add the paper curls. First I divided the curls into design types (silver in one pile, Island Indigo ones in another pile, etc) I used a hot glue gun, first gluing the piece of curled paper on the back of the curl at the middle, then carefully pressing it onto the bare wreath after the glue had cooled just a little.
I managed to burn my finger once during the whole thing, so be careful with that hot glue gun. Maybe use a wooden skewer or Take Your Pick tool to push the curls into place instead of using just your finger. I thought of that before I glued my finger, but I did not get up to find one so it didn't count.
What I did do was to glue the silver curls on first, evenly distributing them around the wreath. I glued some on the inner circle making sure the curls would cover the background everywhere it would show when hung on a wall.

I continued to add the different types of paper curls in turn until I
had used all of them and covered the white foam surface of the wreath.
Then
I took some punched circles of Pool Party cardstock and hot glued some
white organza ribbon to them, then placed the circles on the back of the
wreath near the top to form a hanger for the piece.
It looks so pretty! It sparkles in the light.

Another Way to Make a Paper Wreath
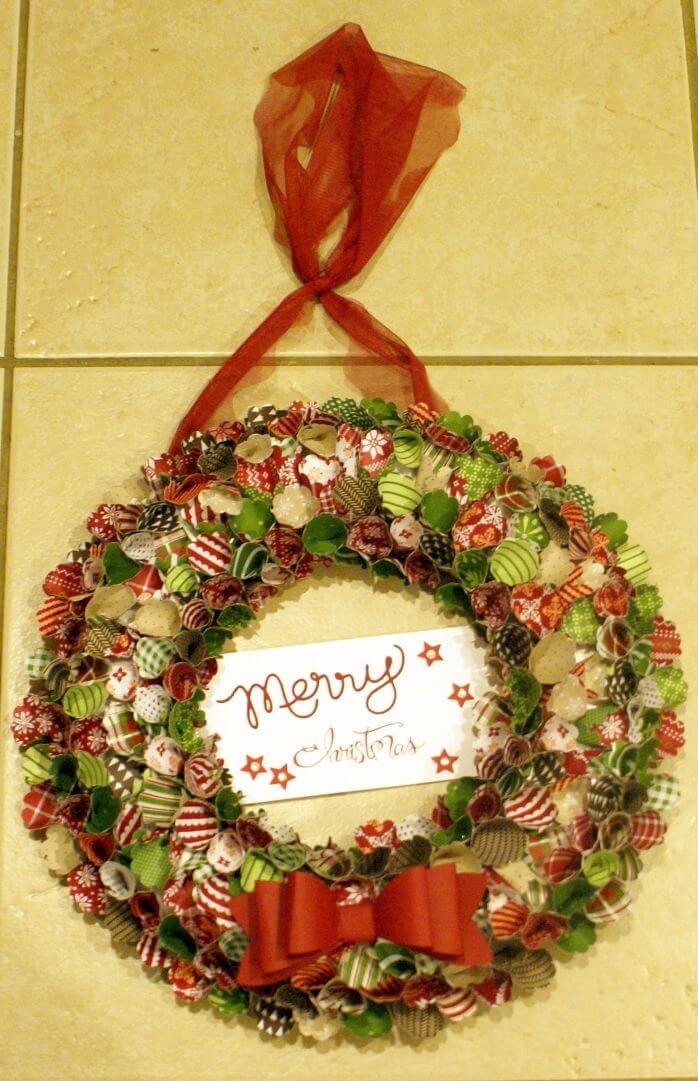
You can make another type of decorated circle by punching out scalloped circles from a mixture of designer series paper in colours you like, then shaping them into cones.
You can fix the cones as shapes with a small stapler. Then use your glue gun to adhere each cone to the wreath shape, starting at the middle and working up to the face, then turning the cones in the opposite direction to descend to the other side.
I used some gauze ribbon to make a hanger, added some stamped Basic White cardstock as the central banner (it has some rhinestones on the stamped stars too and 'Merry' is actually a die cut word), then when everything was fixed in place I added some brown paper to the back of my finished project to hold it all in place.
I made a bow with my Bow Maker die (retired) out of Cherry Cobbler cardstock and fixed it to the bottom centre.
I love the end result!

If you enjoyed reading about this project, you may now like to learn how to make something else, like:


New! Comments
Have your say about what you just read! Leave me a comment in the box below.