Papercraft Bear 2
Written and Created by PaperCraftCentral Susan
In Papercraft Bear 2 you will be able to finish your teddy. Just follow the steps I am about to go through with you.
I have laid out the next steps, one by one. Feel free to use these instructions as a guide only, and make your embellishment your own!
Papercraft Bear 2 Instructions
We're up to the finishing touches now.
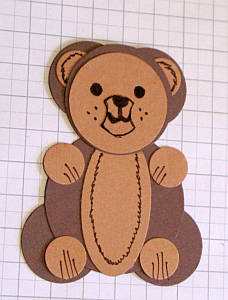
In the next step, use your Stampin' Write dark brown marker to add some circle eyes, some freckles, then some ear and tummy fur.
Don't forget to add some pen strokes to the paws to make it look as though your teddy has cute little claws.
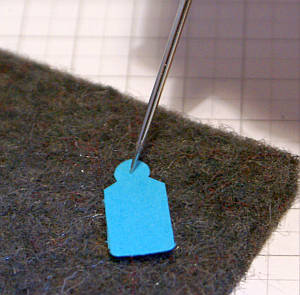
Now punch out a jewelry tag (this punch is now retired) or any other small tag punch you might have , or cut one with your dies and Cutting and Embossing Machine, or make one to suit cutting it by hand.
Pierce it with a piercing tool on a soft mat.
I chose Tempting Turquoise cardstock to make my tiny tag but this colour is now retired. Just choose the colour you like from your stash. Maybe make it from a yellow shade so your teddy can be a neutral teddy, and you will be ready for the birth of the next child regardless!
You will use the hole you pierced to thread your choice of thread through and use that to attach the tag to the teddy.
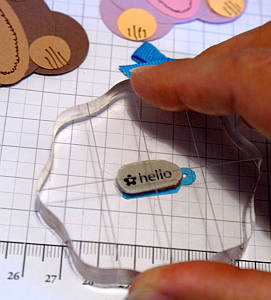
Next I used the now retired Tiny Tags stamps to add a sentiment to my jewelry tag. It was so easy to place it right where I wanted it by using a clear block to stamp.
You could use any shape of tiny tag for this step such as a small circle or oval shape. even a star, heart or square would look nice. Or a rattle. Wouldn't that look cute? I was even thinking you could make a paper bow and add it to your teddy after stamping some cute words on it.
I hope the following instructions are easy to follow....be sure to contact me with questions if not!
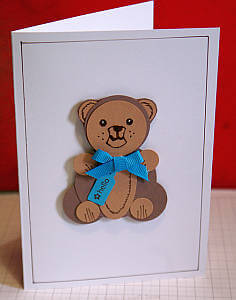
Then I made a bow with a length of Tempting Turquoise ribbon (retired). I used a Stampin' Dimensional to attach the threaded jewelry tag to the teddy, then pressed the bow to the Stampin' Dimensional too.
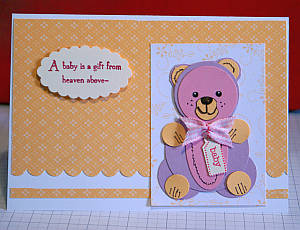
After I had done that, I wished I had trimmed the Stampin' Dimensional a bit smaller. It would not have shown as much. Live and learn! I did trim the sticky pad for the pink teddy card and it did work out better.
The final touch was to trim away some of the 1" circles behind the ears, just leaving a rim of colour to define the inside of the ears. I thought it looked more bear-like that way.
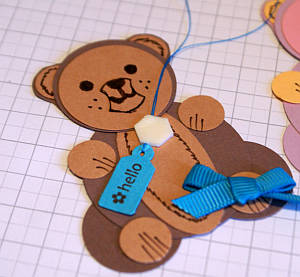
Now your can use your completed teddies on a handmade greeting card or in a scrapbook layout. I made a couple of cards with mine to show you how they would look in pink or blue (see pictures below). I'm thinking of making a few more to add to a scrapbook page, and maybe some with yellow or more neutral colours.
Remember, some mothers love purple too!.
Other ways to use Papercraft Bears
These little guys aren't just for cards and scrapbook page.
- You could make a string of them to adorn a child's room. Just place a strip of cardstock behind the bears to join them together, or string them on ribbon and loop them on pins on the wall.
- You could add them to gifts, using the back of them as a tag to write on.
- You could use them on paddle pop sticks to adorn cupcakes at a baby shower.
- Add them to the top of boxes that are for storing small items in a child's room.
- Use them as name tags at a baby shower. You could write a guest's name on the little tag instead of a greeting. Add a velcro dot to the back to make your bears stick to a person's clothing.
- Add them to a hat brim for a fancy dress party.
- The possibilities ar eendless, really!
I hope you have enjoyed the instructions I called Papercraft Bear 2 and are now ready to make your own teddies. Have fun choosing colours and embellishments to suit your own purposes.I'd love ot hear if you made some or how you used them in your own craft life.
If you enjoyed this punch art project, you might like to try out a few more punched embellishments:
Or just learn some more about punches on these pages:
Or go in another directions entirely and learn about making gift bags with a punch board:
Return from Papercraft Bear 2 to Papercraft Bear | Return to Scrapbooking Tips | Return to PaperCraftCentral Home Page


New! Comments
Have your say about what you just read! Leave me a comment in the box below.