- Home
- Papercraft Adhesives
- Make a Reflection
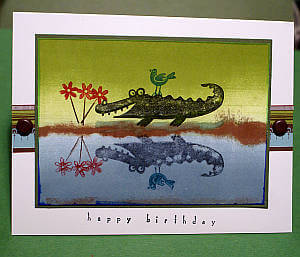
Reflections Cards
Written and Created by PaperCraftCentral Susan
Have you seen those reflections cards with beautiful water reflections and wondered how they are made? They are easier to make than you might think!
Invitation: If you are trying this technique for the first time OR you already know how to make reflections with your cardmaking supplies, please do make a card and show me how YOU use this technique by adding it to the bottom of this page.
You can scroll down to discover the secrets to
making them.
You will need:
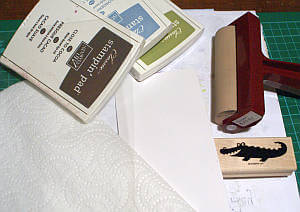
All you will need are
- your stamp(s),
- inks and
- other papercrafting tools/supplies,
- plus a Window Sheet from Stampin' Up! or other sheet of acetate or clear, smooth plastic.
- I also used my brayer
to make my card. I used the retired Wild About You stamp set and the
Occasional Greetings stamp set (also retired) from Stampin' Up! to make
my card, but you can choose your omages to suit your own card. The technique will still work for other images and ink colours.
Click on my SusanSalutations online store link to find all supplies still available to Australian readers.
How to Make a Reflections Card:
Start with your background.
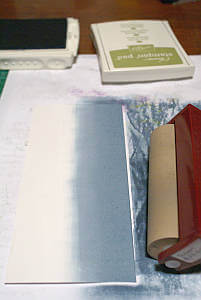
- I chose Basic White cardstock and brayered Bordering Blue ink (now retired, so choose another water coloured pigment ink for your project) on one side to make the water, then Old Olive ink on the other side to make the grass.
- Load up your brayer with the water coloured ink you chose, then start lightly laying colour down by beginning to roll the brayer just off the cardstock but just next to it, so you will avoid having lines on your cardstock instead of soft, blended edges.
- See the next picture where I show you how I start off the project with my ink?
-
See how you wind up with a lighter area in the middle of your image when you brayer colour onto it from either side?
- Now clean your brayer and add your grass colour, remembering to start off your project piece with the ink rolling.
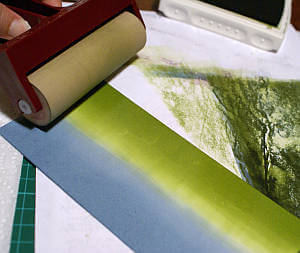
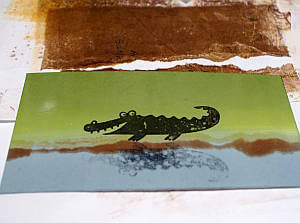
- Once your background is to your liking, ink up your image with Tuxedo Black Stazon ink and stamp it on the grass. I didn't cover the whole stamp with ink as I wanted my crocodile to be a bit fuzzier in the water, but then I made a second rub on with a fuller inked image as I didn't like the first effect.
- Go ahead and experiment to get just the look you want. I placed my crocodile or other stamped image in the centre but you could place him anywhere, as long as he is next to the water.
- Note: The reflection needs to be made in your water, so positioning the crocodile near it will make it seem more real.
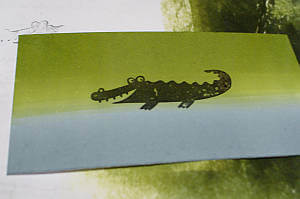
Here's where to discover the Secret to making Reflections Cards, just for you.
Now here is the secret to making Reflections Cards.
- Take your Window Sheet, acetate or plastic and ink up your same main image stamp again (in my case, the crocodile), then stamp the image onto the plastic.
- Flip the plastic over to make a mirror
image, then place the inked image is face down on the card where you
want it to appear in the water.
- Rub over the image with your brayer for a
lighter effect, or treat it as a rub-on and use your bone folder to transfer the refection to the water.
- Make sure to rub horizontally rather than vertically. You seem to get a better transfer of the image that way.
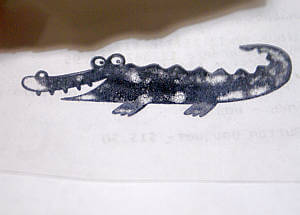
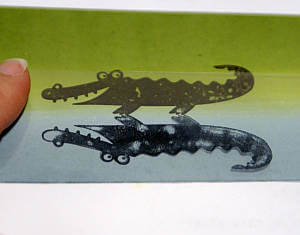
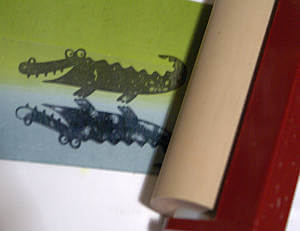
-
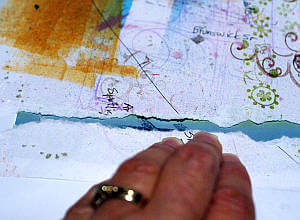
Once you have your reflection the way you want it, tear two pieces of paper and tape them down to make a strip of ground in between.
- Slip your card image underneath and line it up so that the exposed card shows your ground line.
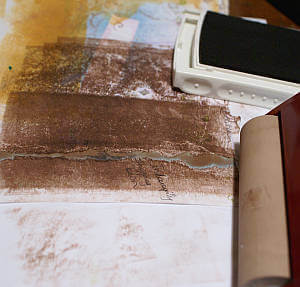
- Brayer some Close to Cocoa ink (retired, so choose a different ground coloured ink) on the exposed bits, adding layers of colour till you are happy with the result.
-
I added more touches such as shadows to the 'real' crocodile by colouring him in a bit with some Stamp 'n' Write markers.
- Then I stamped the bird and the flowers in colour using the Stamp-a-ma-jig or Stamparatus to position them.
- I finished my card with some leftover Christmas designer series paper and some neutral brads from Stampin' Up! before adding my sentiment in a crooked line. Well, crocodiles are crooked critters, aren't they? Or am I wrong? Lol!
I trust you will try making some Reflections Cards now and hopefully will let me see the result. I have seen some beautiful cards made with trees and flowers stamps, for example.You could also use a silhouetted figure of a person or other animal, or even something like a plane!
Go on - give it a try!
Do You Have A Favourite Handmade Card to Share?
Do you make greeting cards? Please do share it with me.
What Other Visitors Have Said
Click below to see contributions from other visitors to this page...
Acetate Cards Not rated yet
Good afternoon Susan
Just a short note. About 8 years ago I made 1000+ acetate cards. They started off as Fat Ladies cards and eventually - just …
If you liked this card making technique, you might like to try quilling or paper piercing next.


New! Comments
Have your say about what you just read! Leave me a comment in the box below.