- Home
- Papercraft Adhesives
- Glue Gun
Glue Gun
Written and Created by PaperCraftCentral Susan
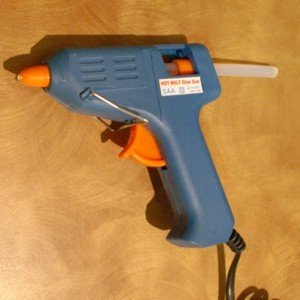
A hot glue gun is a wonderful craft supply item for
fixing heavier objects such as boxes, wood, chipboard and other
beyond-the-page projects together. Maybe it can't quite do what this quote suggests, but a glue gun is a pretty useful tool to have in your craft stash!
"Truth is the glue that holds government together".
Gerald R Ford

This type of papercraft adhesive works well on paper flowers and other bulkier embellishments. The adhesion is strong, quick-drying and effective, though not too flexible, so choose projects that will not be required to bend very much.
It also leaves a raised bead unless you are very careful, so small, delicate items may not be appropriate projects. You could try other papercraft adhesives though.
Types of Glue Gun
There are glue guns with high heat glue sticks and warm heat
glue sticks. There's a significant temperature difference between the
two settings. Some tools offer only one setting while others offer both
warm and hot temperature settings. I would always choose a warm heat
setting when working with children for safety reasons (any hot glue, including warm types, can
burn the skin deeply). Be aware that warm glue can also burn deeply but you have a little more time to get your project organised as the glue sets a little more slowly. It's still a quick acting glue compared to some other types.
You will need to work quickly with higher heat glues as they set quicker.
This type of papercraft adhesive tends to 'string' like mozzarella cheese as it cools so quickly. Try snagging the glue on your project cleanly instead of lifting it away suddenly without a 'stop'. Otherwise the results can be a little clumsy or clunky looking.
Practice will make you
better at this! Here are more tips for reducing those strings.
As the adhesive sets in a thicker layer, I don't use this tool for thin, flimsy materials such as vellum or tissue.
I have seen someone slightly modify their glue gun with an ordinary biro (ballpoint pen) or pen-shaped tip to allow a thinner stream of adhesive to be extruded. This seems to give you better control over where the adhesive can be placed and is therefore more suitable when gluing delicate projects. (I also hope someone markets this little modifier one day soon!)
Safety Tips
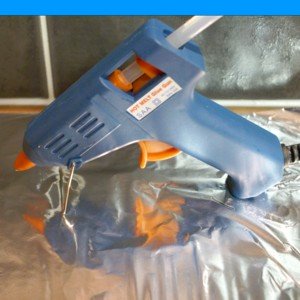
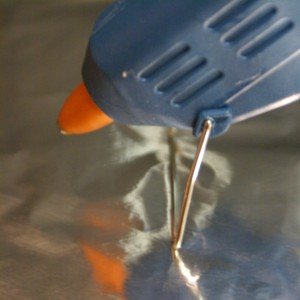
As with all heating appliances, make sure to read the instructions and warnings before using it. I keep a piece of foil or scrap paper or even an old cookie sheet that I no longer cook food with under my appliance as the hot adhesive tends to drip when the tool is at rest.
Stampin' Up! also has a silicone caft sheet (item no 127853) made especially for use with projects you are gluing together and that might become a little messy. Adhesive does not stick to a silicone sheet. Easily assemble your embellishments with it. Just put a dot of adhesive on the sheet and use both hands to assemble the embellishment, then pop it off the sheet when the glue is dry. I don't want to wind up with hard, firmly set beads on my craft table, floor or furniture so I always use something like this.
Go to SusanSalutations to order a Silicone Craft Sheet if you are in Australia.

Another safety measure is to keep a bowl of ice water nearby in case you do get any glue on your skin. Plunge your affected skin in the cold water immediately to minimise the possible burn.
Some people use gloves while adhering with this tool, but do make sure they are not made of a material that could melt
such as rubber or plastic as the hot adhesive will go right through
them and you will have melted glove on your hands as well as the hot
adhesive! Ouch!
If you do get some beads of adhesive on your furniture, allow them to dry completely before chipping them away. Often thee will be no residue left behind but it depends on the type of finish you have on your furniture.
Here's How to Use a Glue Gun:

- Insert a glue stick in the hole at the back of the gun according
to the instructions that came with the tool. Be sure to seat it all the
way down in the head of the gun to allow the grabbers to engage when you pull the trigger
- Plug the appliance in and allow it to heat for 6 - 8 minutes
- As
it heats, the first stick may melt and fill up the gun's reservoir. You
may need to add another stick in order to prime it properly before you
use it
- If the tool has a trigger it will automatically
advance your stick as you squeeze it. Test if a high enough heat has
been reached by squeezing the trigger a little to see if any glue comes
out of the nozzle. It should be clear, not cloudy, unless you are using an opaque glue. If it does come out, you can quickly apply the adhesive to your project.
- If your tool
does not have a trigger, simply press the stick in with your thumb as
you apply your glue to your project
- Once you have adhered two surfaces, hold them in place for about ten seconds. The adhesive sets and cools quickly, completely curing in about a minute
- Add more glue sticks as the original one is used up. Just thread the next one through to butt up against the original one
- Allow the tool to cool completely before you store it away
Things to Make with Hot Glue:
- Stick large beads and shells to a picture frame
- Stick some large fabric flowers to a straw hat
- Stick the flaps of a handmade box together
- Make
handmade Christmas decorations such as a wreath and adhere little pine
cones or other decorations to it, or quickly make such things as paper
chains with it instead of cutting overlapping slits in each link
- Use it to mount your folded paper butterflies to a project
- Adhere embellishments to card tins or other off-the-page projects
- Make your own stencils with it
How about you? Tell us how you have used these tools on your projects!
Do You Have A 3-d PaperCraft Project To Share?
Do you make 3-d PaperCraft items? I'd love to see your work. Please do share below.
What Other Visitors Have Said
Click below to see contributions from other visitors to this page...
Paper Not rated yet
Paper to paper.
Chevy
*****
Hi Chevy
I am not sure what you are asking about. If you are asking if glue guns can glue paper to paper, …


New! Comments
Have your say about what you just read! Leave me a comment in the box below.